Wonder Woman Costume Comes to Life with 3D Printing, 3D Scanning, & 3D Design
For Halloween 2018, I decided to be Wonder Woman. It’s normal for me to go overboard for most costumes, and this year was no exception. This year, I decided to create a Wonder Woman costume as accurately as possible. I used SOLIDWORKS to design her armor and then 3D printed the results. I used SOLIDWORKS Visualize to render the parts and apply the appropriate textures that I would eventually end up painting.
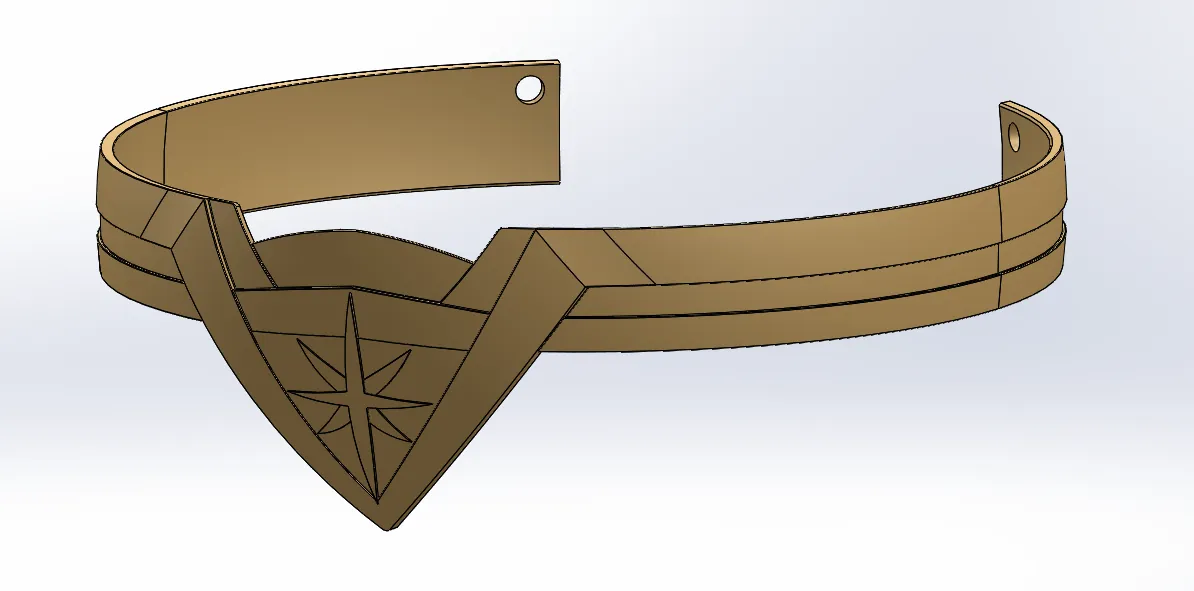
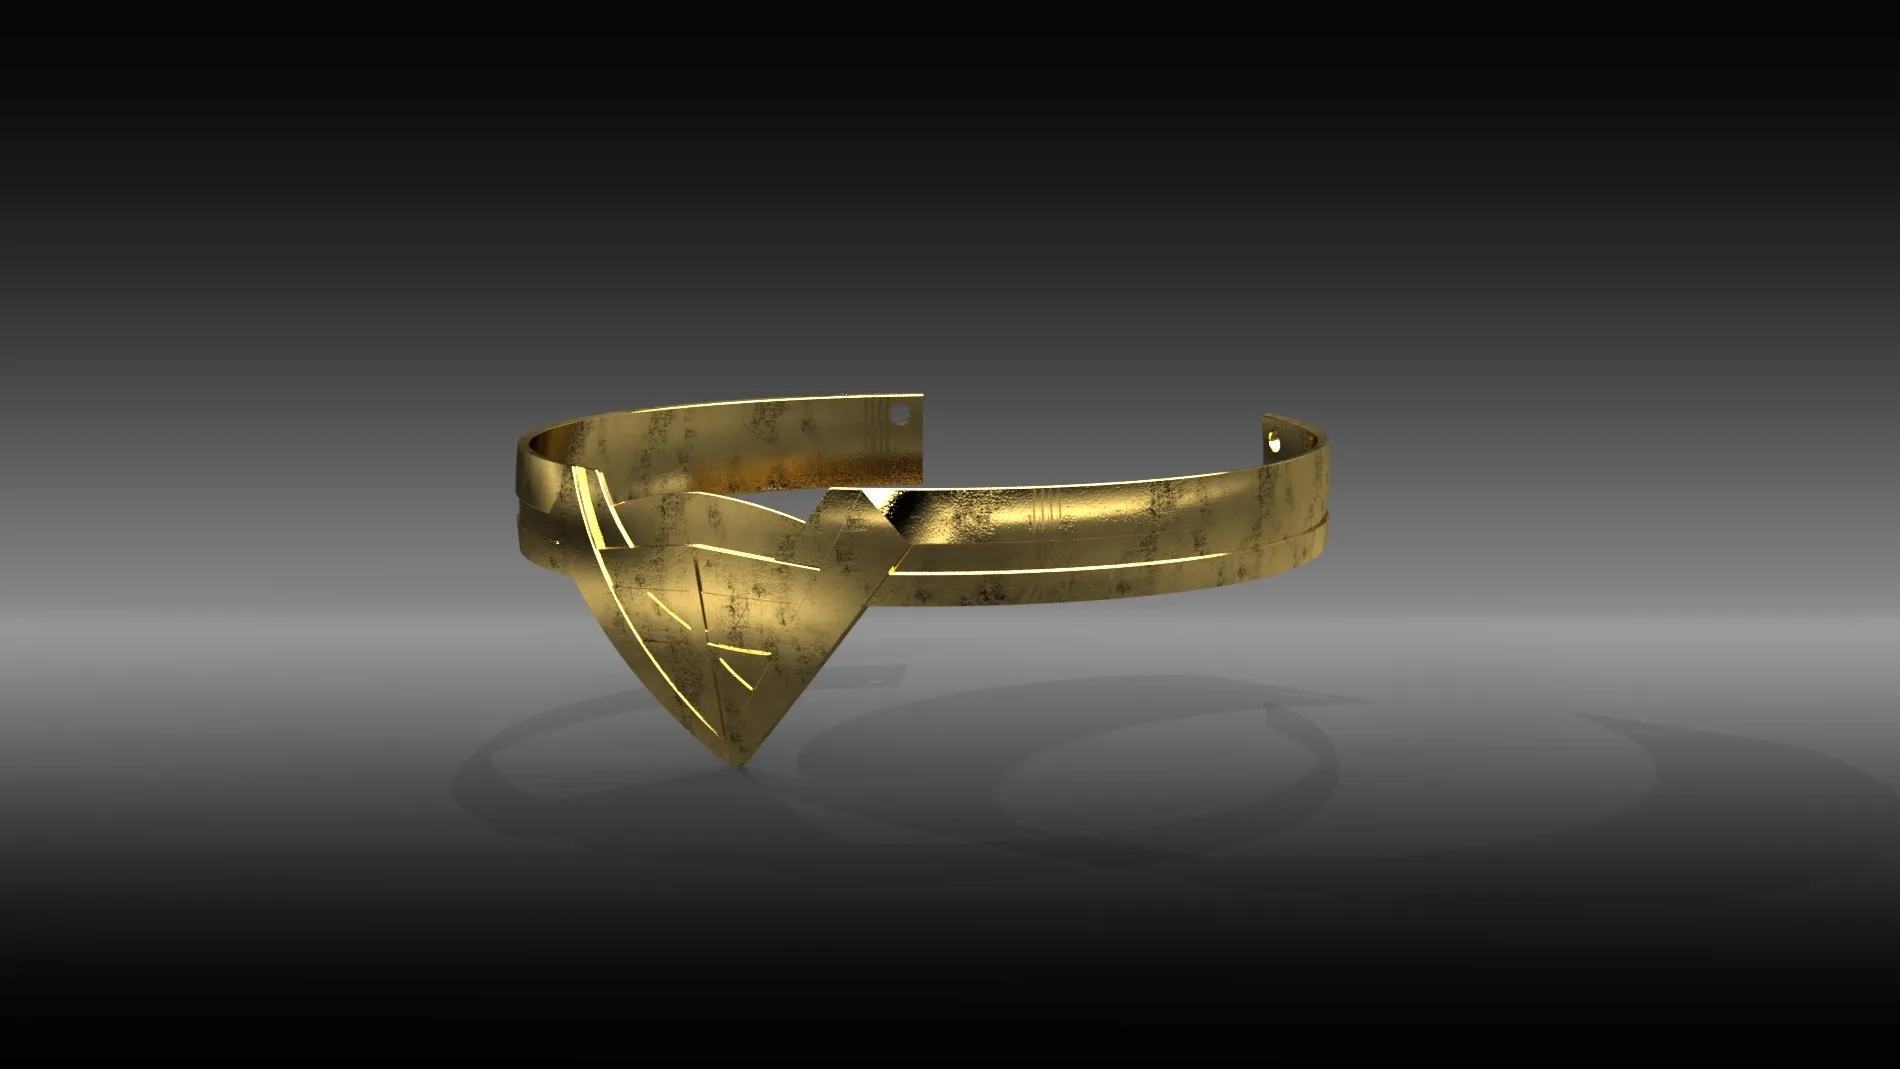
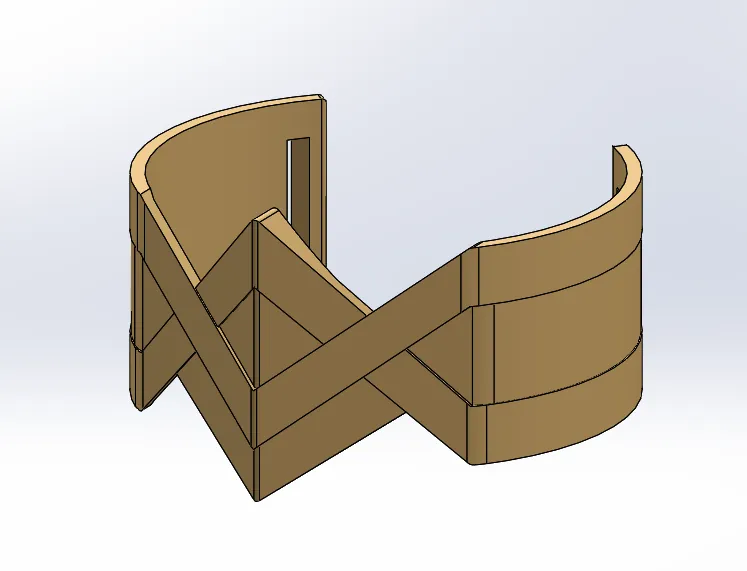
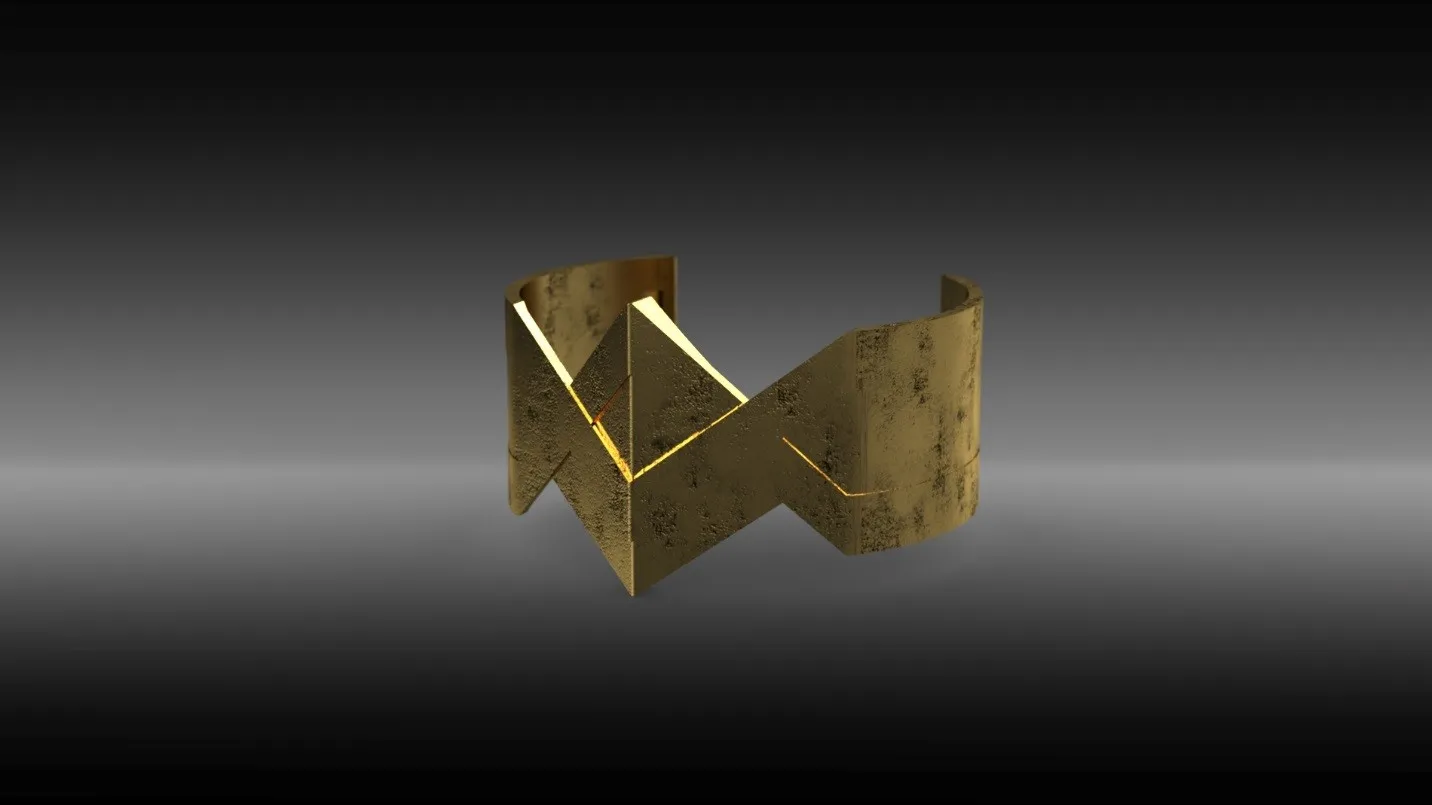
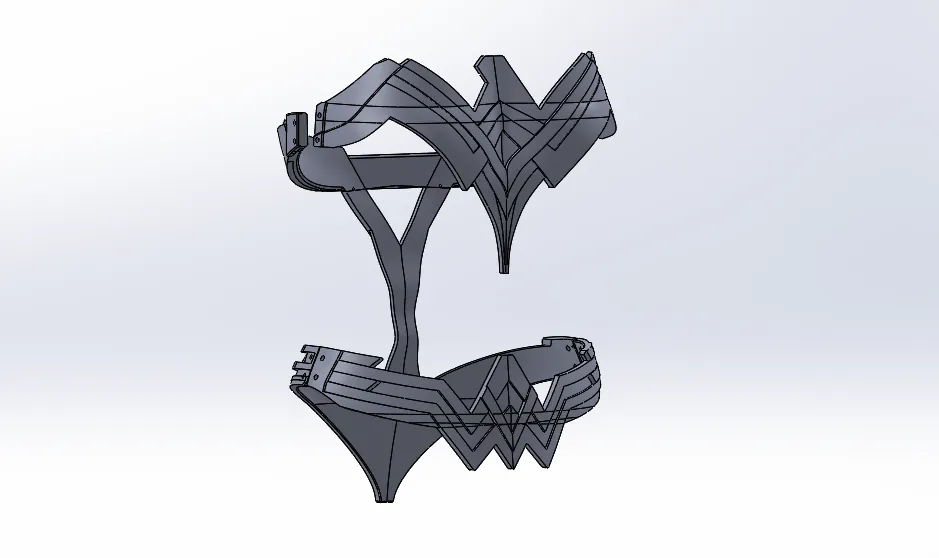
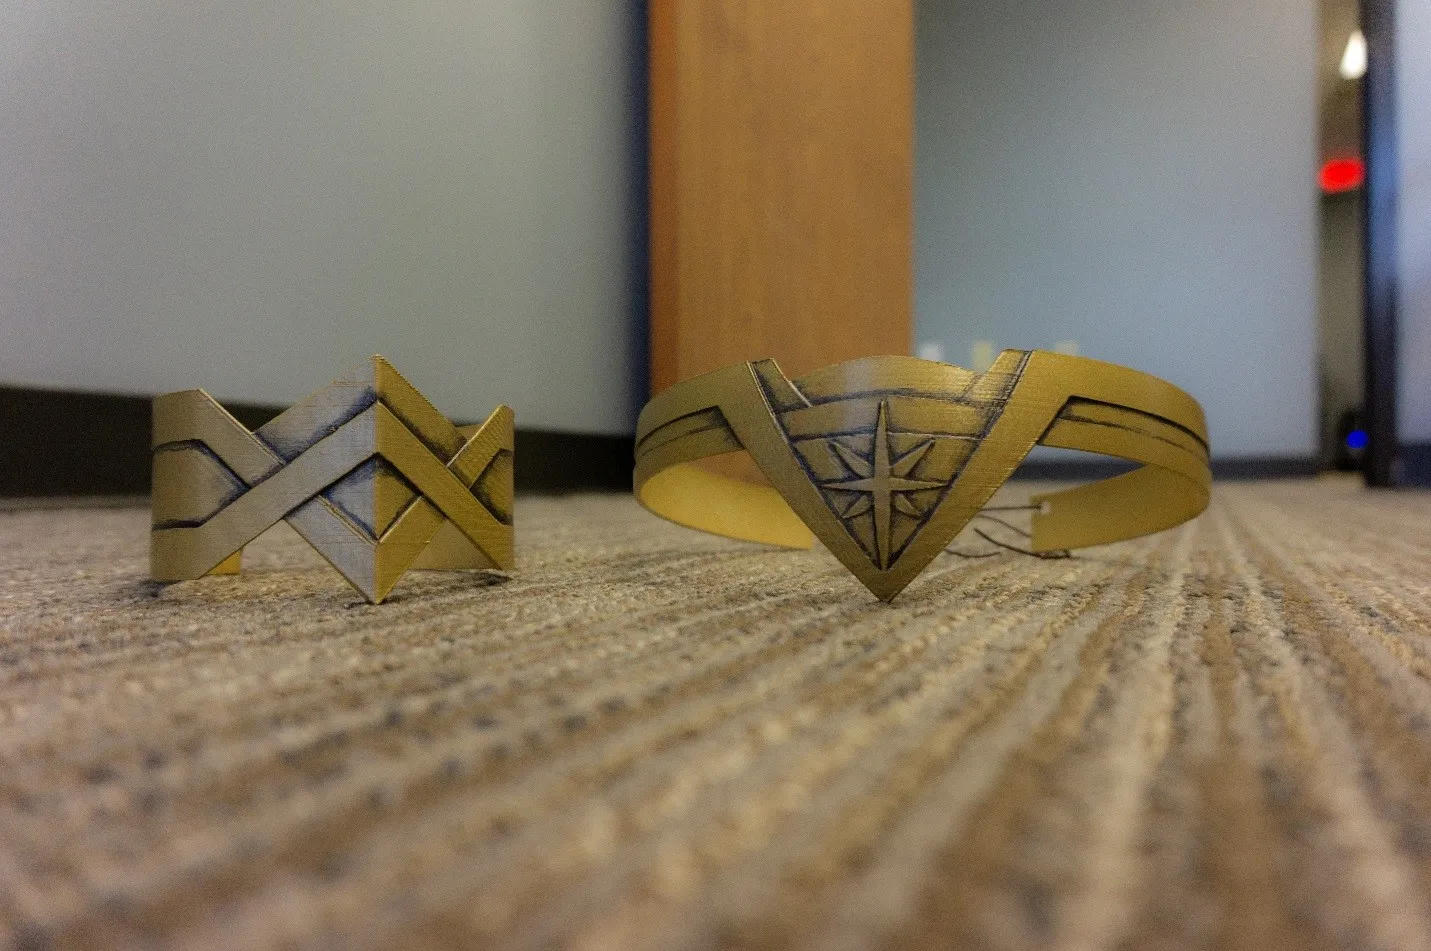
The Tiara
To design the tiara, I started by measuring the circumference of my head with a fabric tape measure. I assumed that my head was slightly elliptical, so in SOLIDWORKS, I used a sweep along an elliptical path to create the majority of her headband. For the rest of the tiara, I used offsets from surface extrusions and cuts to add the distinctive front detailing. I left a gap in the back to tie it.
Armband
I similarly designed the armband, except that I assumed my arm was perfectly round (because I have perfect arms). Again, leaving a gap in the back so I could tie it on.
Wrist Guards
Next, I decided to tackle her bracers. These were notably more complex, so I roughly measured my forearms near the elbow and at the wrist. I assumed they were mostly elliptical cross-areas. Then, in SOLIDWORKS, I lofted those two profiles together with a 3D spline as a guide curve to make sure my huge muscles had enough room.
Then I just used extruded cuts, offsets, split lines, and sweeps to finish off the details. I only modeled one of them, and then I mirrored the component in an assembly to get the opposite hand version. (Because, again, my arms are perfectly symmetrical.)
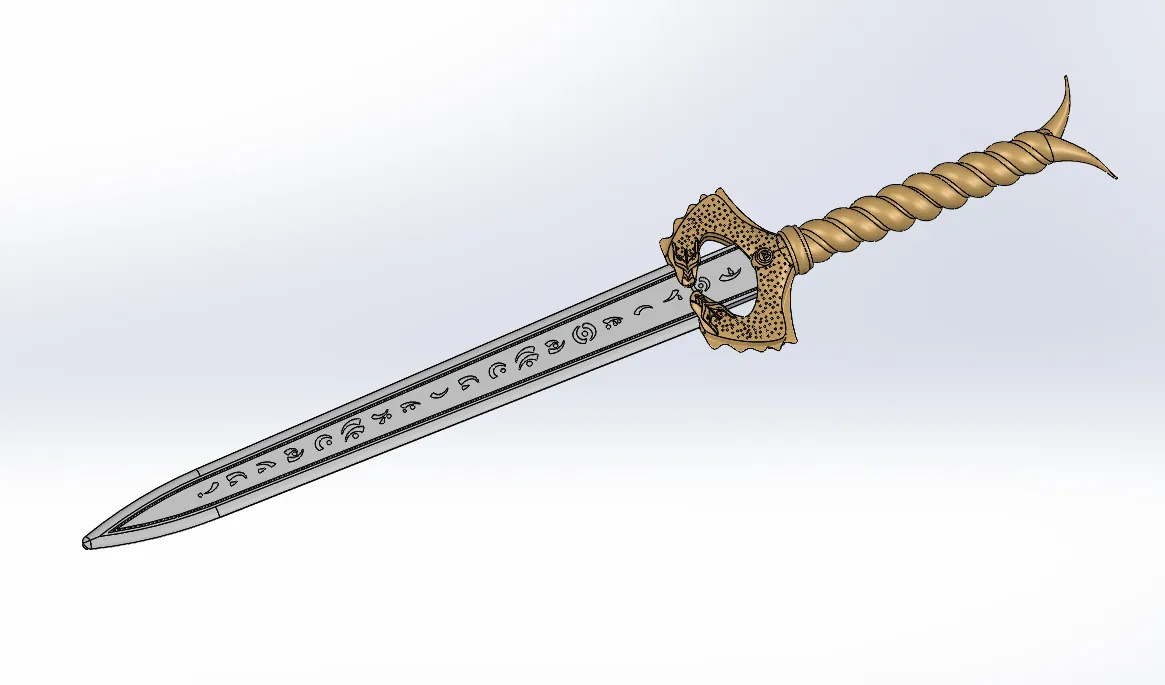
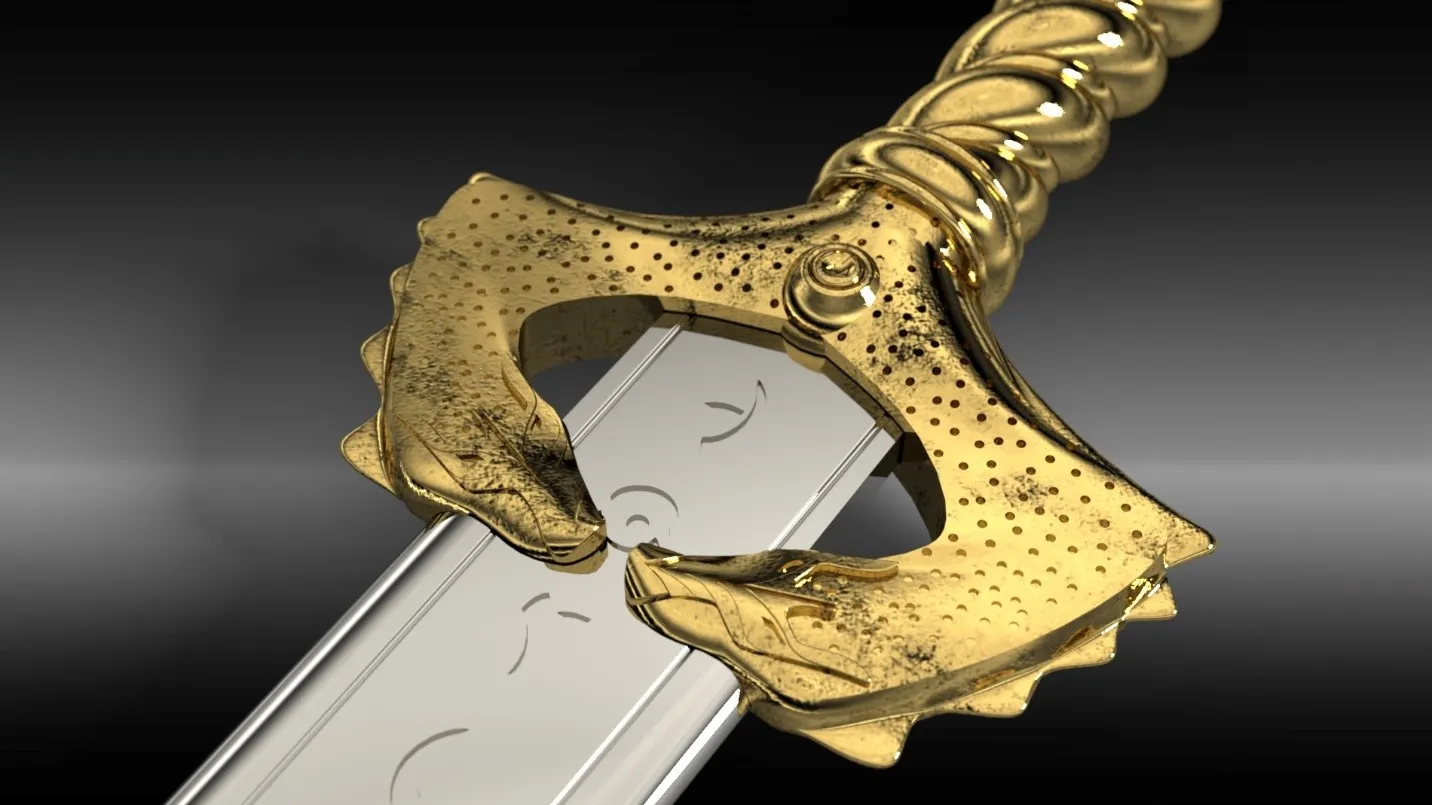
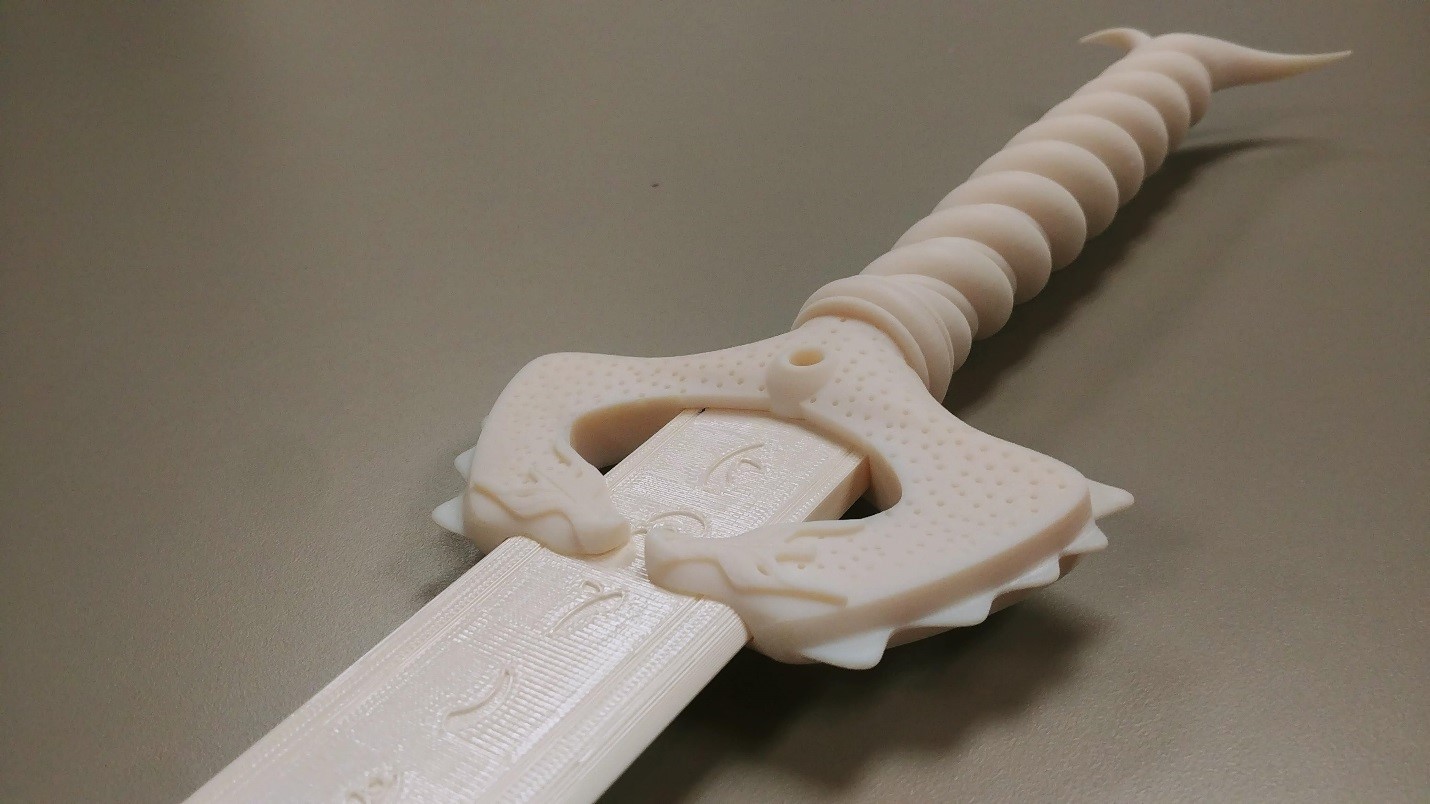
Sword
I then tackled her sword, named the "god killer", which was the most complated piece to model. I began with a sketch to get the proportions as close as I could. I had to compromise a little bit on how long I could get the blade because of build volume limits.
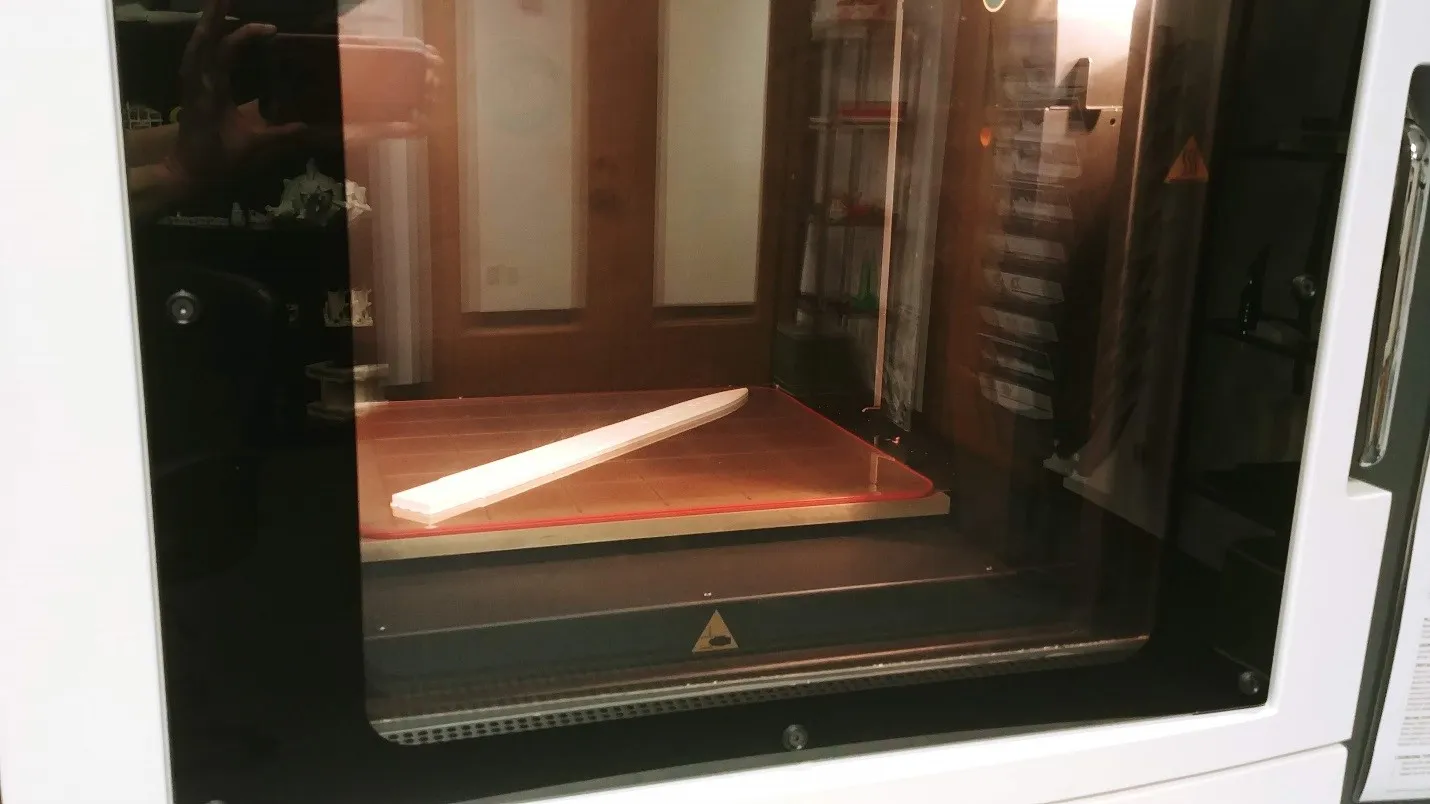
The blade was pretty simple. It has some swept cuts on it to define the shape, and I used a Lord of the Rings font to create the extruded cut text on it. The blade is about 19 inches long so it could be printed diagonally in our Stratasys Fortus 400 3D printer. (The Fortus 400 we have in our office has a build volume of 16 in. x 14 in. x 16 in.)

Handle Challenges
For the handle, I used a helical sweep that was circularly patterned to make it wrap around itself. The dragons (or snakes or dinosaurs or whatever they are) were created with a loft to give it a more animal-like shape.
Then I used the deform tool in SOLIDWORKS to get the ridges made, and also did some base extrusions, extruded cuts, and fillets to get the detailing of their little dragon faces. The sword handle was the only part we printed on the Stratasys J750 because it was by far the most detailed piece I modeled.
To connect the blade and the handle, I modeled in a tiny pin the runs through the base of the blade where it meets the handle.
3D Scanning to the Rescue
At this point, I was in pretty deep, but I hadn’t figured out exactly how to model the body armor. Wonder woman’s armor is very form fitting, and I couldn’t quite figure out how to translate the shape of my torso into SOLIDWORKS accurately with just a fabric tape measure.
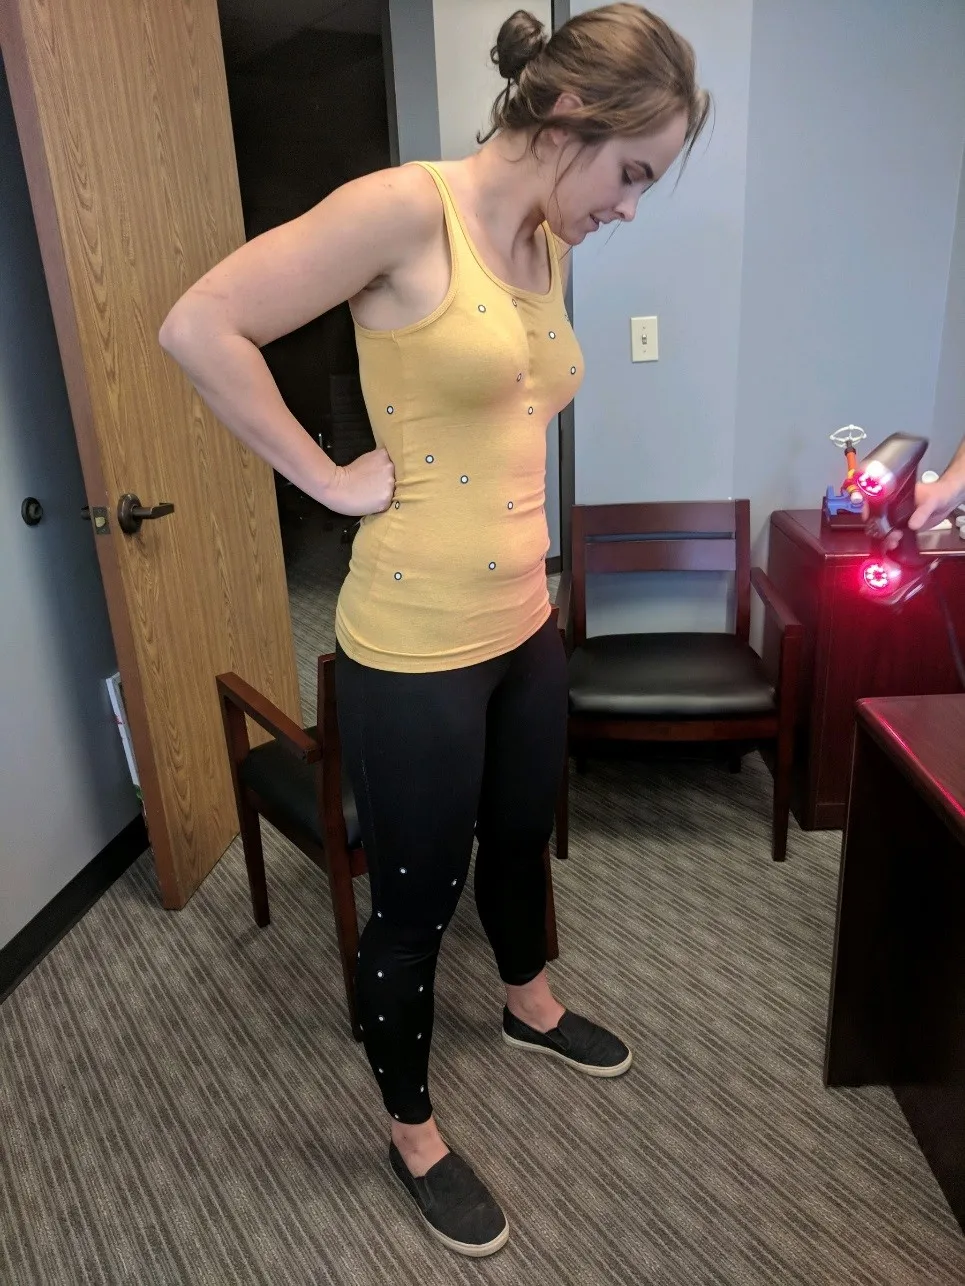
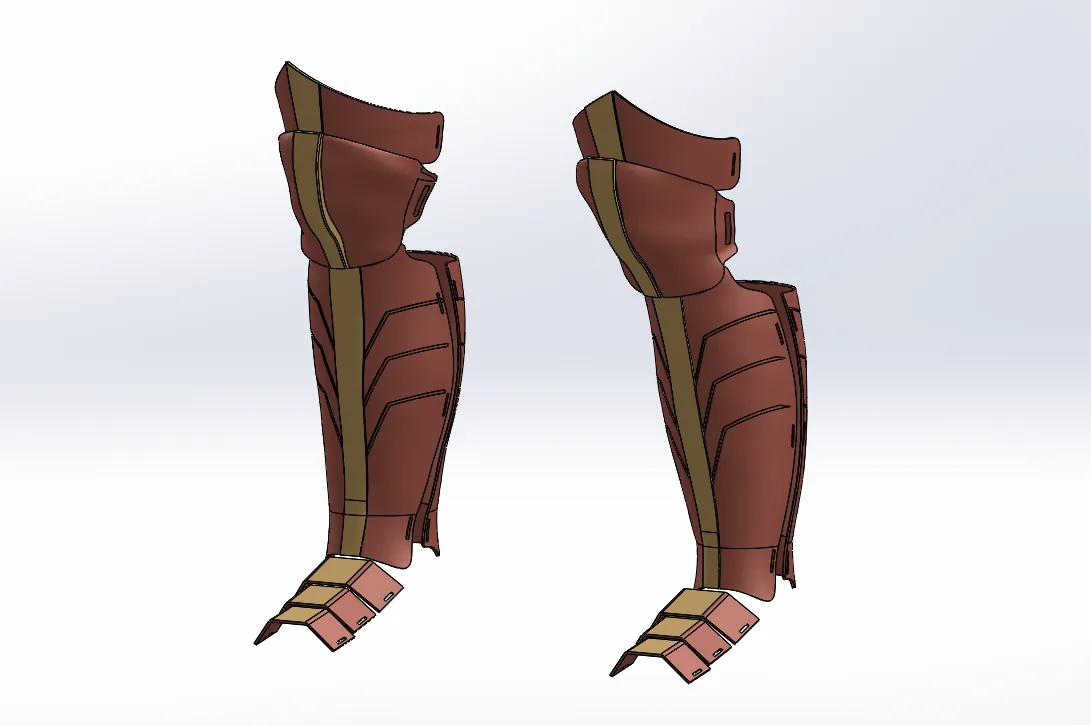
I decided that my coworker would have to 3D scan my torso with a Creaform Handy Scan 3D scanner. We also decided to scan one of my legs while we were at it, so I could make sure the boots/greaves (shin protectors) fit perfectly as well.
I wore the tightest clothes I owned, and we put these little, sticky targets all over me. The targets help the scanner (picture above) understand where it is relative to those stickers.
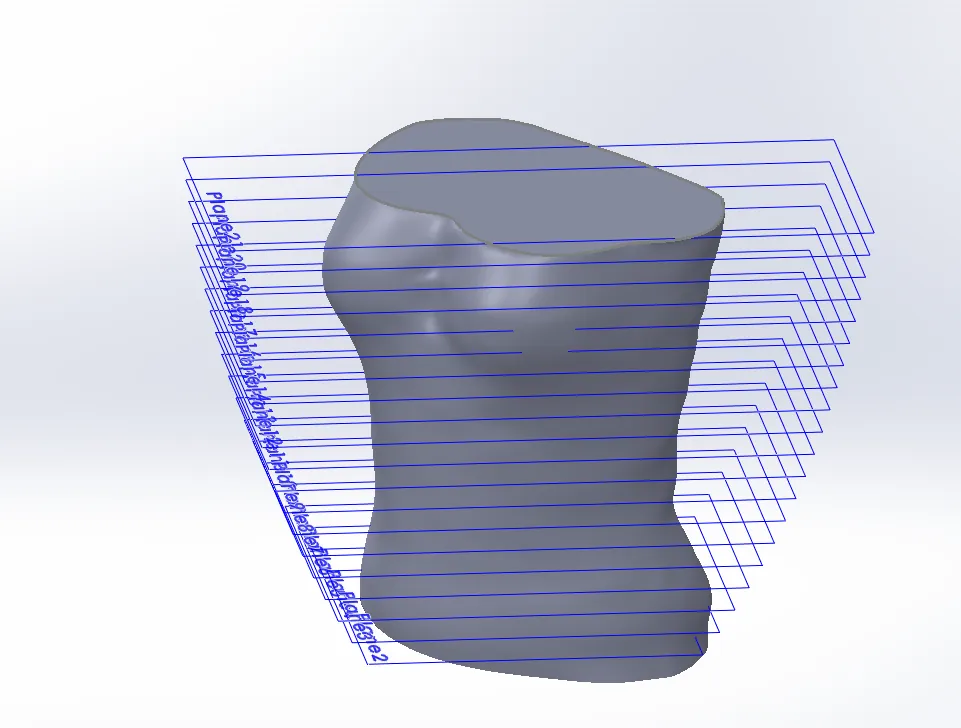
After cleaning the scan up in Geomagic’s Design X software, we imported it as a graphics body into SOLIDWORKS.
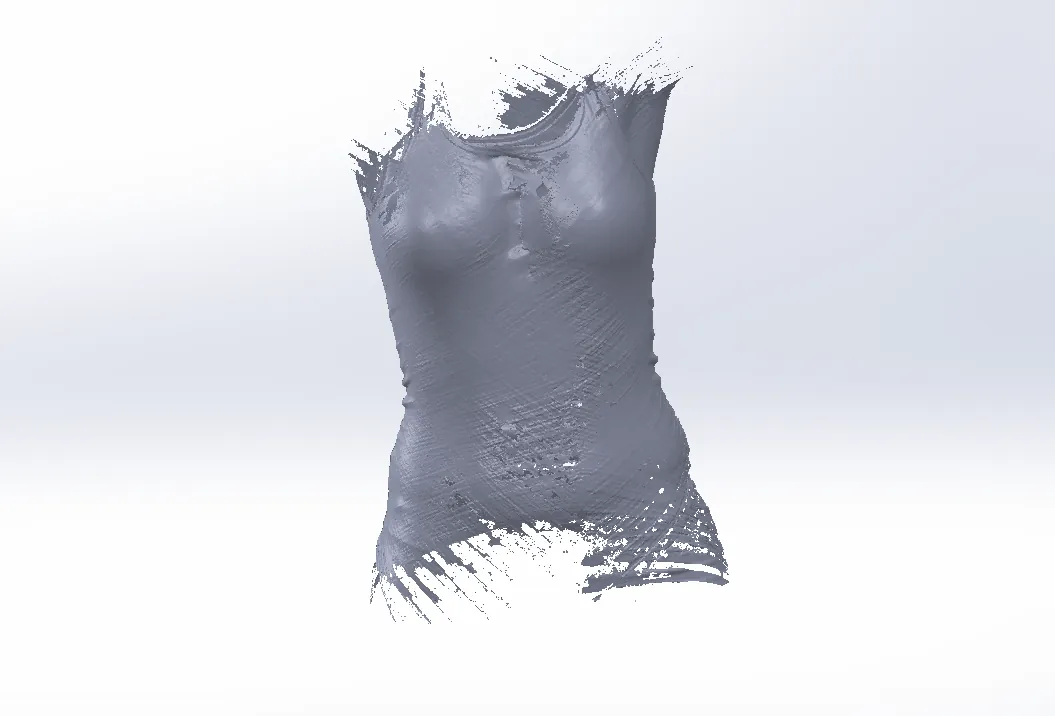
This allowed us to do some intersection curves at different planes to create a smooth, lofted body of … my body.
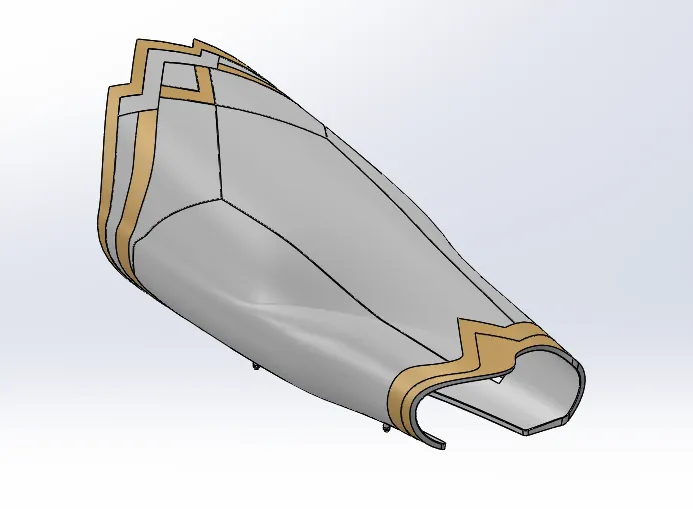
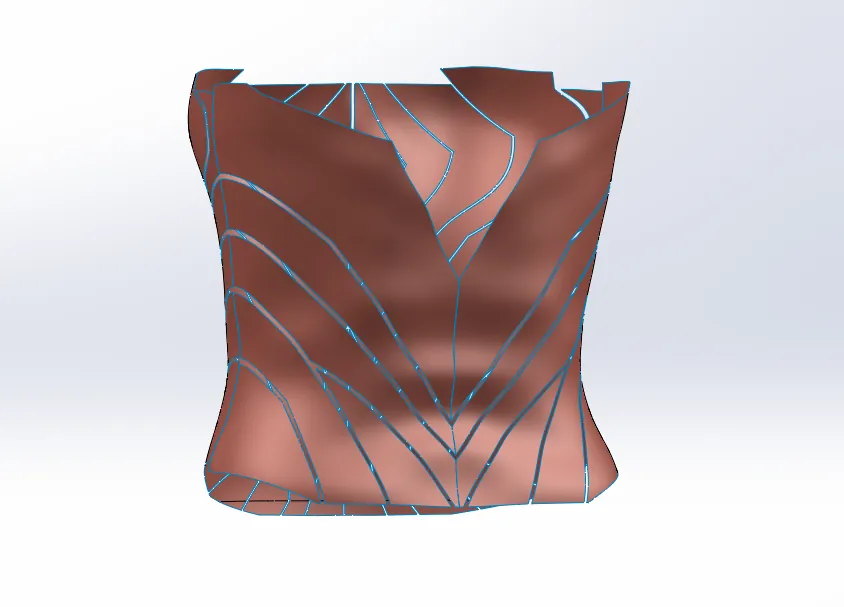
Armor
To create the armor, I did a series of offset surfaces in SOLIDWORKS, including sketch trimming and thickening to get the shapes I wanted. I separated it into four different parts for printing.
With the boots, I did a similar method used for the body armor but with fewer details. I left some openings so I could attach leather and elastic bands to keep them up.
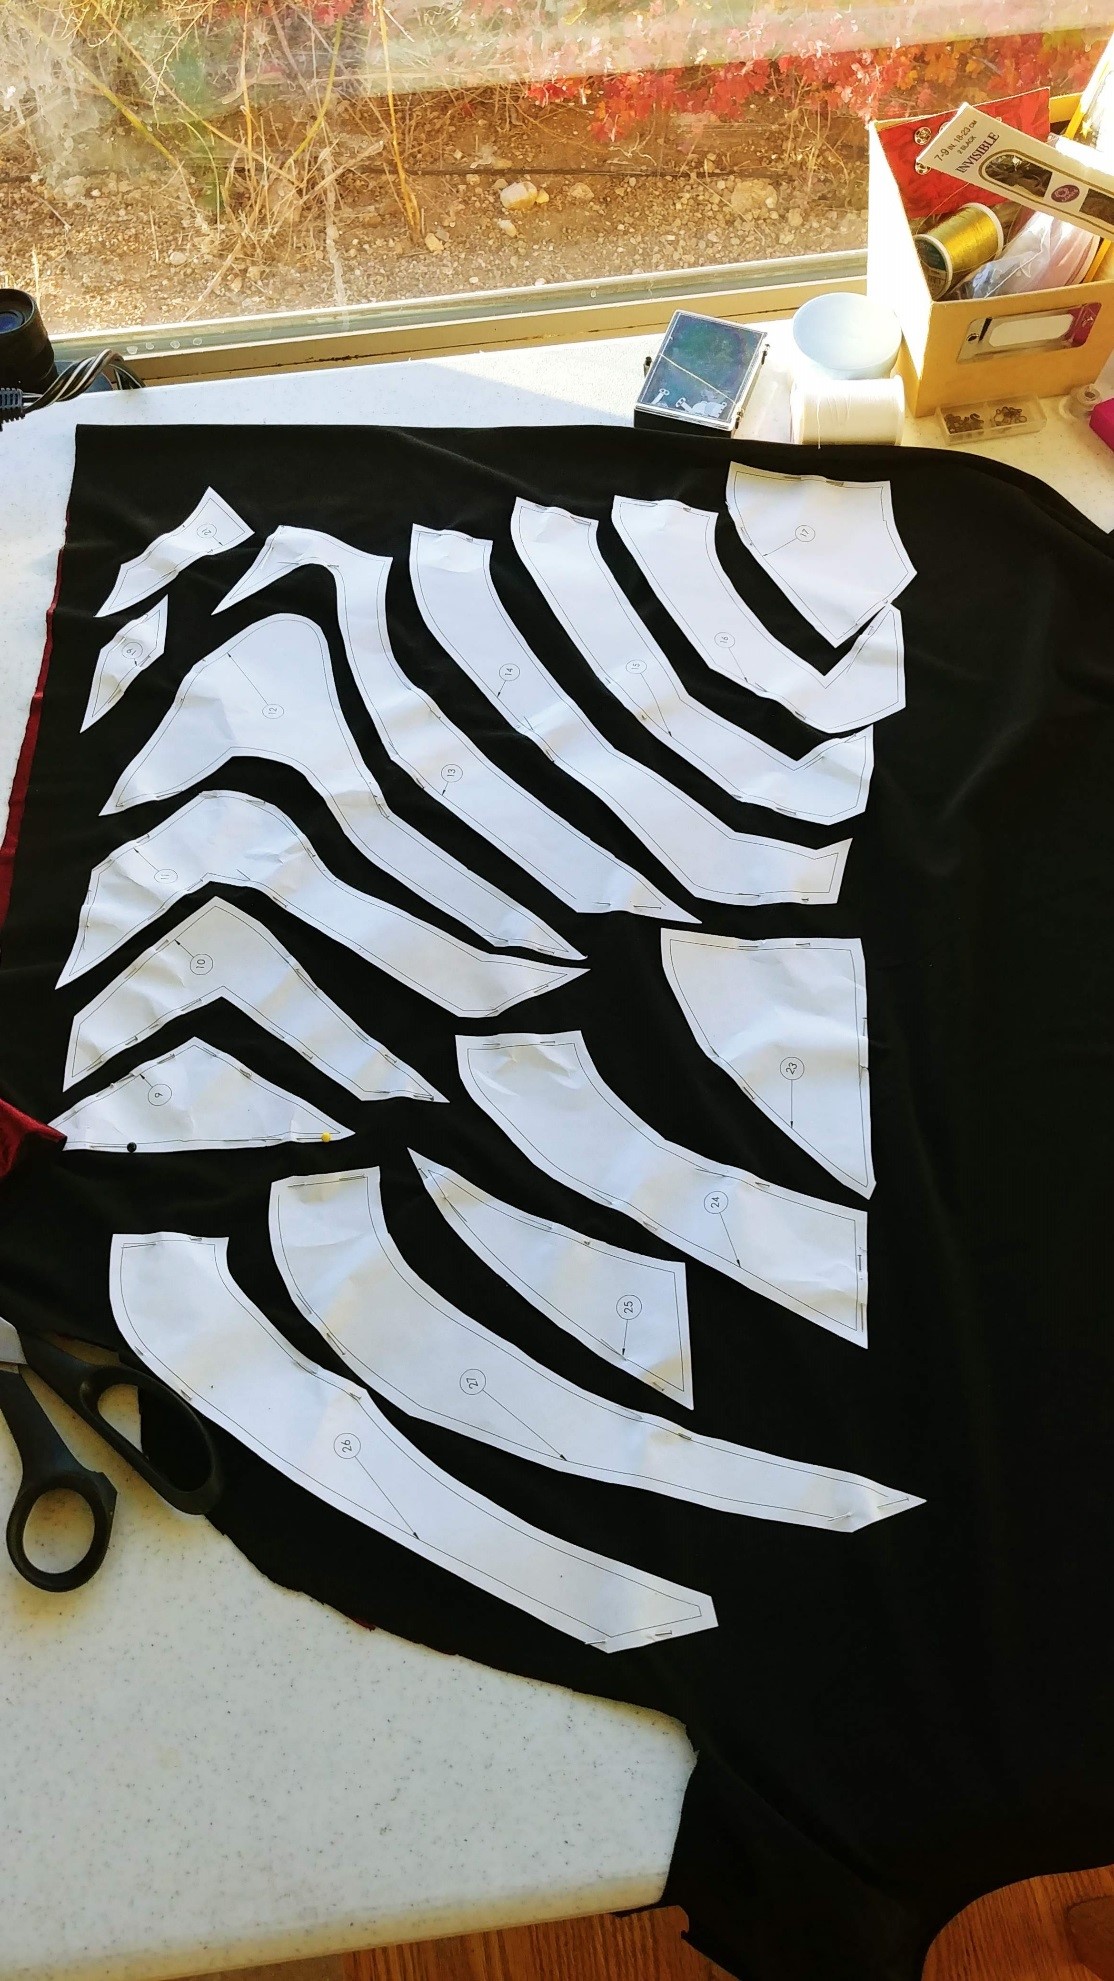
For the last part, I used SOLIDWORKS to create a pattern to cut out fabric for the red body armor. This is a fairly complex design, so I used surfacing tools with the scan of my torso to get surface bodies of every piece of fabric.
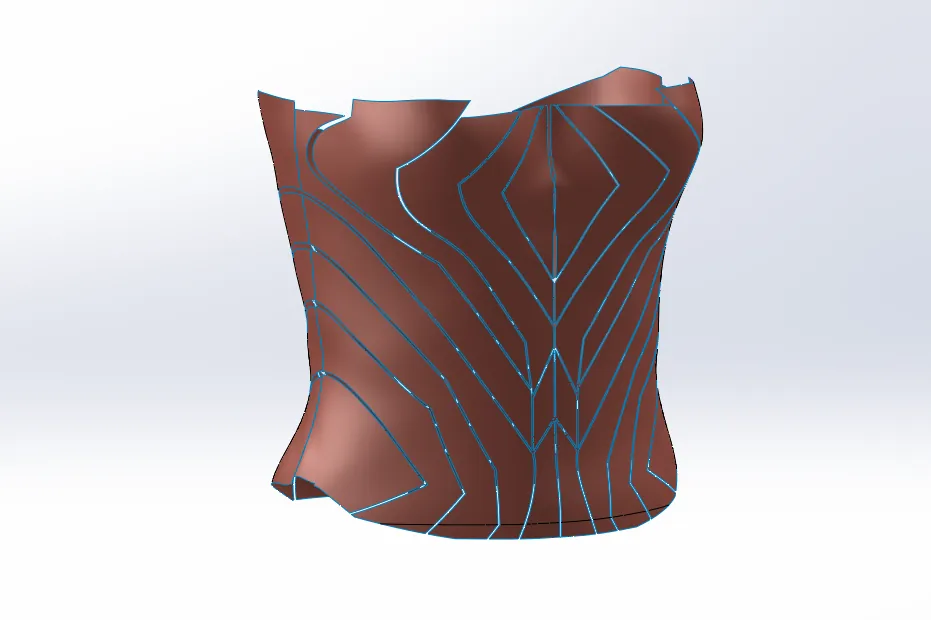
I put each one on the resulting surface bodies in its own part file, that way I was able to create a flattened surface. I put these flattened surfaces into part drawings and printed them so I could use them as a cutting guide.

Painting, Printing, and a Little Help from my Friends and Family
My cousin was kind enough to donate her skills to piece together the top. She also created the pattern for the skirt by hand. Throughout the entirety of October, my coworkers helped me 3D print the various components.
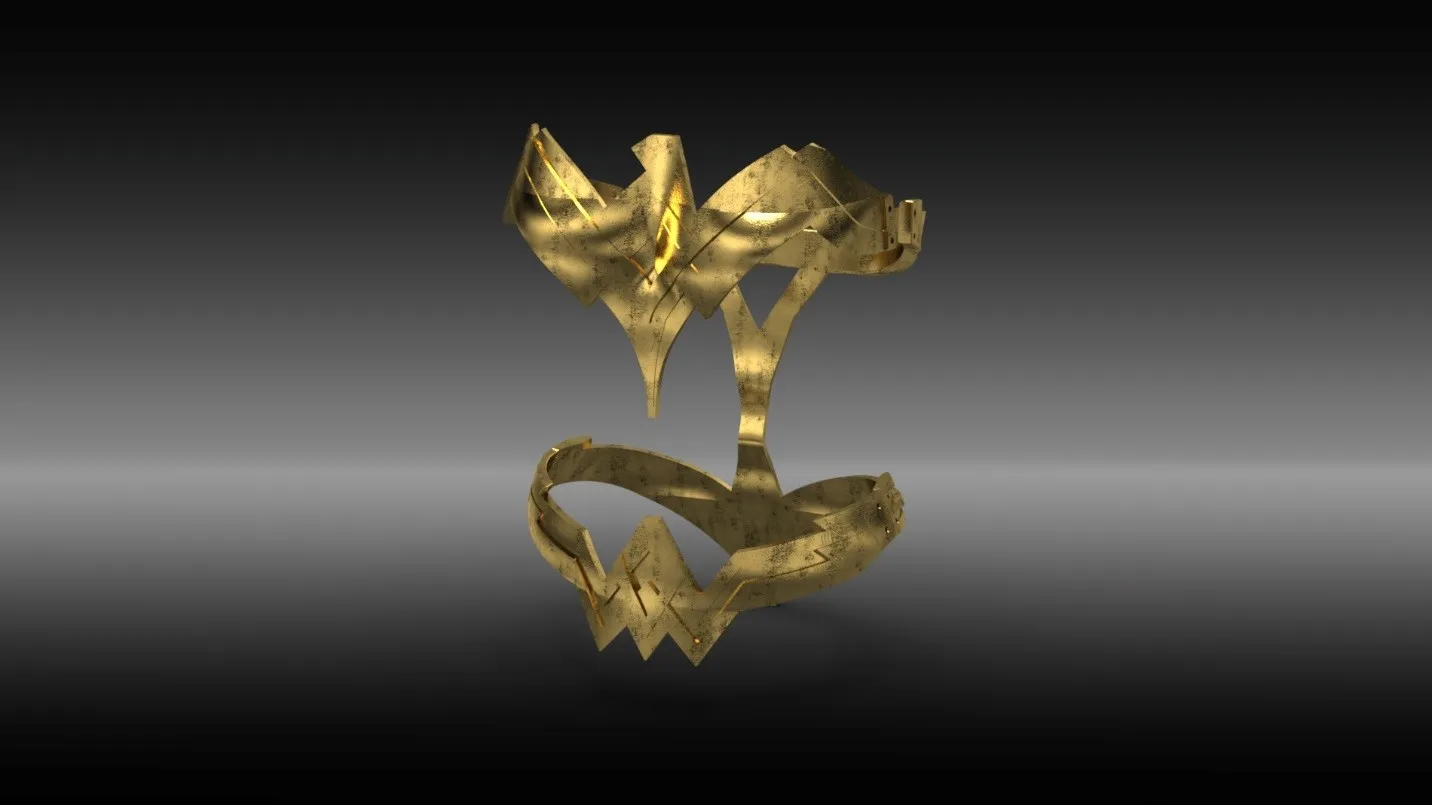
For the armband and tiara, we used our Stratasys Fortus 400 3D printer.
I spray painted them gold and did an antiquing technique with black and silver paint.

After we printed the body pieces on the Fortus 400, I sprayed painted them gold. I attached them using leather cording and used Velcro to make sure the shirt didn’t go anywhere.
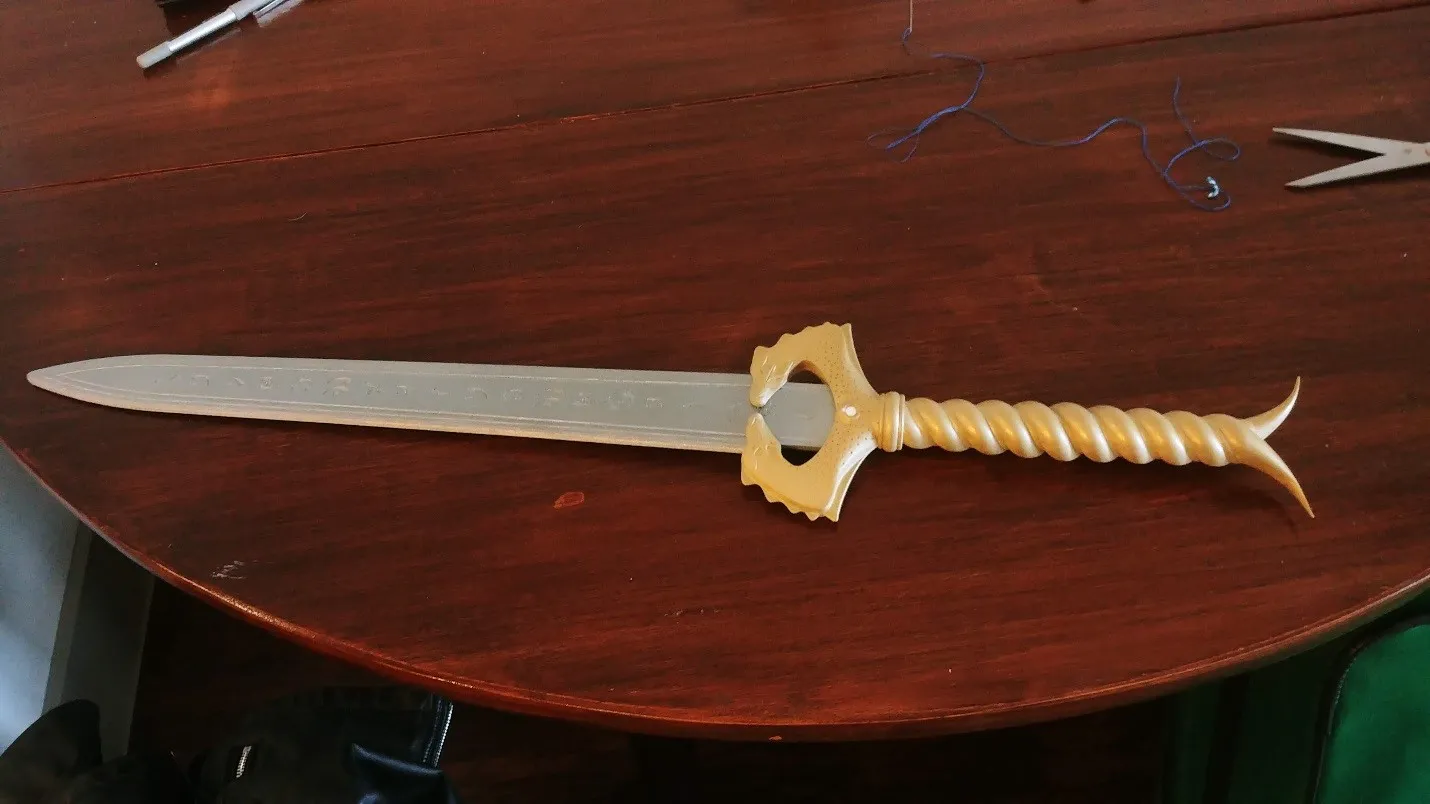
The blade of the sword I painted with a steel spray paint. I did the handle in the same color of gold as the body armor.

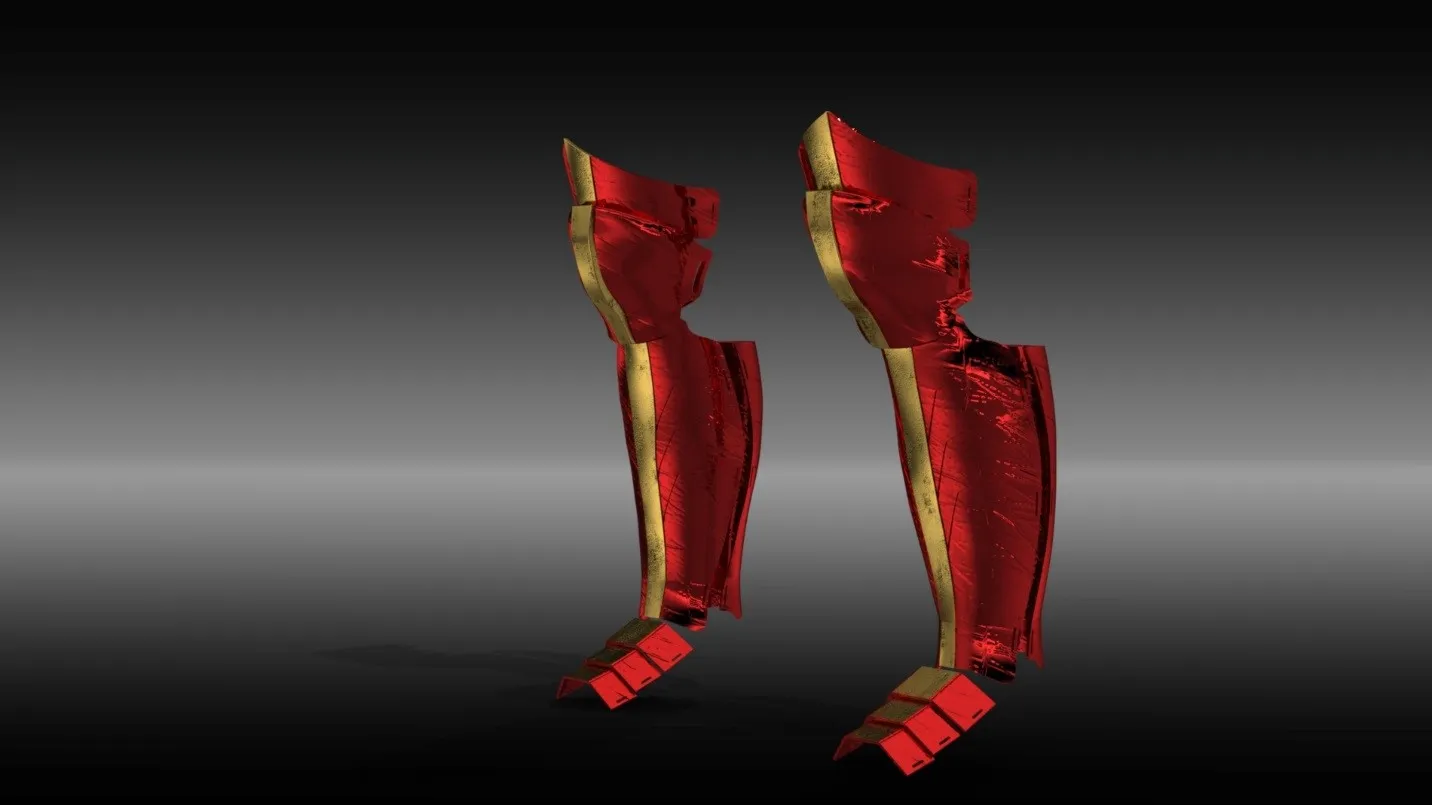
We printed the boots on the Fortus 400 and primed them before painting. (I taped off the middle extruded part so I could paint it gold.) Then I spray painted the rest of the boots with red glitter spray paint.

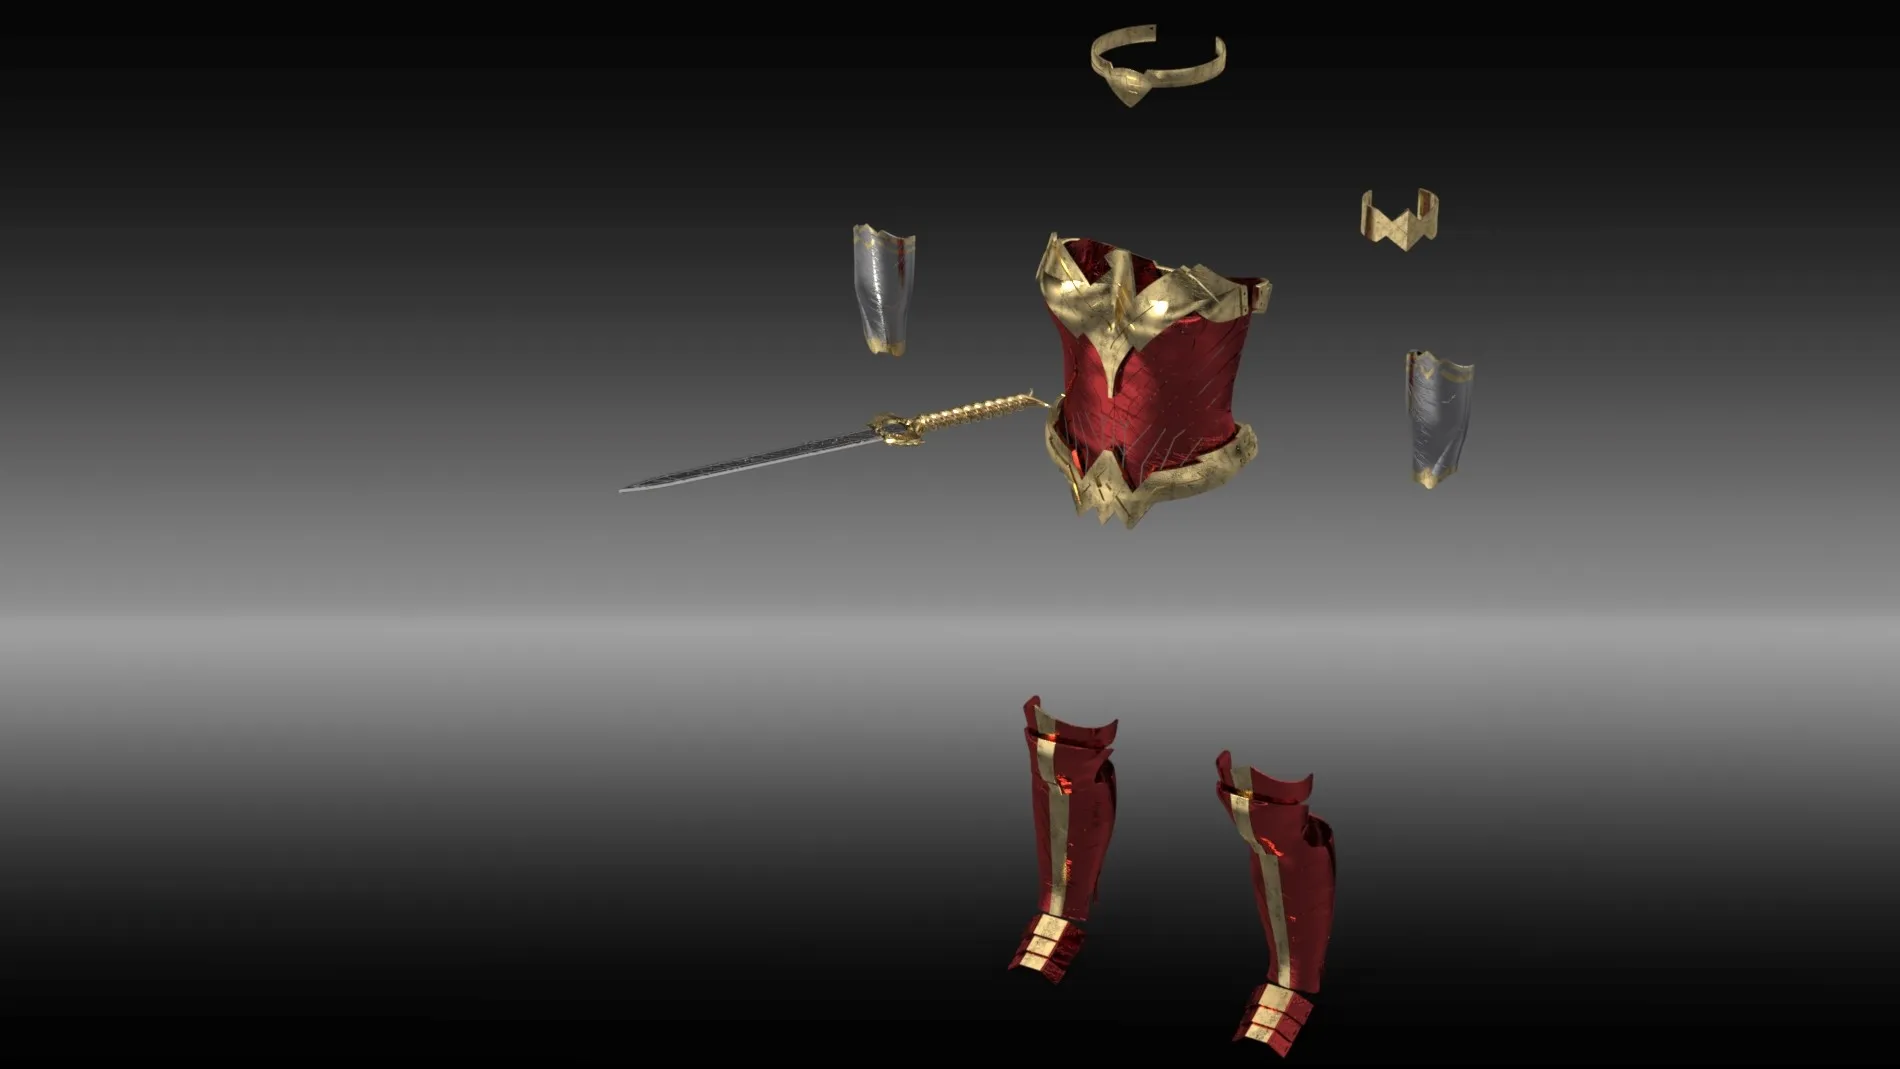
I used leather, Velcro, and elastic straps to make sure I could get in and out of the boots relatively quickly. Here it is, the final rendered picture of all the pieces together.
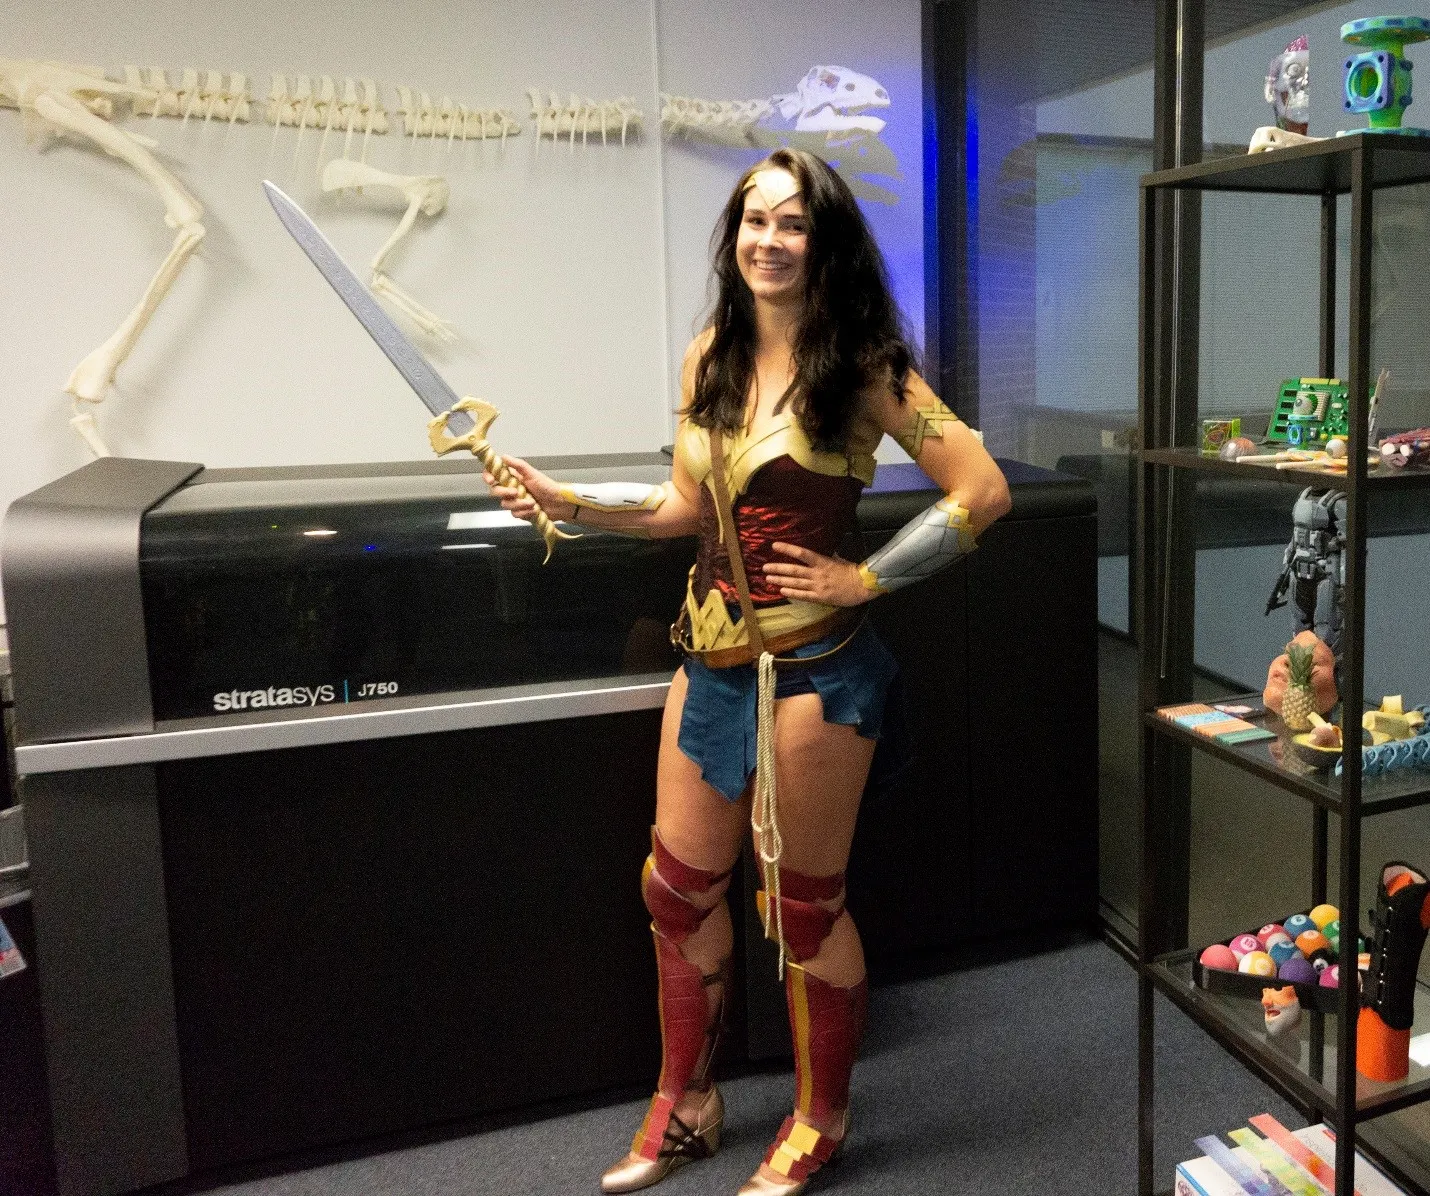
Here’s the final picture of me in my overly elaborate outfit.
I wonder what I’ll do next Halloween!
More Design Projects
A Modern Take on a Classic: 3D Printed Fender Telecaster
Creating a 3D Printed Race Medallion Hanger Using SOLIDWORKS

About Kate Hedberg
With industry experience creating electrical documentation in construction as well as oil and gas, Kate brings a ton of knowledge to SOLIDWORKS Electrical and PCB users. She earned her bachelor’s degree in Electrical Engineering from the Colorado School of Mines and is ready to help you adopt these technologies to suit your application.
Get our wide array of technical resources delivered right to your inbox.
Unsubscribe at any time.