Explication des étiquettes de vue de dessin SOLIDWORKS
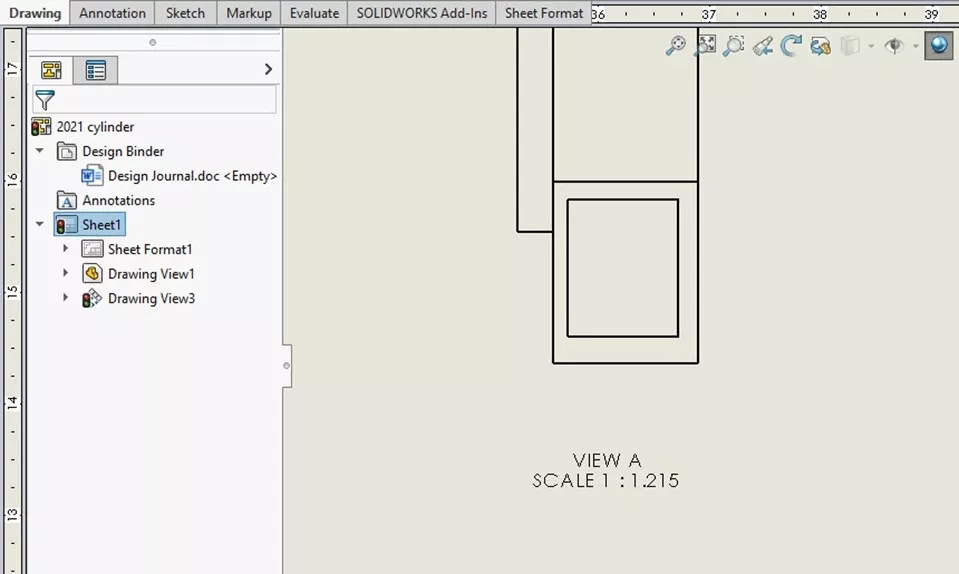
When working with SOLIDWORKS drawing views, it is possible to customize them in various ways. Sometimes, it is necessary to label each view to indicate the customizations made. For instance, when a custom scale is used, it is important to indicate this for each view to avoid confusion during manufacturing. Individual view labels can be inserted into each view to automatically pull relevant information such as scale, name, label, delimiter, and angle. Manual view labels can be created as well.
How to Insert a View Label
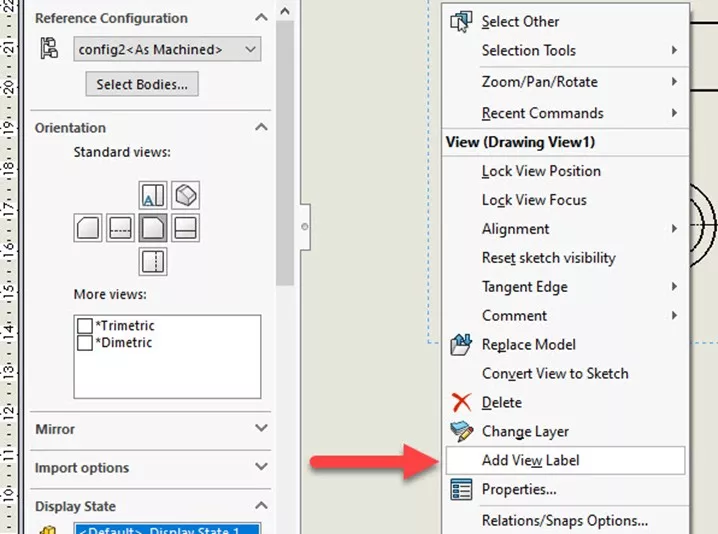
To insert a view label, right-click the view and select Add View Label in the flyout menu.
This puts a small box in the drawing where the label will be displayed.
You can drag and drop this label as needed.
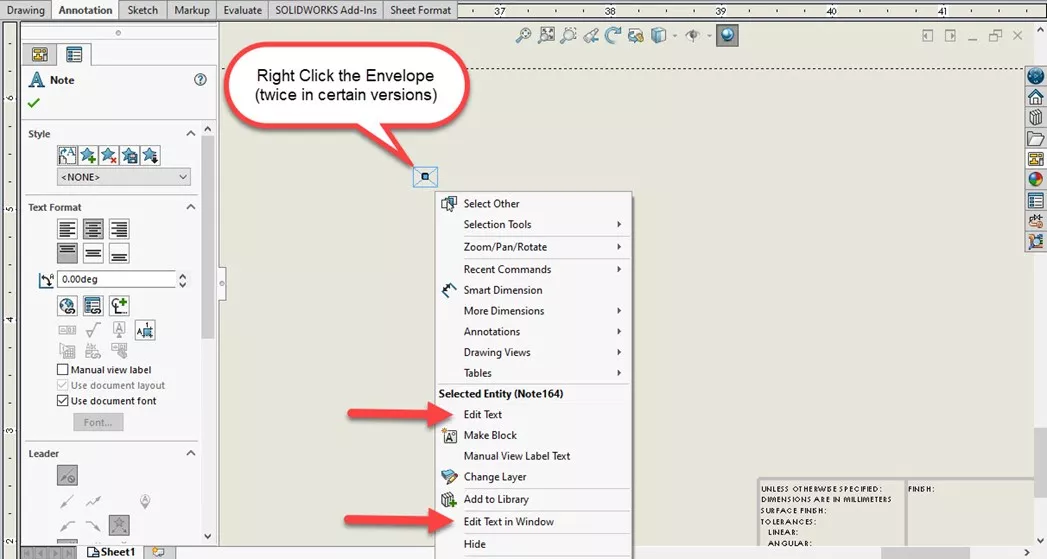
To edit the contents of the box, double-click with the left mouse button or right-click with the right button.
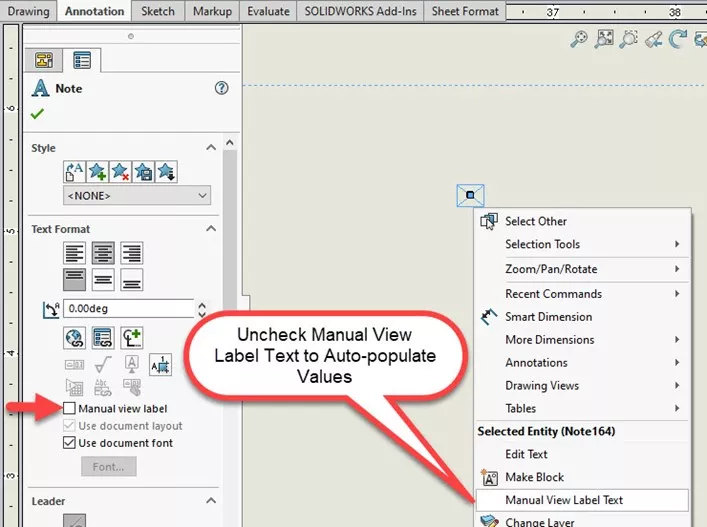
To enable automatic labels and tags, ensure Manual View Label Text is not selected.
To manually enter text, select Edit Text.
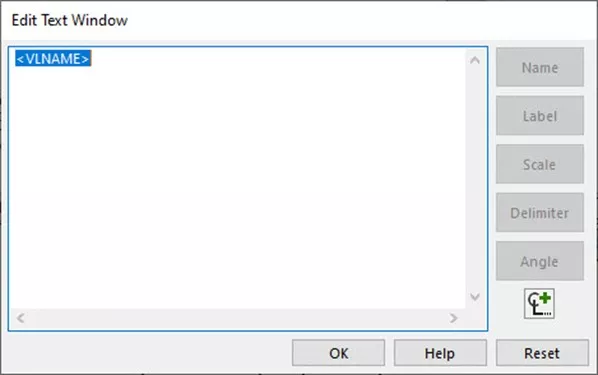
To insert labels, select Edit Text in Window. This lets you choose from different label options, including Name, Label, Scale, Delimiter, and Angle.
How to Use Automatic Labels
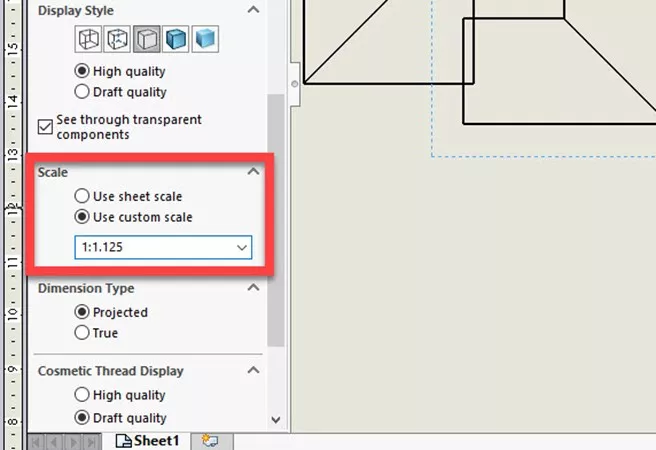
You might notice that some (or all) label options are grayed out. This is because they are determined by values specified in Document Properties as well as the scale. If a custom scale is not specified, the Scale label will not be enabled.
To enable the Scale label, specify a custom scale in the PropertyManager.
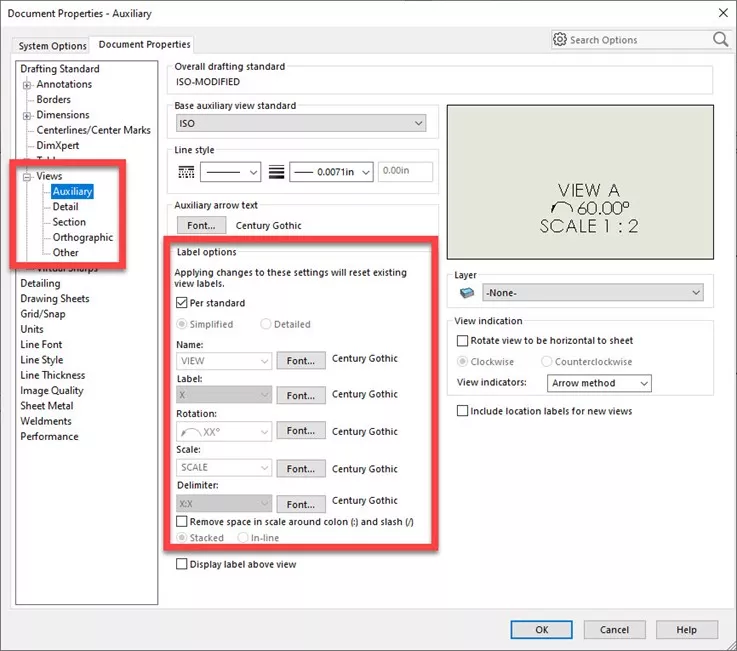
Other label options are specified for each view type in Document Properties. To get there, select Tools > Options > Document Properties > Views > View Type. Specify per standard or enter custom values. Optionally, have a view label created automatically upon view insertion.
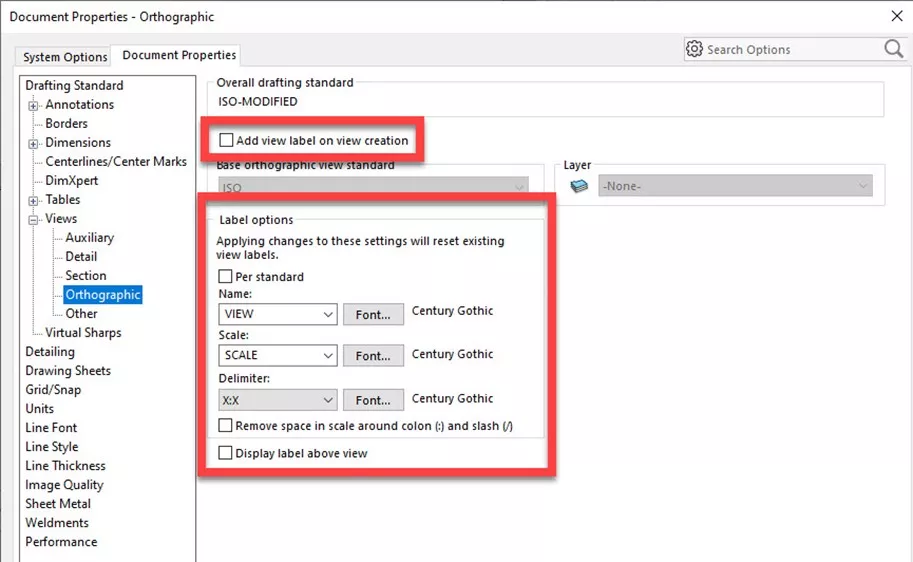
Note: Not all view labels are available for all view types. Auxiliary, for example, has Rotation and Label whereas Orthographic does not.
Click OK to save these settings. You can also save these settings under a custom template for future use!
I hope this article helped explain SOLIDWORKS drawing view labels. Check out more tips and tricks listed below. Additionally, join the GoEngineer Community to participate in the conversation, create forum posts, and answer questions from other SOLIDWORKS users.
Take your SOLIDWORKS skills to the next level by enrolling in the official SOLIDWORKS Drawings training course. This course teaches designers how to create drawings of parts & assemblies by expanding on drawing topics introduced in Essentials. Both online and in-person classes are available.

SOLIDWORKS CAD Cheat Sheet
SHORTCUTS ⋅ MOUSE GESTURES ⋅ HOT KEYS
Our SOLIDWORKS CAD Cheat Sheet, featuring over 90 tips and tricks, will help speed up your process.
More SOLIDWORKS Tutorials
How to Rotate and Customize a SOLIDWORKS Drawing View
SOLIDWORKS Pierce vs Coincident Relations & When to Use Each
11 SOLIDWORKS CTRL Key Shortcuts to Start Using Today
Add Mixed Display Styles in SOLIDWORKS Drawings

À propos de Gary Ballentine
Gary Ballentine est un ingénieur mécanique basé à notre siège social à Salt Lake City, Utah. Il a obtenu un baccalauréat de l'Université de Californie, Davis, une certification en rédaction technique de l'Université d'État de San Francisco, et un baccalauréat en génie mécanique de l'Université de l'Utah. Gary fait partie de la famille GoEngineer depuis avril 2019 en tant qu'ingénieur de support et instructeur certifié SOLIDWORKS.
Recevez notre vaste gamme de ressources techniques directement dans votre boîte de réception.
Désabonnez-vous à tout moment.