4 SOLIDWORKS Part Modeling Tools That are Time-Savers
SOLIDWORKS has some awesome part modeling tools and in this blog, I’m going to share some of my favorite life pro tips which are little features that have saved me a significant amount of time. These features include tolerances for hole wizard holes, interference detection for multi-body parts, options for offset on surface and inside of trim entities. Let’s take a look at where these features are located and how to use them.
#1. Hole Wizard Tolerances

My first favorite part modeling tool was released in SOLIDWORKS 2019 and gave users the ability to automatically add a custom tolerance to hole wizard holes. Select the Hole Wizard command located on the feature tab of the command. This feature can be found in the property manager for Hole Wizard. There is a tolerance box located at the very bottom of the properties manager box.
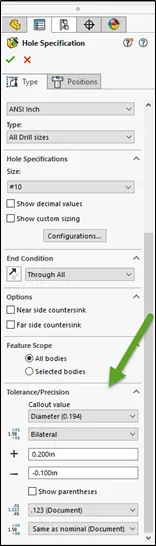
In my example, I’ve set the tolerance to a bilateral tolerance, with an upper limit of 0.2” and a lower limit of 0.1”. The same tolerances options that are available for dimensions in a part are now available here as well.
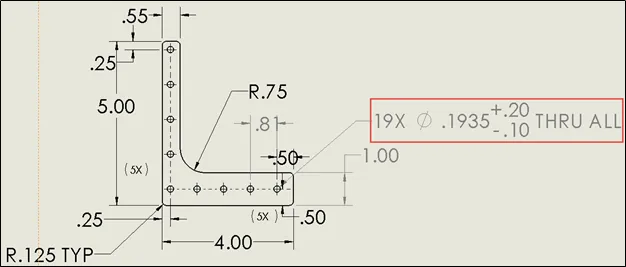
The tolerance will appear when the part is brought into a drawing and the hole callout is applied either manually or automatically through the model items button.
( Note : Use Hole Wizard if the smart fastener is desired to automatically place all of the bolts, nuts, and washers in place.)
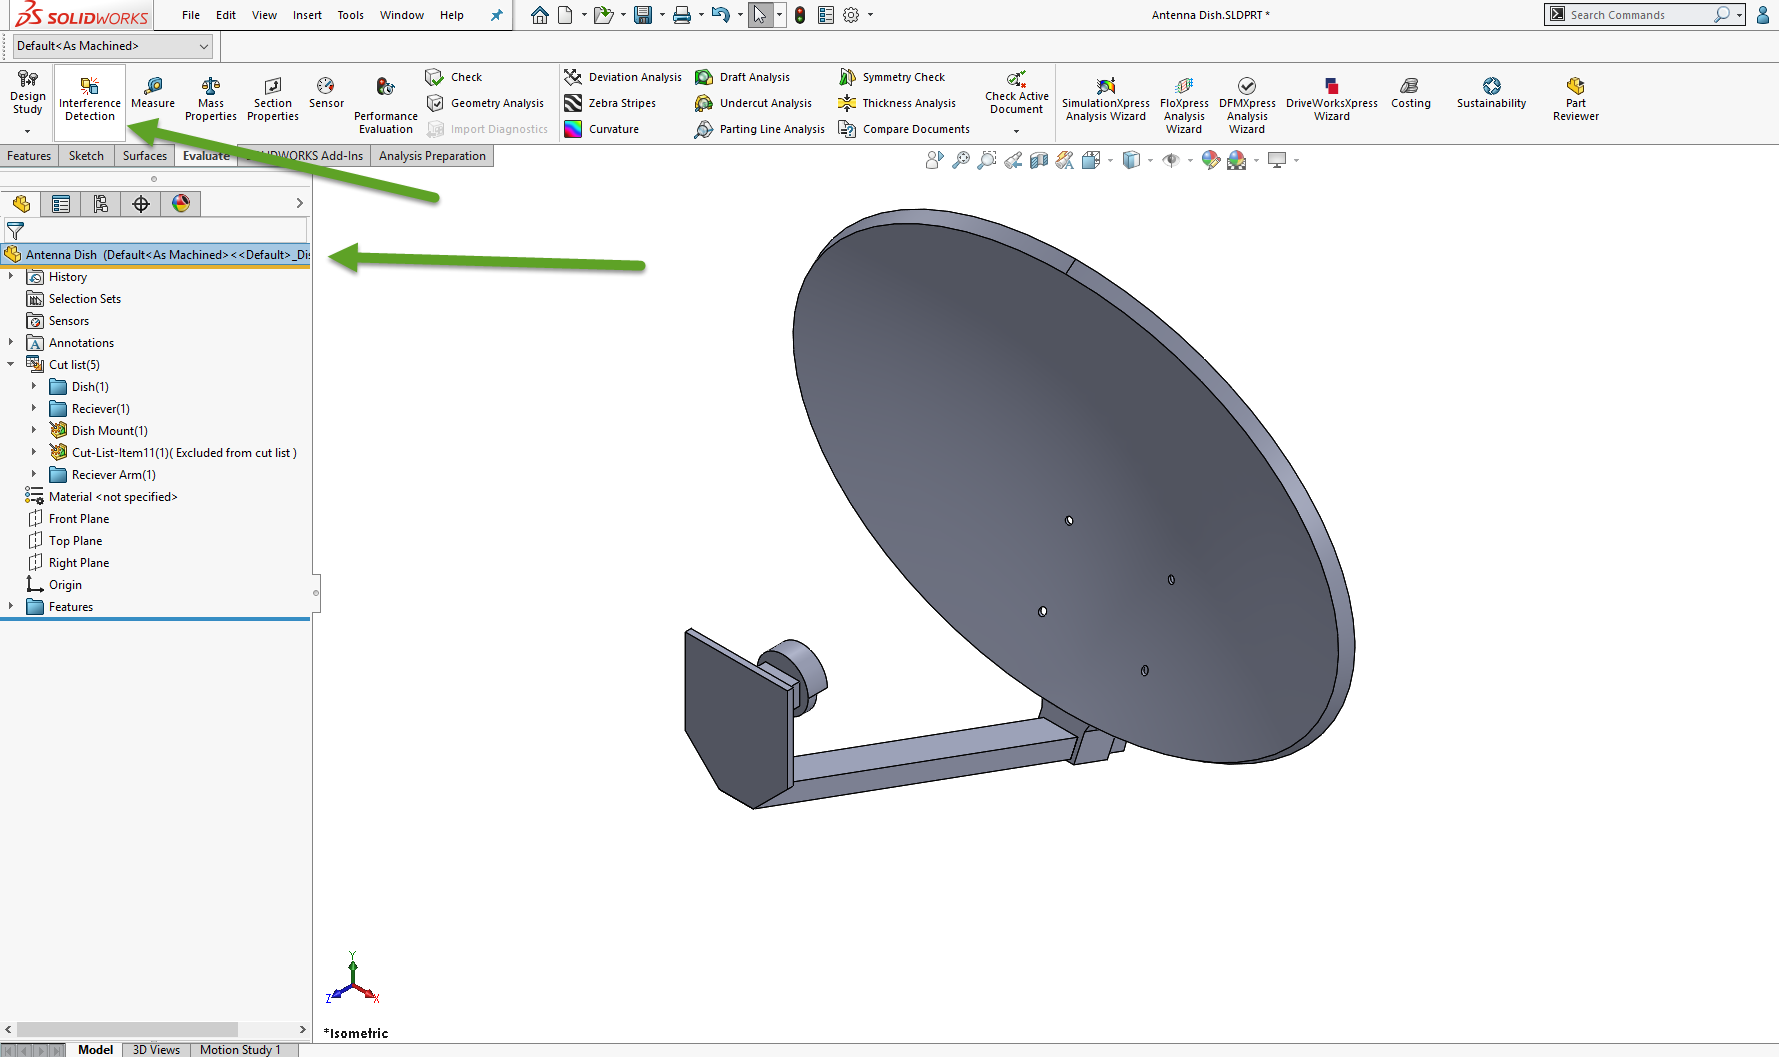
#2. Interference detection for multibody parts
Below is an image of a multibody part with several bodies. In SOLIDWORKS 2019 and older is the ability to do interference detection on multibody parts. The interference detection tool eliminates the need to save bodies out to an assembly to perform an interference detection. We can access the interference detection from the Evaluate tab in the same location as the assembly mode.
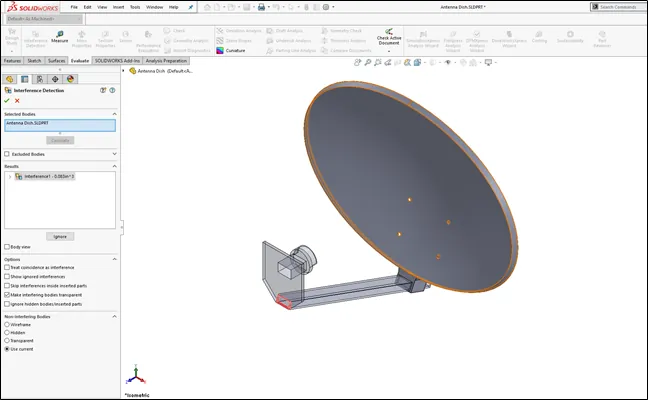
The above image shows what the menu looks like when executed. You can learn more information about how to use the interface detection tool by watching the video below.
#3. Offset on Surface
SOLIDWORKS 2017 introduced the ability to create an offset on a surface, however it can only create Euclidean offsets to a surface.
Euclidean offsets
Just like the image below, a Euclidean offset to the pink edge would create a linear offset distance between the pink selected edge and the offset entity but does not consider the curvature of the surface.
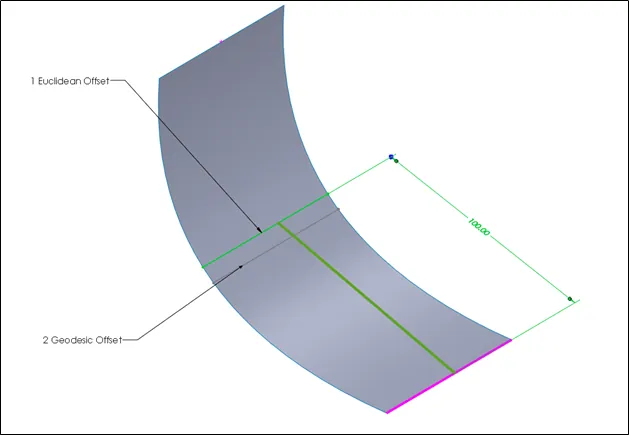
Geodesic offsets
SOLIDWORKS 2019 and later versions include a Geodesic offset which will create an offset distance that is the shortest possible distance between the selected edge and the resultant offset entity, but the Geodesic offset will take the curvature of the surface.
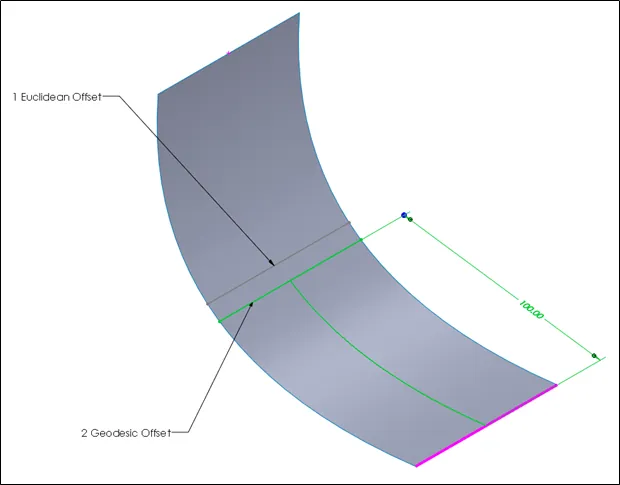
Notice that both distances are 100mm the actual offset varies based on curvature. However, since curvature is considered, the actual distance is shortened by this curvature. The image above gives us a better insight into the difference.
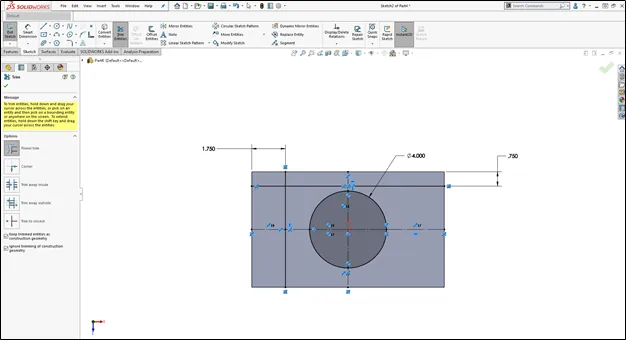
#4. Trim entities
For sketching and trimming there are two check boxes to make trimming much easier. Those check boxes allow trimmed geometry to become construction geometry and allow trimming of construction geometry to be ignored.
In the example below, I want to turn the midpoint lines into construction geometry and make sure that they don’t get trimmed by accident once they become construction. This way, I can use them to mirror the lines.
Having these two options on made it much easier to convert the lines to construction geometry and ensure I didn’t accidentally trim them as well when trimming lines.
.png?format=webp)
Those are my favorite time-saving part modeling tools. Hopefully these tips will assist in future part modeling for you. For more SOLIDWORKS tips & tricks make sure to subscribe.

About Jacob Bakovsky
Jacob is a Senior Elite Application Engineer at GoEngineer. His expertise is in SOLIDWORKS but he also has knowledge with PDM, Composer, Inspection, Visualize, Simulation, and the 3DEXPERIENCE platform. In addition, he also helps run the 3D printing service bureau at our Santa Ana, California branch.
Get our wide array of technical resources delivered right to your inbox.
Unsubscribe at any time.