This is the second article in the series on manually importing CAD data into PDM. In this document we will cover the “Copy/Paste a Folder” method of import.
For an overview of the methods for import please see the first document in the series “Manually Importing CAD Data into SOLIDWORKS PDM”.
Advantages:
- Maintain folder structure – If you want to maintain the same folder structure inside of PDM as you currently have outside of PDM then this might be an attractive option. When you paste a folder into PDM the sub-folder structure and file locations within the folders will be maintained
- You will get all of the files that are in the folders into PDM
Disadvantages:
- None of the references will be updated in the files. Therefore, they will continue to attempt to open the files from the original location outside of PDM
- There may be duplicate files in subfolders. These will have to be located and resolved
Procedure Overview:
- Verify that your vault is set to not allow duplicate file names
- Copy the top level folder with all subfolders and files into the desired location in PDM
- Check in all files that have unique file names
- Identify and resolve files that have duplicate file names
- Fix file references so they all point to files inside of the PDM Vault
- Release files inside of PDM that have previously been released outside of PDM. Set the PDM Revision to match their current, released revision.
Detailed Procedure
Verify that your vault is set to not allow duplicate file names
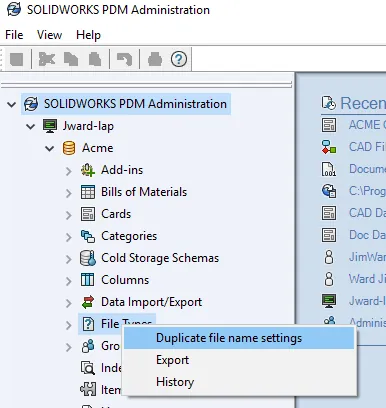
1) Open the SOLIDWORKS PDM Administration tool
2) Log-in to your vault with the Admin user account
Copy the top level folder with all subfolders and files into the desired location in PDM
This can be your complete folder structure from your existing SOLIDWORKS save location or a subfolder.
Use Windows “Copy” on the folder, browse to where you want it in PDM and choose “Paste”. This action will copy the folder, sub folders and all files contained in those folders into PDM. This action will NOT update any references of the drawings or the assemblies.
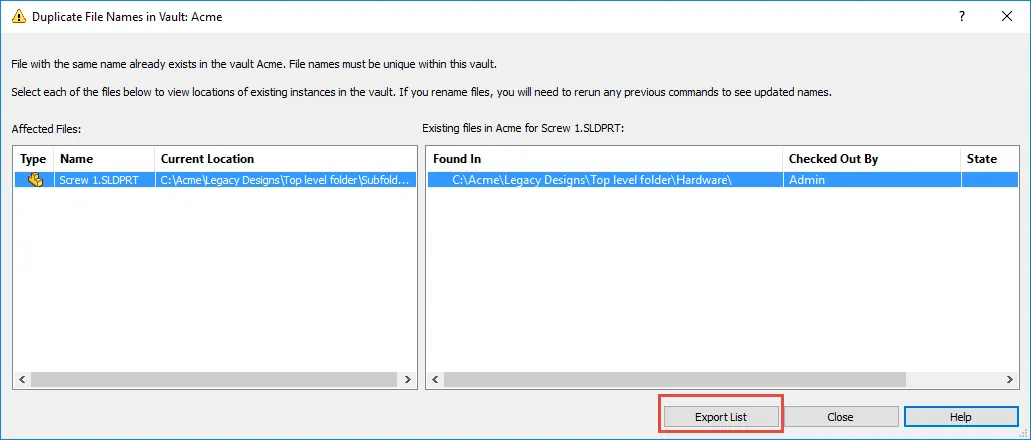
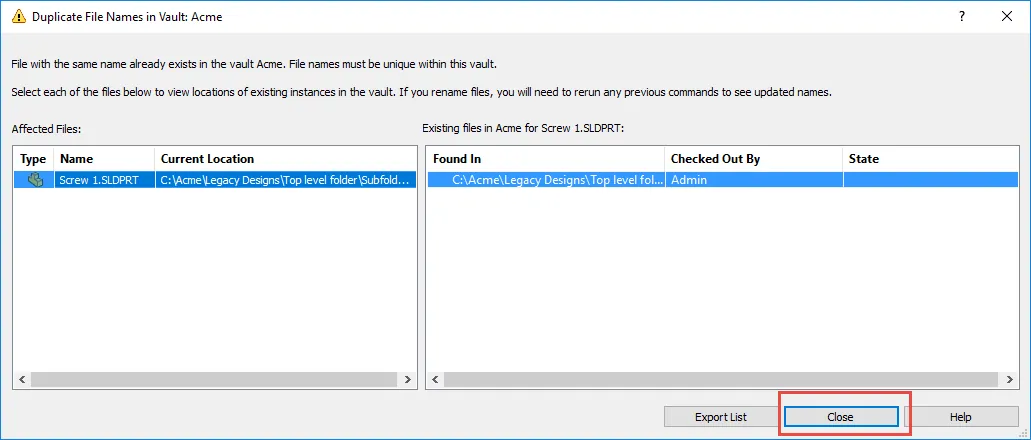
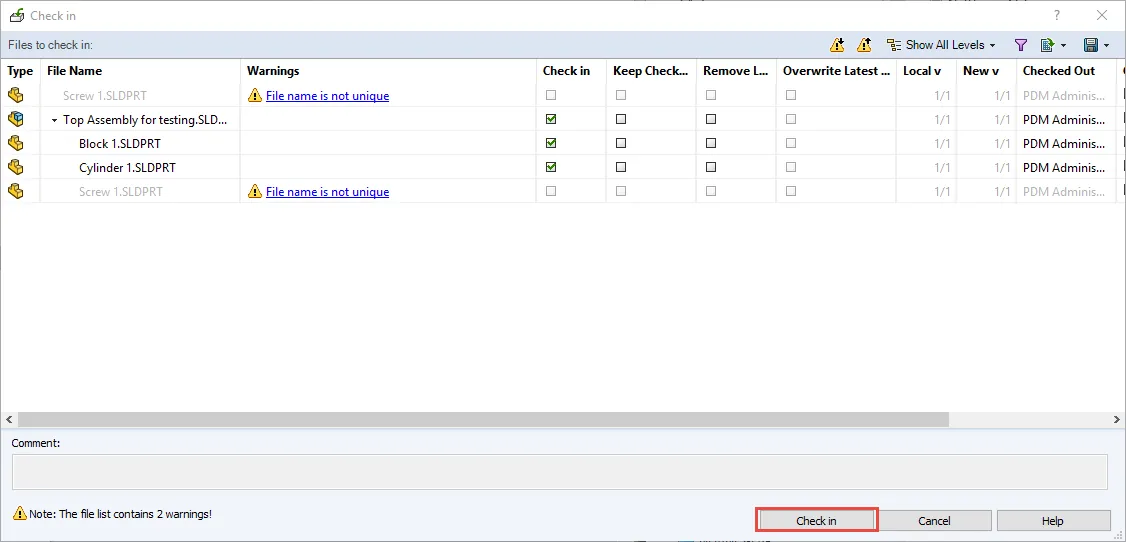
During the copy process there might be a dialog which lists files with duplicate names and their locations. Choose “Export List” to save the contents into Excel. Please see the section “Export List in Excel” on how to manipulate this data so it comes into Excel properly.
Once the list of duplicate file names has been saved, simply close this dialog.
Resolve duplicate file names
Now is a good time to open up the list of duplicate file names. If you have a lot of duplicates then this may take some time to complete but it is important that you don’t have duplicate file names in the vault. For each duplicate name
- Decide which file you want to keep
- Either rename or delete the duplicates so each one has a unique file name
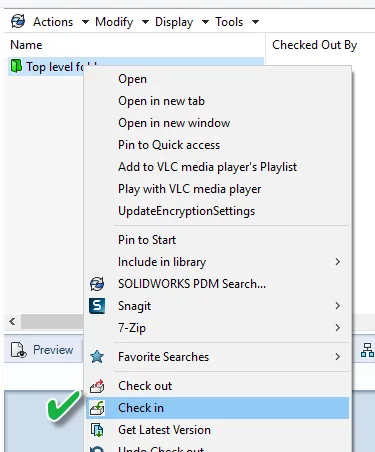
Once you have resolved all of the duplicate file names, again go to the top level folder and check it in. Only the files that are checked out will be listed. No duplicate file names should be identified.
Fix file references so they all point to files inside of the PDM Vault
Begin Process
Only drawings and assemblies reference other files so part files can be ignored. We will start by checking out all assemblies under the top level folder.
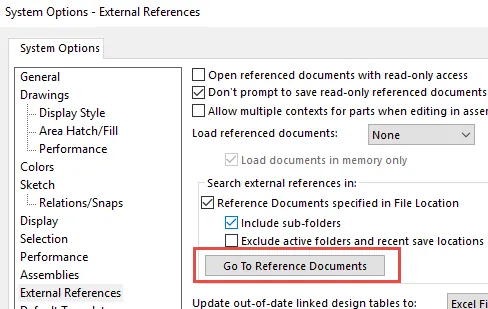
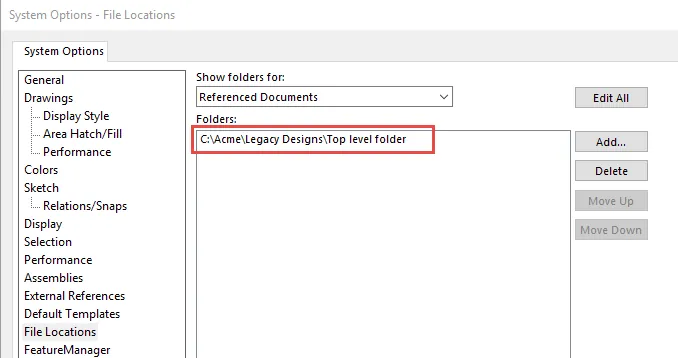
CAUTION: Changing the below settings in SOLIDWORKS will cause SOLIDWORKS to look in the search paths for references even before it uses the paths saved in the file. Therefore, these settings are temporary. They are only to be used to reset the references of newly imported files so they point internal to PDM. Leaving these settings will cause file open to be very slow. Once the new files have been reset, turn this feature off by unchecking “Reference Documents specified in File Location” and removing the paths in “Reference Documents”
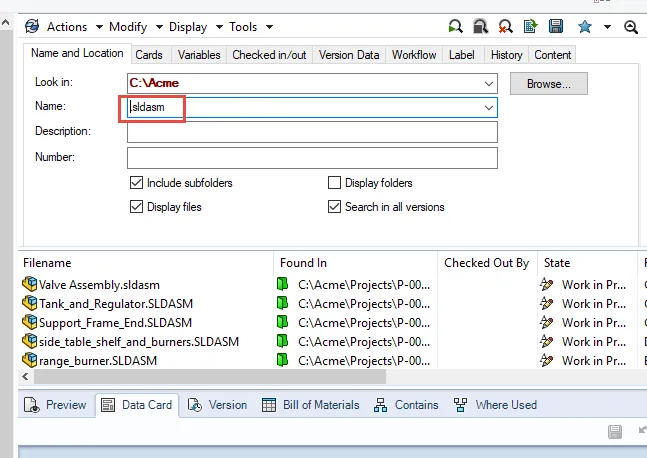
8) If any files are not coming from inside of PDM then you can select “Copy List” at the bottom of the dialog, paste it into Notepad and then open it in Excel.
9) Do a search inside of the file opened in Excel for any files that are coming from outside of the PDM vault. Chances are that the file was missed during the copy process. Remember that this is done by file name so the name has to match exactly.
10) Close the “Find References” dialog.
11) Rebuild and save all assemblies.
12) Close SOLIDWORKS.
At this point, all of your assemblies’ referenced components should be inside of PDM.
13) Go back to the top level folder in PDM. Right-click it and select “Check-in”.
End Process
14) >Repeat this process (from “Begin Process”) for all drawings. The search term is “*.slddrw”
Set the PDM Revision to match their current, released revision
With a new file in PDM the revision is managed by the workflow. As a file is released in the workflow then the revision is automatically updated to the new release. This process will always use the first revision in the sequence for the first release of a file. While this is perfect for a new file being released for the first time, it is not desired for imported files that have already been released. If your files have been released outside of PDM you would like for them to now be released with the same revision inside of PDM.
In order to accomplish this in SOLIDWORKS PDM Standard you will need to use the “Set Revision” command. There is a method to accomplish this but it is complex enough that it deserves it’s own video. Therefore, that will be next in this series.