Save SOLIDWORKS Assembly as Part and Preserve Geometry References
Saving an Assembly as a Part
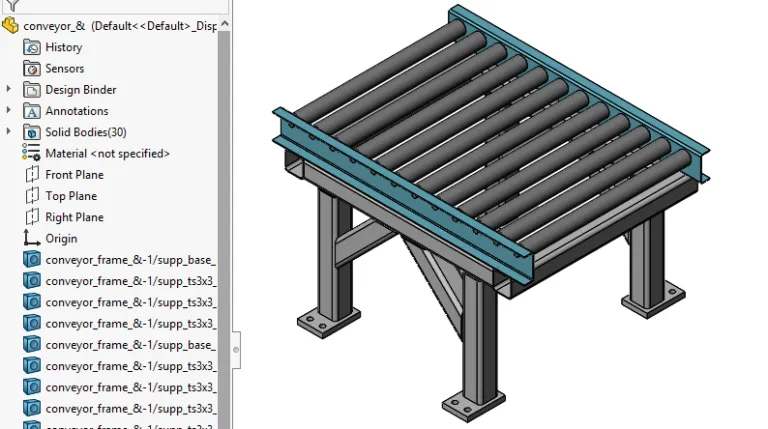
A good way to simplify a large assembly is to save it as a part. Doing so will convert the file references into multiple solid (or surface) bodies in the resulting part file’s feature tree. This is a major way to improve performance on large assemblies by using the simplified part versions of sub-assemblies in the upper level.
Associated Risks from SOLIDWORKS 2017 and Lower
When creating a model SOLIDWORKS generates a name for each face, called a unique identifier, which the program uses to keep references intact. Saving an assembly as a part creates new unique identifiers for each face when the reference geometry is converted to a part file. As a result, when a sub-assembly is saved as a part, and then replaced in the upper level, it would cause errors to mates referencing the former sub-assembly. In drawings any annotations connected to the former reference geometry would become dangling as well. This usually resulted in a lot of clean up to be done.
How to Save the Assembly as a Part and Maintain Mate References
Now in SOLIDWORKS 2018 a new option called Preserve Geometry References has been added to the Save As dialog box when saving an assembly as a part file.
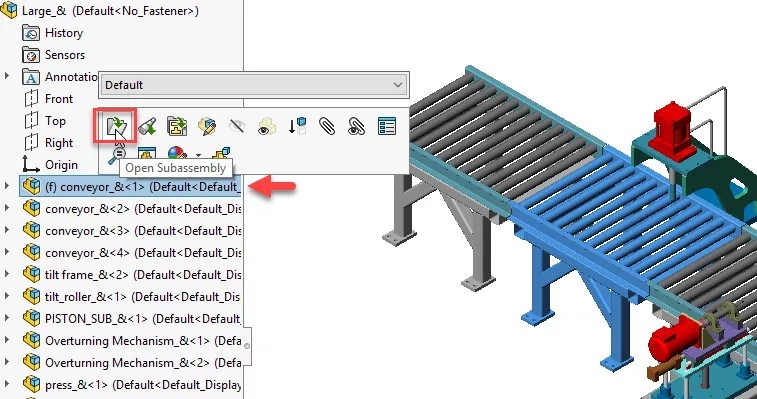
1. With your top level assembly open, left click on a sub-assembly that you would like to save as a part and chose Open Subassembly.
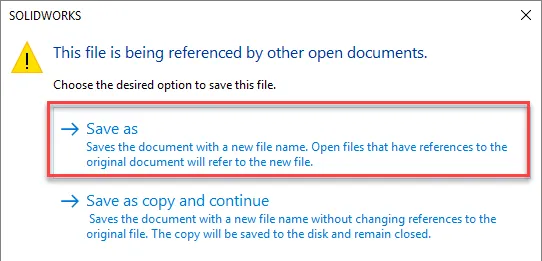
2. With the sub-assembly open click File, Save as. Chose the option to Save as when prompted.
3. In the Save As dialog box use the Save as type pull down to change it to Part (.sldprt)
4. In Geometry to save you have three options
- Exterior faces (converts only exterior faces into surfaces)
- Exterior components (converts all extior part files to solid bodies)
- All components (converts all part files to solid bodies)
5. Finally click the check box for Preserve geometry references and click Save.

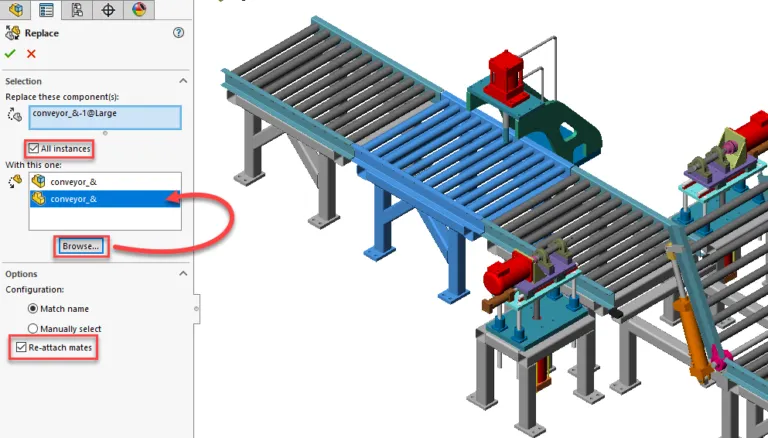
6. Switch back to your top level assembly then right click on the sub-assembly, and chose Replace Components. 
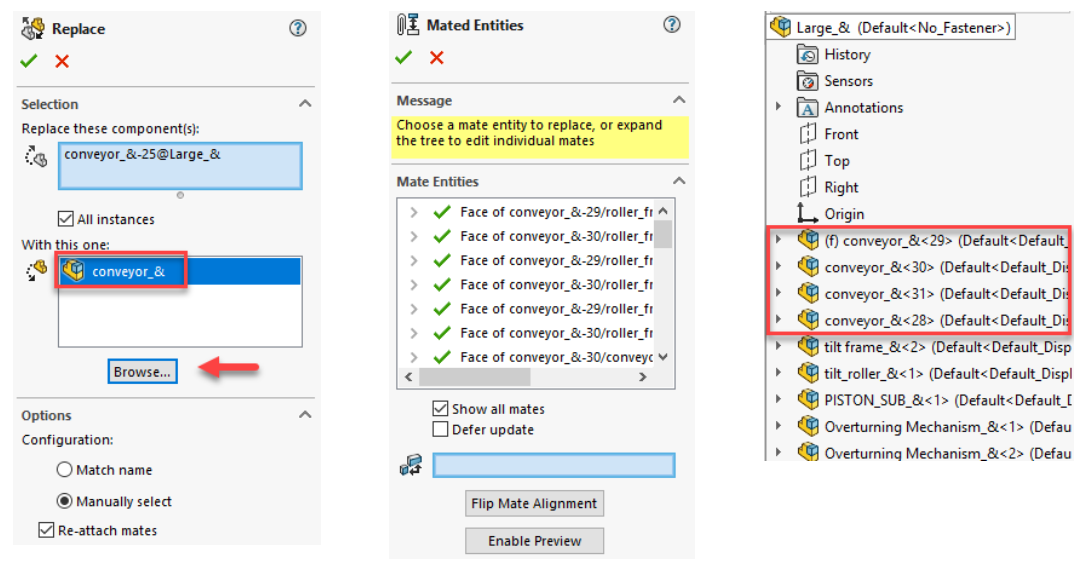
7. In the Replace property manager chose any instances of the sub-assembly that you want to replace with the part version, or click All Instances. Then browse to the part file you just created.
8. Under Options click the check box for Re-attach mates and click Ok.
9. You will then get a Mated Entities dialog that shows all of the mates are still in tact (referenced by green check marks).
10. Click OK.
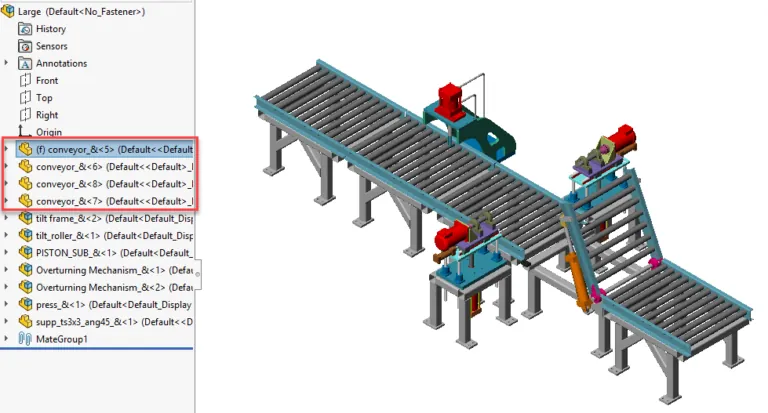
This result is you now have all of the sub-assemblies replaced with the simplified part file, and the best part is no mate errors.
If you have a drawing of your top level that included dimensions or other annotations pointing to the sub-assembly, you will notice that the relationships remain intact there as well meaning no dangling dimensions.
Open the part file to see all of the former file references converted to solid, or surface, bodies.
What to Do If You Need to Make Changes to the Subassembly and Update the Part Version.
In the case that you need to make changes to the sub-assembly and have the part update in your upper level you will need to do a couple of things to ensure all references stay intact. Essentially we will be reversing the order of operations, then repeating the steps above.
1. In the top level assembly right click on the part file that was your former sub-assembly and chose Replace Components.
2. Browse for the sub-assembly that had been replaced with the part file and make sure Re-attach mates is selected, then click OK.
3. Click Ok again to accept Mated Entities.
4. This will replace the part file with the sub-assembly again and all mate references will still be intact.
5. Make any changes to the sub-assembly and save your work.
6. You may now repeat the steps at the beginning of the document to save as the sub-assembly as a part again and replace it in your top level assembly.
This concludes the tutorial. I hope this was helpful and thank you for visiting the GoEngineer blog.

SOLIDWORKS CAD Cheat Sheet
Our SOLIDWORKS CAD Cheat Sheet, featuring over 90 tips and tricks, will help speed up your process.
![]()
About GoEngineer
GoEngineer delivers software, technology, and expertise that enable companies to unlock design innovation and deliver better products faster. With more than 40 years of experience and tens of thousands of customers in high tech, medical, machine design, energy and other industries, GoEngineer provides best-in-class design solutions from SOLIDWORKS CAD, Stratasys 3D printing, Creaform & Artec 3D scanning, CAMWorks, PLM, and more
Get our wide array of technical resources delivered right to your inbox.
Unsubscribe at any time.