Designing a Trailer Using SOLIDWORKS Weldments
Trailer design is an engineering challenge that is made easier by robust, yet flexible CAD tools. SOLIDWORKS Weldments is well-suited for this endeavor with intuitive features that make modeling this and other structures a lean process.
Start with Sketching
A layout sketch is helpful as the first step in your model. This creates a footprint and will provide some construction geometry to dimension your subsequent sketches to. In this sketch, and the ones that follow, take advantage of symmetry and the origin. The rectangle in Figure 1 is a simple example of this.
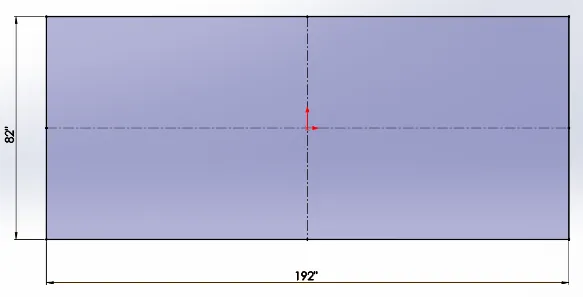
Figure 1. Initial profile shape – SOLIDWORKS Sketch
The rest of your sketch segments can be in 2D or 3D sketches. The former is best used as your default sketch method. This simplifies the sketching process especially if all of your sketch entities will be on planes that are perpendicular and parallel to each other. This should be sufficient for most trailer designs. In the event of more complex structures, simply select 3D sketch on the Weldments tab and hit the Tab key to alternate between the x-y, x-z, and y-z plane. It will also be helpful to create 2D sketches first, then use 3D sketches when making segments that will go between them. In this way, your 2D segments serve as endpoints and guides.
Structural Members
Make sure to enable the Weldment button from the Weldments tab to access the necessary features for the rest of your modeling as seen in Figure 2. From there, the Structural Member icon on the Weldments tab allows you to pick sketch segments and specify what beam profile you need using the Standard, Type, and Size subfolders as shown in Figure 3.
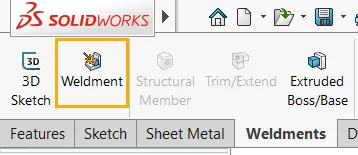
Figure 2. Weldments icon in SOLIDWORKS
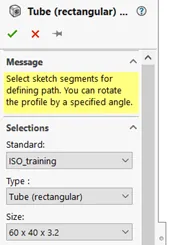
Figure 3. Select the beam profile.
This is where you’ll reap the benefits of good design intent from your sketches. As you create different sketches, put sketch segments that will have the same beam profile in the same sketch. This is a great visual aid when creating the weldment features. Simply select New Group and pick line segments that are connected to each other in a continuous string as shown in Figure 4.
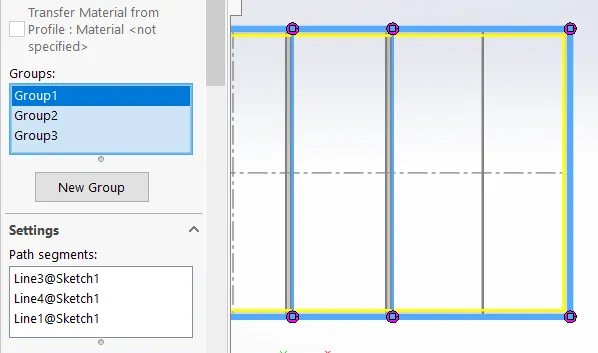
Figure 4. Continuous parallel and perpendicular line segments selected.
Additionally, you can select line segments that are parallel to each other. To do this in the same feature, click New Group again as shown in Figure 5 and create more structural members of the same beam type.
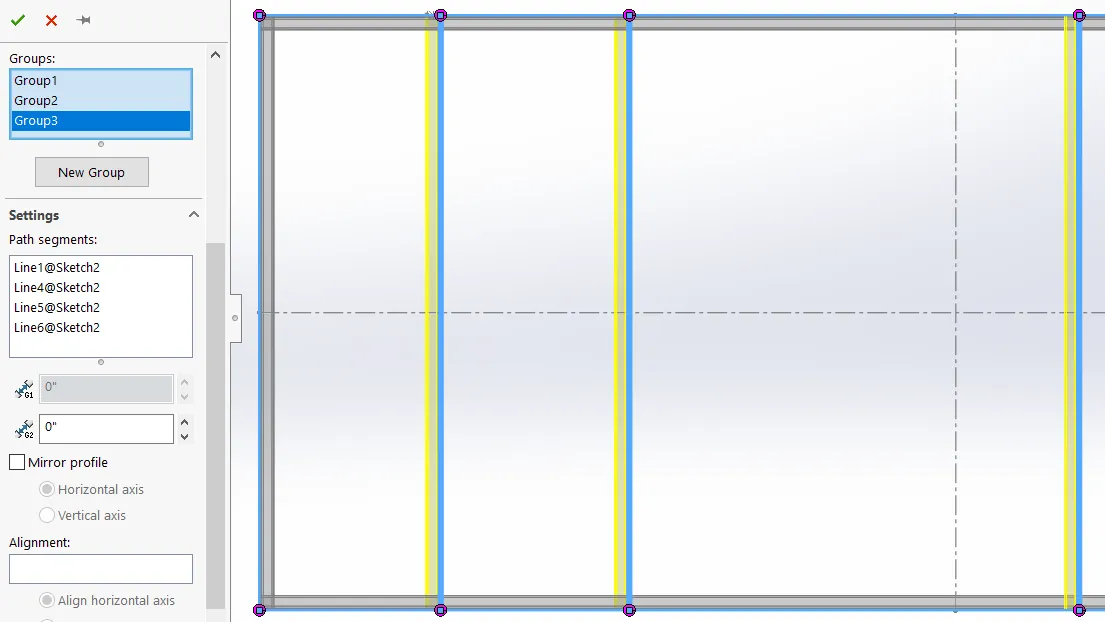
Figure 5. New group, new set of parallel line segments selected.
When you’re ready to change beam types, click the green check and create a new structural member feature. As an example, you may decide on a rectangular tube for your main beam structure and C-channel for the tongue. Separating your structural features based on the parts of the trailer is another good visual aid when examining your feature tree.
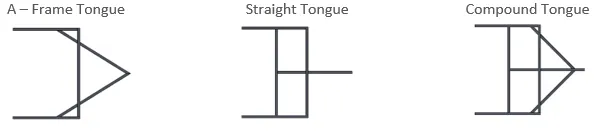
Figure 6. Various tongue styles.
It is often necessary to change the orientation or location of the beams that you place. Near the bottom of the structural member property manager, you’ll find the Locate Profile button as seen in Figure 7. Once clicked, you can choose which sketch point in the beam profile will be coincident with your line segment (Figure 8). If further adjustments are needed, you may specify the rotation of the beam profile in the box located just above the Locate Profile button.
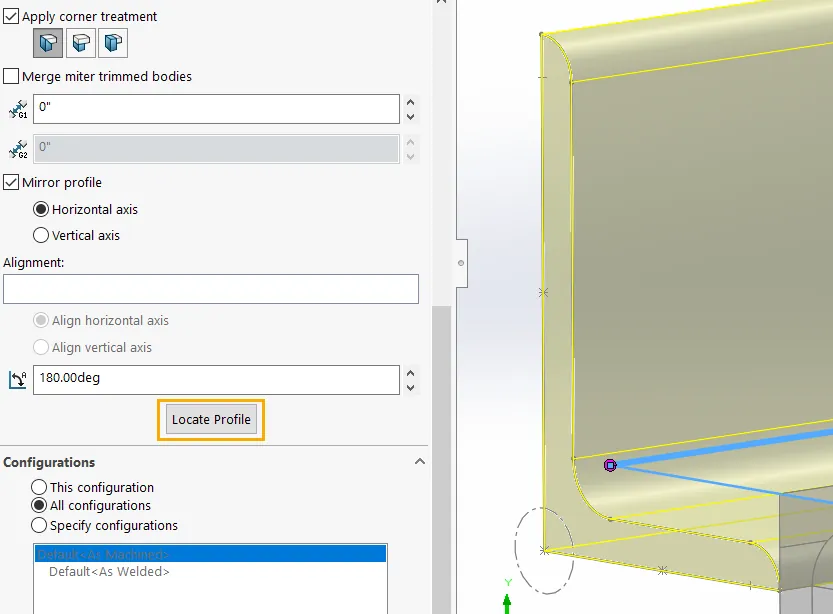
Figure 7. Select the Locate Profile button.
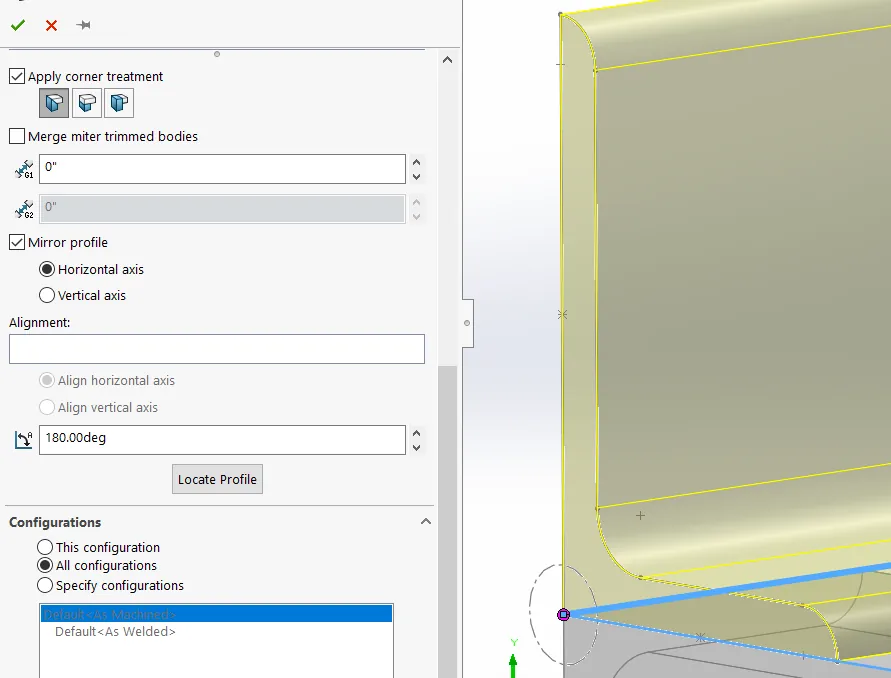
Figure 8. Select a new vertex or sketch point to snap to.
Assembly
Trailer frames are typically welded together to yield a structurally sound product. However, it is best to accompany welding with additional support in the form of gussets. The gusset feature allows you to select connecting faces and specify the thickness and size of the gusset as shown in Figure 9. To save time adding individual gusset features to the assembly, you can again take advantage of symmetry by mirroring across planes or faces.
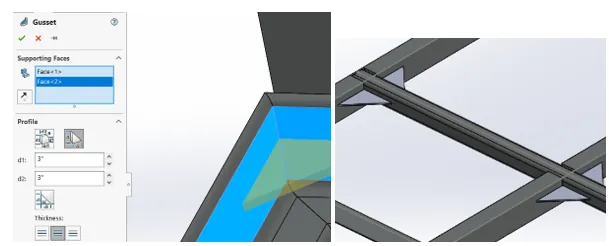
Figure 9. Gusset feature and property manager.
Now it’s time for cleanup and finishing touches. Some beam segments will be too long or short. This is where the Trim/Extend feature in the Weldments tab is helpful as shown in Figure 10. First choose the beam(s) that need to be trimmed, then specify which body, face, or plane will be used as the trimming entity.
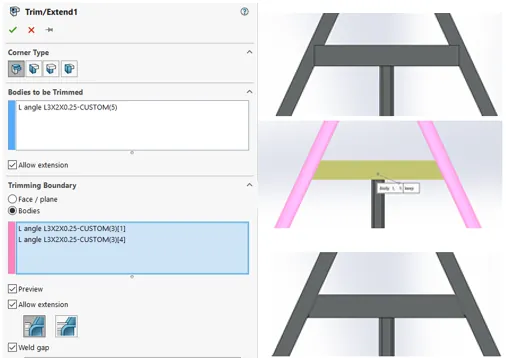
Figure 10. Trim/Extend tool.
We’ve discussed several tools in the Weldments module for this case study. First, a layout sketch sets the scale and a footprint to guide your design. Putting sketch segments that will have the same type of beam in the same sketch will make creating the geometry easier. Second, structural members can be created for your sketch segments.
All of the segments that share the same beam profile can be managed in one feature with the aid of Groups. Third, we want to take a look at our design as a whole and see how our different beams will fit together. The trim tool will cut beams so that they intersect properly with each other while the gusset tool will help reinforce weak corners. Stay tuned for the next article in this series which will discuss using SOLIDWORKS Simulation to validate the structural design of your trailer.
Related Articles
SOLIDWORKS 2020 Structure Systems for Weldments
Puppy Love with SOLIDWORKS Weldments

About Jared Trotter
Jared Trotter is an Application Engineer and CSWE at GoEngineer. He holds a Bachelor’s Degree in Biomedical Engineering from Mississippi State University. Previously, Jared worked as a design engineer with Hol-Mac in Bay Springs, MS and worked on curriculum development with the Engineering is Elementary program at the Museum of Science in Boston, MA.
Get our wide array of technical resources delivered right to your inbox.
Unsubscribe at any time.