How to Update Templates in SOLIDWORKS
Every few releases it’s always a good idea to update your SOLIDWORKS templates to the latest version you and your company are currently using. Being one of the techs on the Technical Support team, we run into the rare occurrence that a part, assembly or drawing seems to have become corrupt. It’s even more rare that we find that multiple files fail to open, this is when we start looking at the templates being the culprit.
OLD SOLIDWORKS TEMPLATES
With CAD software continually updating, you would not want to design your new parts in old templates. Similarly, would you want to use a template from an old version Microsoft Word 5.5 to be used in your Microsoft Word 2016?
Over many years, during the normal upgrade path of SOLIDWORKS, templates get changed, updated and saved in the current version of SOLIDWORKS. This should allow the users to have templates that are of the best quality to start their new part, assembly and drawing file(s) with. However, as with any program on Windows, templates can have problems. The steps below are how to get a fresh set of current templates created and, if so desired, to copy the Drafting Standard and Sheet Format (title block) over to the new template(s).
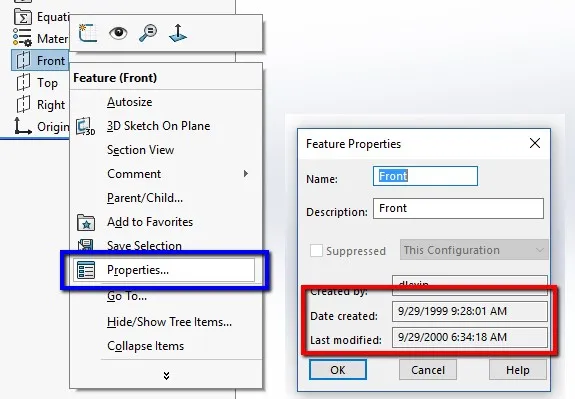
Hint: To check the age of a part or assembly template you can, start the new part or assembly, right click over one of the normal planes (Front, Top or Right), select Properties and look at the Date created and Last modify fields.
Here is an example of a template to NOT continue using until it’s updated (replaced):
Follow these steps on how to get a fresh set of SOLIDWORKS templates:
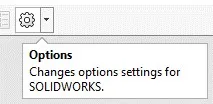
- Open SOLIDWORKS > go to Options (gear icon on top center toolbar)
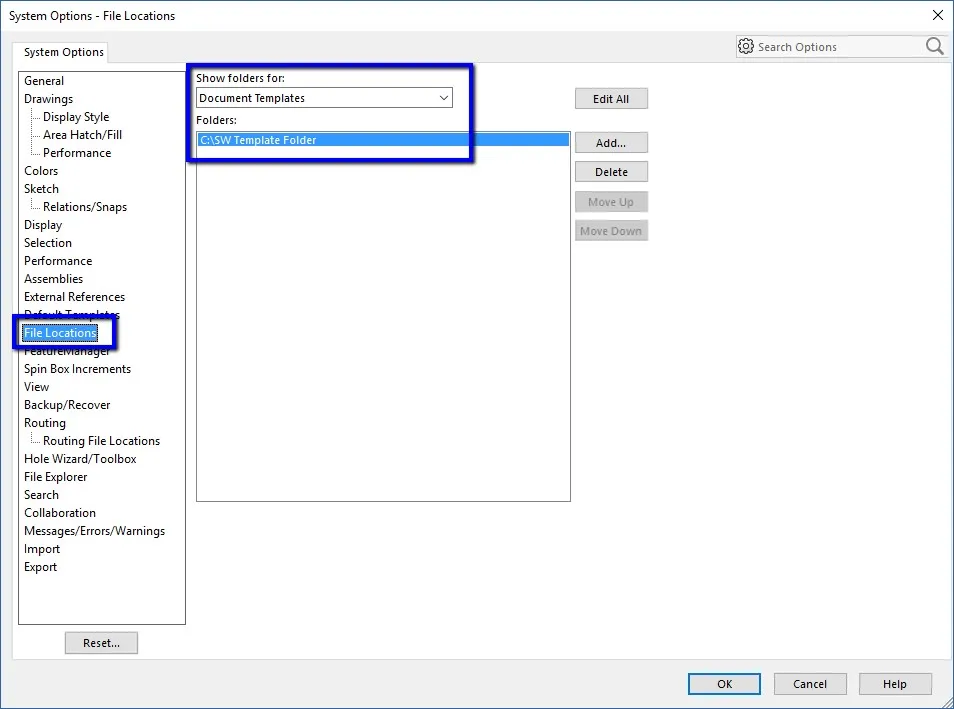
- On the ‘System Options’ tab, select ‘File Locations’ category on the left side (about in the center)
- Leave the ‘Show folders for:’ set to ‘Document Templates’
Hint: We will be deleting all the paths in the Folders box in the next step. Take a screen shot or copy these down if you wish to re-establish these paths afterwards. - Selecting one by one, delete all paths that are listed. (If using PDM Professional, skip deleting the path pointed towards your PDM vault temp folder)
- Click the ‘Add’ button, browse to some place convenient. (C:\ or Desktop or Documents)
- Create a new empty folder. I created mine as ‘C:\SW Template Folder\
- Open this folder and then click the ‘Select Folder’ button.
- Click OK out of ‘System Options’, click yes if prompted to making changes to search paths. The creation of the new templates happens very quickly and behind the scenes.
- Start by going to the File menu, then selecting New or Clicking on New button. This action causes SOLIDWORKS to check the empty folder that we pointed towards, see that there aren’t any templates in the folder and create new ones.
At this point, you can just keep using the new templates that SOLIDWORKS created, modifying them as needed or you can use these templates as the basis for creating updated version of your old templates. If you plan on updating your old templates, then you may want to add the old paths back into File Locations, Document Templates.
The basic process for creating new templates using the settings from your old templates is as such:
- Open the old template, let’s start with a part template. This can be done by file, open (change your file type to Template), browse to the folder where your existing part template is stored or by file, new and selecting the existing part template. (File, New works if you put your old template paths back into folder locations.
- Save the drafting standard to an external file by going to Options, Document Properties tab, stay on the ‘Drafting Standard’ category, then click the ‘Save to External File’ button. This creates an .sldstd file that can be read back into another part file. It stores most items on the Document Properties Tab but not all of them.
- To import these settings into the new part template that was created in the first half of this article. Open the template by going to the ‘File’ menu, ‘Open’, change ‘File Type’ to template, browse to the folder that we created them in. In my example ‘C:\SW Template Folder\’. Open the part template for this example. Part.prtdot
- While the part.prtdot file is open, go to Options, Document Properties, Drafting Standard category. Select the ‘Load From External File’ button, browse to the .sldstd file we make back in step 2). This imports all of the settings from your existing part template file. Verify that all of your existing settings are imported and then make any additional changes on the Document Properties tab as needed.
- Save the part.prtdot, close the template. Then click new and test the new template.
Hint: I like to name my templates as to what they are and when I created them. i.e. ‘Part Inch 2020.prtdot’
Repeat these last steps 1) through 5) for your assembly and drawing templates. For your drawing template, you will also need to move over your Sheet Format (Title block) if you’ve customized them. To move over your Sheet Format follow these general additional steps.
- Open your existing Drawing template that contains your title block.
- From the file menu, select ‘Save Sheet Format…’ This allows you to save your title block as a .slddrt file.
- Close your existing drawing.
- Open your new drawing template by ‘File’ menu, ‘Open’, change ‘File Type’ to template, browse to the folder that we created them in. Again, in my example ‘C:\SW Template Folder\’. Open the drawing template for this example. draw.prtdot
- Change the sheet format by right click over ‘Sheet1’ in the ‘FeatureManager’ tree, selecting ‘Properties’ and then browse to the .slddrt file that was saved in step 2
- Save your drawing template, close it and then test it to make sure it’s working correctly.
To expand on these steps if you have additional size drawing sheets and/or need to update your title block with extra things like, Annotations that are linked to custom properties.
Since you are updating your templates here is a group of great other tech articles that go further in-depth of Drawing templates:
SOLIDWORKS – Drawing Templates Pt. 1 of 3
SOLIDWORKS – Drawing Templates Pt. 2 of 3

About Michael Nolte
Michael Nolte is a Sr. Applications Engineer at GoEngineer. He has been in the SOLIDWORKS reseller channel since 2007 and is skilled in a large array of SOLIDWORKS products. He has been a Certified SOLIDWORKS Expert (CSWE) since 2011 and received his Dassault Systems Elite Application Engineer status in 2019. Combined with 24+ years of industry experience. Michael specializes in SOLIDWORKS PDM and SOLIDWORKS Electrical and is a Certified SOLIDWORKS Instructor based out of Northern Arizona.
Get our wide array of technical resources delivered right to your inbox.
Unsubscribe at any time.