SOLIDWORKS Simulation CAD Conditioning with Shell Elements
SOLIDWORKS Simulation users often want to know how they can make their simulations run smoother and quicker. When it comes to meshing bodies in Simulation, it is often a goal to simplify the geometry to make the meshing process smoother. Unfortunately, the difficulty increases with thin components as it requires an increase in mesh size, which increases the number of elements. This often leads to larger solve times and wasted productivity.
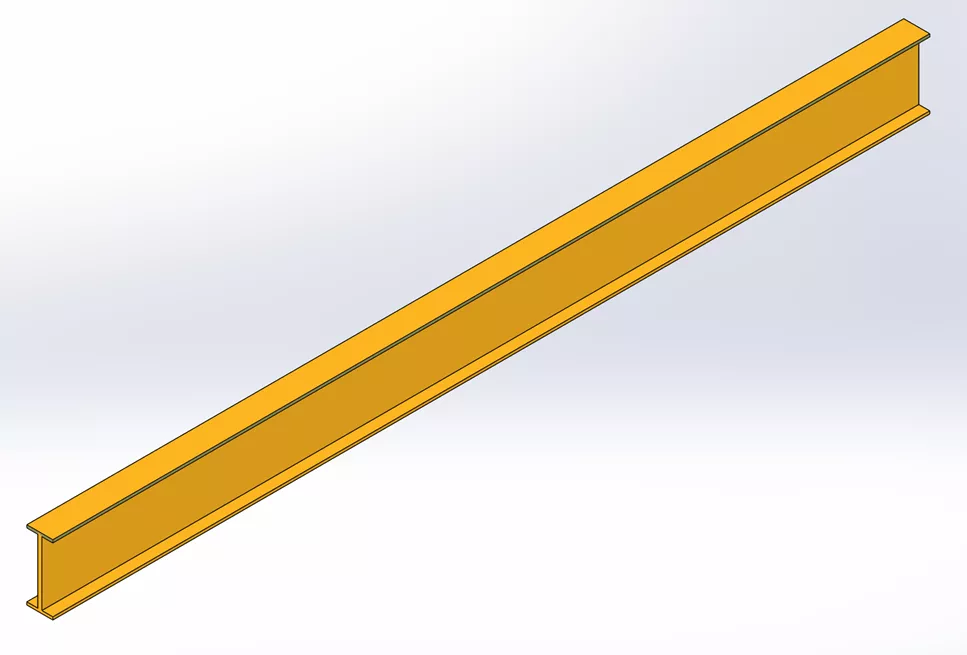
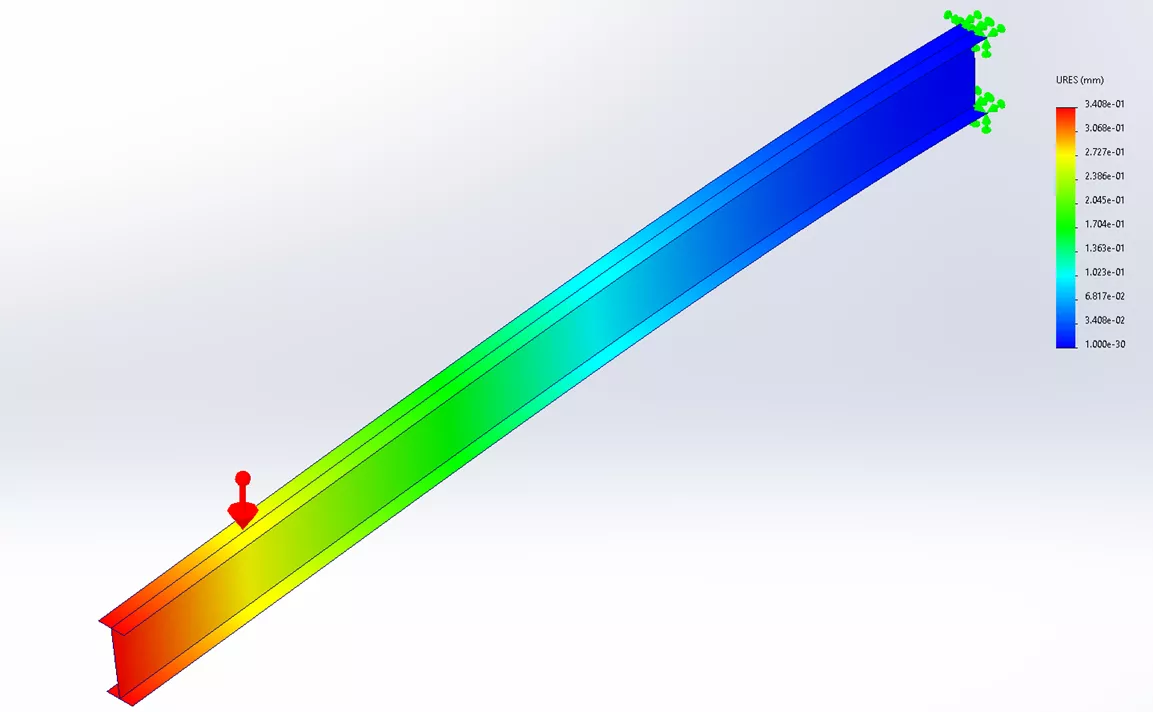
With shell elements, this takes the complexity out of meshing through the thickness and focuses only on the surface meshing. In the example below, we will model an I-Beam that contains a uniform thickness and then utilize the simulation shell elements to mesh the body.
Setting Up the Model
A tip to help make setting up shell elements easier is to convert the faces to surface bodies. An additional bonus is to ensure the surfaces penetrate halfway through the thickness. The Mid Surface command in SOLIDWORKS is ideal for this.
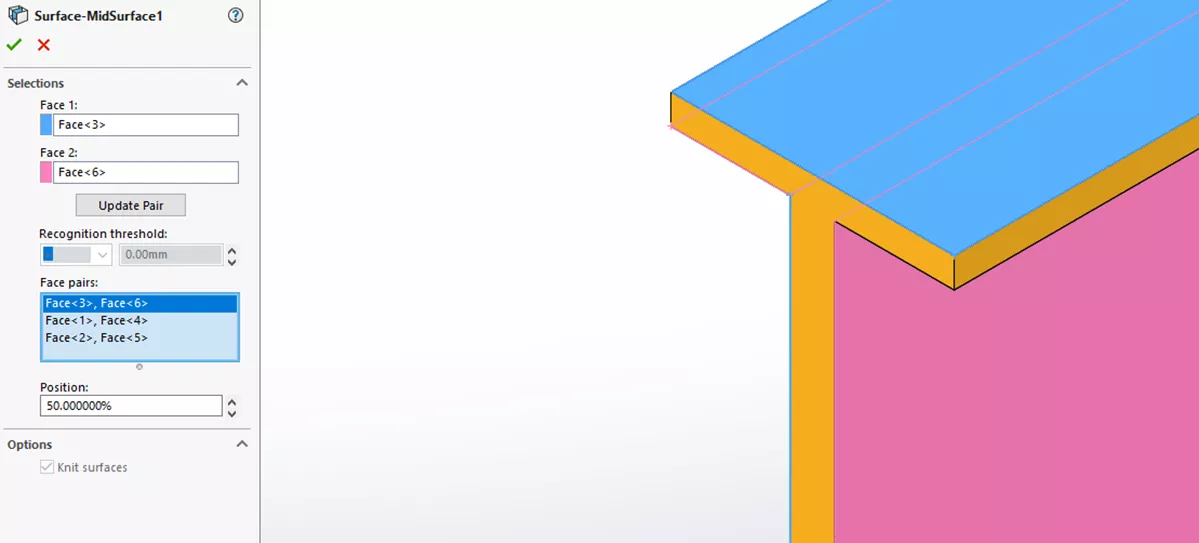
Additional features like the Extend Surface command can bring the surface edges to the faces for contact. Also, the Split Line feature allows faces to be split up. We'll explain this technique later when the mesh is created in Simulation.
Note: Mid Surface can apply the Extend and Split features automatically.
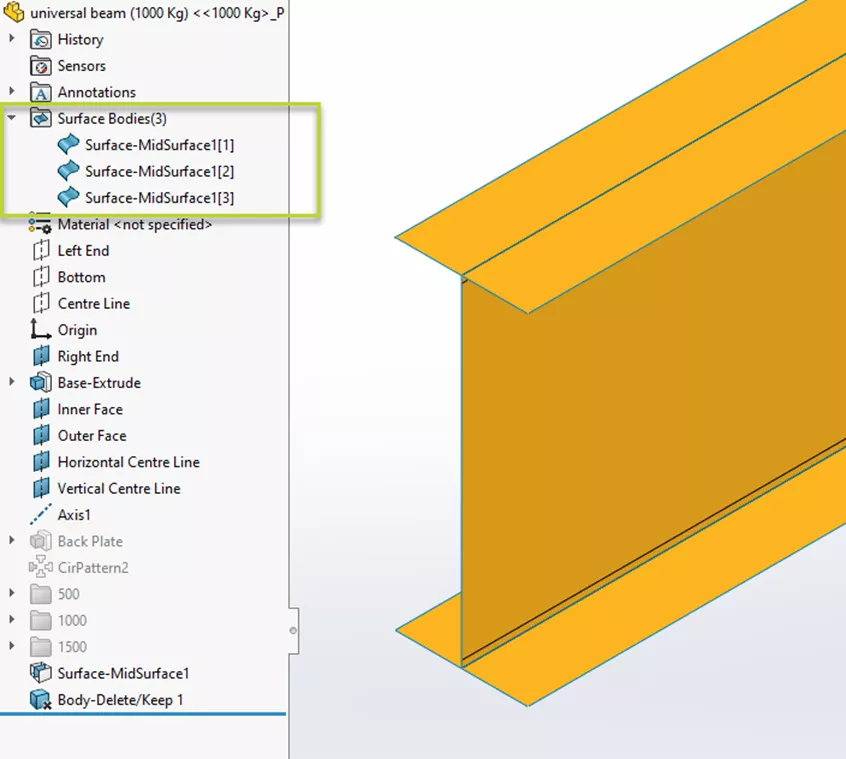
When finished, we can go back and delete the solid body from the tree, as it will not be needed in the simulation. In this example, the three surface bodies are left intact.
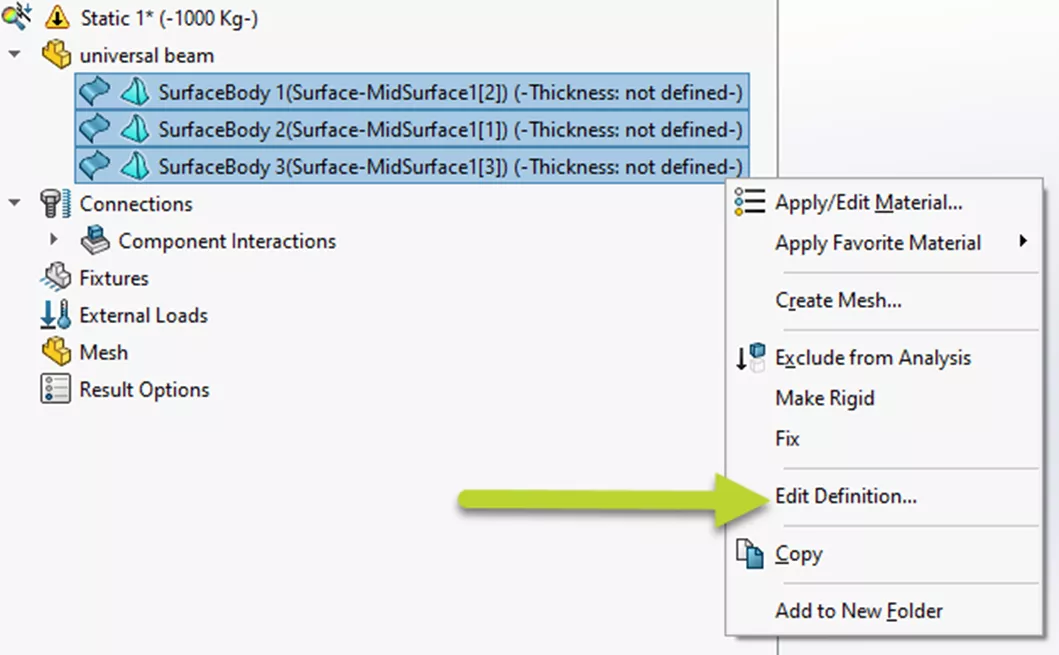
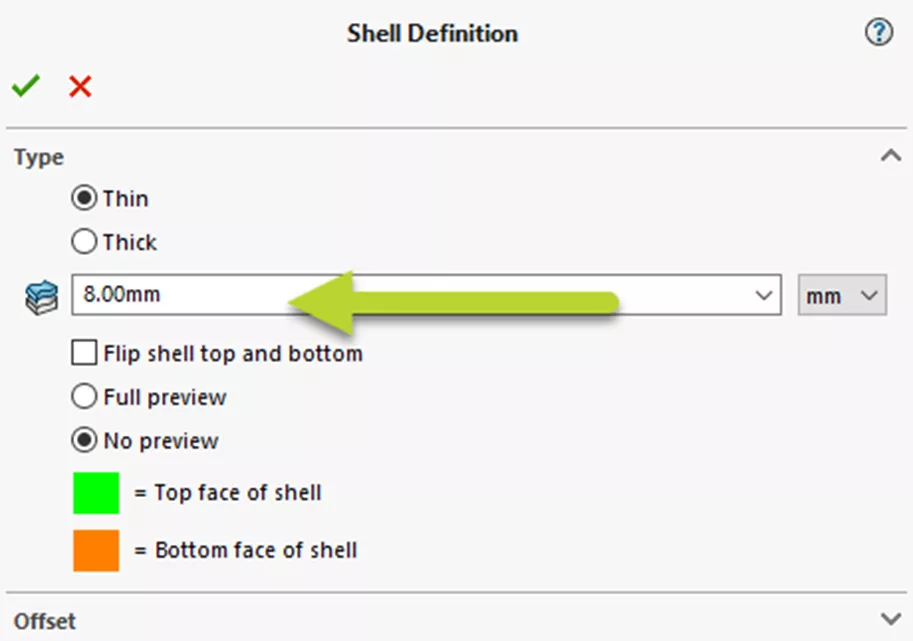
In the simulation, right-click the surface body and Edit Definition...
Apply the thickness value.
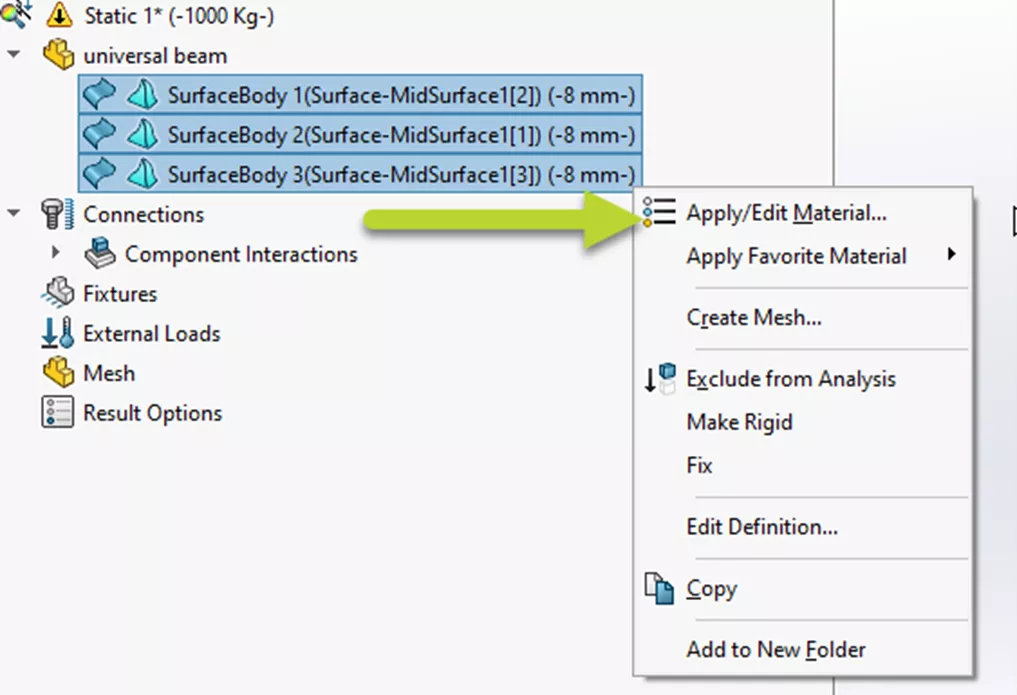
Right-click the surface bodies and click Add/Edit Material to edit the material.
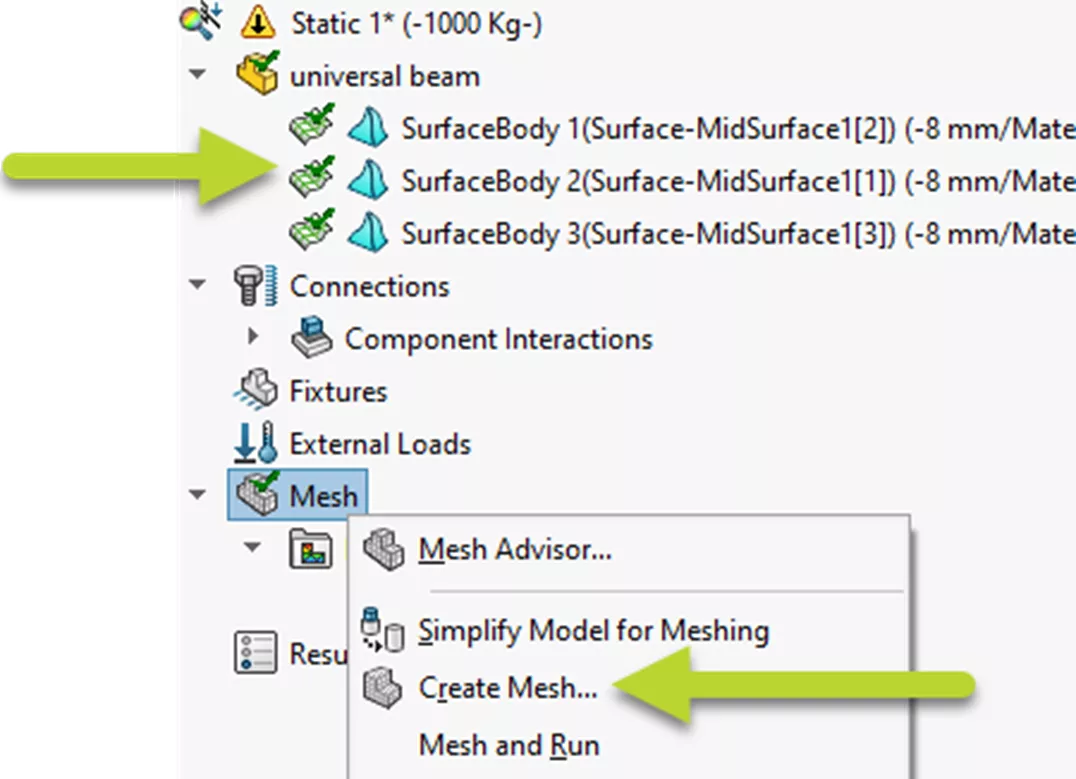
Finally, create the mesh by right-clicking the mesh and selecting Create Mesh. Note that the shell mesh icon will appear differently than if it was a solid mesh.
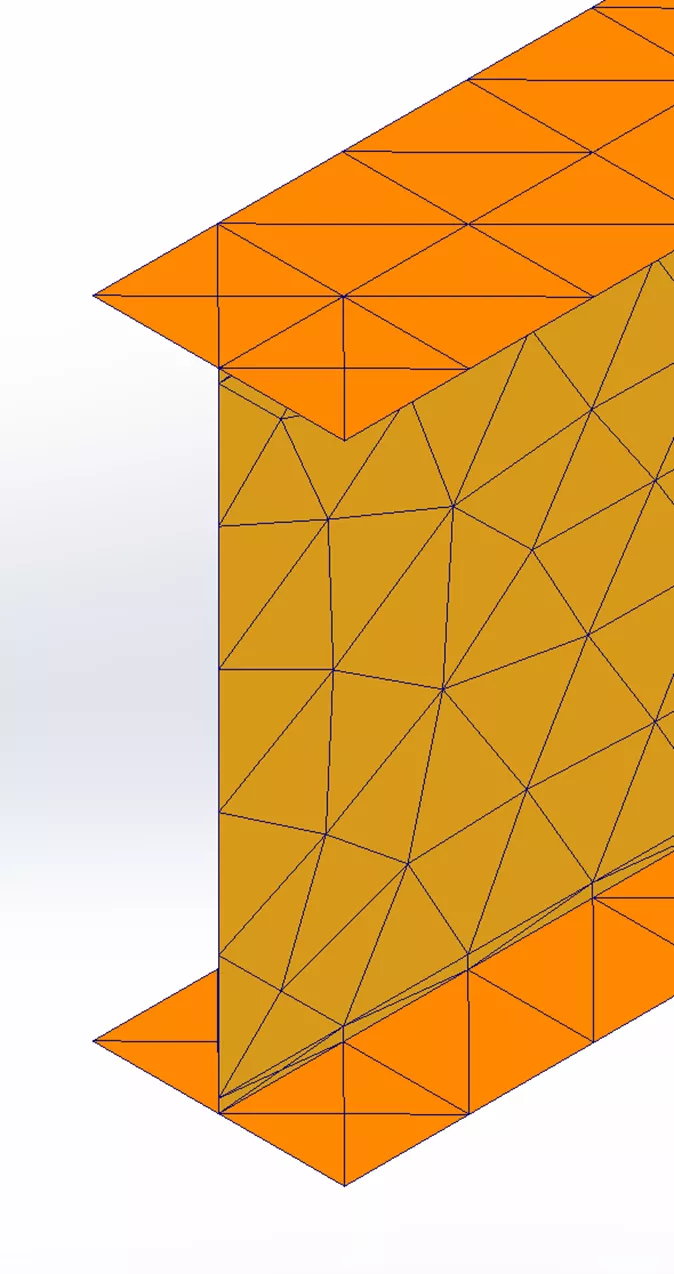
To analyze the differences, shell elements will not show the thickness in the preview, but the surfaces will be colored-coded to determine the front and back.
Also, depending on whether the faces on the surface are split, the touching edges appear visible on the elements, which helps with creating compatible nodes.
We can also add a manual contact set if the nodes are incompatible (not touching) to ensure the face pairs are detected.
Finally, run a study to verify that the results are obtainable with shell elements.
Conclusion
This method, referred to as CAD Conditioning, allows us to focus on simplifying the model for simulation. In this example, shell elements were identified in the simulation since surface bodies were created in the model. Reviewing the results, it will be similar to a study that was meshed with finer solid elements but can mesh and solve quicker.
I hope you found this SOLIDWORKS Simulation CAD Conditioning with Shell Elements helpful. Check out more SOLIDWORKS Simulation tips and tricks listed below. Additionally, join the GoEngineer Community to participate in the conversation, create forum posts, and answer questions from other SOLIDWORKS users.
More SOLIDWORKS Simulation Tutorials
Importing .CSV Files into SOLIDWORKS Simulation Design Studies
Winter Beehive Analysis Using SOLIDWORKS Flow & Thermal Simulation
How to Use the SOLIDWORKS Simulation Probe Tool
Optimizing Your Workstation Budget for Design & Engineering Applications: Simulation

About Jackie Yip
Jackie Yip is a Technical Support Engineer at GoEngineer. When Jackie isn’t assisting customers or teaching a SOLIDWORKS Essentials class, he enjoys road biking and keeping up on the latest tech trends.
Get our wide array of technical resources delivered right to your inbox.
Unsubscribe at any time.