Ultimate Guide to SOLIDWORKS Splines
Creating splines in SOLIDWORKS is not as easy as creating lines, arcs, and circles. Splines have more controls and settings to help define the desired shape. In this guide, we look at various ways in which we can manipulate spline geometry in SOLIDWORKS.
Where are Splines Located?
- Tools > Sketch Entities > Spline.

- Sketch Toolbar > Spline Flyout > Spline.
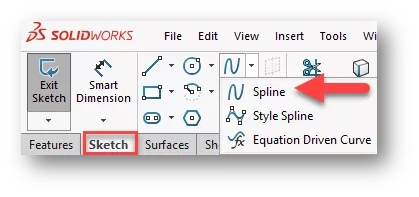
Types of SOLIDWORKS Splines
- The Spline command creates a B-spline that can be modified using several controls, including spline points, spline handles, and control polygons.
 The Style Spline command is based on Bezier curves. These are defined using control vertices that form a control polygon.
Spline Manipulation Techniques
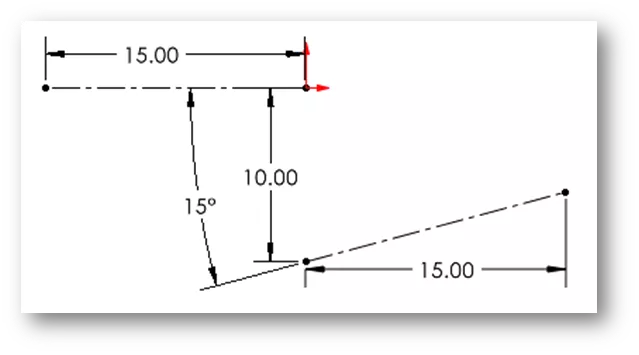
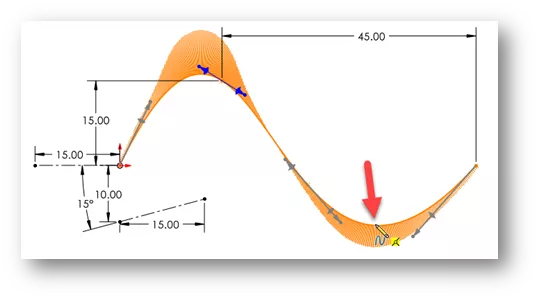
In this example, I have created a sketch with a couple of construction lines and added dimensions to fully define them.
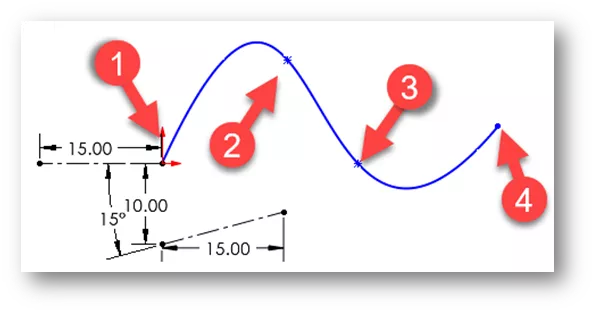
Creating a Spline
To create a spline, start the Spline command and drop points into place using the left mouse button. You can see the curvature as more points are added. For this example, I created a spline with four points.
To end the spline, either double-click the last point or hit Escape on your keyboard.
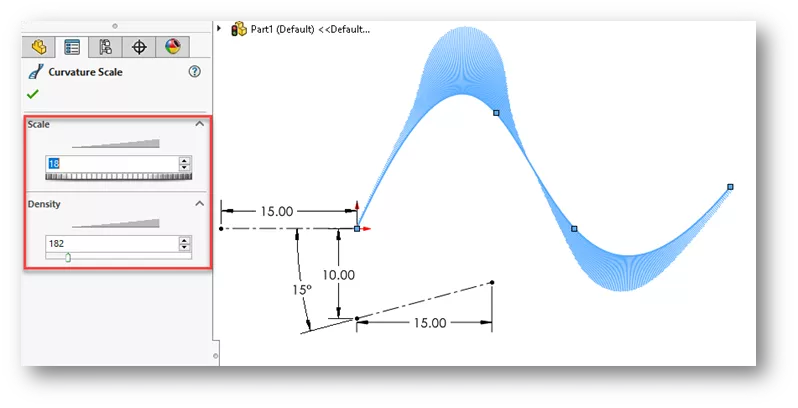
Showing Curvature Combs
Sometimes it is necessary to see a visual representation of the slope of curvature. To do this, right-click on the spline and choose Show Curvature Combs. ![]()
Scale and Density can adjust to control the curvature comb display.
Showing Control Polygons
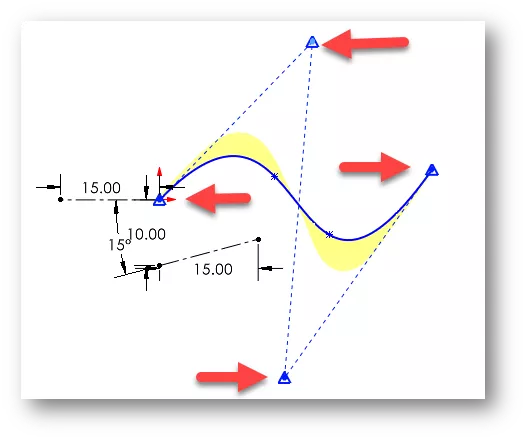
Control Polygons are a way to adjust the curvature of the spline and the location of the spline points. To turn on Control Polygons, right-click the spline and choose Show Control Polygons. ![]()
Grips at each polygon vertex can be moved around to manipulate the curvature of the spline.
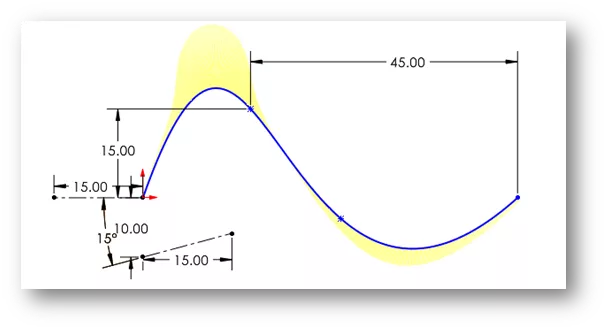
Adding Dimensions
Another way to control the curvature of the spline is to add dimensions between the spline points and other geometry.
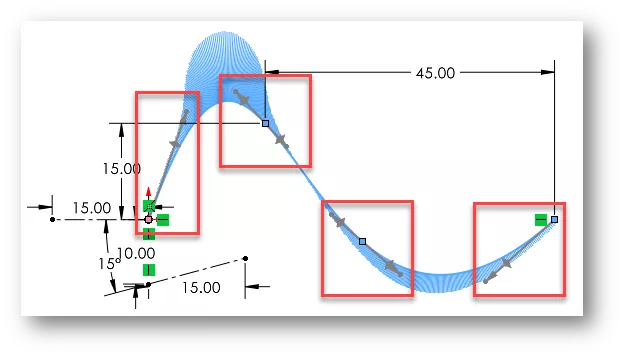
Spline Handles
Spline handles offer curvature control for each spline point. To see spline handles, click on the spline. Grey, two-sided arrows show up on each through point, and a single-sided arrow for the beginning and end points.
Activating Spline Handles
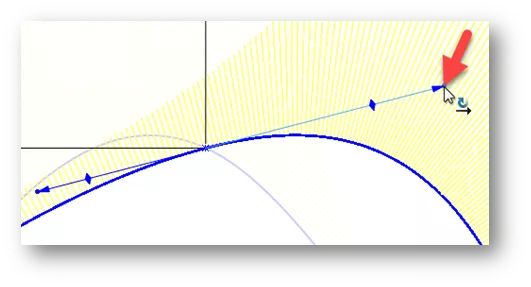
Spline handles have three controls. The spline handles are grey, meaning they are not active. To activate a spline handle, click on one of the three control grips and drag.
The diamond grip controls the tangency of the angle.
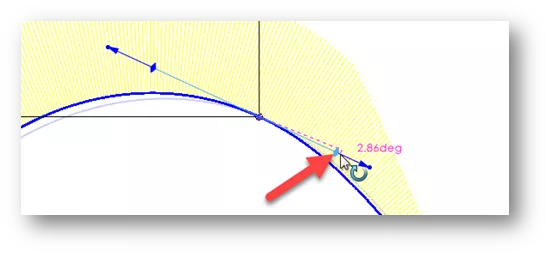
The arrow controls the tangency length.
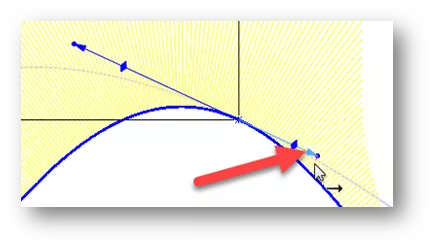
The point at the end of the arrow controls both tangency angle and length in one drag.
Adding Points to the Spline
Points can be added to the spline for additional manipulation purposes. To do this, right-click on the spline and choose Insert Spline Point. ![]() Then click where you want to add the additional point(s).
Then click where you want to add the additional point(s).
To delete a spline point, right-click on the point and choose Delete. ![]()
Resetting Splinee Handles
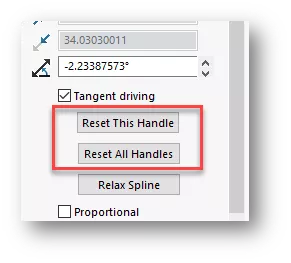
After manipulating spline handles, you may find it difficult to get back to the original curvature by further manipulation. We can reset the spline handles back to their original positions.
Click on any spline handle, and in the Spline PropertyManager, select Reset All Handles.
Reset This Handle will reset only the spline handle selected.
Adding Dimensions to Spline Handles
Dimensions and relationships can be applied directly to the spline handle for more accurate adjustments.
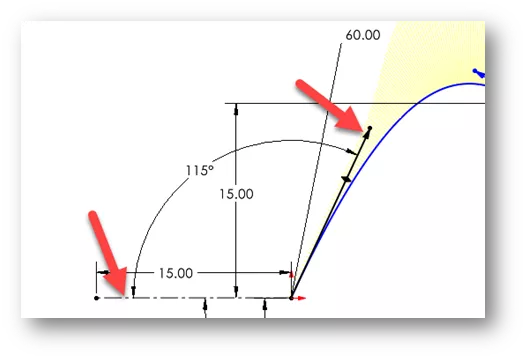
With Smart Dimension active, select a spline handle arrow and click in space to place a dimension. This dimension controls the length of the spline handle. I’ll put 60in on this dimension.
With Smart Dimension active, select a spline handle arrow, then select other geometry to add a dimension between them. Here, I’ll create a 115-degree angle dimension between the handle and the horizontal construction line.
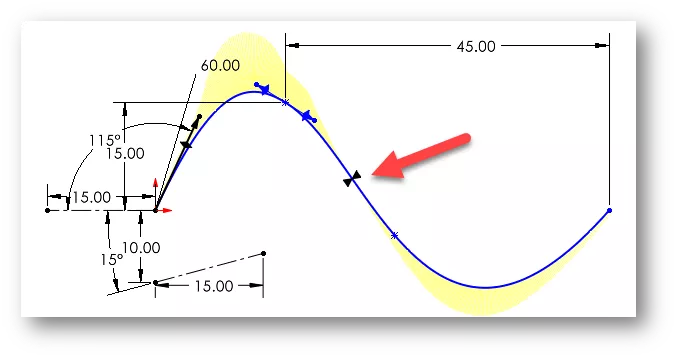
Show Inflection Points
Where there is an inflection (or change in curvature) along the spline, we can add a graphical indicator. To do this, right-click on the spline, and choose Show Inflection Points. ![]()
Style Spline Tool
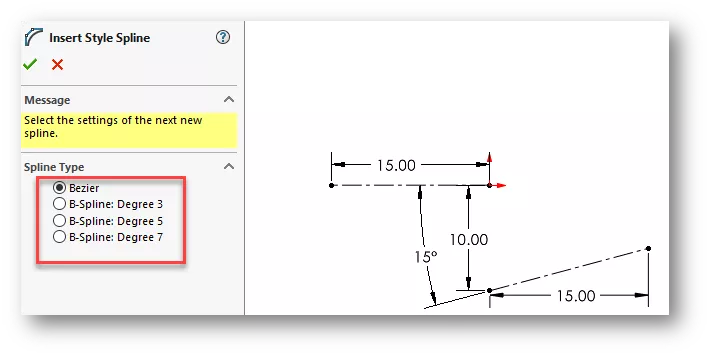
We also have the option to create a style spline (or Bezier curve). From the Spline Flyout dropdown, choose Style Spline. ![]()
We also have the option to create a Bezier curve with a higher B-Spline degree, or a smoother curve. For this example, we will stick with Bezier.
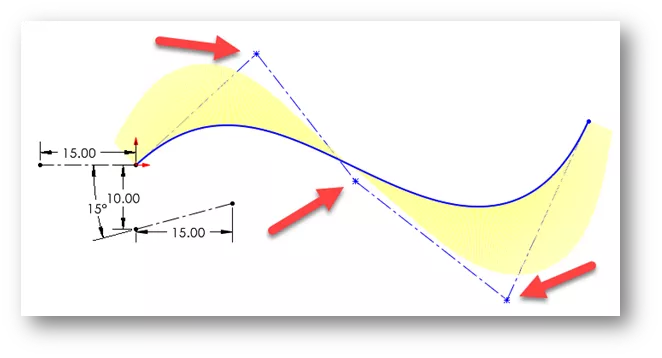
Instead of placing spline points, with Style Splines, we are clicking polygon vertices into place. This is different than placing spline points, as you must think where the polygon vertices will be. The curvature comb display shows a very smooth result.
Style Spline Manipulation
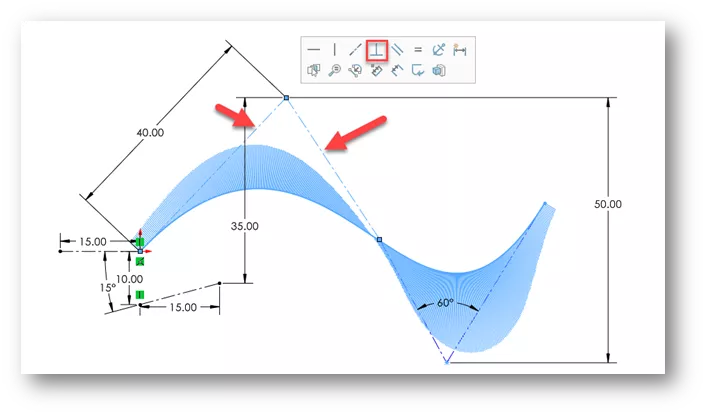
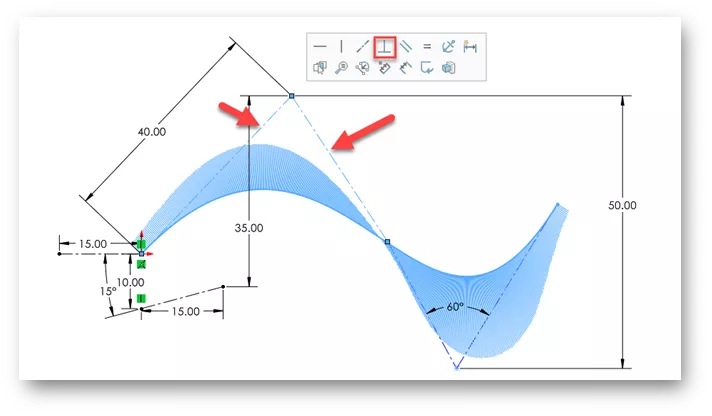
Style splines can be manipulated in much the same way as regular splines. Polygon vertices can be dragged, dimensioned, and have relationships added. For this example, I have added dimensions between polygon vertices and an angled dimension between two polygon lines. We can add relationships by CTRL-selecting the polygon lines and clicking the appropriate relationship from the Context Toolbar.
Adding More Polygon Vertices
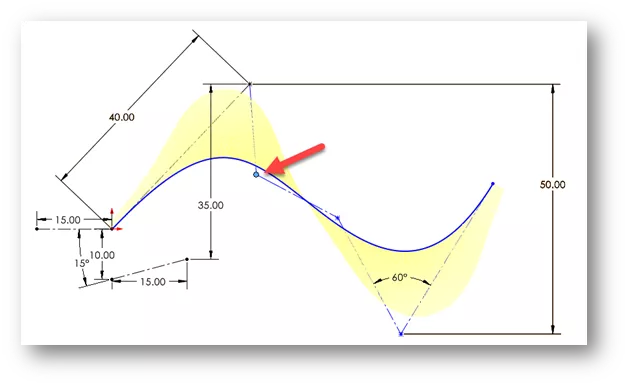
Like adding spline points to a B-Spline, we can also add more polygon control vertices to a Style spline. To do this, hover over one of the polygon construction lines, right-click, then choose Insert Control Vertex. ![]()
The vertex can be dragged to a new position. Doing this may remove previously added relationships.
Splines are a big topic, and there are more settings and controls than what we discussed here. This should, however, provide a nice starting point for creating and using splines.
Want to Become An Expert Using SOLIDWORKS Splines?
Take the official SOLIDWORKS Advanced Part Modeling self-paced training course to learn more about working with splines.

![]() Want to learn more? Check out this YouTube video for a demonstration of these tips, tricks, and best practices.
Want to learn more? Check out this YouTube video for a demonstration of these tips, tricks, and best practices.
More SOLIDWORKS Tutorials
Introduction to Continuity and Curvature in SOLIDWORKS (Part 1)
Surface Continuity in SOLIDWORKS (Part 2)
Using the Curve Through XYZ Points Tool in SOLIDWORKS
Inserting Model Dimensions into a SOLIDWORKS Drawing

About Zach Brown
Zach Brown is a certified SOLIDWORKS Expert and a Technical Support Engineer. Prior to working at GoEngineer, he spent 15 years as a mechanical designer, CAD support tech, and instructor using SOLIDWORKS. His hobbies include playing guitar, riding motorcycles, and skiing.
Get our wide array of technical resources delivered right to your inbox.
Unsubscribe at any time.