How to Change Your SOLIDWORKS Serial Number
There are a number of reasons why you might need to change the SOLIDWORKS serial number that is installed on your computer. Maybe you were given an evaluation license to start out and now your permanent license is available. Perhaps there was already a permanent license installed on your computer, but it’s the wrong license and it needs to be changed. Some users find that they need to convert their standalone license to a network license or vice versa. Still others are students or educators with education versions of the software installed which they need to change out for a commercial license.
In all instances, it is imperative that the current activation of SOLIDWORKS is released from your computer before you initiate the change of the serial number.
Deactivate License
For Standalone Installations:
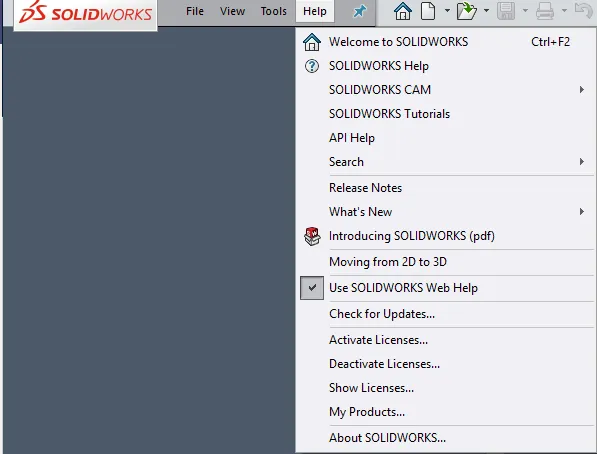
Launch SOLIDWORKS and select “Deactivate licenses…” from the “Help” menu.
For Network Installations (applies only to license server):
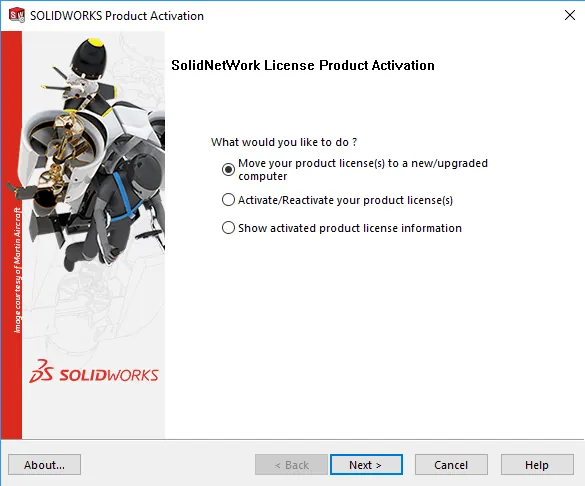
Launch the SolidNetwork License Manager, click “Modify” on the “Server Management” tab. Then, select “Move your product license(s)…” from the list.
For Both:
Follow the prompts to deactivate your licenses.
Modify Installation
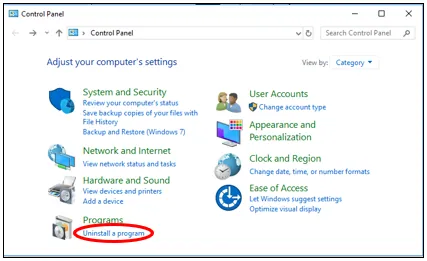
Once your license is deactivated, you may initiate the serial number change by performing a “Modify” installation. This is done through the “Programs and Features” utility within Windows. To find the “Programs and Features” utility, open the Control Panel. Next, select “Programs and Features” from the “Programs” section.
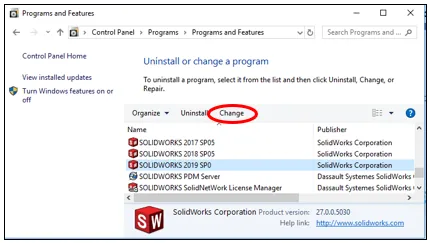
From the list of installed programs, find the SOLIDWORKS installation, select it and click Change. (Do NOT Select Uninstall. If the only option available is Uninstall, then your SOLIDWORKS was installed using an Administrative Image. Refer to the end of this article for details on next steps for Administrative Images.)
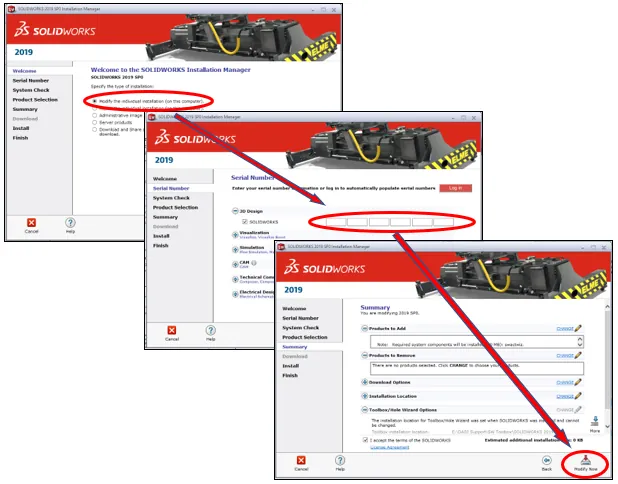
SOLIDWORKS Installation Manager
The SOLIDWORKS Installation Manager will now launch. Select the top option, “Modify the individual installation” and click “Next”.
On the “Serial Number” screen of the Installation Manager, you can now change the serial number to the new one that you want to use. (CRTL+V will paste the serial number into the 6 boxes.)
Once the new serial number is entered, click “Next” through the rest of the installation screens without making any further changes. Click on “Modify Now” to complete the process.
Administrative Images
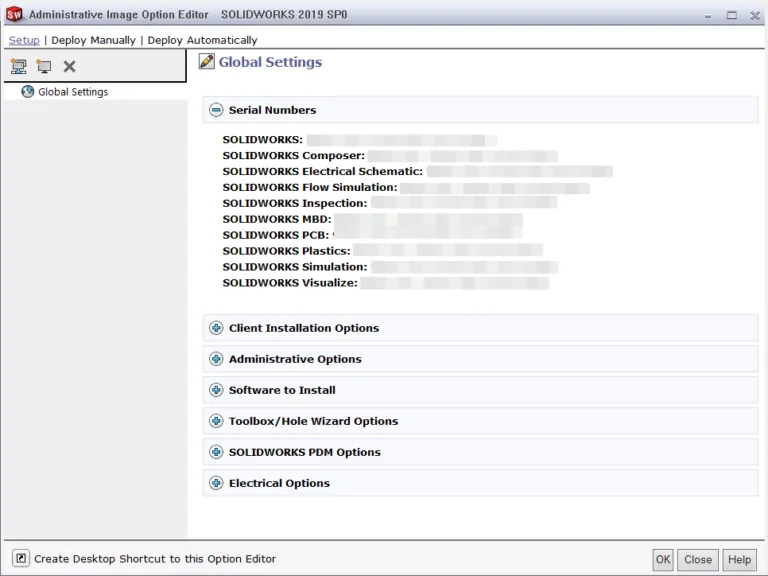
If, when selecting your SOLIDWORKS installation in the “Programs and Features” dialog, the only option available to you is “Uninstall”, then your license was installed with an Administrative Image.
To change the serial number installed on your system, you will need to use the Administrative Image Option Editor. You will use this editor to input the appropriate serial numbers and then deploy the image to your computer.
Realated Articles
SOLIDWORKS Standalone Serial Number Management Skills
SOLIDWORKS SolidNetWork License Administrator Temporary License Setup
Ultimate Guide to SOLIDWORKS Licensing: Types, Activation, and Borrowing

About Shaun Johnson
Shaun has been using and supporting SOLIDWORKS since 2000. After spending five years in a support role, he went on to develop products and solutions in industries ranging from consumer electronics to military aviation ground support equipment. Once again in a support role, Shaun enjoys leveraging this experience to help others realize their designs and transform pixels into parts. Whenever he can, Shaun fires up his coal forge and takes a more ‘hands on’ approach to creating parts from raw steel.
Get our wide array of technical resources delivered right to your inbox.
Unsubscribe at any time.