SOLIDWORKS (SNL) Temporary License Setup
Temporary files can be obtained to run the server-side SOLIDWORKS SolidNetWork License Administrator for the purposes of testing new server hardware while not interrupting a running production server. These temporary files are useful for a limited time frame (usually 7-14 days) for a limited number of licenses (1 or 2). This limited window and license quantity is meant to facilitate a testing period before transitioning the production license server to the new hardware or new software version.
Temporary SOLIDWORKS File Setup
To implement a temporary file on the server (assuming the license server software is now installed) proceed through the following processs:
1. Open the ‘SOLIDWORKS SolidNetWork License Administrator’ on the server machine
2. On the ‘Server Administration’ tab select ‘Options’
3. Set options to ‘Use a License File’ and press ‘OK’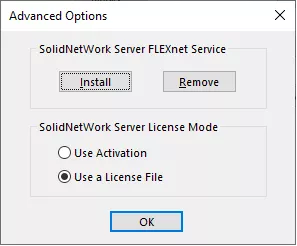
Figure 1: Use a License File SolidNetWork Server License Mode
4. On the ‘Server Administration’ tab select ‘Modify’
5. In the ‘License File Wizard’ Select ‘Single’ for ‘Server Type’ and proceed ‘Next’
6. For ‘Dongle ID’ and ‘ANY’ and an appropriate firewall setting and proceed ‘Next’ (see Figure 2)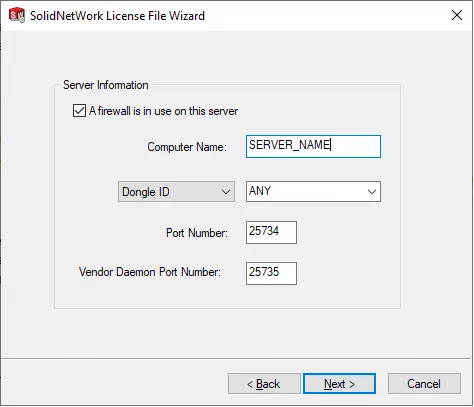
Figure 2: Dialog showing the specific settings for using a temporary file
7. On the following screen select ‘Read’ and browse to the “SNL_ANY.TXT” file supplied with this email
and temporarily stored somewhere on the server (like the desktop)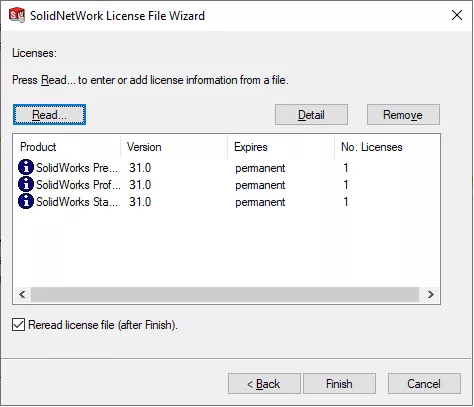
Figure 3: Dialog showing the final set of temporary licenses
8. Once the file is read into the system and licenses show select ‘Finish’ and the server will be running
with a SOLIDWORKS license available for testing.
Switching from a Temporary SOLIDWORKS License to Activation License
At times, when a temporary license file is placed into a production environment, it is necessary to change back
to a normal activation license. To make this change proceed through the following procedure
- Open the ‘SOLIDWORKS SolidNetWork License Administrator’ on the server machine
- On the ‘Server Administration’ tab select ‘Options’
- Set options to ‘Use Activation’ and press ‘OK’
- On the ‘Server Administration’ tab select ‘Modify’
- Proceed through ‘Product Activation’ to activate the license pool onto the system. On the final screen
select and delete the temporary license entries denoted by their proximal “Expires” date.
Editor's Note: This article was originally published in July 2020 and has been updated for accuracy and comprehensiveness.
Related Articles
Network License Management for SOLIDWORKS
How to Reactivate Your SolidNetWork License Manager
SolidNetWork License Manager Options File

About Ryan Dark
Ryan has been in the GoEngineer technical support team since February 2008 where he most notably provides support for all FEA and CFD software offered by SolidWorks. His most recent accolade is the title of Elite Application Engineer awarded by SolidWorks Corp.
Get our wide array of technical resources delivered right to your inbox.
Unsubscribe at any time.