SOLIDWORKS PDM: Connecting to the SNL Server
Starting with 2015, SOLIDWORKS PDM uses the SolidNetWork License (SNL) Server to handle PDM licenses, just like SOLIDWORKS network licenses. As a result, companies must install the SNL server when they upgrade to PDM 2015 or later. Because it is a first-time installation of the SNL server, connection problems can pop up once the upgrade is complete.
If you perform an upgrade of SOLIDWORKS PDM from 2014 or earlier and you find that your client computers can’t access the license server even though your licenses have been activated, the problem is likely due to ports in the Windows Firewall that need to be opened. Read on.
In a typical environment, Windows Firewall is active on the server and may also be active on the client computer as well. The SNL server needs to communicate with each PDM client using two ports, typically 25374 and 25375. In both cases, the protocol is TCP.
To ensure that this communication can take place, connection Rules (sometimes called ‘Exceptions’) must be made in the Firewalls. Perform the following step starting with the server first, then do the same on each user machine where the Firewall is active. Here’s a step-by-step using Windows 7:
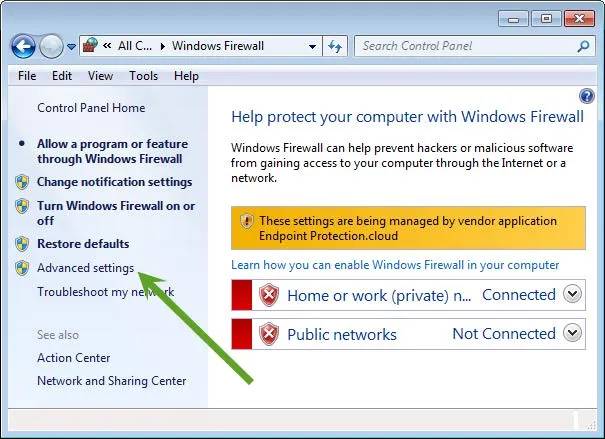
- Open the Control Panel app and select Windows Firewall
- From the left side panel, choose Advanced Settings
- In the Windows Firewall with Advanced Security dialog:
- From the left side panel, select Inbound Rules
- From the right-side panel, select New Rule

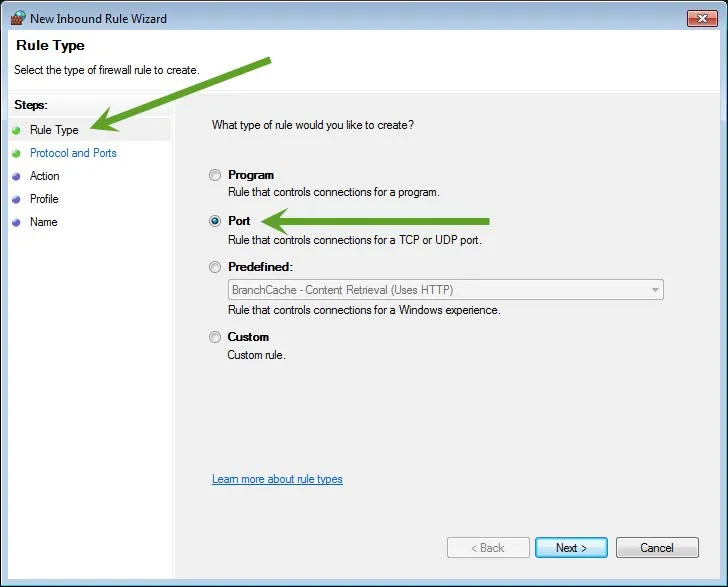
- For the Rule Type step, choose Port, and click Next
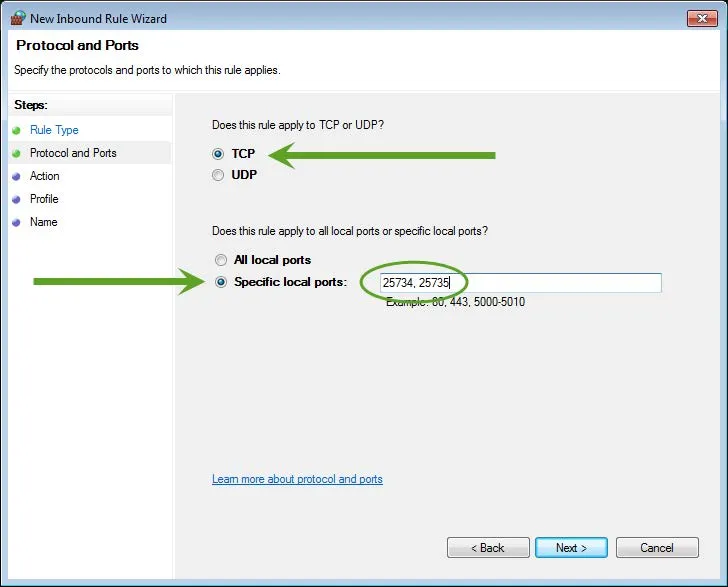
- For the Protocol and Ports step, choose TCP, choose Specific local ports, and type in “25734, 25735”, omitting the quotes, then click Next
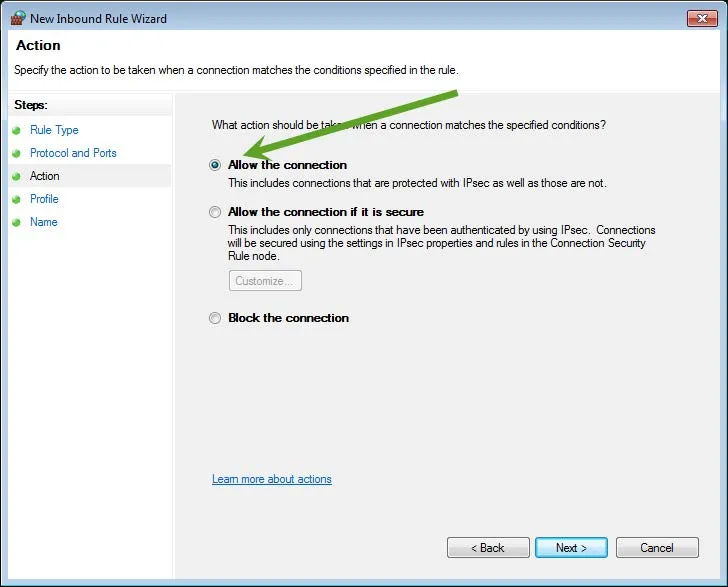
- For the Action step, choose to Allow the connection
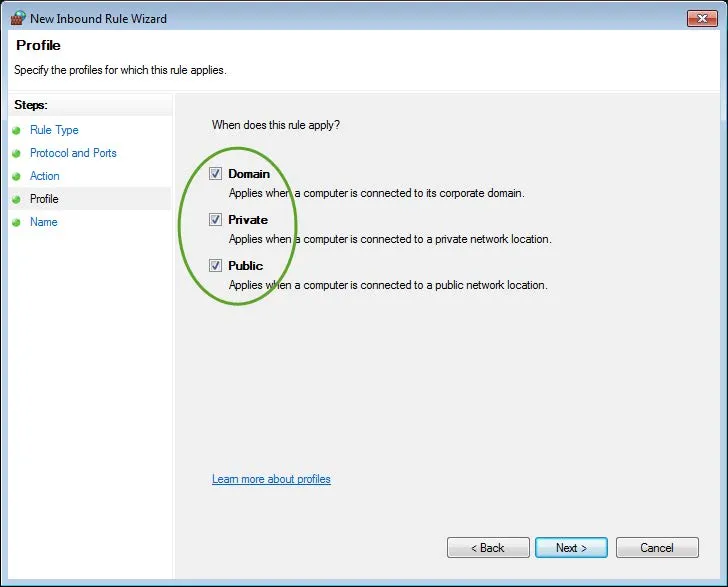
- For the Profile step, check all three options (Domain, Private and Public)
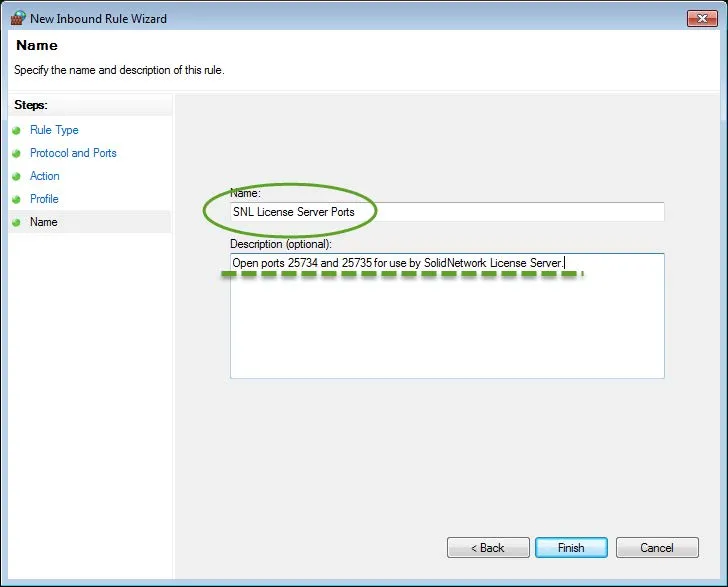
- For the Name step, enter a name that will be shown in the Rules list (ie, SNL Ports). Optionally, enter a description of the rule to further document its purpose, and click Finish
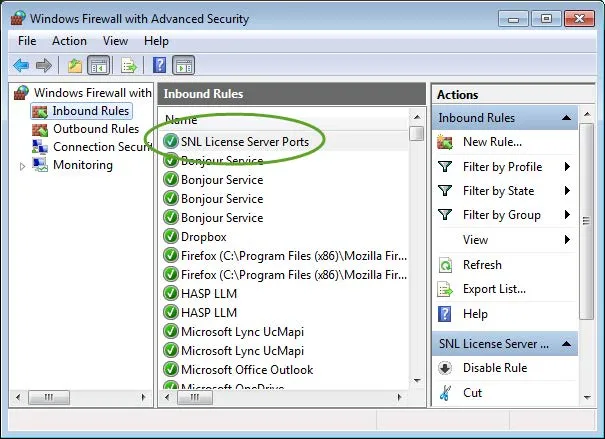
- The newly created rule appears in the list of Inbound Rules
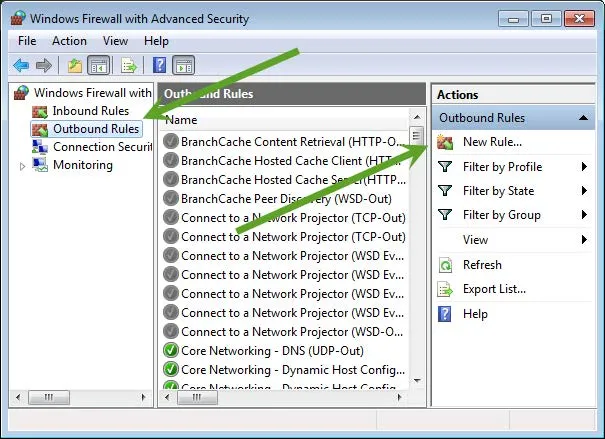
- Now, to create the same rule in the Outbound Rules, select Outbound Rules and click on New Rule
- Repeat Steps 4 – 8 to create the new Outbound rule.
Opening the ports in this way should allow each PDM client computer to successfully communicate with the PDM server.
Learn More about SOLIDWORKS PDM
Option File - A Great Solution For Managing Your SNL(s)
Sharing Your SOLIDWORKS PDM Vault Without Sharing Licenses
Changing SOLIDWORKS PDM License Types
Moving the SOLIDWORKS PDM Archive Server Yourself? Start Here
![]()
About GoEngineer
GoEngineer delivers software, technology, and expertise that enable companies to unlock design innovation and deliver better products faster. With more than 40 years of experience and tens of thousands of customers in high tech, medical, machine design, energy and other industries, GoEngineer provides best-in-class design solutions from SOLIDWORKS CAD, Stratasys 3D printing, Creaform & Artec 3D scanning, CAMWorks, PLM, and more
Get our wide array of technical resources delivered right to your inbox.
Unsubscribe at any time.