3D Scan to 3D Printed Realistic Face Mask Using Materialise Magics
It started as a joke on a Friday afternoon - the week before Halloween. “Somebody should print a Halloween mask of their face!”
I hopped online, and after a bit of searching, acquired a rather sophisticated little 3D scanning iPhone app called Poly-cam.
I scanned my face by waving my phone around my head for about a minute. The scan data was then uploaded by the application to a cloud server for processing.
In the time it took to brew a cup of coffee, I was able to export the data as an .obj file. I uploaded the file to Google Drive and then downloaded the file to my PC.
Using Tools in Materialise Magics
I then imported the .obj into Materialise Magics software to see what type of data I had to work with.
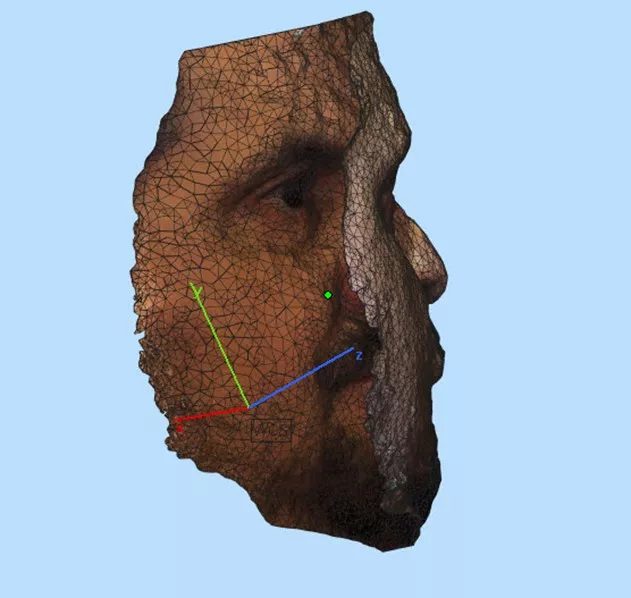
The geometry was pretty rough, but I thought, “I could make this work.”
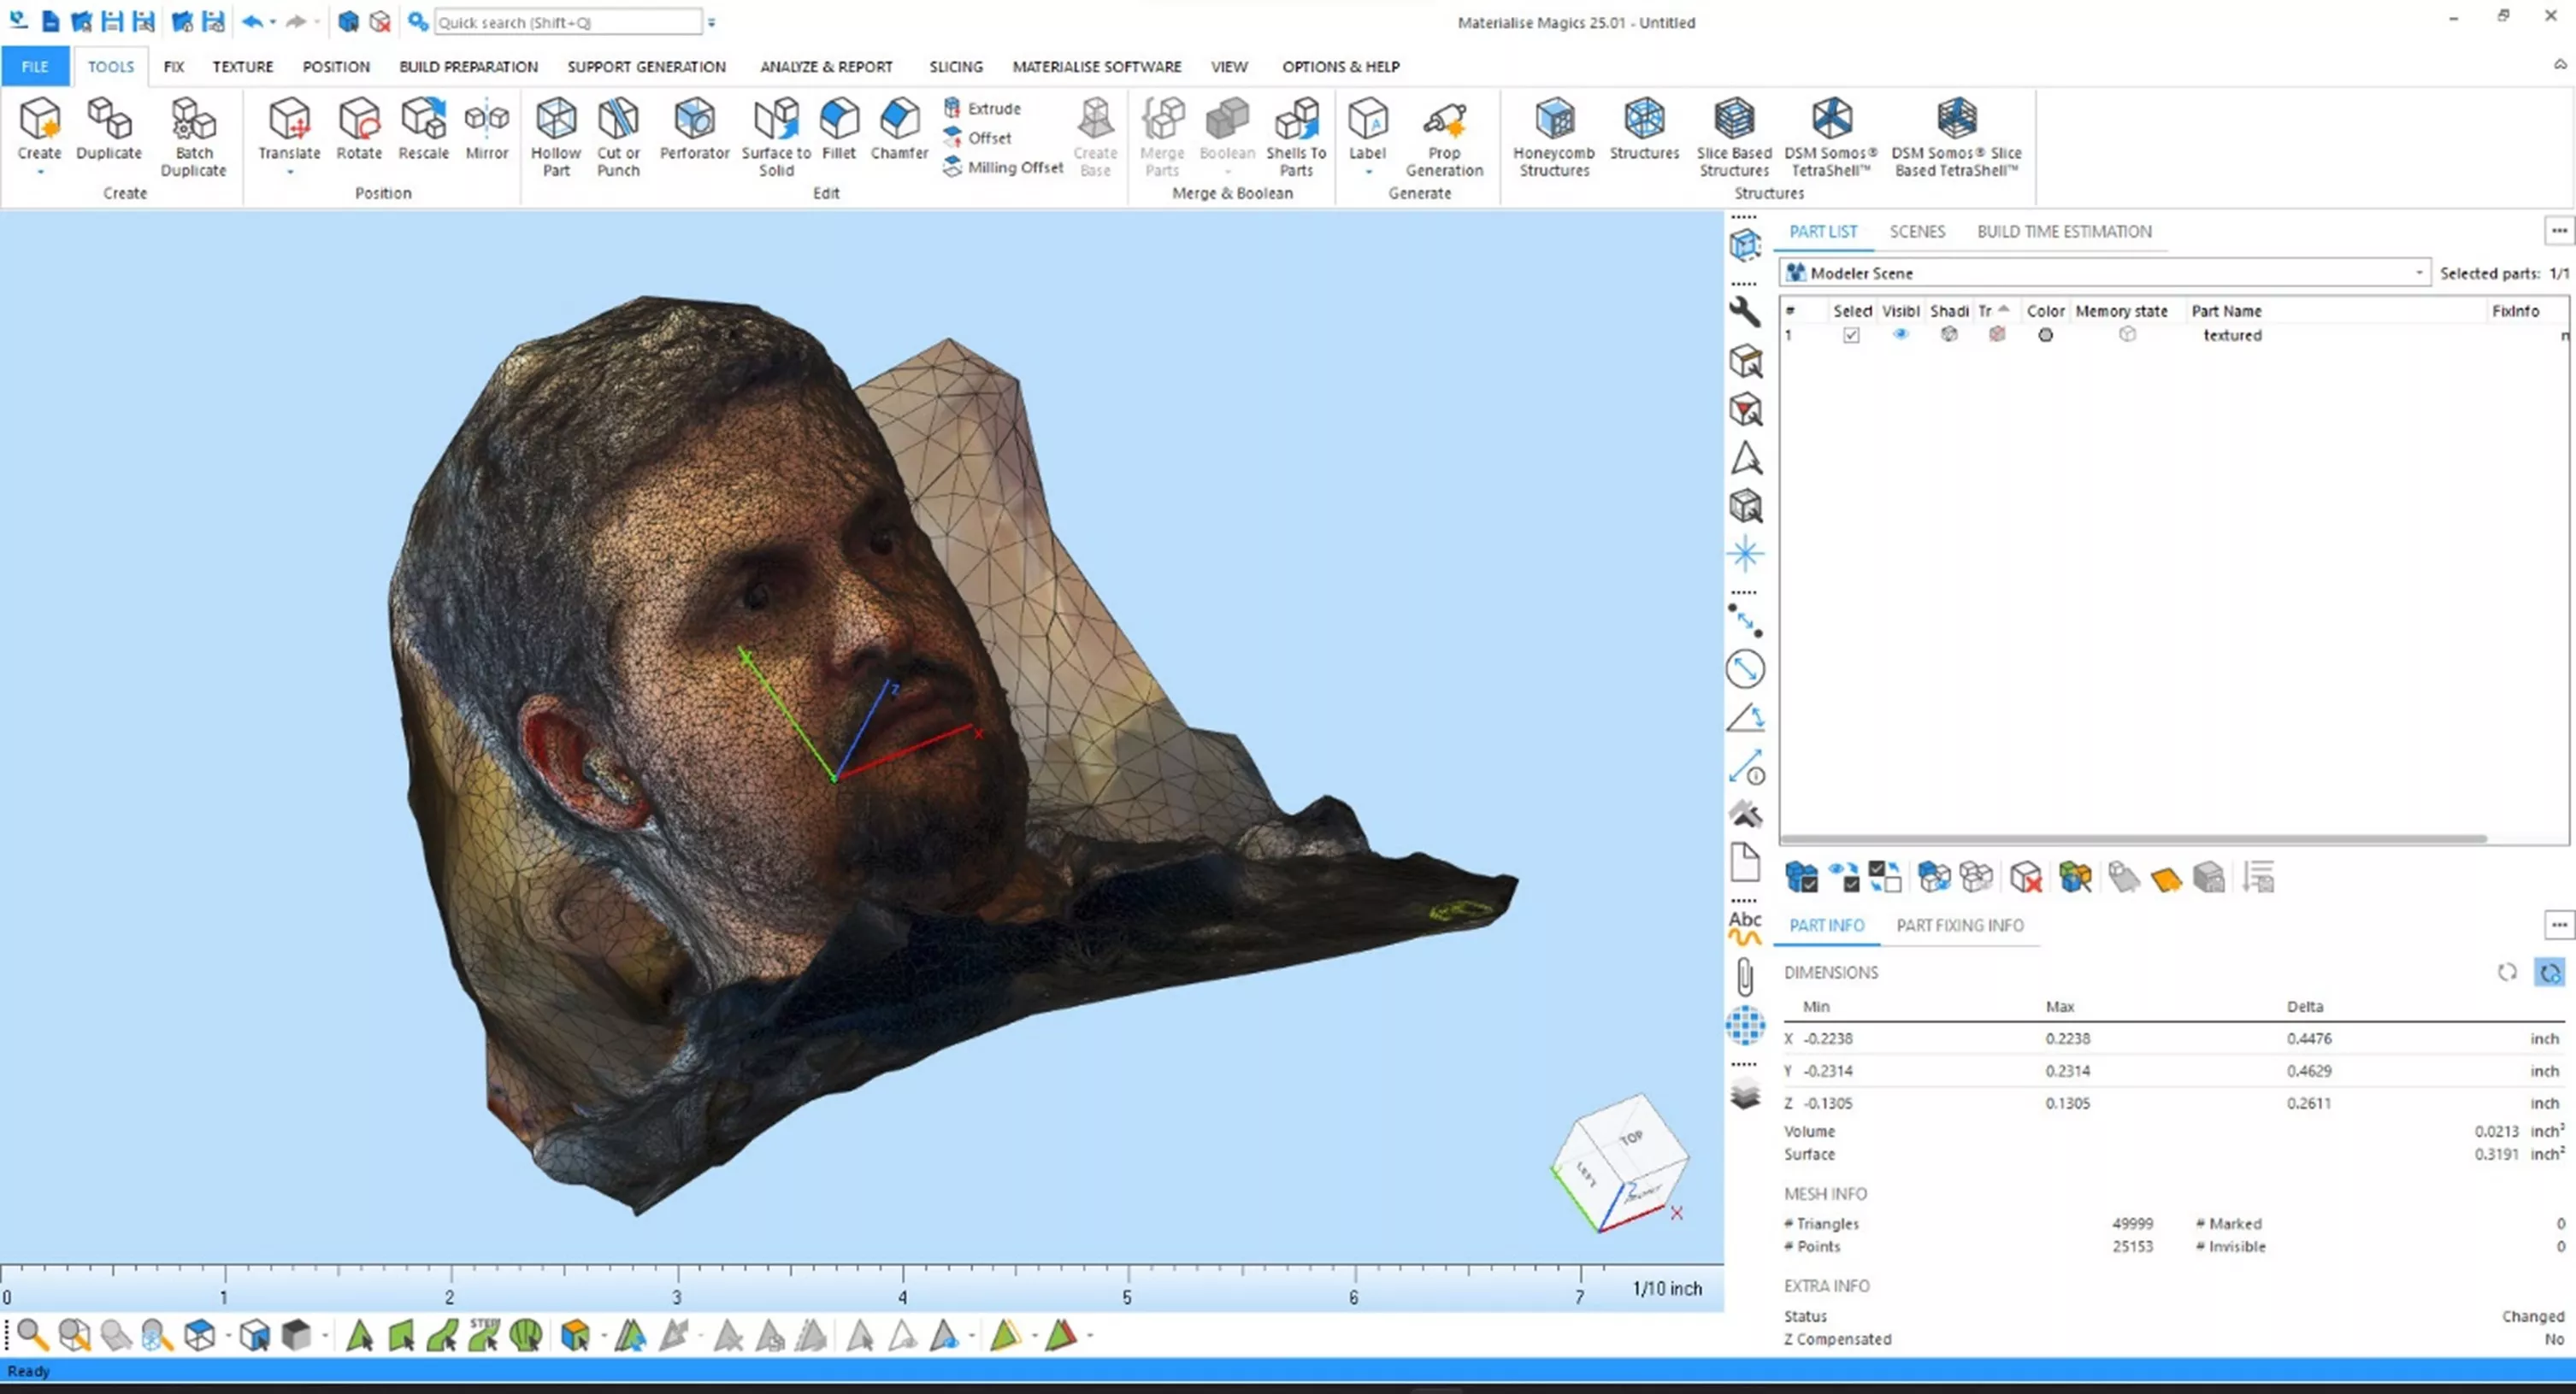
What I had, was an infinitely thin, full-color digital surface representing the topography of my goofy expression.
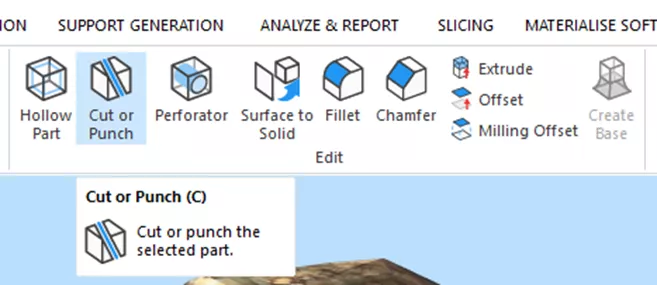
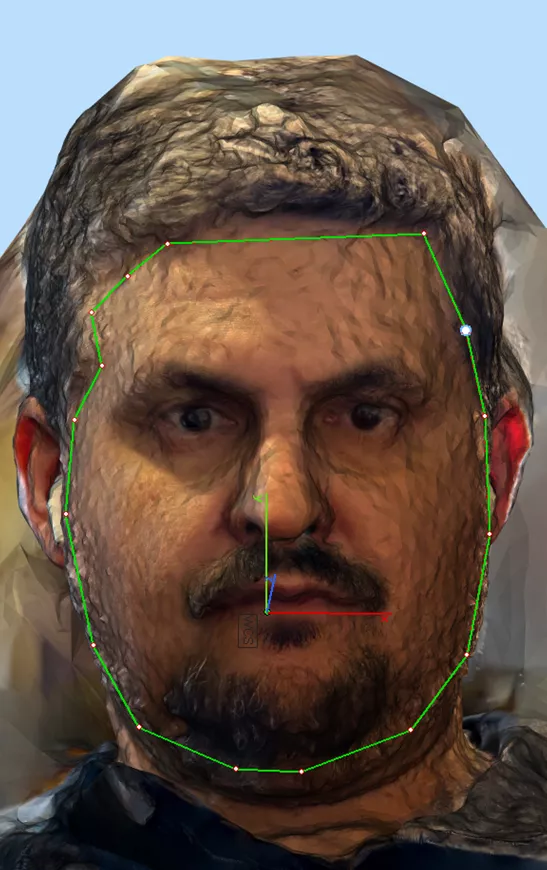
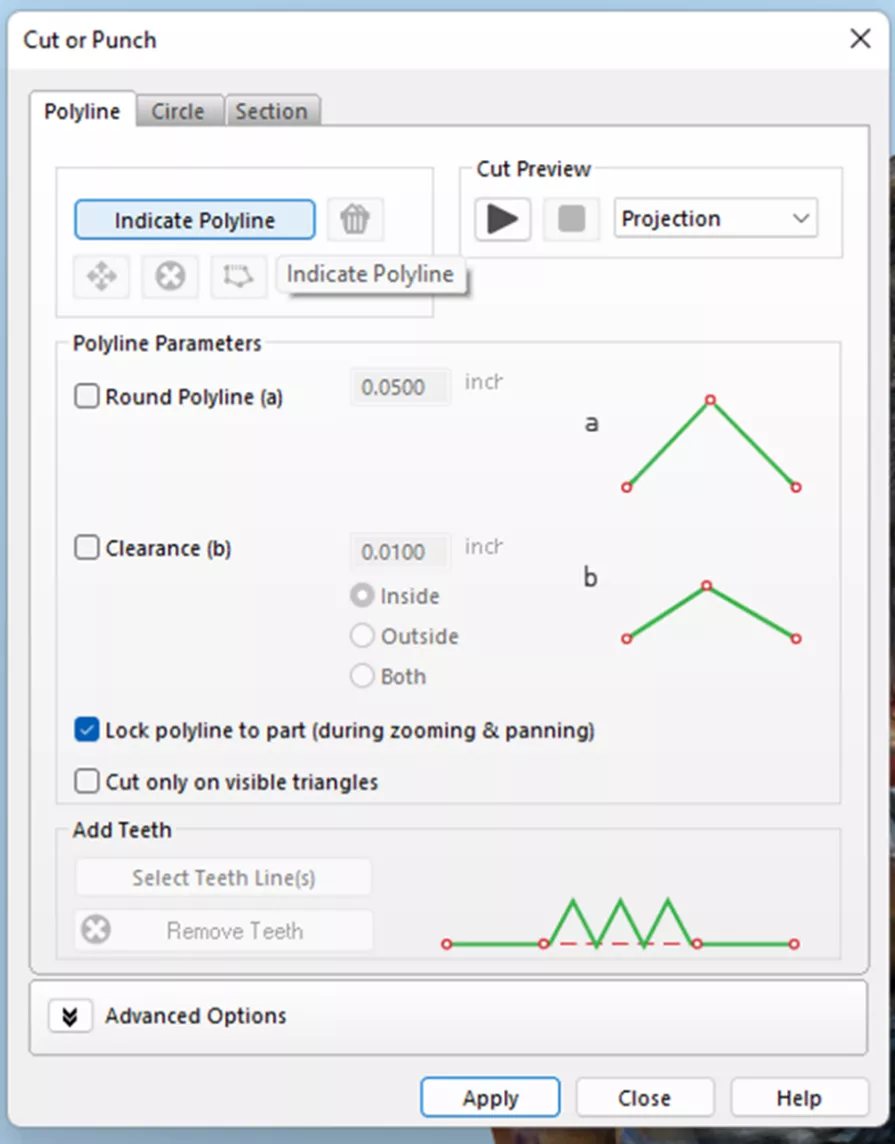
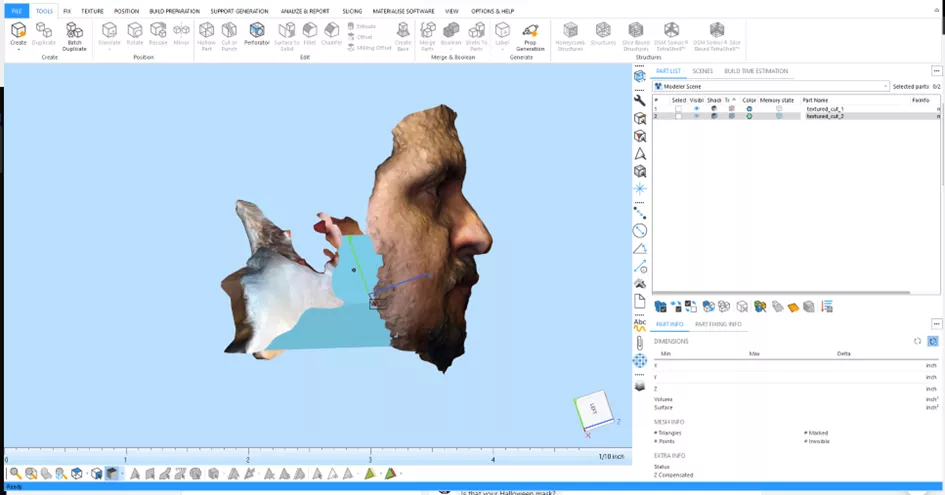
Since I only wanted my face, I needed to remove everything else from the equation. To accomplish this, I used the Punch command located in the tools tab.
I traced a polyline around my tessellated mug and hit apply.
The Punch function “punches” along the polyline separating the single surface into two. Like a digital cookie cutter. I now had my “face” and “everything else”.
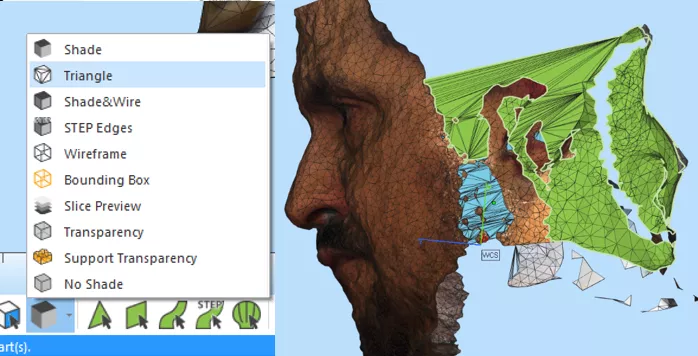
However, upon hiding the “everything else” surface, I could see that my Punch command also captured some additional unwanted surface elements.
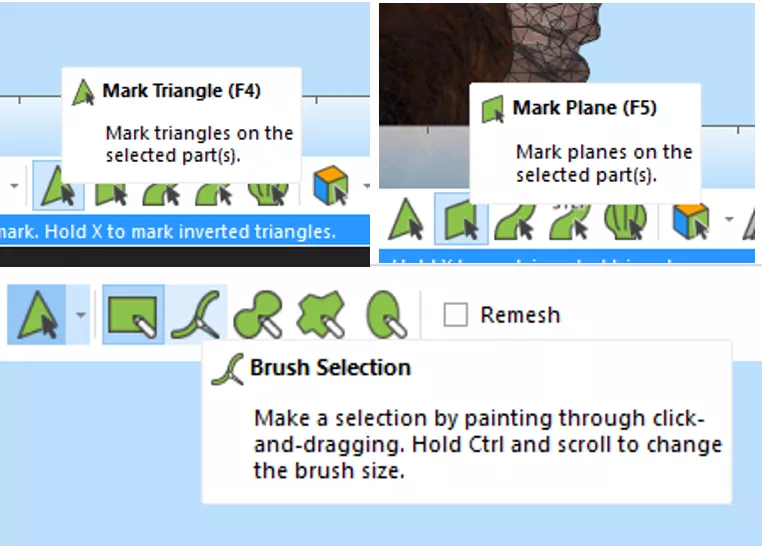
I was able to mark and remove the offending elements using tools in Materialise Magics for marking triangles and planes. When using this method to mark a surface, it is important to check the geometry from several views, as the triangles can only be selected from their “normal” surface direction. Accidentally deleting something intended to be kept can be replaced with a simple “Undo” (CTRL+Z).
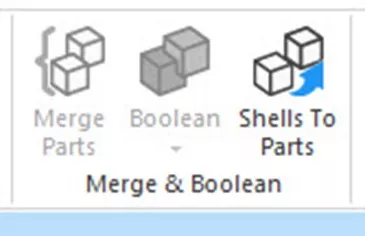
As a final check to ensure nothing is left but the intended target, a tip is to use the Shells to Parts command. This will convert any errant surfaces we didn’t delete into parts that can then be identified on the parts tree and subsequently hidden or deleted.
This is a good time to use Materialise Magics' power to “fix” the project before moving forward. After all, we have performed some wacky functions on this surface and likely have increased the potential for errors.
However, we need to be careful. The Autofix tool in Materialise Magics is powerful; we need to dial it down a bit so that it doesn’t try to fix “everything” and inadvertently turn the project into a mess.
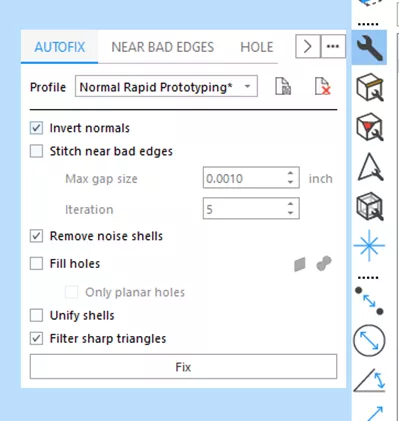
The Autofix hotbar tool opens a window with tabs of its own. We only want the Autofix tool to ensure that the surface normals are properly aligned, noise shells are removed, and that sharp triangles are filtered.
With that complete, it's time to rescale the model (it was imported in millimeters, and I want it in inches) using the Rescale tool on the Command bar.

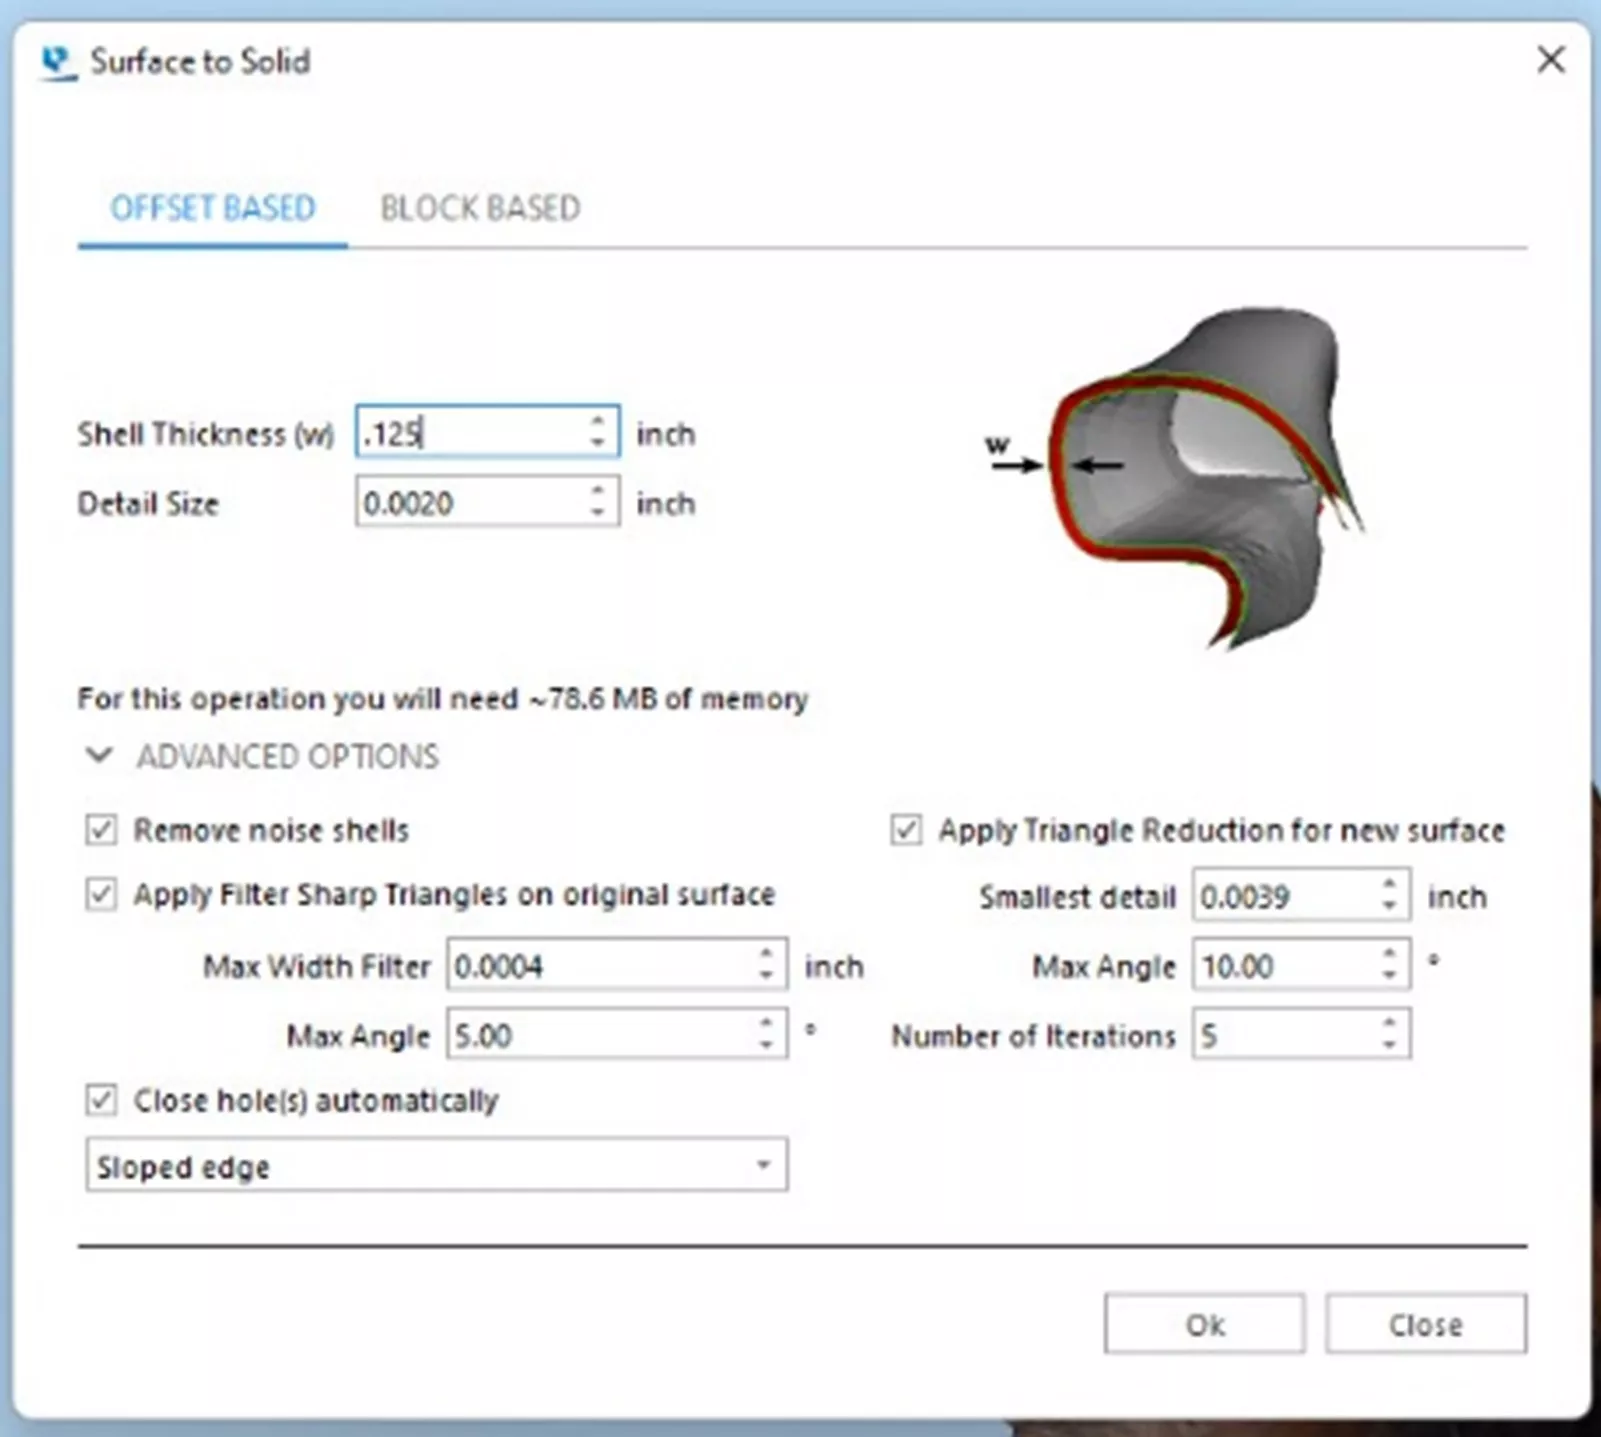
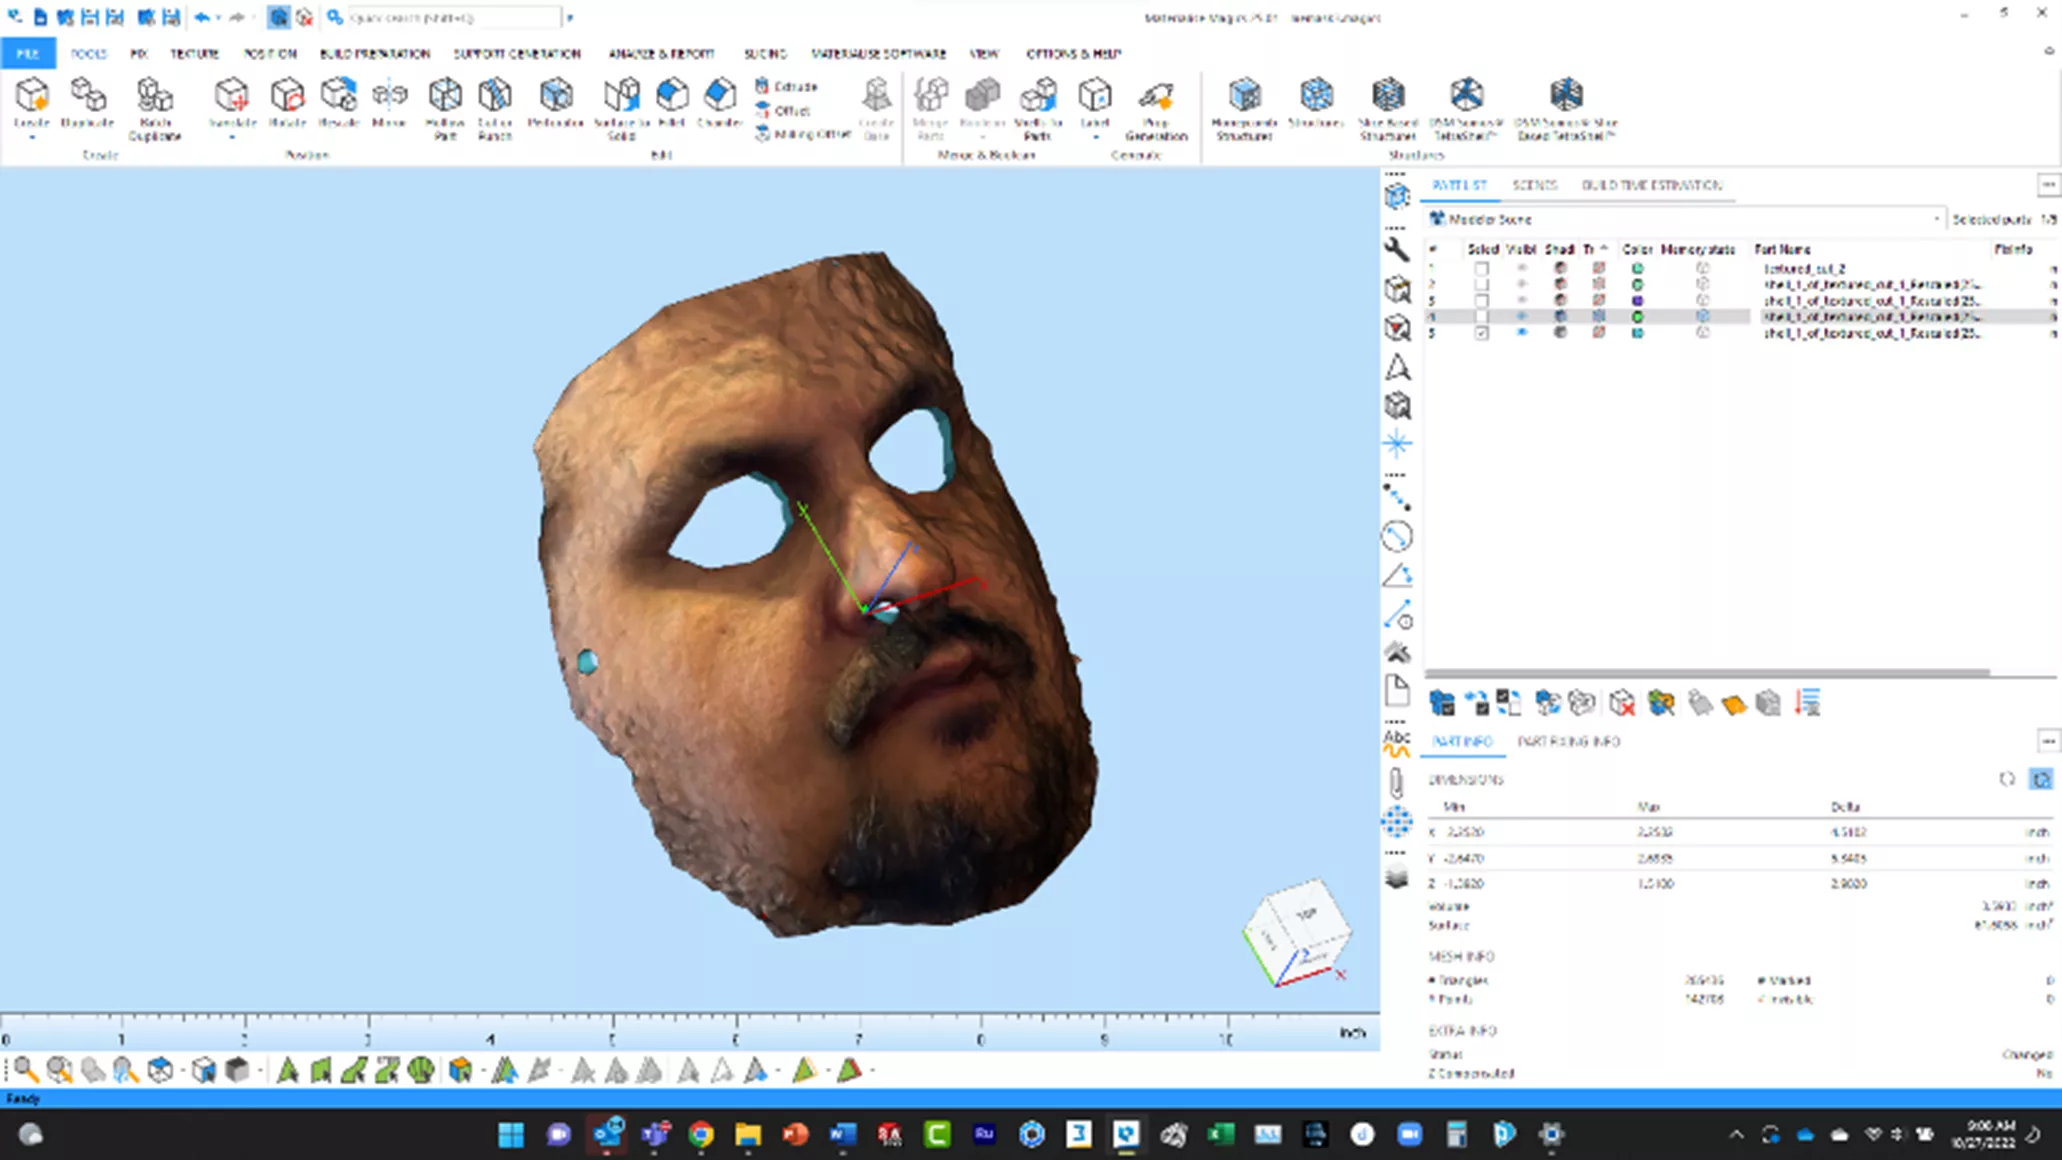
Although we have our surface, I can’t do too much with it. It is also infinitely thin, so we must add thickness before it can be manifested in the real world!
To do this, we unleash the Surface to Solid tool on the Command bar from the Tools tab.

This complex algorithm takes a tremendous amount of processing power, so before beginning the next step, it is important to note that it is best to do this when you are not going to need your computer for a while (I ran this step overnight). I set the thickness parameter to .125”.
Sometime later, we will come back to a 3D solid mask!
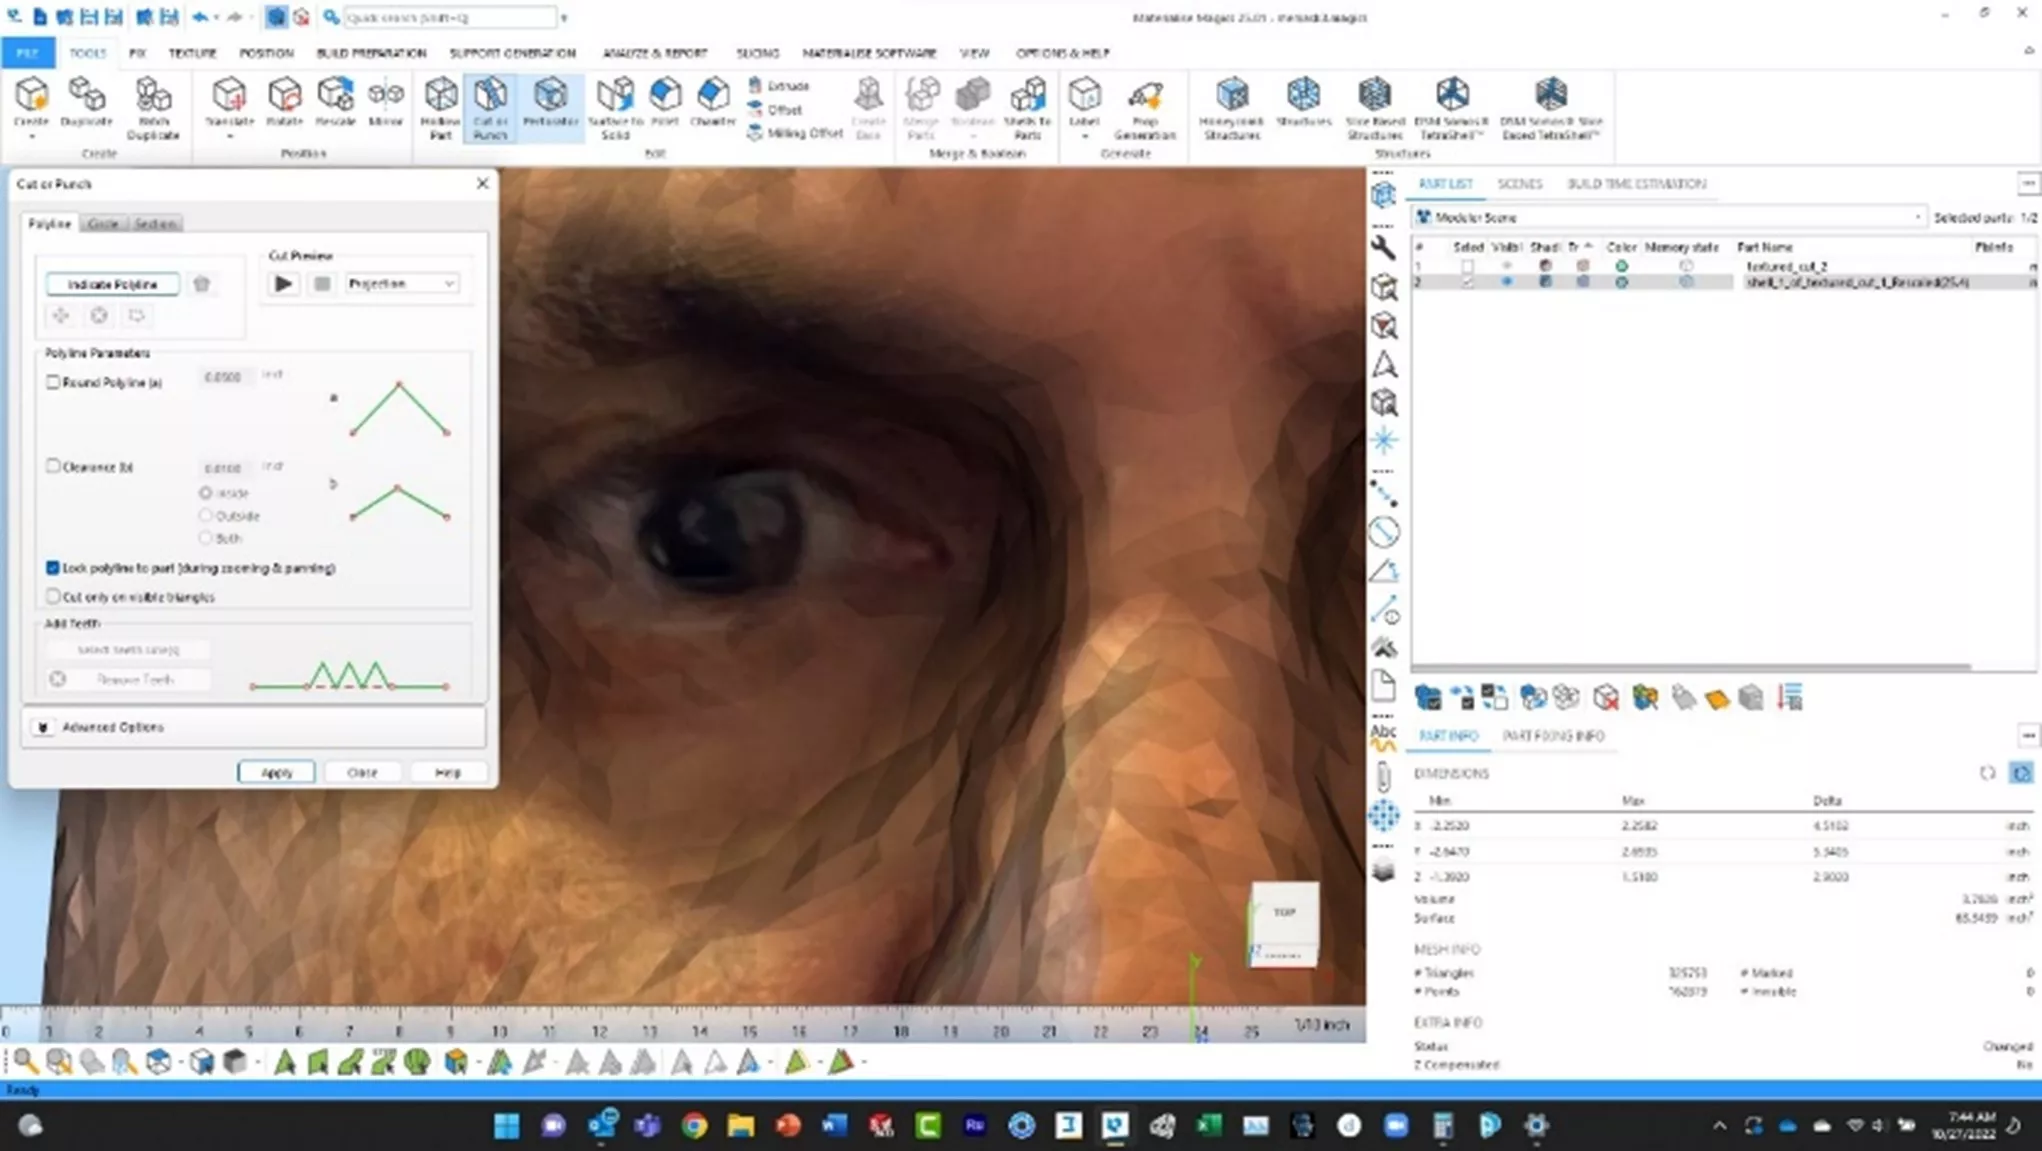
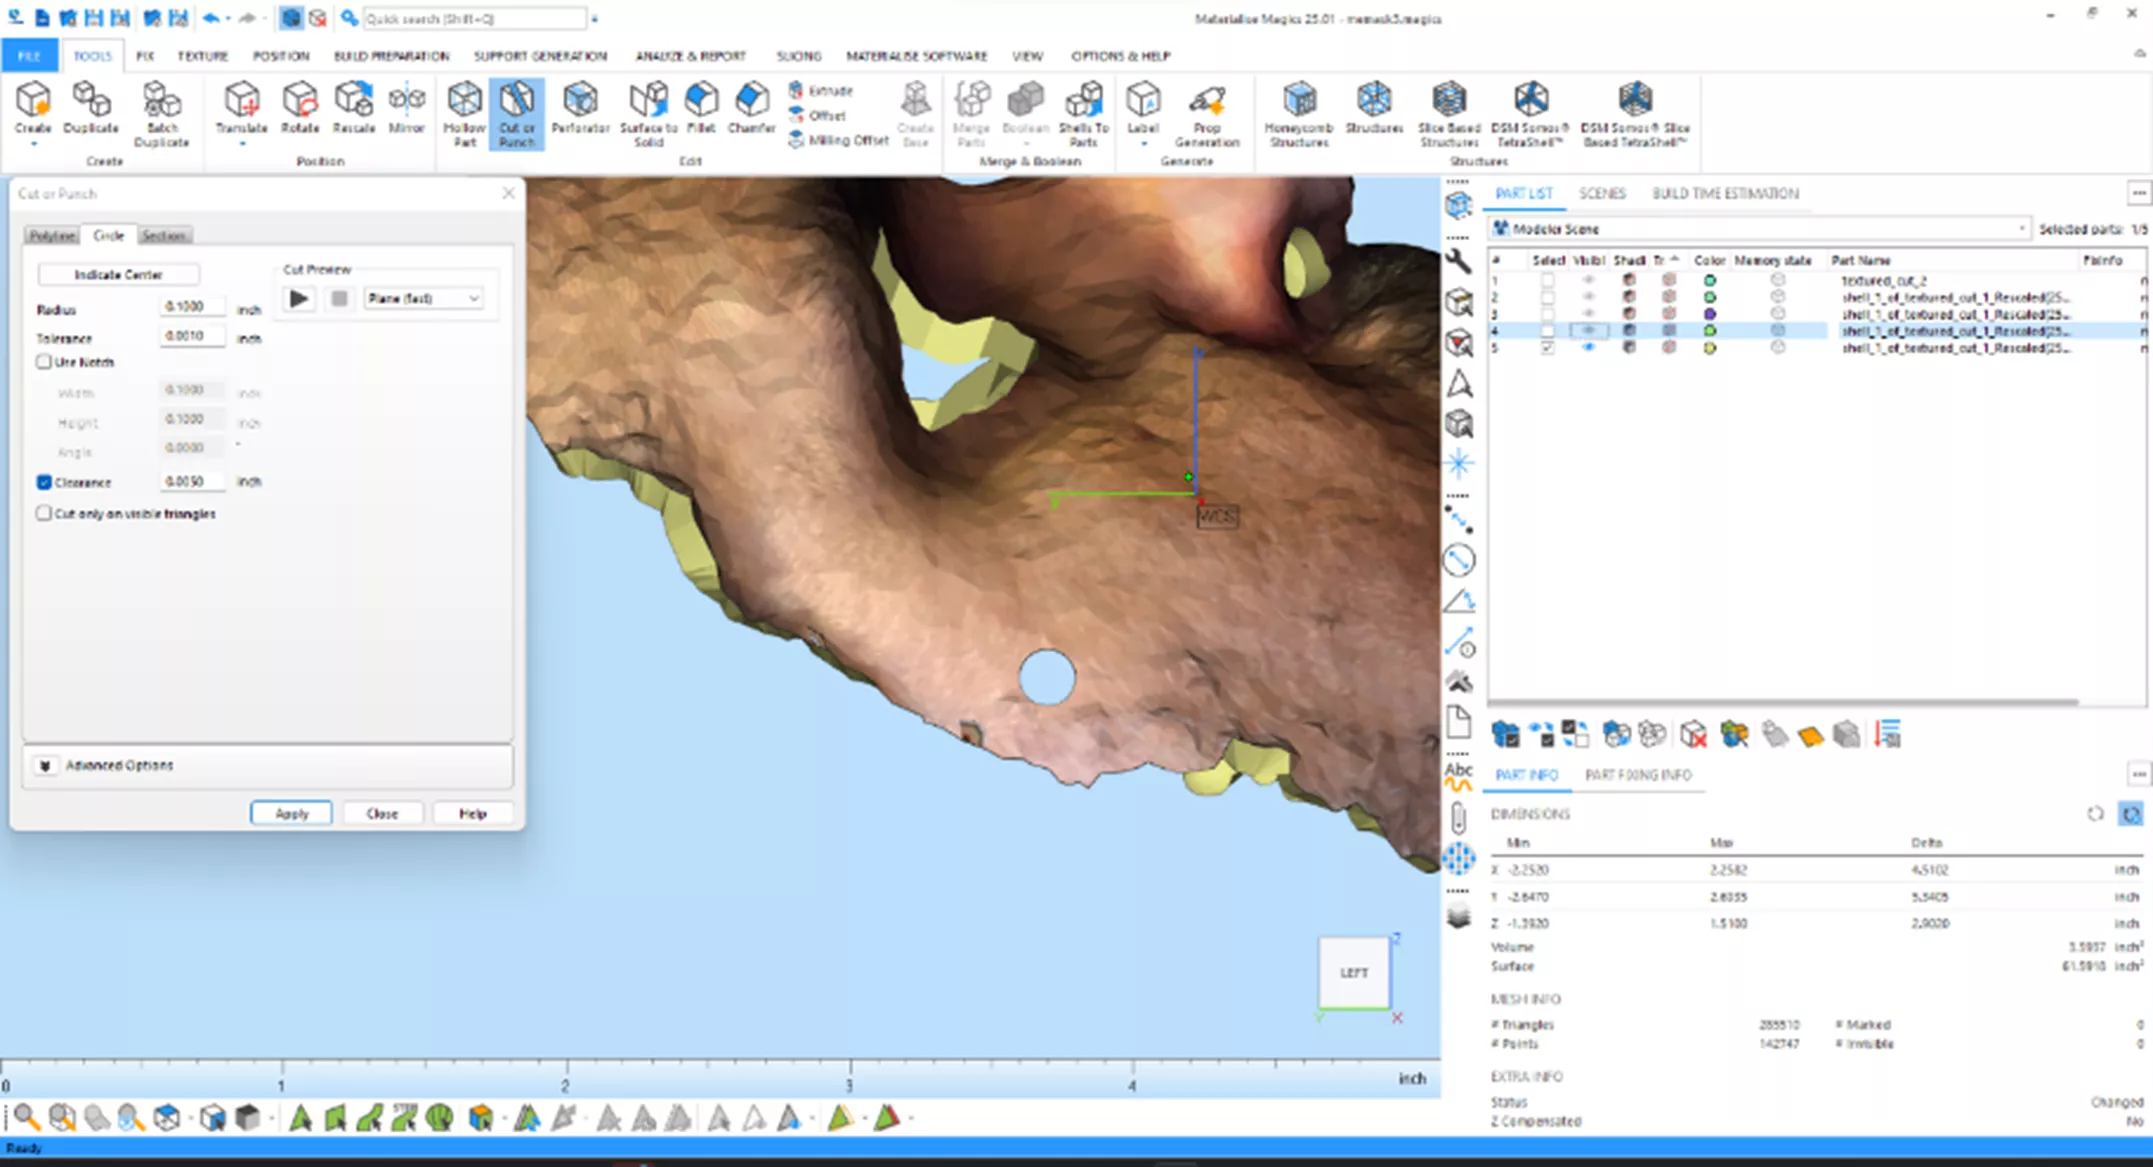
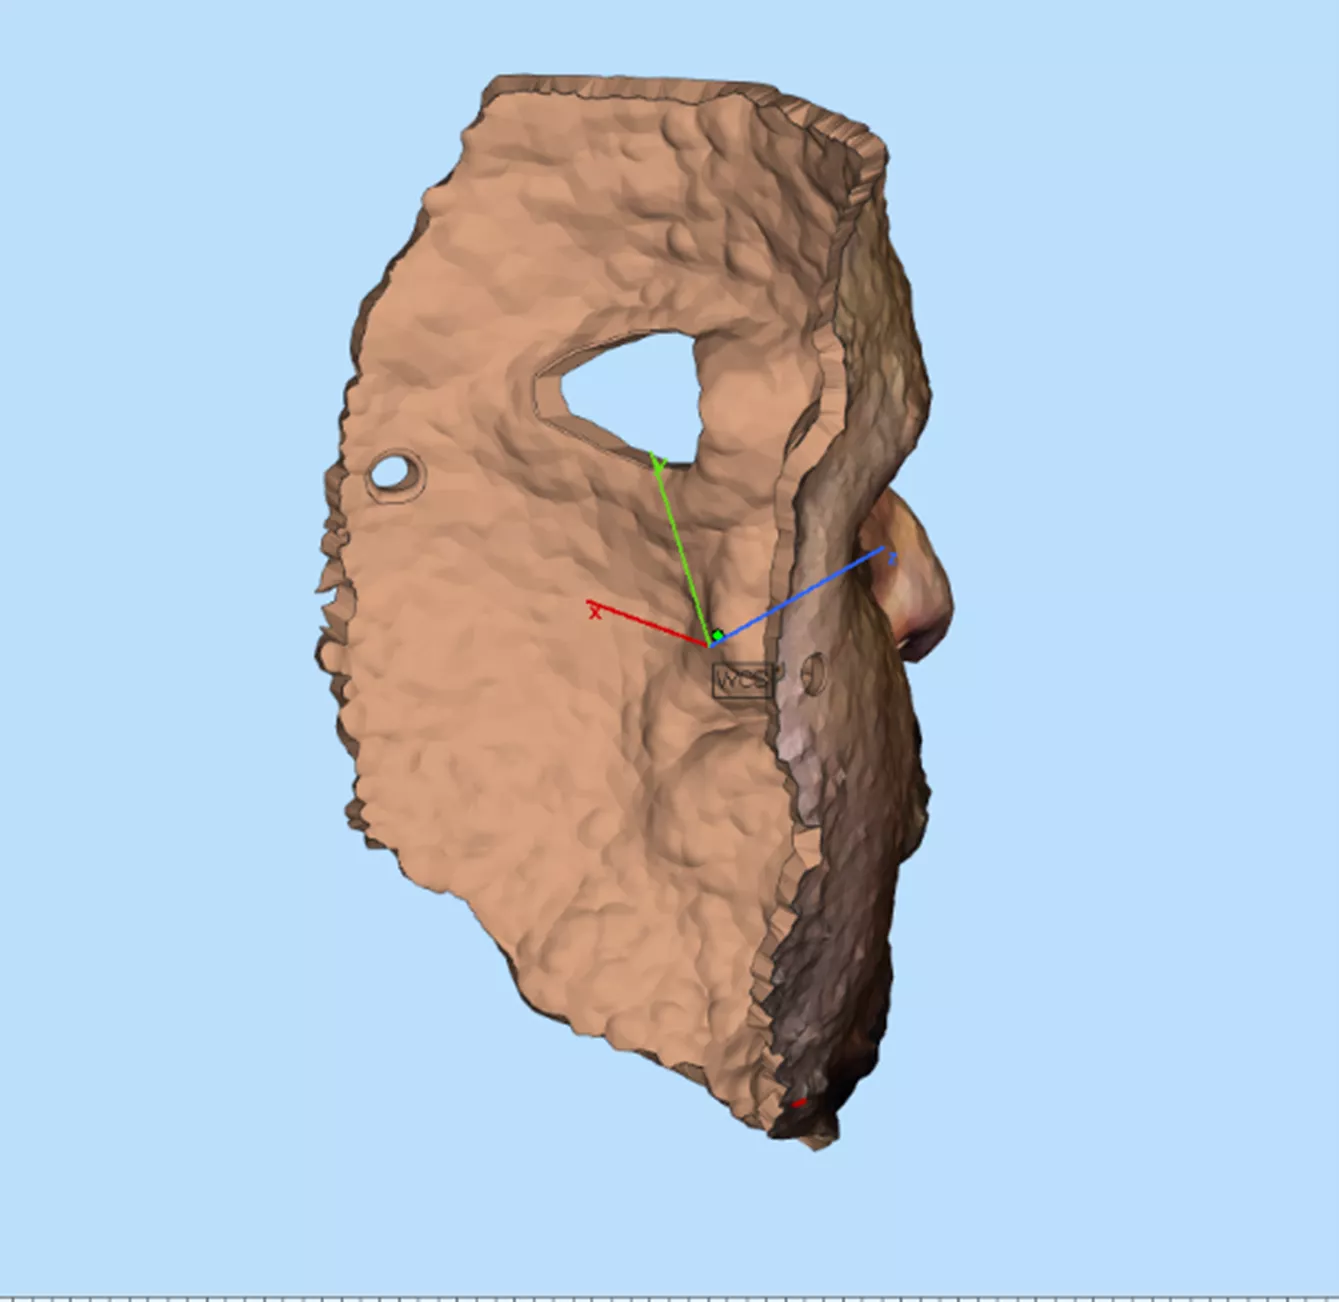
In order to wear this mask and see where I'm going, I'll need to cut some eye holes.
To do so, I'll fall back on the trusty Cut/Punch command previously used to extricate the face from the “everything else.”
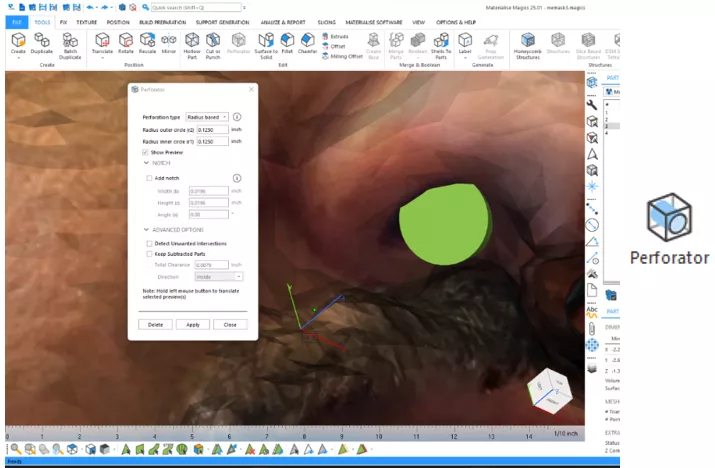
I also need to be able to breathe. Using the Perforation tool, I can create nose holes and holes through which I can tie strings for wearability.
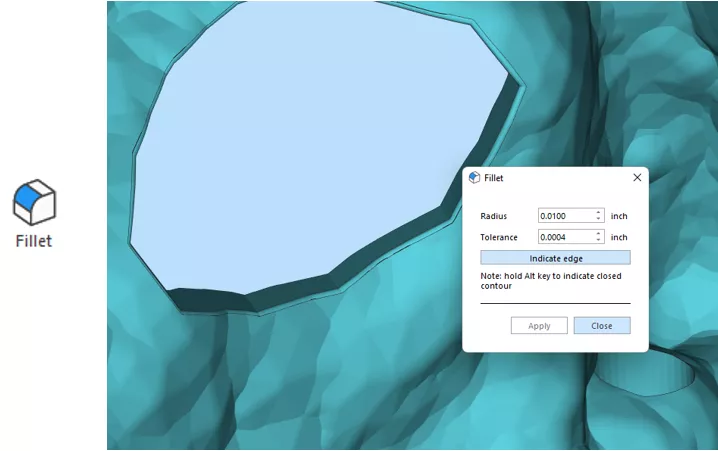
The next step pertains to ergonomics. I used the filleting tool to add fillets around the inside of the eye holes. I also added them to the holes for the strings.
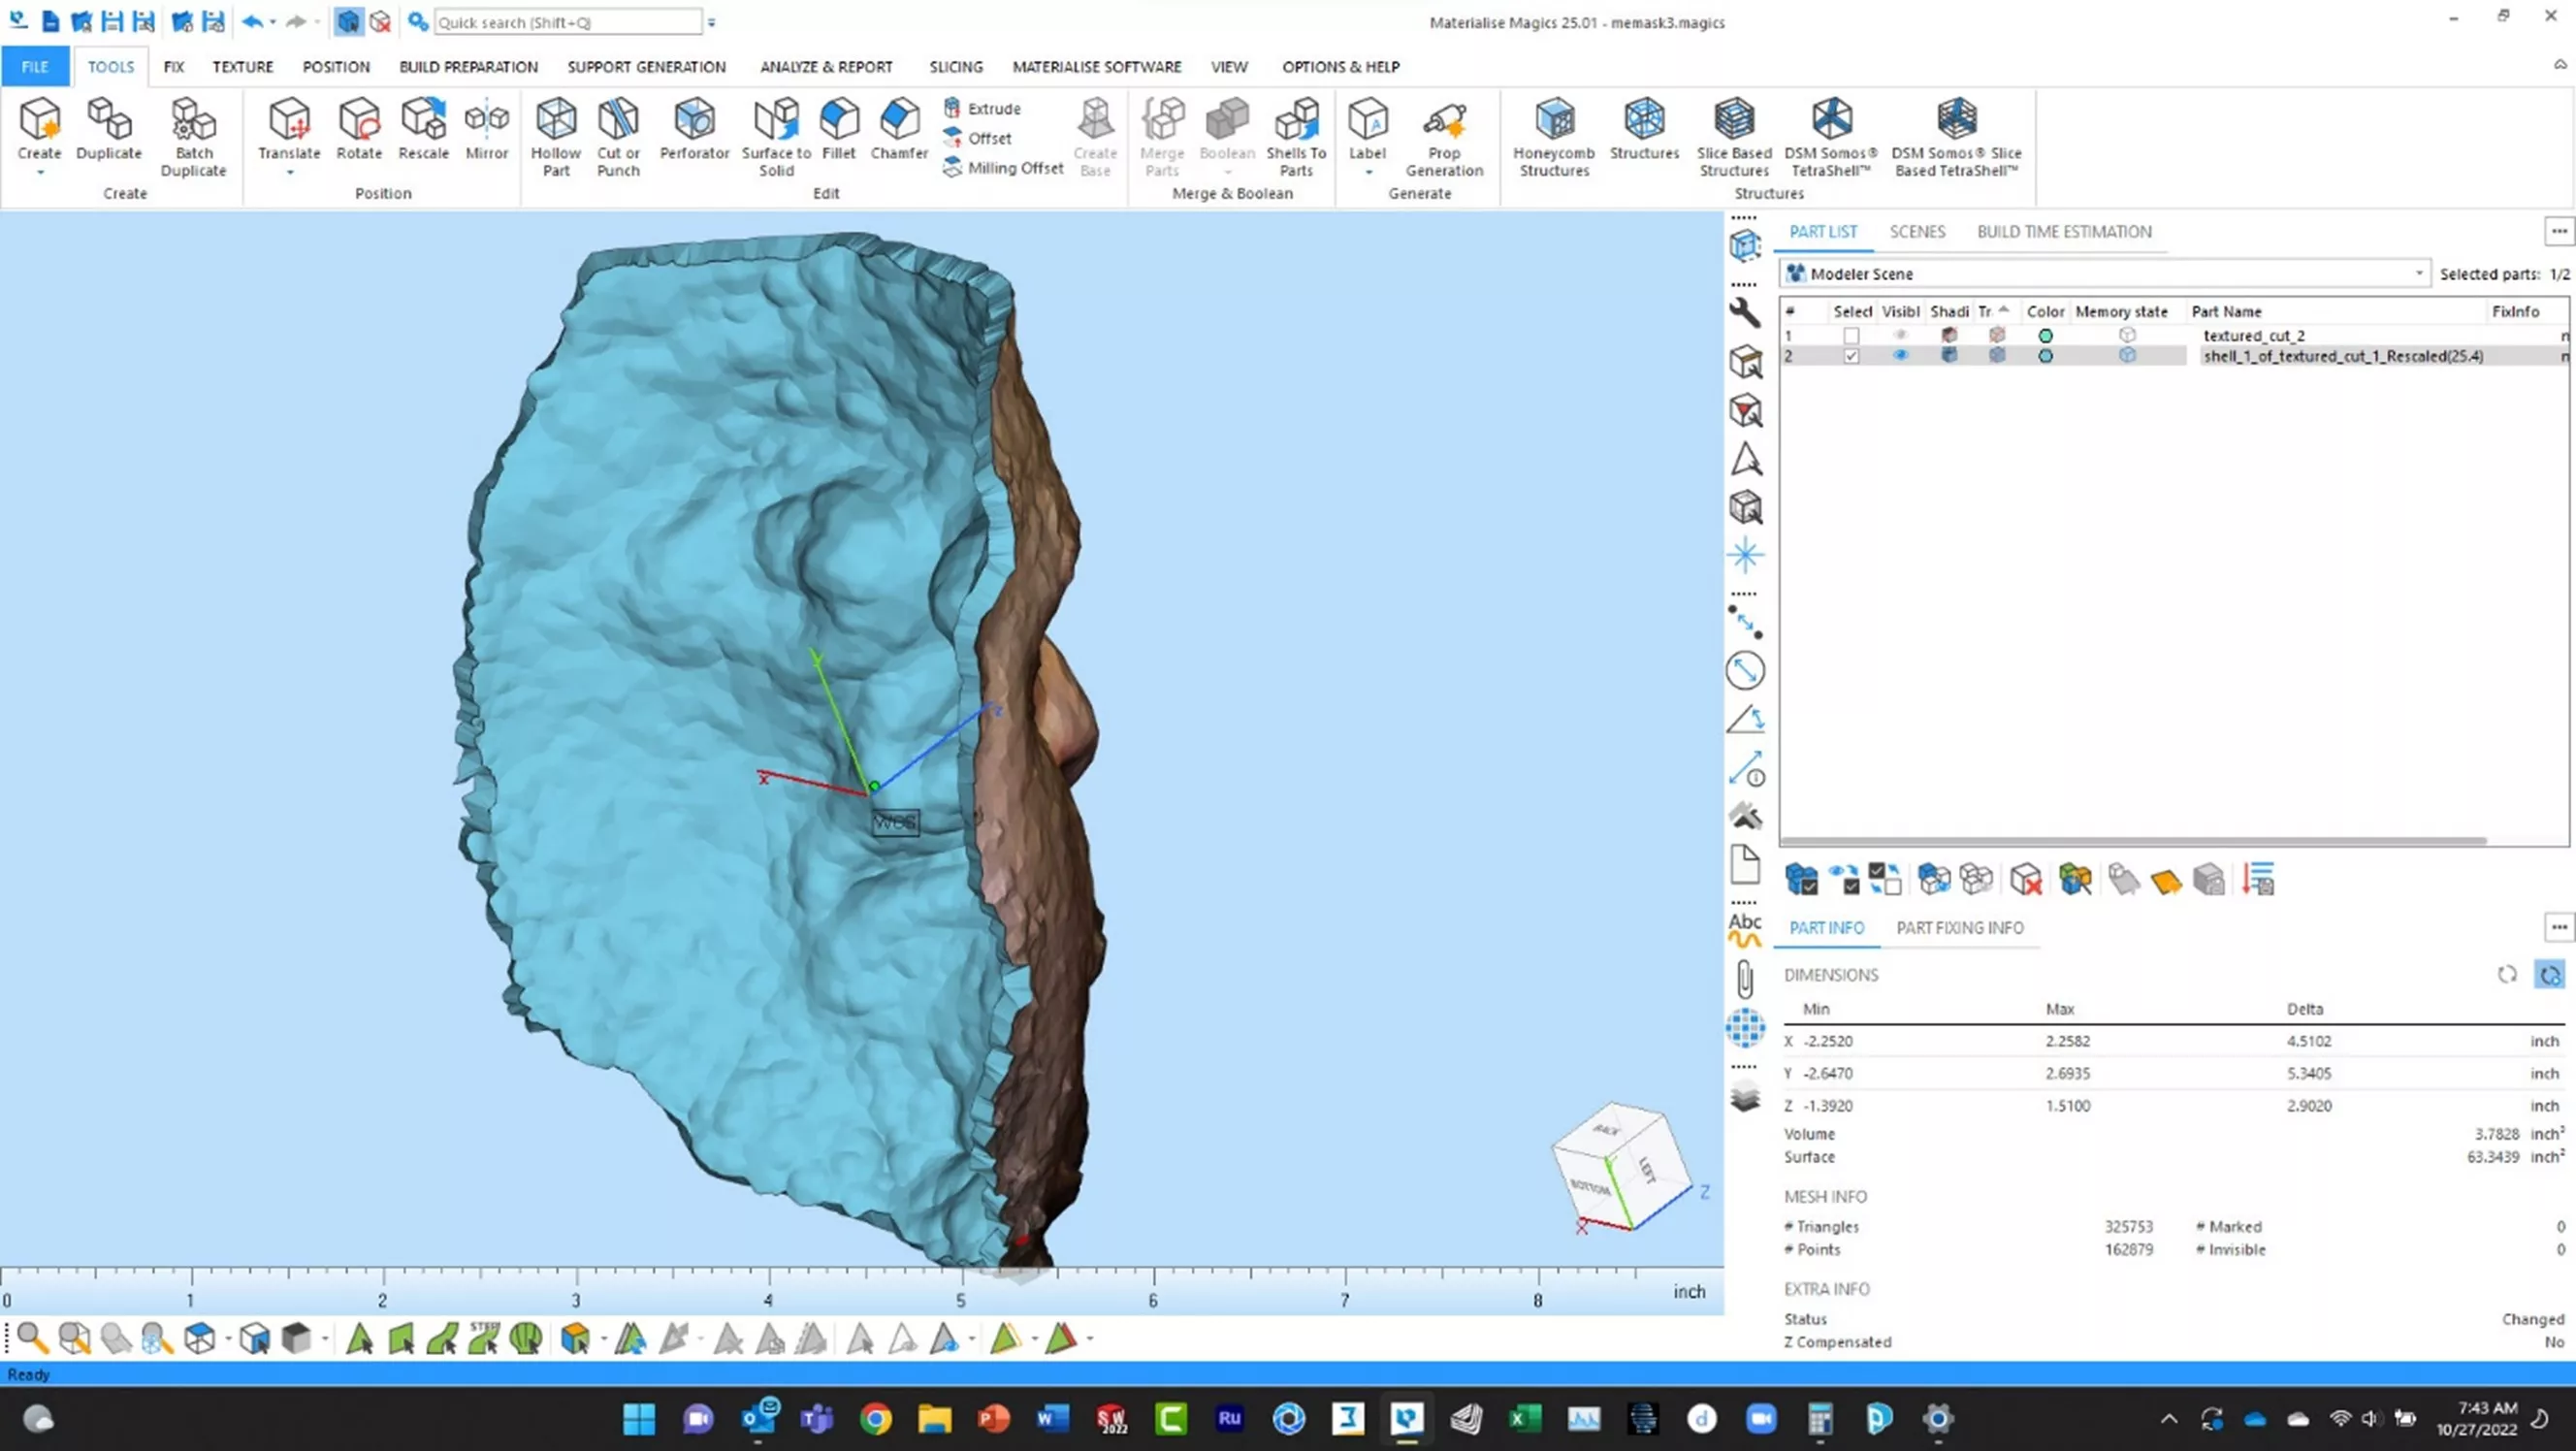
After selecting the back surface and changing its color to match one selected using the Eye Dropper from the front, I officially had a solid model of a mask of my own face!
Build Prep Using GrabCAD Print before 3D printing
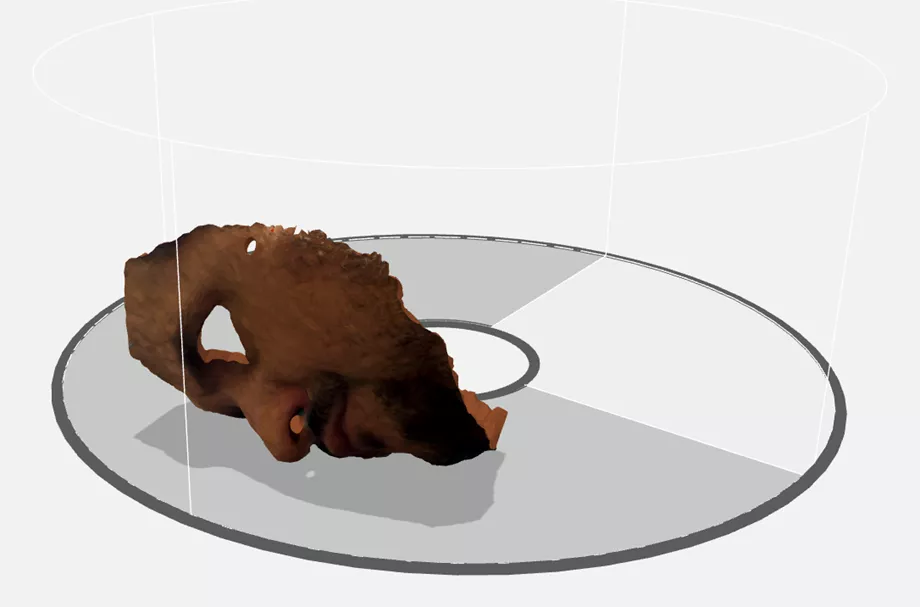
The next step was to export the file as .3mf and import it into Stratasys' proprietary build preparation and slicing software, GrabCAD Print.
I was quickly able to orient the mask onto the build tray of the Stratasys J55 Prime PolyJet 3D printer at the lab. The colors were all intact and the model was ready to print!
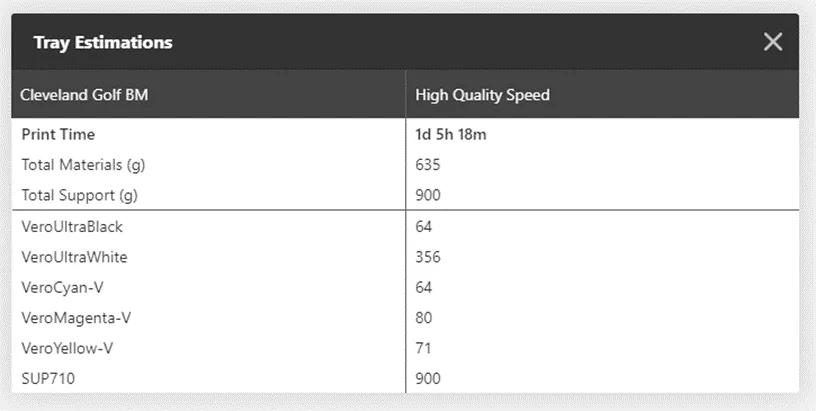
A nice feature of GrabCAD Print is that it provides accurate print time and material usage estimates.
PolyJet 3D Printing Technology
Upon conclusion of the build, this is what the mask looked like fresh off the J55 Prime’s build plate. The white material coating the model is the SUP710 support material. I will remove that in a Balco waterjet station to reveal the mask underneath.
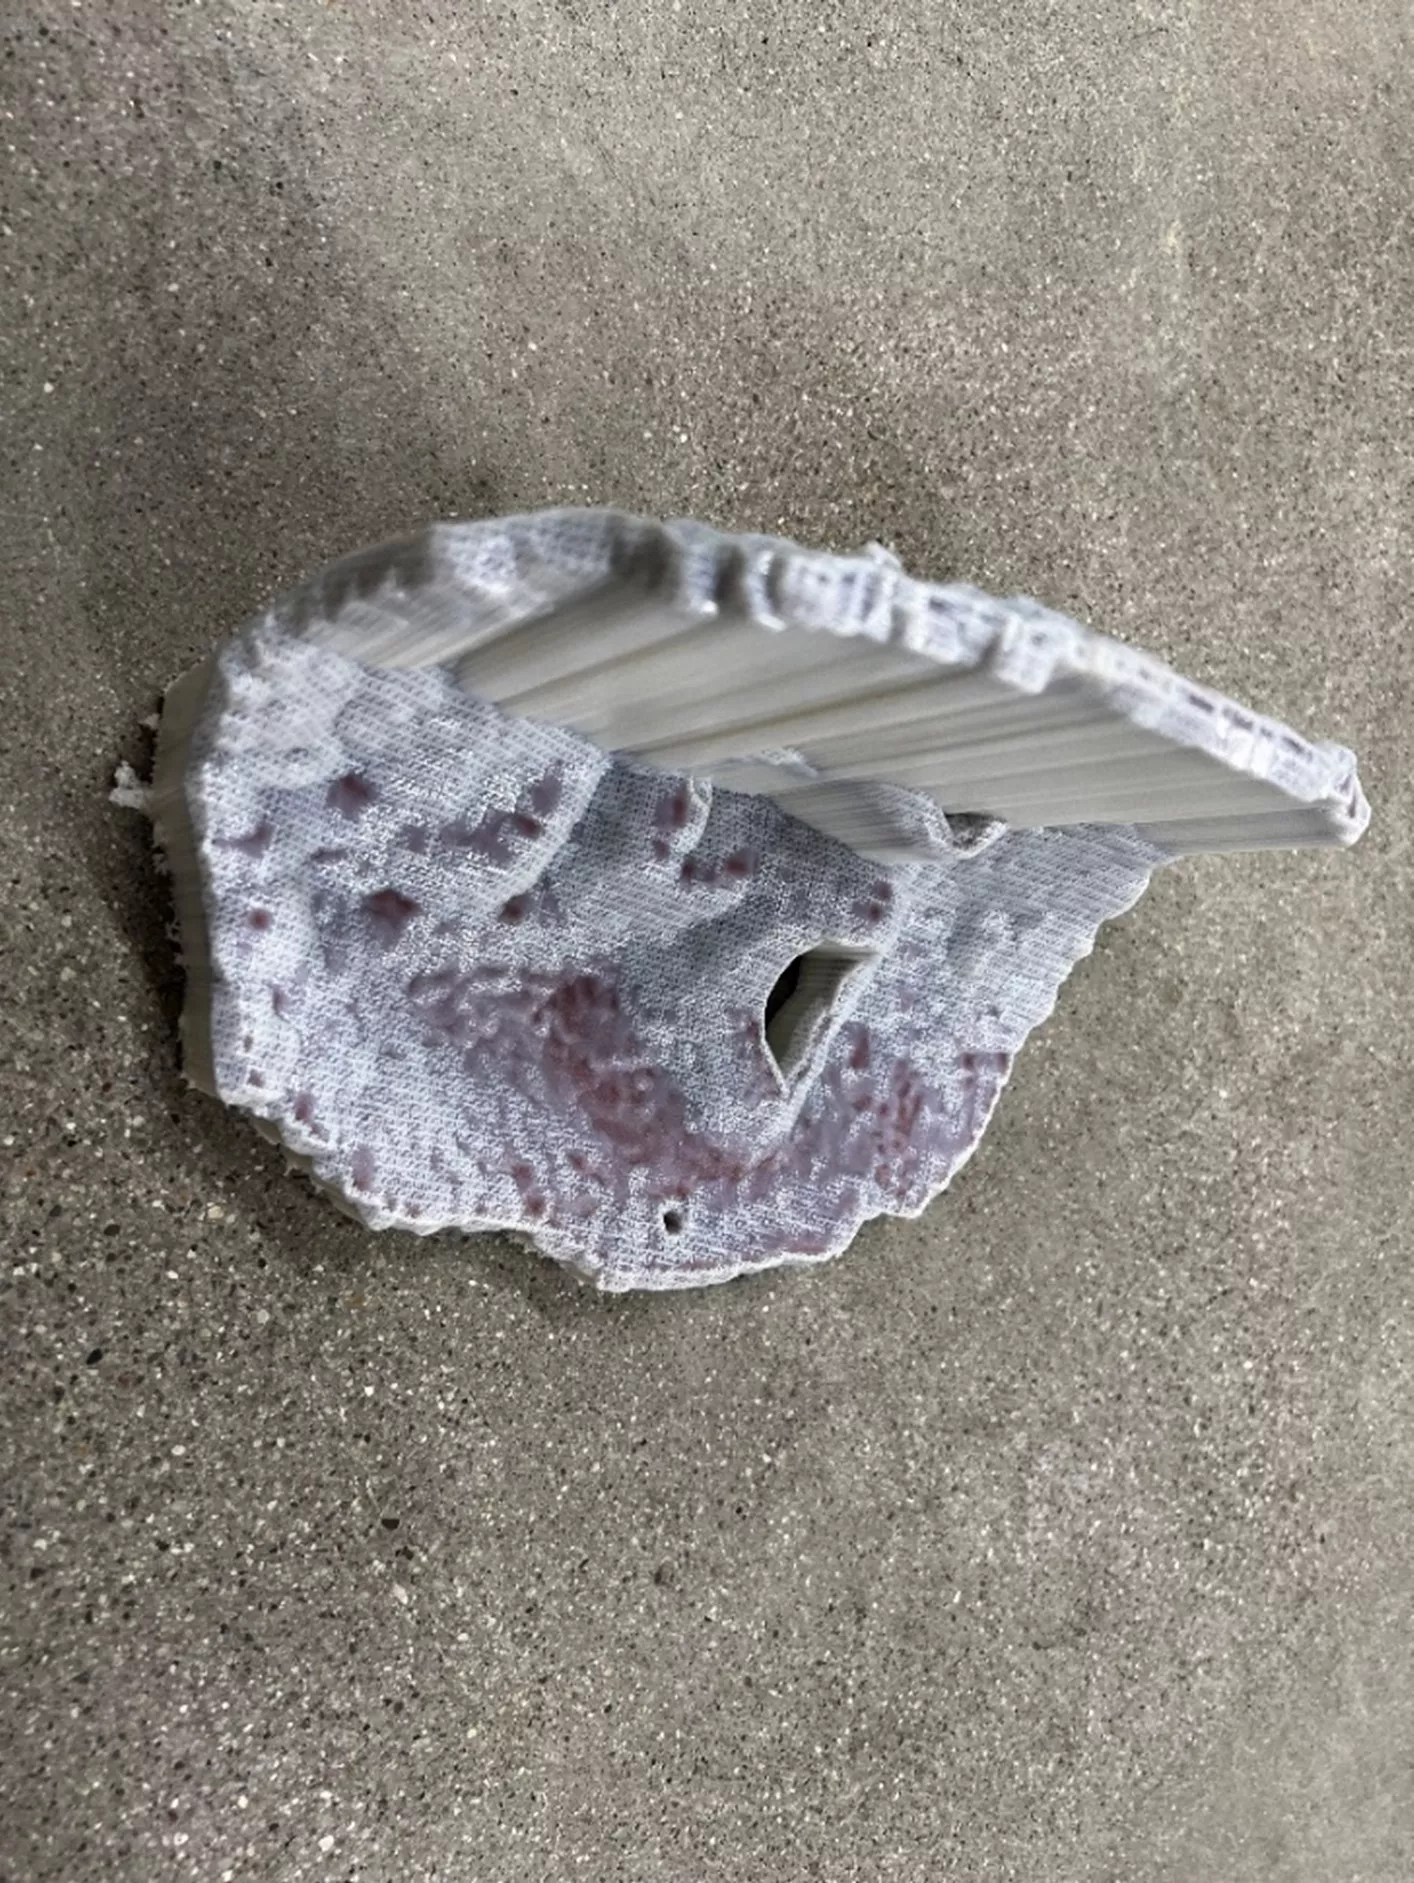
After about 10 minutes of cleaning, we have the finished 3D printed mask of my own face!

Check Out More 3D Printing Projects
3D Printed Redesign of Corvette C4 Gas Pedal Mount
3D Printed Trim Panel for Custom Shifters
A Modern Take on a Classic: 3D Printed Fender Telecaster
Making Happily Ever After with 3D Printing

About Richard Cromwell
Richard Cromwell is an Additive Manufacturing Applications Engineer based out of Auburn Hills, MI, having recently joined the team in February 2020. He is a Certified Stratasys Applications Engineer and holds a degree in Technological Science with a specialization in CAD from Oakland Community College in Auburn Hills. Before delving fully into his passion for additive manufacturing and 3D CAD modeling, Richard honed his mechanical design, CAM, and custom fabrication skills while working for over a decade as a renowned craftsman creating custom retrofit piano actions for many of the world’s most prized musical instruments.
Get our wide array of technical resources delivered right to your inbox.
Unsubscribe at any time.