3D Printed Trim Panel for Custom Shifters
My grandpa once told me, "if it ain’t broke, don’t fix it"; but I’m an engineer, therefore I can't leave things “well enough” alone.
When the time came to tow my rock crawler to Utah, I needed an answer to a particular obstacle that left me scratching my head. How was I going to tow this up a large, 40 degree paved incline with blind hairpin turns at the top and bottom, (one of which is on a busy road) when I drive a tiny Toyota Tacoma?
The solution? A two-wheel-drive low range! This definitely isn’t a factory option, so I had to get creative.
The need for a 3D printer
A Toyota Tacoma comes with electronically-actuated transfer cases that can potentially be hacked, but their FJ Cruiser brethren come with a mechanically shifted version of what is essentially the same transfer case. Given the reliability of a mechanically shifted transfer case, and the fun of having three shifters, it was a no brainer: install an FJ case!
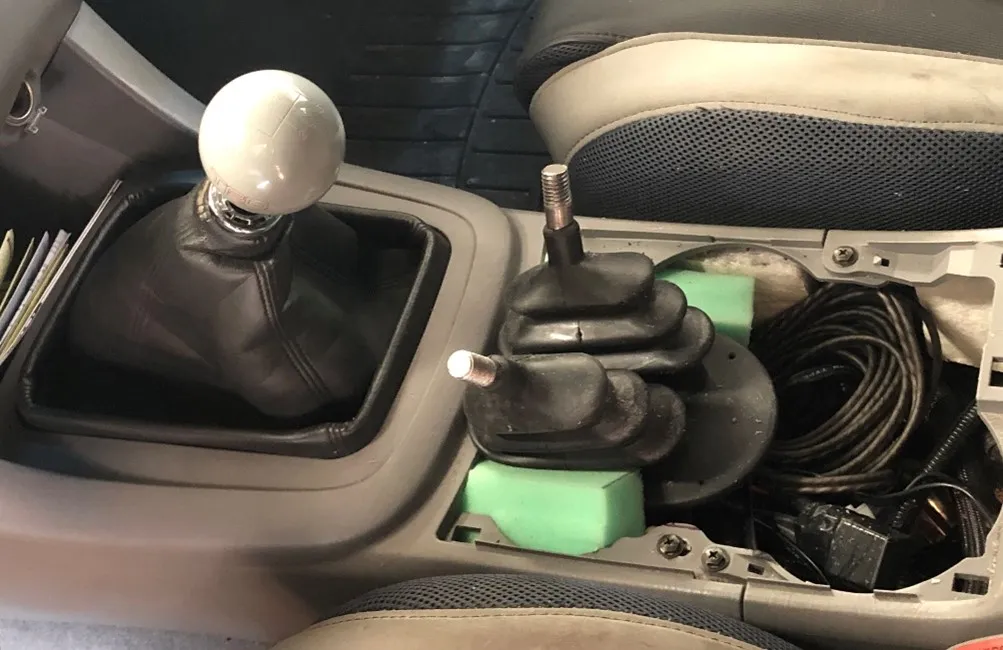
The swap was easy enough, and with a little cutting, welding, and modification to the FJ case, I had three shifters: one for the transmission, one for 4WD, and one for low range. But because my truck was never designed to have three shifters, I had to come up with a way to make it all fit.
I've created fiberglass interior panels before, a process that is both time consuming and delicate. It involves carving pieces of florist’s foam into desired shapes, laying fiberglass, trimming, sanding, smoothing it out, painting it, and loads of prep work in between. Since I have access to SOLIDWORKS CAD software and a 3D printer, the obvious choice was to print it!
Designing in SOLIDWORKS
I wanted the basic shape to resemble the existing centerpiece where the cup holders are, so taking measurements from this factory piece proved a good starting point. A simple profile and a swept extrude yielded a surprisingly stock-looking panel, and all I had to do was customize it to my needs.
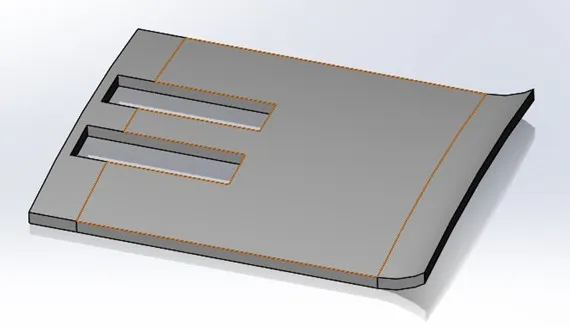
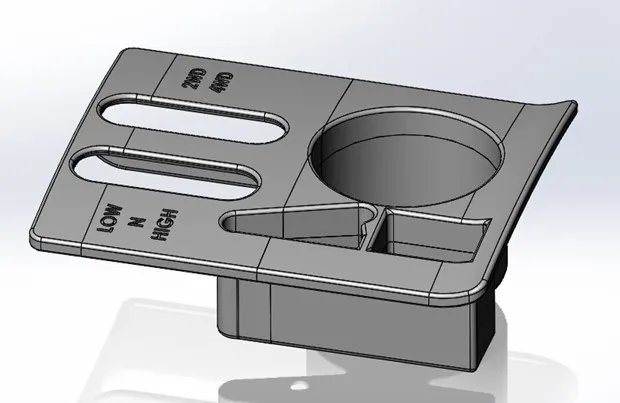
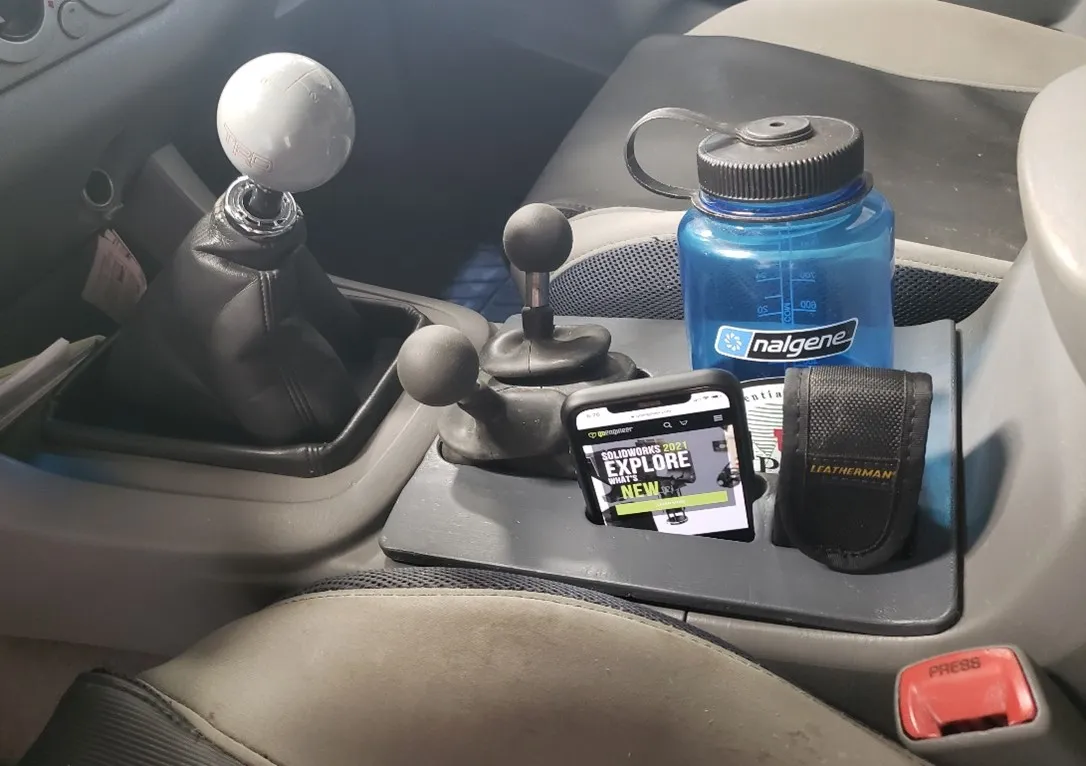
The first step was to cut holes large enough for the shifters then address other possible uses. My original panel has three cup holers, but since I'm not a soda drinker, I typically use cup holders for a large Nalgene bottle, my phone, and whatever else I have in my pockets. Although I sometimes use a smaller water bottle, there wasn't room left for two cup holders.
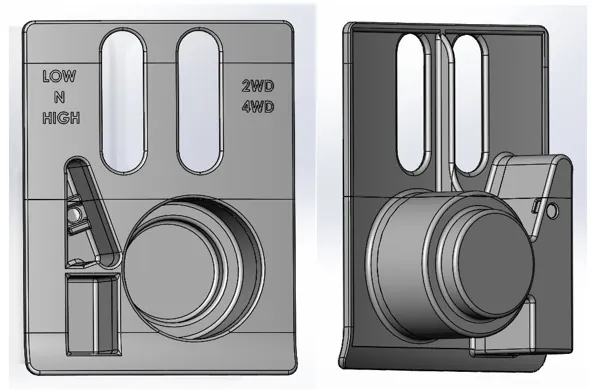
I compromised by creating a stepped cup holder that would fit both sizes of bottles, then incorporated in a compartment for my phone and one for miscellaneous things—keys, pens, tools, etc. Why not modernize it more though? It’s 2020 after all, so I added a docking station.
Prototyping
Without a 3D scanner at my disposal, I'm left taking measurements with a caliper and ruler. My initial design was close, but not close enough, as miscellaneous mounts and wires interfered with the low-hanging portions. I successfully filled up a small trash can with discarded prints. But you know what? I have a part that I can customize and reprint as many times as I want.
Implementation
To make prototyping and subtle changes easier, I printed this on my personal 3D printer instead of a professional-grade 3D printer like the ones we offer from Stratasys. The build space was smaller than the trim panel though, which meant breaking up the part in SOLIDWORKS using the Split tool and printing the panel in multiple pieces. I then glued the pieces together with Gorilla super glue gel, to create a powerful bond.
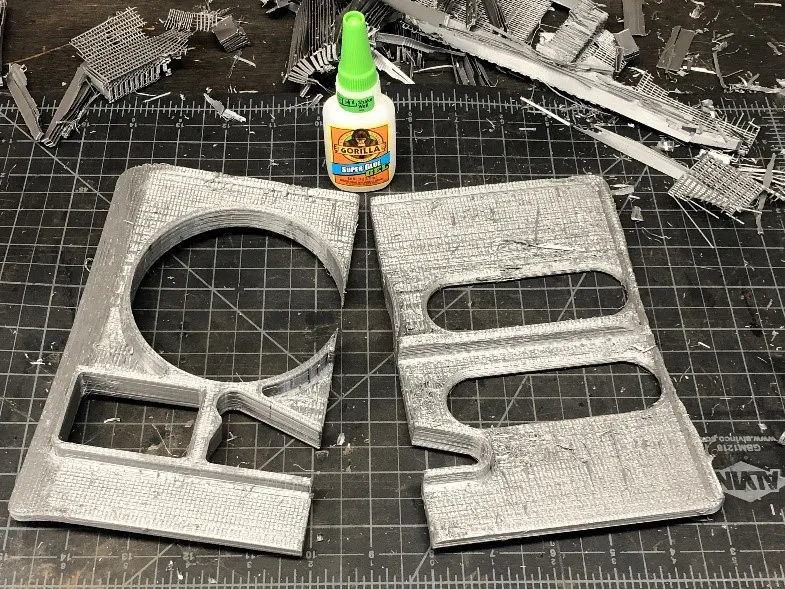
The printed surface was OK, but because I used a low-resolution printer and my part had seams, I needed to smooth it out with Bondo. To attain a durable and inviting finish, I coated the smoothed panel with Plasti Dip and then glued on the bottom pieces. This gave it a tough, rubberized surface with a textured finish. It filled in the text I had wrapped onto the panel though, which just means I have another project coming up...3D printed shift knobs! Stay tuned!
More 3D Printing Hacks
Tips for Adding Fasteners to 3D Printed Parts
A Modern Take on a Classic: 3D Printed Fender Telecaster
3D Printing & Controlling a 6-Axis Robotic Arm
Prop Guards for Drone Propellers
Creating a 3D Printed Race Medallion Hanger Using SOLIDWORKS
Designing a 3D Printed Storage Box Using Multi-Body Part Modeling in SOLIDWORKS

About Gary Ballentine
Gary Ballentine is a Mechanical Engineer based out of our Headquarters in Salt Lake City, Utah. He earned a Bachelor’s degree from the University of California, Davis, a certification in Technical Writing from San Francisco State University, and a Bachelor’s degree in Mechanical Engineering from the University of Utah. Gary has been part of the GoEngineer family since April 2019 as a Support Engineer and Certified SOLIDWORKS Instructor.
Get our wide array of technical resources delivered right to your inbox.
Unsubscribe at any time.