Create a SOLIDWORKS Assembly from a Multibody Part
In this article, we will show you the steps to convert a SOLIDWORKS Multibody Part file into a SOLIDWORKS Assembly File. The steps listed below can be useful when creating Molds as you can easily model everything at the Part level, and then move to the Assembly drawing to simply create your annotations.
Our example, (Figure 1) is a multibody part made up of eight (8) individual bodies.
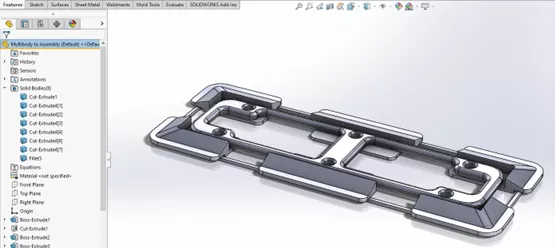
Figure 1: Multibody Part with eight (8) Solid Bodies
To convert the multibody part into an assembly, go to Insert > Features and select Save Bodies (Figure 2). Optionally, right-click on the Solid Bodies folder and select Save Bodies (Figure 3).
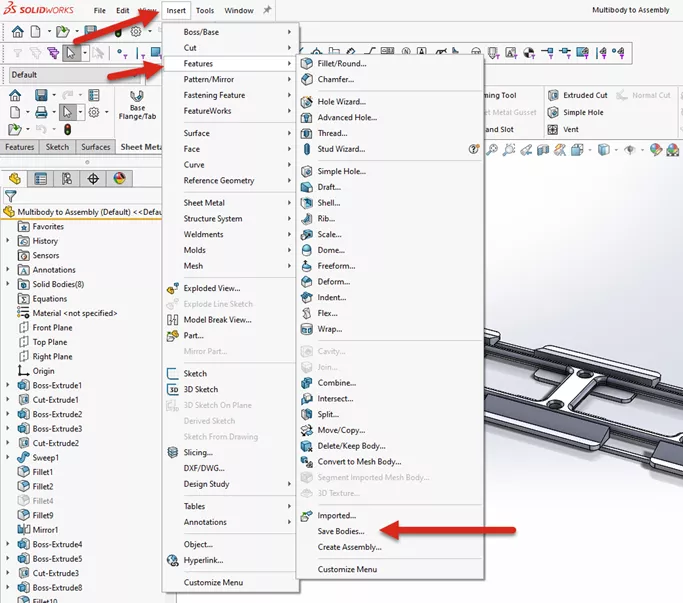
Figure 2: Insert > Features > Save Bodies
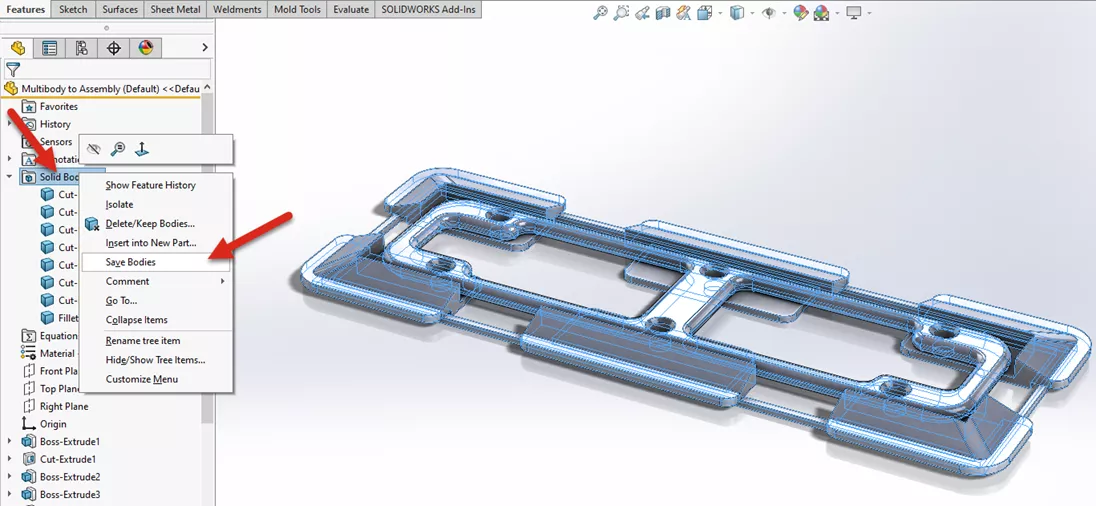
Figure 3: Right-click on Solid Bodies folder and select Save Bodies
Next, select the desired Part and Assembly Templates to be used for the new Part files and Assembly. (Figures 4 & 5)
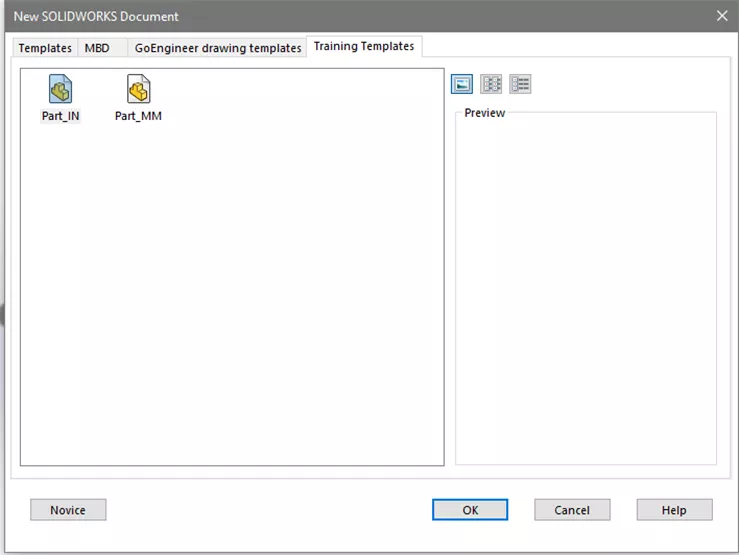
Figure 4: Select the Part Template
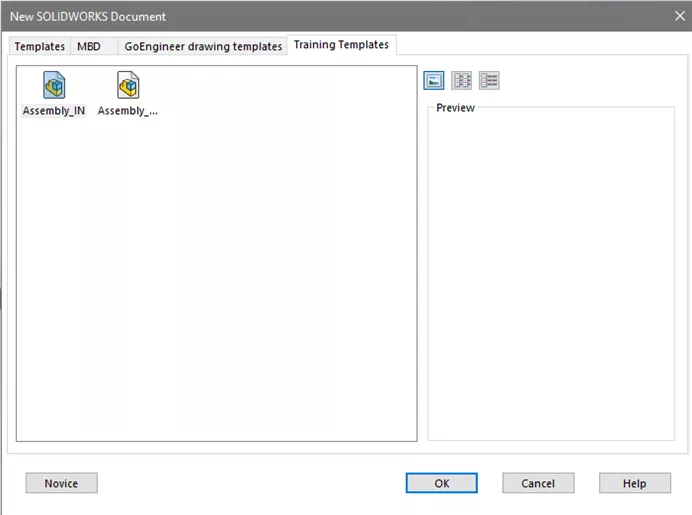
Figure 5: Select the Assembly Template
After selecting the SOLIDWORKS Part Template and SOLIDWORKS Assembly Template you want the software to use, you will see a list of Resulting Parts and an option to create an Assembly of these parts.
You have the option to change the name of each part file either in the list or by clicking on the individual Body Flags (Figure 6), or you can select Auto-Assign Names.
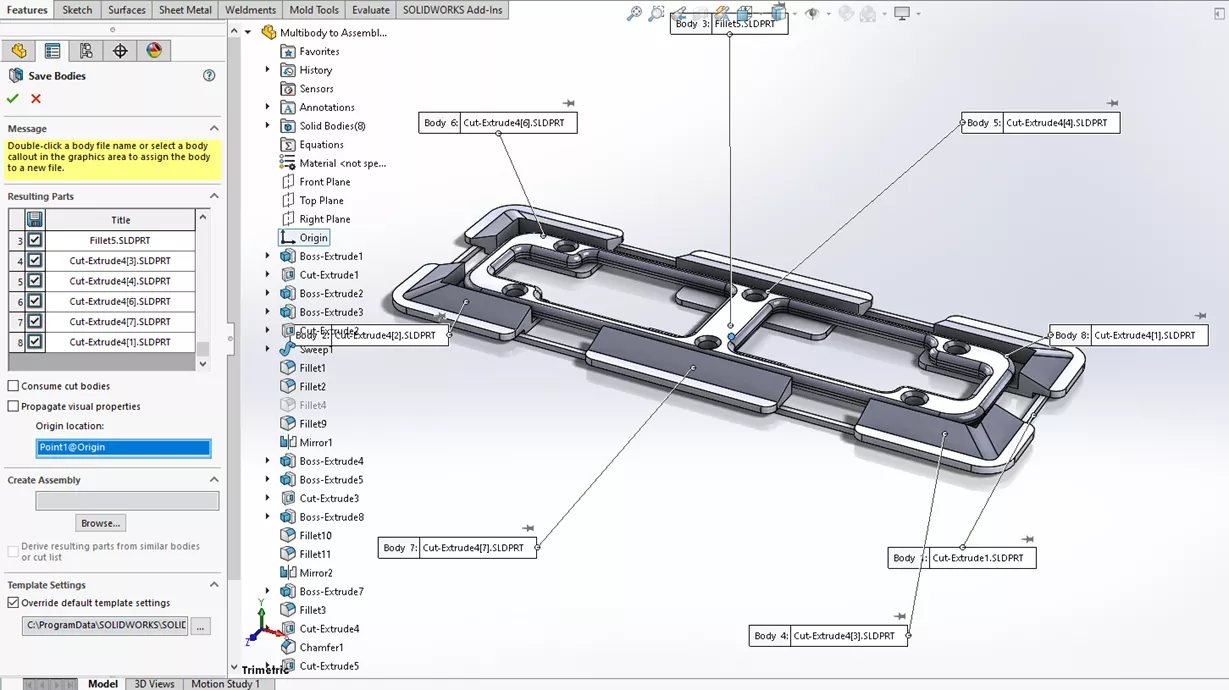
Figure 6: Save Bodies FeatureManager Design Tree
Select Browse under Create Assembly. This will open the Save-As Dialog (Figure 7). When you create the assembly, select the check box Derive Resulting Parts from Similar Bodies or Cut List to condense your cut list. This option finds multiple instances of similar bodies for your assembly Bill of Material.
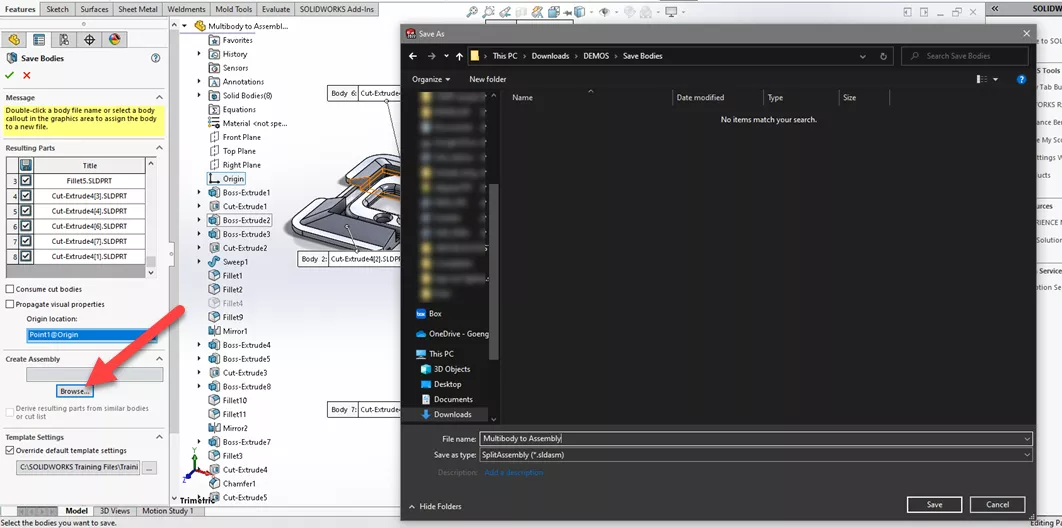
Feature 7: Create a SOLIDWORKS Assembly file of your exported SOLIDWORKS Part files
In Figure 8, you will see that this option changes the resulting part files from eight (8) to five (5) since three (3) of the bodies are the same.
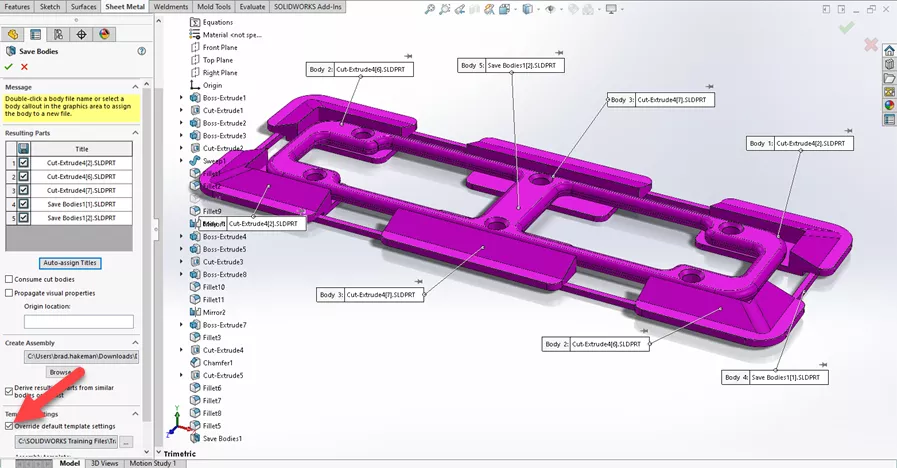
Figure 8: Save Bodies Feature with “Derive resulting parts from similar bodies or cut list".
After exporting the bodies as individual part files, you will notice a new feature at the bottom of the FeatureManager Design Tree for the original Multibody Part (Figure 9).
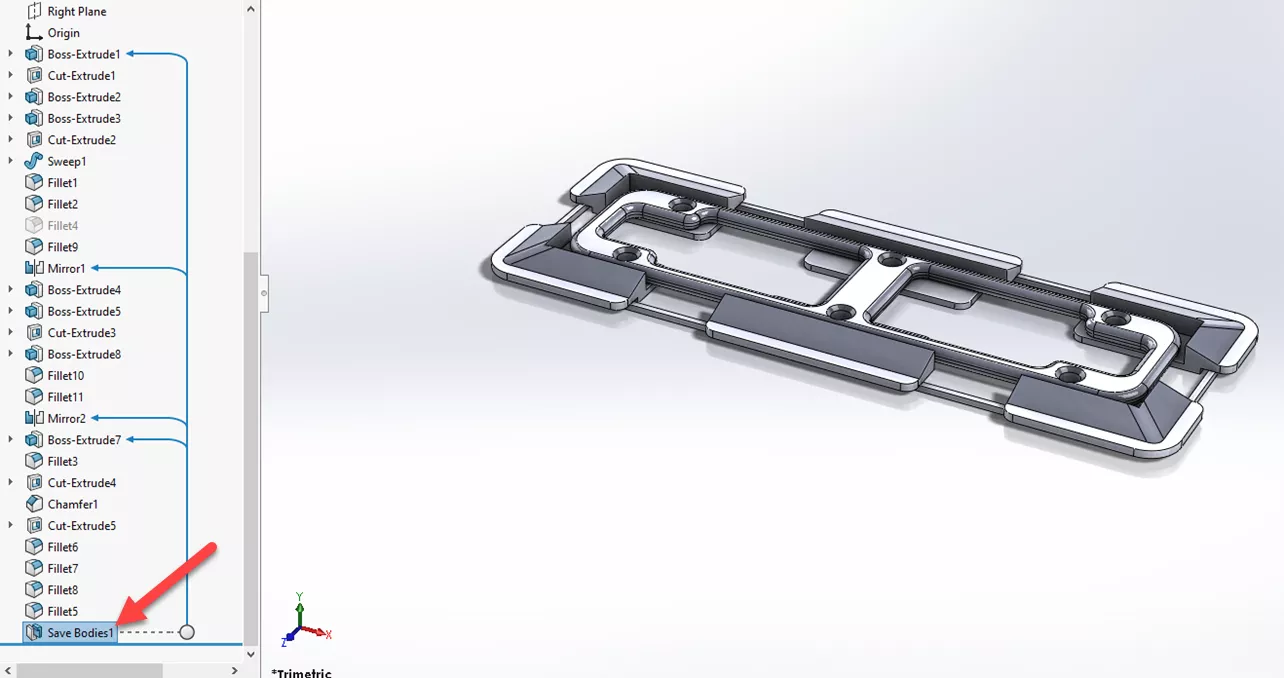
Figure 9: Save Bodies Feature in the original multibody part file
When you open the newly created Assembly File (Figure 10), you will see each part file has an external reference back to the original multibody part file. Each Part file can be used to create detailed part drawings and the assembly can be used to generate an Assembly Drawing, complete with a Bill of Materials and Exploded Views.
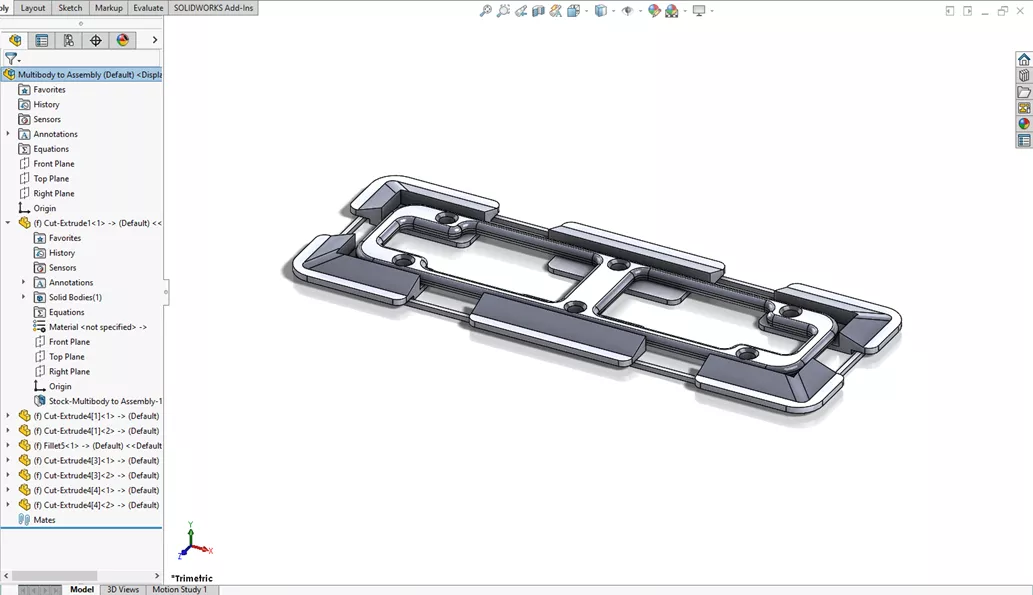
Figure 10: Assembly file created from the exported bodies
As you can see, with a few simple steps, you can go from a multibody part file to an assembly file in SOLIDWORKS.
I hope you found this tutorial helpful. Check out more SOLIDWORKS tips and tricks below.
![]() Want to see this in action? Check out our YouTube video Converting Multibody Parts to Assembly for a live demonstration.
Want to see this in action? Check out our YouTube video Converting Multibody Parts to Assembly for a live demonstration.
More SOLIDWORKS Tutorials
SOLIDWORKS Multibody Sheet Metal Flat Pattern Drawing
SOLIDWORKS: Splitting a Body into Multiple Parts
How to Save a SOLIDWORKS Assembly as an STL File
How to Link Values with External Files in SOLIDWORKS

About Brad Hakeman
Bradley Hakeman is an Application Engineer at GoEngineer. When he isn’t helping customers with their SOLIDWORKS related challenges, he is keeping up on the latest features of SOLIDWORKS. In his spare time, he’s trying to sort out his kids’ soccer schedules and working on household projects, many of which were designed in SOLIDWORKS. Most recently, he has taken up woodturning, currently focusing on pen making.
Get our wide array of technical resources delivered right to your inbox.
Unsubscribe at any time.