DraftSight Draw Compare Tool Explained
In this quick tip, we demonstrate how to use Draw Compare, a handy tool in DraftSight for comparing two versions of a drawing to verify differences in the files.
What Does the Draw Compare Tool Do?
Rather than check a drawing side by side manually, either by checking hard copies by hand or on screen, the Draw Compare tool, built into DraftSight, can instead be used to confirm the changes have been made.
The Draw Compare tool will examine two drawings and highlight any changes that have been made to the drawing. The Draw Compare tool will look for visual changes between the drawings at a bit level (graphic). Any changes to a custom property, such as Description or Material, are not reflected in the comparison.
How to Use the DraftSight Draw Compare Tool
To use the Draw Compare tool, locate it on the Powertools toolbar. (Figure 1)

Figure 1: Locate the Draw Compare tool in the DraftSight Powertools Toolbar
Click the Browse button (Figure 2) to locate Drawing 1 and Drawing 2.
Previews of the drawings will appear below with the differences highlighted in a third window in the tool. There are two checkboxes in the interface (Additions and Removals). In this example, we select Additions to highlight the entities that have been added to the new drawing.
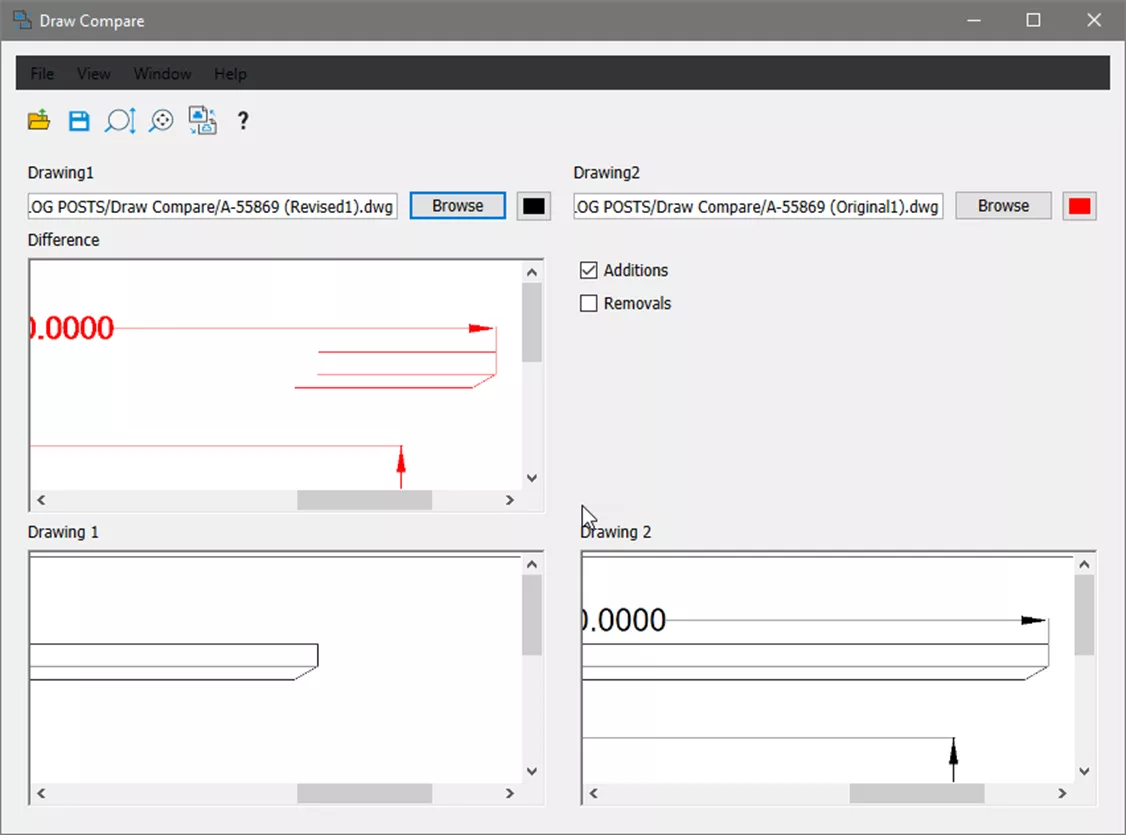
Figure 2: The Draw Compare user interface
After both drawings have been loaded into the Draw Compare tool, click on the Compare Drawings icon at the top of the Draw Compare tool (Figure 3).
A popup will appear with a brief description of the differences between the drawings. Click OK to close the Draw Compare message.
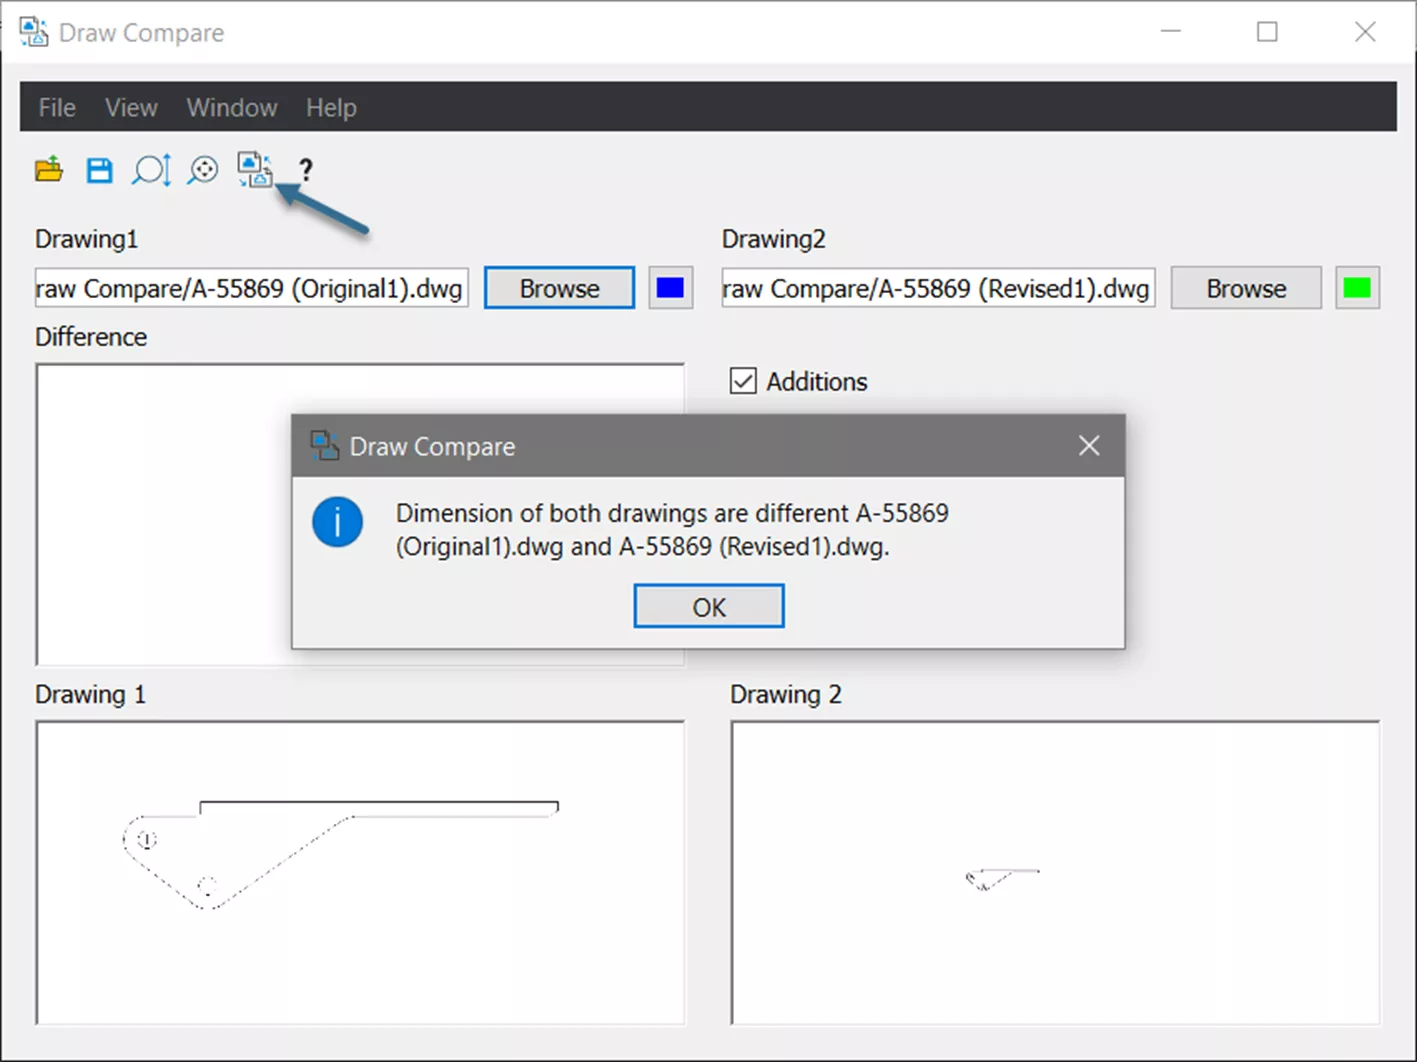
Figure 3: Confirming the differences between the two drawings
To view only the differences in your drawings (Figure 4), click Window and select Differences.
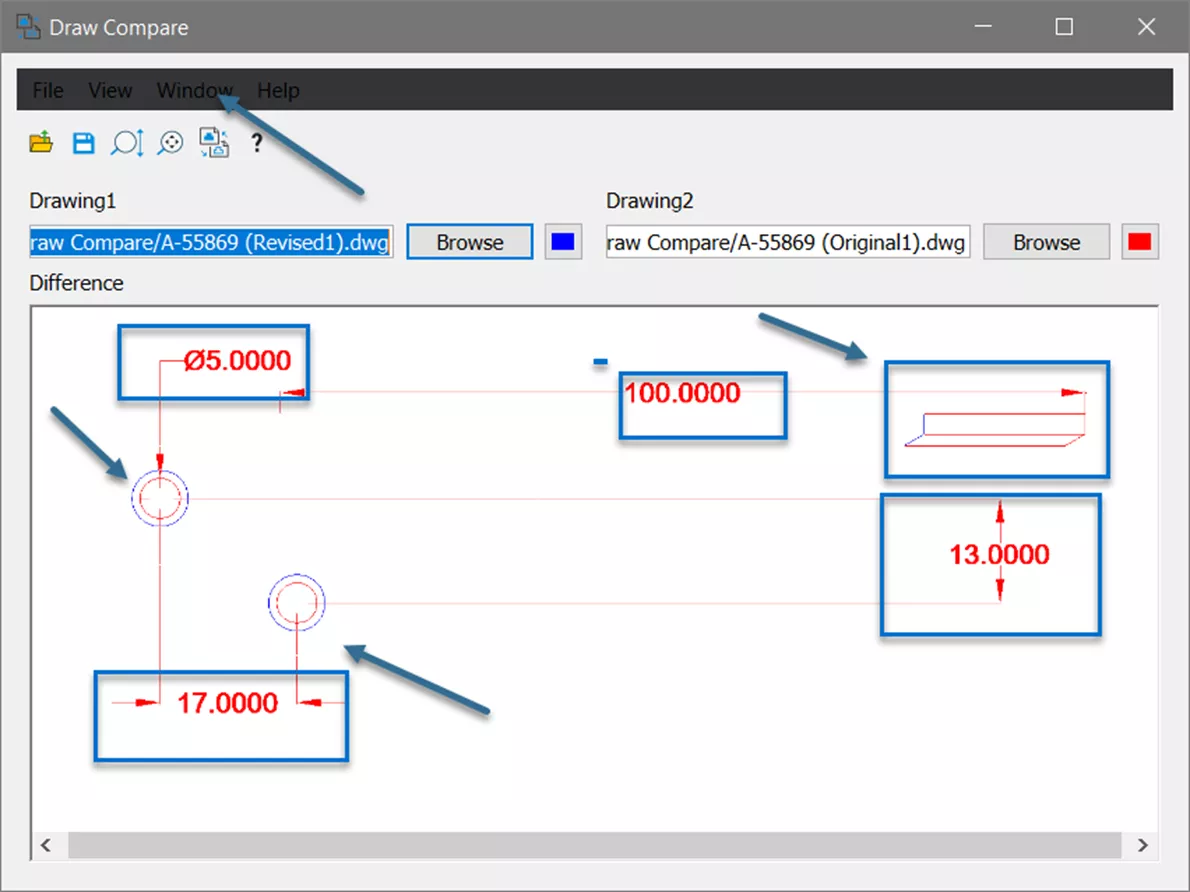
Figure 4: Preview of the differences between the two drawings
Note that the added dimensions are shown in RED, and the change to the hole diameters is shown in BLUE. (Figure 4)
A bitmap of the differences can be saved for your records by clicking the Save icon in the interface or going to File > Save. (Figure 5)
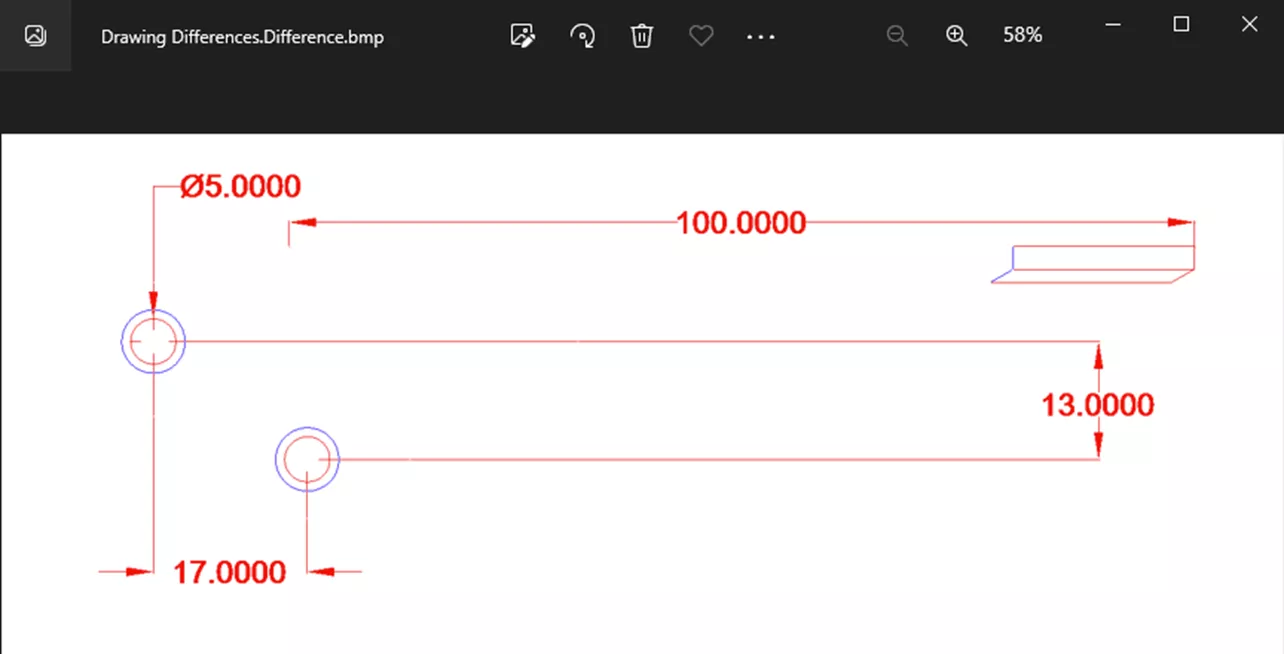
Figure 5: Bitmap image of the differences between the two drawings generated by the Draw Compare tool
Compare (but not Check) Your Drawings
As mentioned in the beginning, the Draw Compare tool only looks for graphical changes and highlights those changes. If you want to confirm that changes have been made to your revised drawing and generate a graphic for future reference, consider using the Draw Compare tool in DraftSight for this purpose.
More DraftSight Tutorials
DraftSight Quick Access Toolbar Customization Tutorial
How to Transfer DraftSight Settings
DraftSight Software Packages, Price, and Features
DraftSight and SOLIDWORKS PDM: Getting Started
![]() Watch it on YouTube! Check out our DraftSight playlist for more.
Watch it on YouTube! Check out our DraftSight playlist for more.

About Brad Hakeman
Bradley Hakeman is an Application Engineer at GoEngineer. When he isn’t helping customers with their SOLIDWORKS related challenges, he is keeping up on the latest features of SOLIDWORKS. In his spare time, he’s trying to sort out his kids’ soccer schedules and working on household projects, many of which were designed in SOLIDWORKS. Most recently, he has taken up woodturning, currently focusing on pen making.
Get our wide array of technical resources delivered right to your inbox.
Unsubscribe at any time.