How to Transfer DraftSight Settings
DraftSight is a powerful two-dimensional drafting tool. Much like SOLIDWORKS, DraftSight is highly customizable, and users can easily backup and transfer their settings to another computer. In this quick tip, we’ll demonstrate how simple it is to copy your DraftSight settings and transfer them to another computer.
DraftSight Profiles
DraftSight Profiles store your custom settings and file template locations. To manage your Profiles, click on the DraftSight logo (Figure 1a) at the top left corner of your session of DraftSight and select Options.
A second location is in the Manage Tab (Figure 1b) and select Options found under Customization.
A third option is to type options in the Command Window.
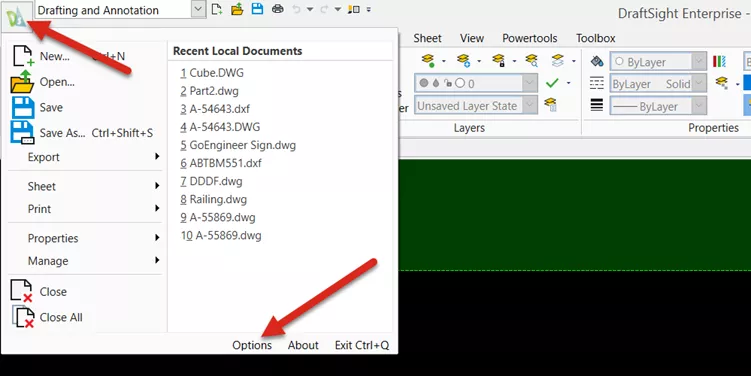
Figure 1a: How to launch the Options menu in DraftSight

Figure 1b: How to launch the Options menu in DraftSight
In the Options Menu, click on Profiles (Figure 2). If this is your first time using this menu, you should only see the <<unnamed profile>> which is the default profile.
Note that any modifications you have made to DraftSight up to this point, such as keyboard shortcuts and default template locations, are stored in that unnamed profile until you launch this tool.
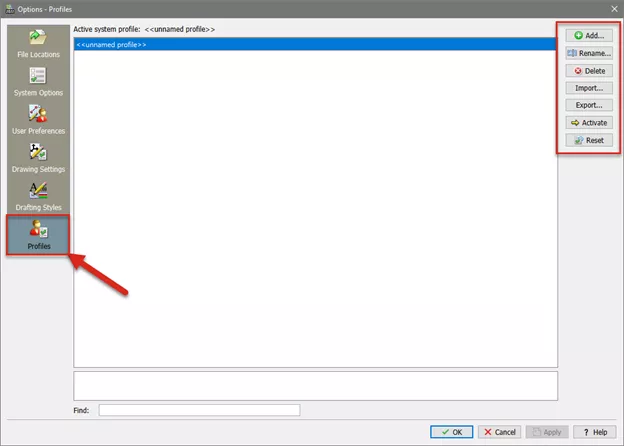
Figure 2: DraftSight Options – Profile menu
To save your customizations, either as a backup or to be used for new installations on other computers, select your profile (typically <<unnamed profile>> if no others are available) and select Export.
The Profile is saved as a .xml file format (See Figure 5). Give your Profile a Name and click Save.
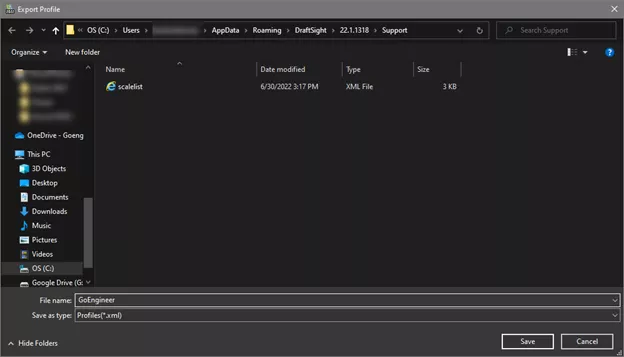
Figure 3: Save the Profile as an xml file
When you’re ready to use the Profile, click the Import button (Figure 2) and select the desired Profile .xml file. You will see an Import Profile window (Figure 4) with an option to add a Description to the Profile.
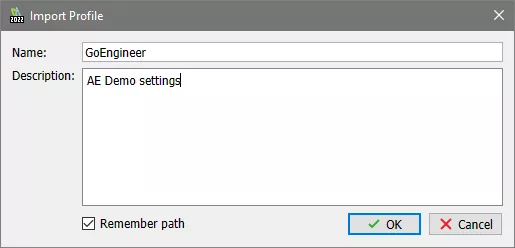
Figure 4: Add a Description to the Imported Profile
Once you have imported the profile, it needs to be set as the active profile. To do so, select the desired profile, and click Activate (Figure 5).
As a bonus, several Profiles can be added to the list, but only one can be Active at a time, depending on your needs.
Note that the top of the list states the Active system profile to visually confirm which Profile is currently in use.
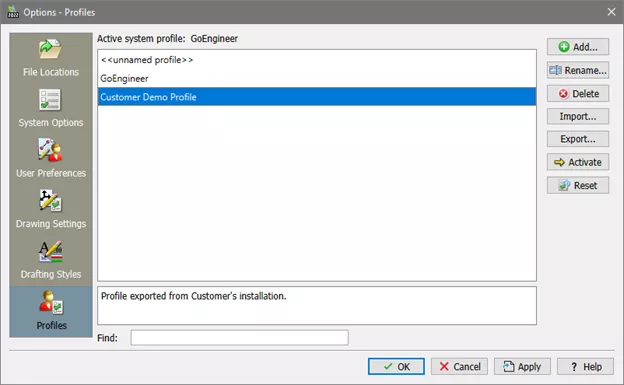
Figure 5: Select your desired Profile from your list and click Activate
Using these steps, you can easily export and import custom profiles for your DraftSight installation.
I hope you found this DraftSight tutorial helpful. Learn more about DraftSight by checking out the articles below.
Learn More About DraftSight
DraftSight and SOLIDWORKS PDM: Getting Started
DraftSight: The Best Choice for 2D CAD
DraftSight Software Packages, Price, and Features
DraftSight Enterprise Plus with 3D Modeling

About Brad Hakeman
Bradley Hakeman is an Application Engineer at GoEngineer. When he isn’t helping customers with their SOLIDWORKS related challenges, he is keeping up on the latest features of SOLIDWORKS. In his spare time, he’s trying to sort out his kids’ soccer schedules and working on household projects, many of which were designed in SOLIDWORKS. Most recently, he has taken up woodturning, currently focusing on pen making.
Get our wide array of technical resources delivered right to your inbox.
Unsubscribe at any time.