DriveWorks Live Integration Theme Setup
DriveWorks Live Integration Theme is a theme used by DriveWorks Live that hosts the DriveWorks Live Web API. It allows DriveWorks to integrate directly into a new or existing website, giving you the ability to customize the website itself to your liking, instead of having to use the pre-made DriveWorks forms through an iFrame.
In this article, we cover the following steps:
- Initial integration theme setup
- Configuring integration theme & client SDK examples
- Setting up multiple websites
The DriveWorks documentation on the Integration Theme can be found here.
There are then two main pieces of the DriveWorks Live Integration Theme: the Integration Theme Server API and the Client SDK. In other words, the different websites communicate with the Integration Theme to display what you want. Since the theme is set up this way, we can set up different websites using the same Integration Theme Server API.
Initial Integration Theme Setup
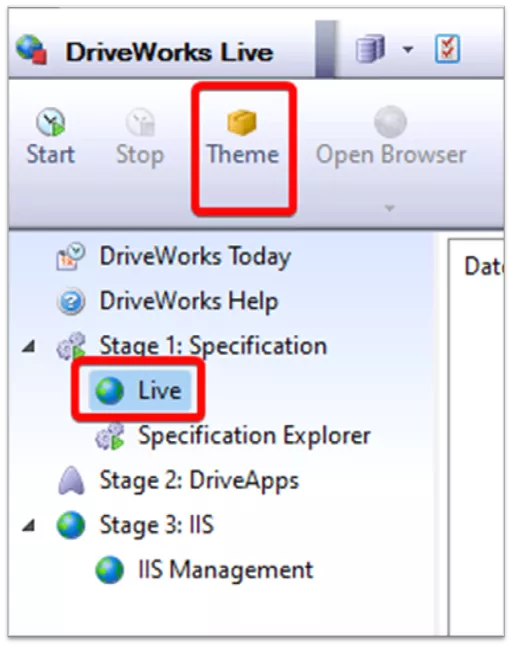
The initial setup of the Integration Theme is simple. First, launch the DriveWorks Live application and log into any group (the group you log into does not matter). Click on Live and then click the Theme button.
Choose the Integration Theme and click Next. Set the path where you want the static files to be stored and whether to copy the client SDK examples to that folder.
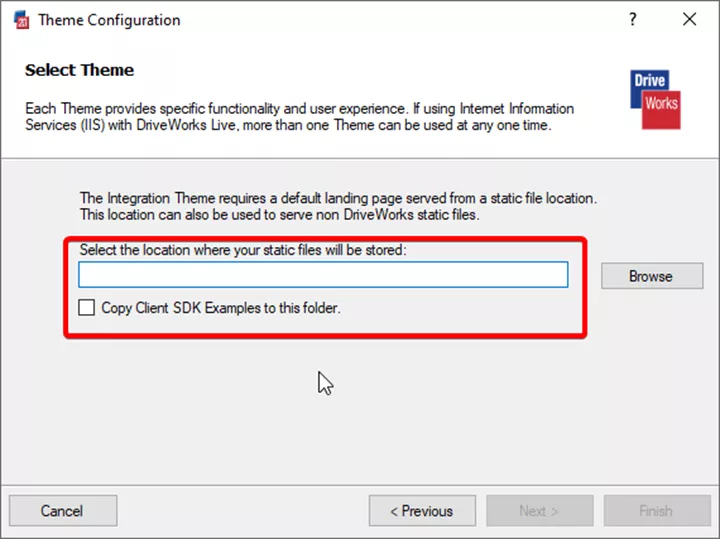
In this article, I will be utilizing the Client SDK example, but it is not necessary to check the box for this example.
Note: An easy way to get all the examples is to use this process, set a different path, check the box, then run it again, set the original path again, and uncheck the box. You'll then have a separate folder with all the examples.
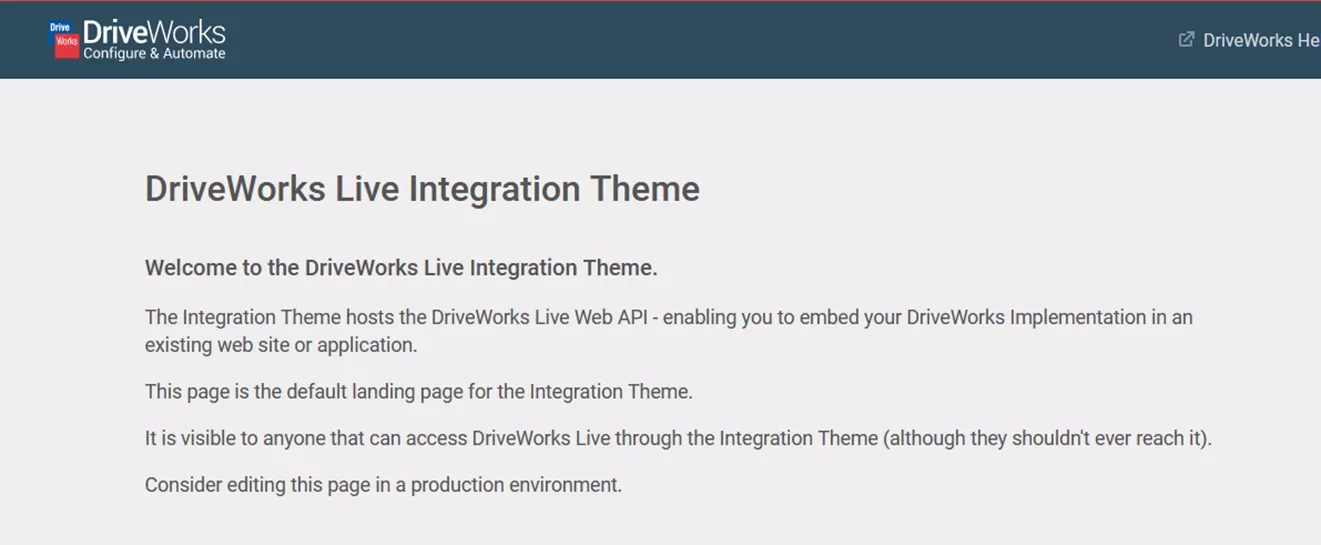
After clicking Finish, click Start and then Open in Browser in the DriveWorks Live application. You should see a website (shown below) telling you this is the default landing page for the Integration Theme and to customize it for use in production environments.
Note: This is the website defined in the static files path we set in the DriveWorks Live application.
You have completed the first part of setting up the DriveWorks Live Integration Theme! Next, we will walk through configuring the Integration Theme and Client SDK examples to use our shared and individual groups.
Configuring Integration Theme and Client SDK Examples
For this section, you must first install and configure IIS for the Integration Theme (documented here). You should then have a website setup pointing to the files in C:\ProgramData\DriveWorks\<version>\Live\Themes\Integration.
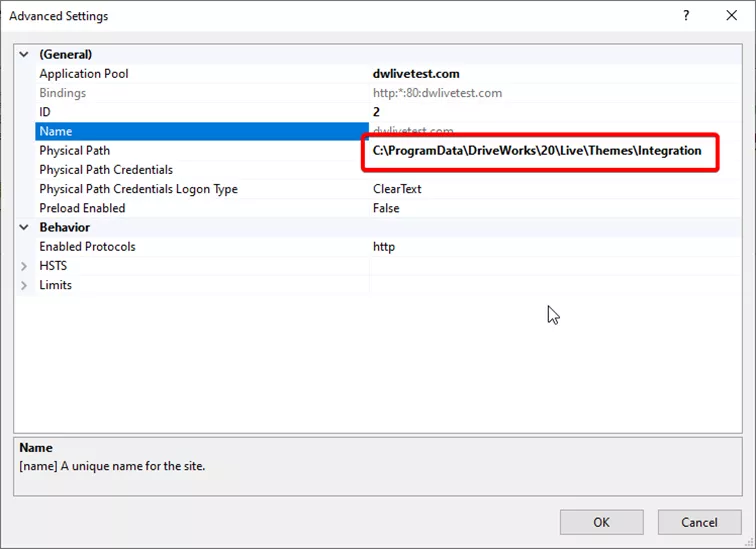
We'll need to configure the Integration Theme Web API and tell it which groups (individual or shared) we will be using on our websites. This is set up in the DriveWorksConfigUser.xml file located in C:\ProgramData\DriveWorks\<version>\Live\Themes\Integration.
We must set up some connections to shared and individual groups in this .xml file. The documentation about what goes in this file can be found here. Setting up shared and individual group aliases can be done as shown below.
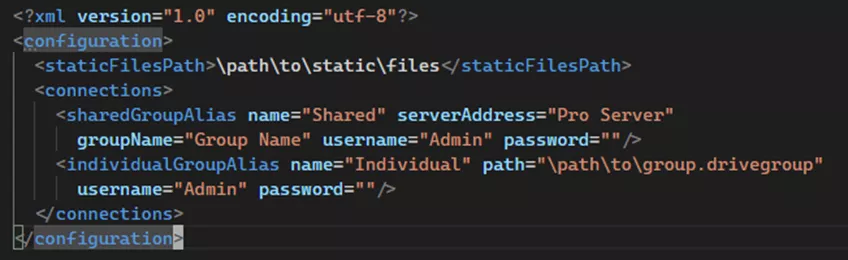
Note: You can set up multiple group aliases in the DriveWorksConfigUser.xml file and choose between multiple groups in the different websites we'll set up.
We will use these group aliases defined in this .xml file in the websites we set up.
Setting up Multiple Websites
While you can set up one single website with all the pieces you want stored in the static files path from the DriveWorksConfigUser.xml file, you can separate it into multiple sites. Perhaps you want to have a site only for internal use and another site for external use. Perhaps you want to have a production site using your production group and another site for testing using a development group.
Whatever the reason, setting up multiple sites with the Integration Theme is simple. For this example, I did not copy the client examples to the static files path to leave the initial site intentionally blank. We will be setting up the Corporate Website and Simple Fullscreen examples as separate websites.
We will be editing the config.js from each of the examples from the DriveWorks client SDK examples to connect them to the group aliases set up in the DriveWorksConfigUser.xml file from earlier.
Here is the modified config.js file from the Simple Fullscreen example:
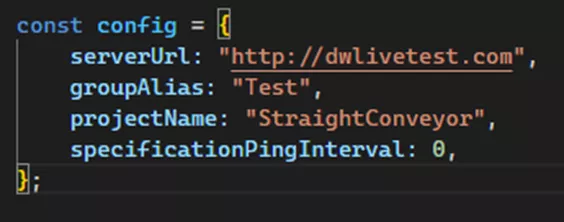
Here, the serverUrl is the URL set in the initial IIS configuration of the Integration Theme, the groupAlias is the alias set in the DriveWorksConfigUser.xml for my shared group, and the projectName is the project being used on that site.
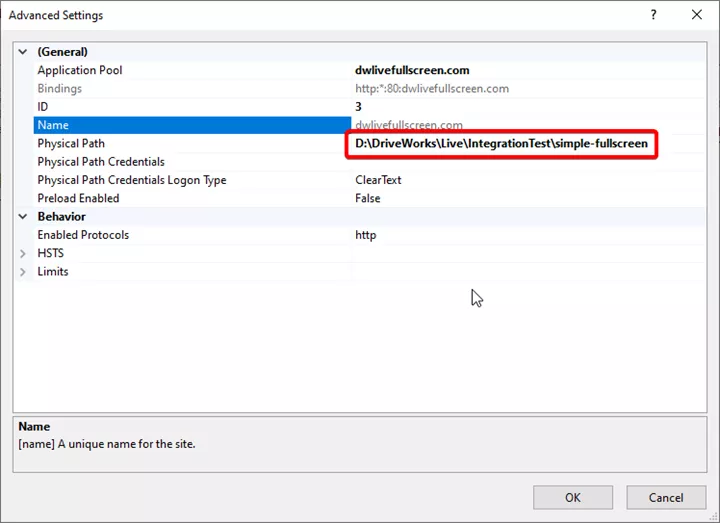
Now, in Internet Information Services (IIS), we will be setting up a new site the same way we set up the first one, except instead of setting the path to be the location of the DriveWorksConfigUser.xml file, we set the path to the Simple Fullscreen files.
Navigating to this second URL, we get this site:
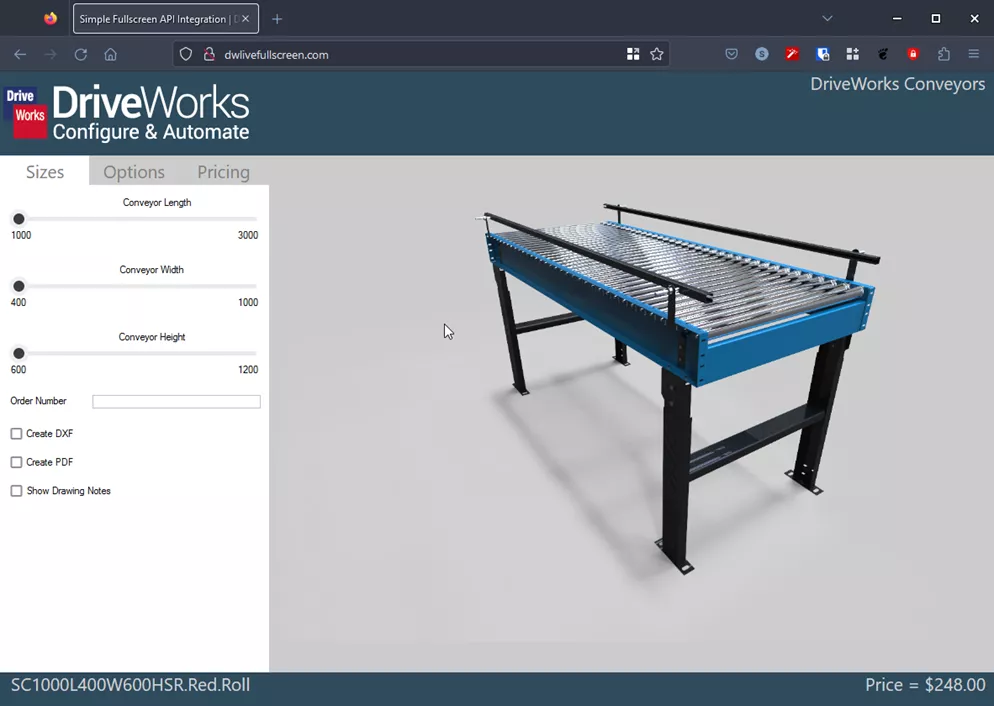
We now have a separate website from the initial one we configured earlier. (I did the same thing with the Corporate Website example, except I used a different group.)
Navigating to this third site, we get this:
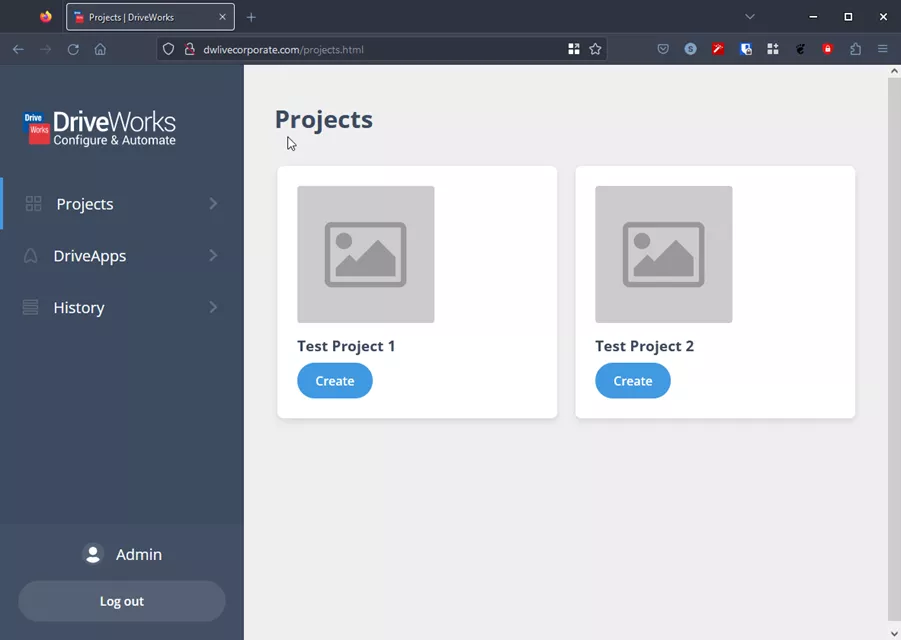
So, there you have it! We have created three different websites, and two are using two different groups, all from the same implementation of the DriveWorks Live Integration Theme.
Related Articles
DriveWorks Child Specifications Explained
Everything New in DriveWorks 21: Rules, Integration, 3D Previews & More
Managing Configurations with DriveWorks and SOLIDWORKS
Everything You Need to Know about DriveWorks Pro
![]()
About Isaac Smith
Isaac Smith is a SOLIDWORKS Technical Support Engineer at GoEngineer.
Get our wide array of technical resources delivered right to your inbox.
Unsubscribe at any time.