Materialise Magics Dental Segmentation for Color PolyJet 3D Printing
While Stratasys PolyJet technology can create extremely realistic, multi-material anatomical models and functional parts for the dental industry, presently, there are few defined solutions for segmenting the teeth from the gums of a typical stone model or processed intraoral scan. This segmentation is a prerequisite for applying a different color/material to each element individually.
The following protocol presents such a workflow. It is an overview of using Materialise Magics software to segment a dental model .STL into separate solid bodies (teeth and gums) and then exporting the assembly to GrabCAD Print so that each body can be individually assigned a material/color for 3D printing on a Stratasys J5 DentaJet or other Stratasys PolyJet System.
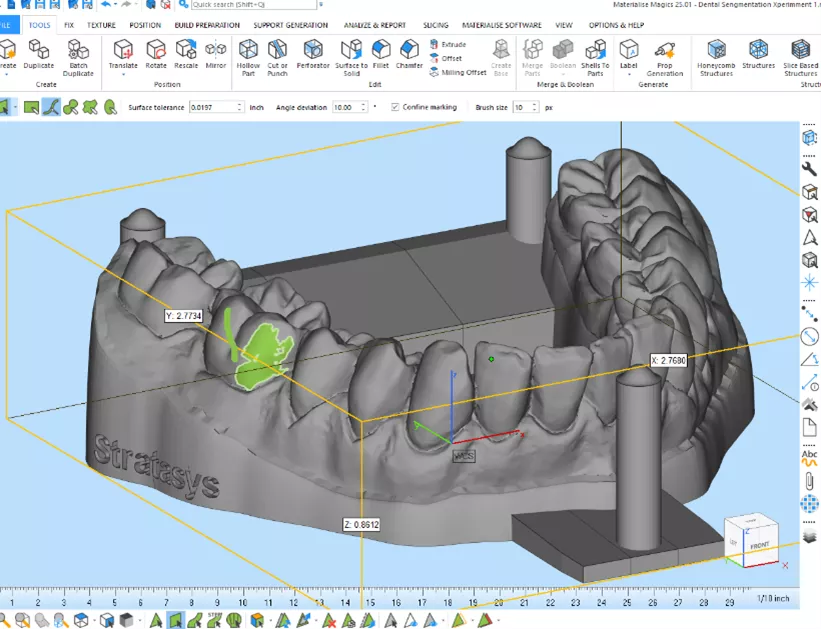
- Import the dental .STL that you want to segment into Materialise Magics. (For this example, I am using version 25.01.)
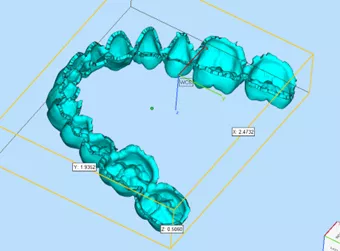
- Use the Triangle Marking tool to designate the surface of the “teeth”.

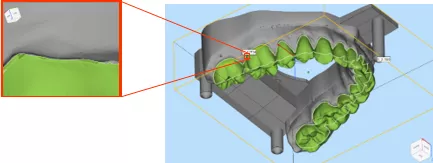
All the “teeth” surfaces have been marked and there are no internal “bad edges”.
Note: It is important to mark each triangle of the tooth surface all the way to interface with the gums. Also ensure that the tooth surface is continuous with no internal holes or gaps. (Display “highlight bad edges” as you mark the surface to assist with this). - In the Surfaces Toolbar select the Separate Surfaces operation.
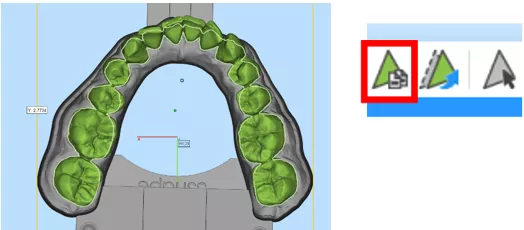
- You will now have two separate “open” surfaces. One of the teeth and one of the gums.
The surfaces are still in their original superimposed position and share the same coordinate system. The parts below are displayed one at a time to show that these are only infinitely thin, digital surfaces and no longer a solid model - and thus uninterpretable by a 3D printer.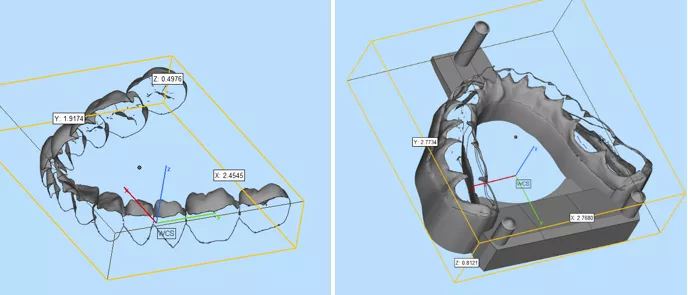
- We must convert the surfaces into independent solid bodies using the Shells to Parts command. Select one of the surfaces and apply the command. You have now converted the surface into a solid shell.
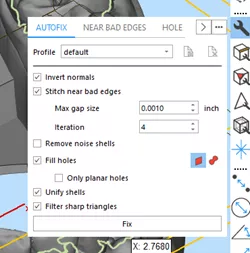
- Repair the new shell’s surfaces with the Autofix Tool.
Repeat steps 5 and 6 for the other open surface.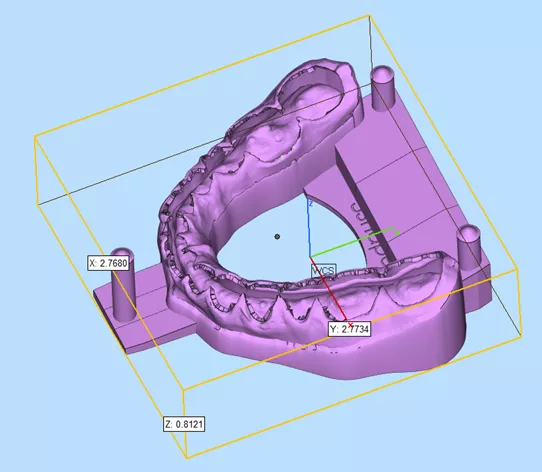
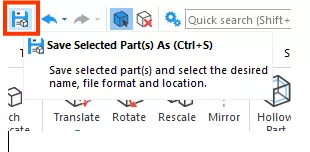
- Export both selected parts as individual .STL files.
- Open GrabCAD Print and import both of the .stl files you created in step 7 as an assembly.
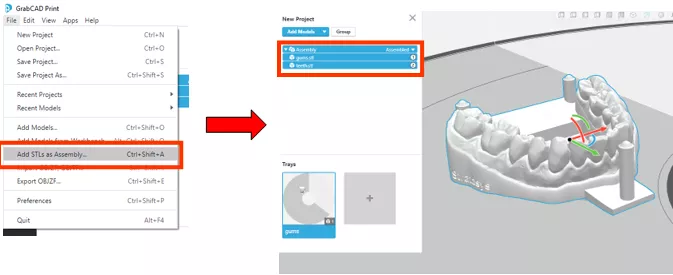
- Apply colors/materials to individual bodies (teeth and gums) as normal in GrabCAD Print and print your part!
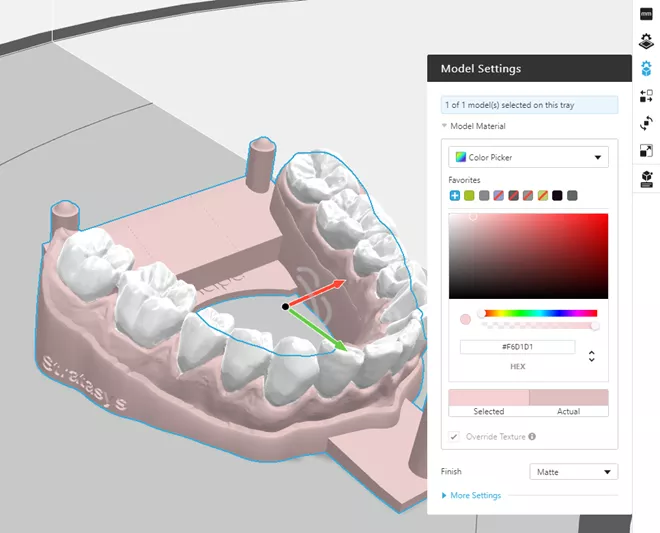
![]() To better understand the fundamentals of color applications in GrabCAD Print, check out this Stratasys GrabCAD tutorial for adding color to a model.
To better understand the fundamentals of color applications in GrabCAD Print, check out this Stratasys GrabCAD tutorial for adding color to a model.
Related Articles
The Future of Digital Dentistry: Stratasys Solutions
Dental 3D Printing Technology: PolyJet and P3
GoEngineer Enters Canadian Market
GrabCAD Shop: Improve Communication & Collaboration

About Richard Cromwell
Richard Cromwell is an Additive Manufacturing Applications Engineer based out of Auburn Hills, MI, having recently joined the team in February 2020. He is a Certified Stratasys Applications Engineer and holds a degree in Technological Science with a specialization in CAD from Oakland Community College in Auburn Hills. Before delving fully into his passion for additive manufacturing and 3D CAD modeling, Richard honed his mechanical design, CAM, and custom fabrication skills while working for over a decade as a renowned craftsman creating custom retrofit piano actions for many of the world’s most prized musical instruments.
Get our wide array of technical resources delivered right to your inbox.
Unsubscribe at any time.