SOLIDWORKS Flow Simulation FEA Load Transfer: Setup, Results, & Static Study
In this article, we demonstrate how to set up a static FEA (Finite Element Analysis) by reusing boundary conditions in SOLIDWORKS Flow Simulation. This method, known as a load transfer, allows flow parameters to act as an external load to solve for the ideal stresses of a model. An ideal scenario for this setup includes a wind velocity acting upon an object that can then be transferred as a loading condition to evaluate the stresses it causes our model to undergo.
We’ll create a flow simulation first to introduce our fluid parameters, then switch to a new static study to transfer it over. Let's get started.
Setup
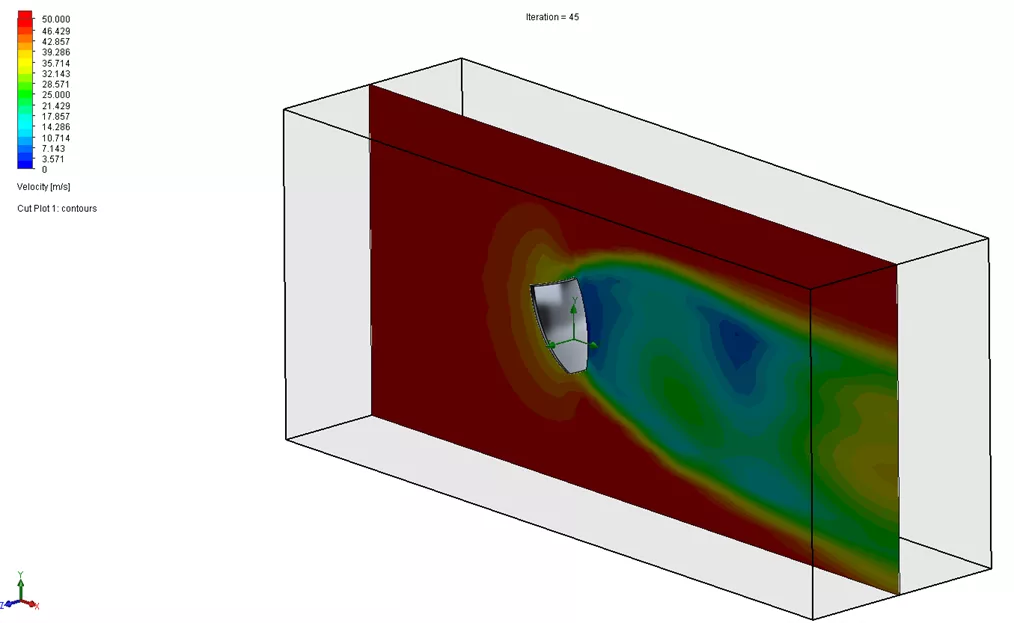
In the following example, we're studying a reflector where a fluid is pushing at a constant x-direction upon the surface. Since one of our goals is to find the amount of force the fluid generates on the surface, we can set up a goal to measure this value.

Once the study is solved, we can review the results and generate several plots, such as a cut plot, to review the fluid movement as well as the goal plot to grab our force value. The force can then be considered when setting up a new static study for stressing the model.

Exporting Results
While we can set up a new static study with the force value in mind, SOLIDWORKS makes it easier to import the values from our flow simulation into a new static study without the need to recreate the loads ourselves.
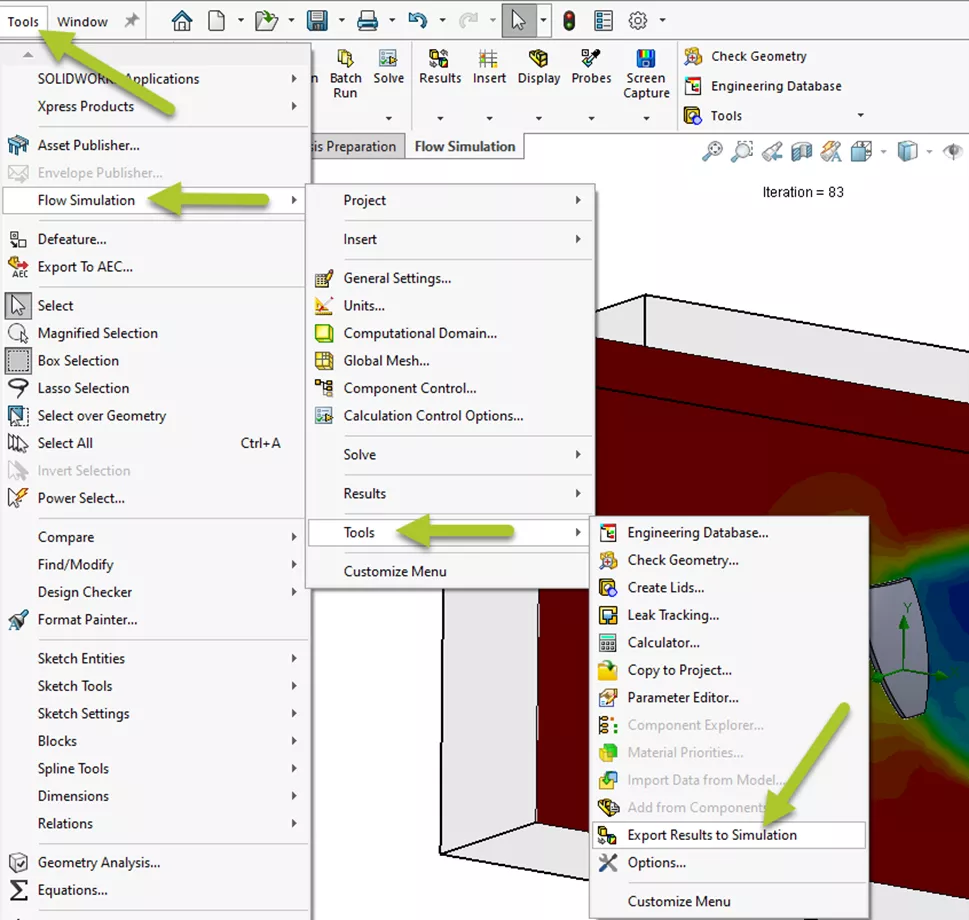
The first step is to ensure the flow results file is saved. By going to Tools > Flow Simulation > Tools > Export Results to Simulation, SOLIDWORKS will update the .fld result file with parameters that can be used in a new static study.
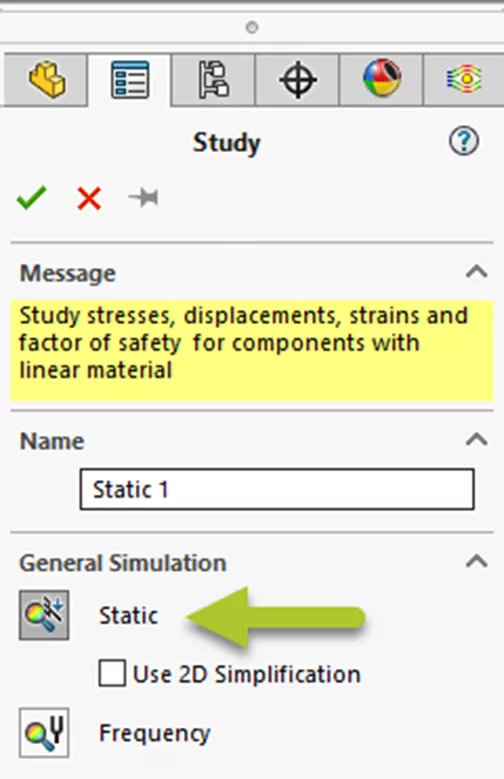
Creating a new Static Study
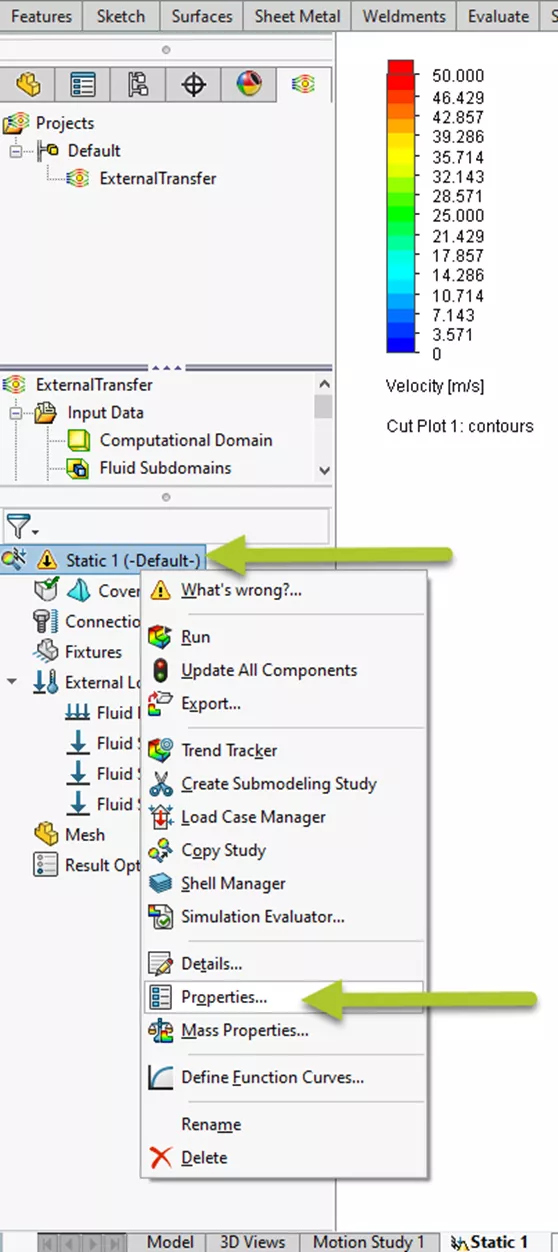
After exporting the results file, create a new static study and, at the top of the study, right-click > Properties...
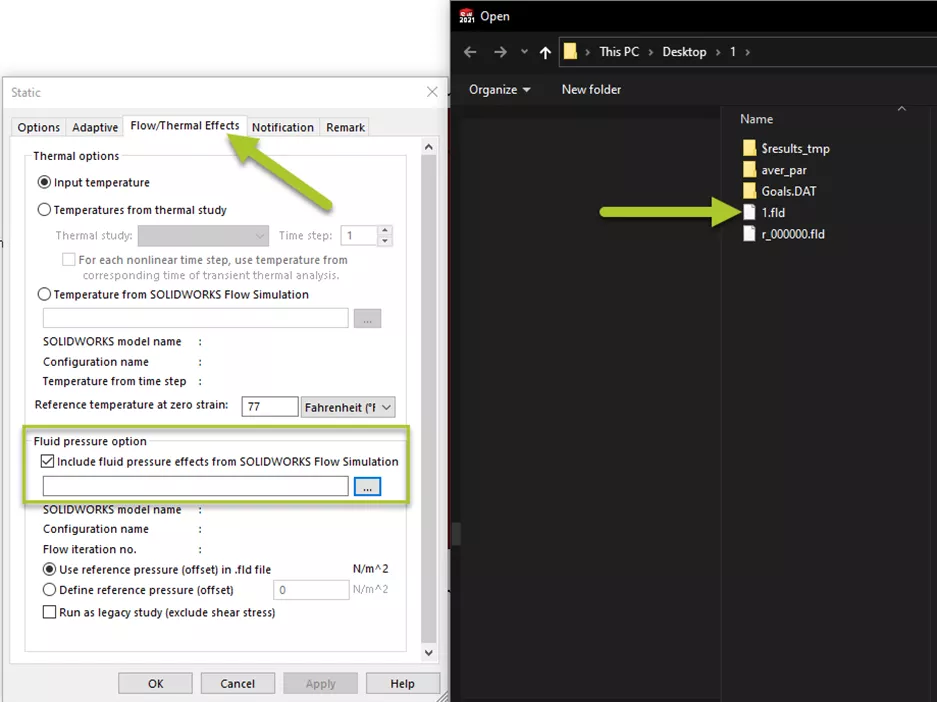
In the Flow/Thermal Effects tab, go to the Fluid Pressure option and check the option Include fluid pressure effects from SOLIDWORKS Flow Simulation.
We can then browse to the folder where our .fld file is stored. Once selected, hit OK on the window.

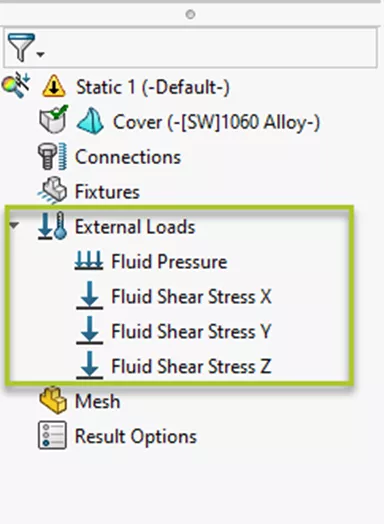
Back on the static study, the external loads will now contain several new items including the fluid pressure and fluid shear stress results. These loading conditions will now act as the fluid effects we ran previously from our flow simulation. Once we run the study, we can check the stresses induced on our model.
![]() Want to learn more? Check out this YouTube video for a demonstration of these tips, tricks, and best practices.
Want to learn more? Check out this YouTube video for a demonstration of these tips, tricks, and best practices.
I hope you found this SOLIDWORKS Flow Simulation tutorial helpful. Check out more tips and tricks listed below.
More SOLIDWORKS Flow Simulation Tutorials
SOLIDWORKS Flow Simulation Recirculating System Scenario
SOLIDWORKS Flow Simulation Design of Experiments and Optimization Study
Understanding Flaps Using SOLIDWORKS Flow Simulation Parametric Study
SOLIDWORKS Flow Simulation Convergence Solver Quick Tip

About Jackie Yip
Jackie Yip is a Technical Support Engineer at GoEngineer. When Jackie isn’t assisting customers or teaching a SOLIDWORKS Essentials class, he enjoys road biking and keeping up on the latest tech trends.
Get our wide array of technical resources delivered right to your inbox.
Unsubscribe at any time.