SOLIDWORKS PDM Professional Web2 Upgrade
This article outlines the steps necessary to upgrade Web2 from 2016 SP0 or older to 2016 SP1 or newer. When upgrading Web2 from 2016 SP1 or newer, the existing application and application pool will be upgraded automatically by the SOLIDWORKS PDM Installation Manager and the following steps do not need to be performed.
The Upgrade Process
The upgrade process involves manually removing the existing installation of Web2 and installing the newer version. The following steps below are taken from the SOLIDWORKS solution S-069296 and you can reference this solution from the SOLIDWORKS knowledge base on your SOLIDWORKS Customer Portal account for more information.
- Stop the Internet Information Server (IIS) service 'World Wide Web Publishing Service' by right-clicking on the webserver name at the top of the IIS tree in the IIS manager.
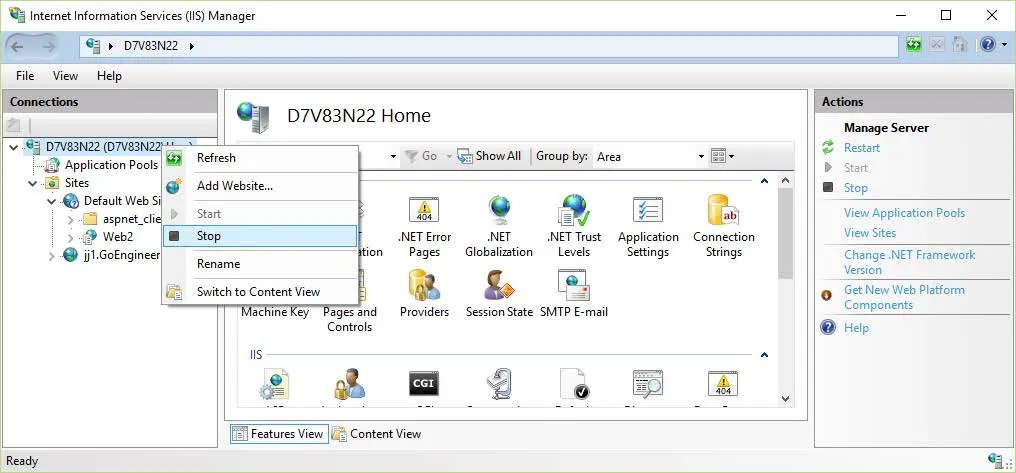
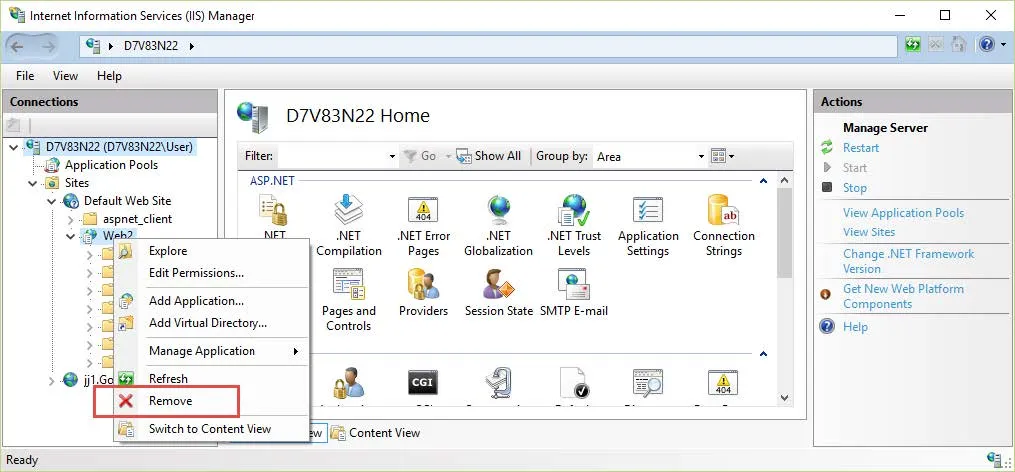
- Open IIS Manager, expand 'Sites', expand 'Default Web Site', and delete the previous Web2 application by right-clicking on it and selecting ‘Remove’.
- Select 'Application Pools' and delete the old Web2 application pool.

- Default the older web2 server files (the files are found inside the folder containing the 'web.config' file and subfolders).
- (Default file location is here: 'C:\inetpub\wwwroot\SOLIDWORKSPDM\Web2\').
- You can keep a copy of the older 'web.config' file to see what modifications were made to the web2 server settings previously.
- Right-click the webserver name and select 'Start' to start the IIS server service.
- Install the 2016 version of Web2 by running the SOLIDWORKS PDM Server install from the 2016 setup media.
- The Web2 server install will automatically create an application pool named 'SOLIDWORKS PDM Web2' and an application named 'SOLIDWORKSPDM'.
- Edit the 'web.config' file with the vault name(s) and other edits that were made to the previous version of the file.
- In IIS manager, select 'Application Pools', right-click 'SOLIDWORKS PDM Web2' and select 'Advanced Settings'. Under 'Identity', enter the username and password of the currently logged in Windows account (or enter an account that has logged in to the IIS server and accessed the local vault view at least once).
- SWPDM 2016 Web2 should now be ready to use. The default web address is: 'http://ServerName/SOLIDWORKSPDM/'.
Expland your SOLIDWORKS PDM Skillset
SOLIDWORKS PDM Web2 What's New 2020

About Jeff Jensen
Jeff is a Sr. Technical Support Engineer at GoEngineer and has been using SOLIDWORKS since 2004. He has earned a Bachelors in Design Engineering Technology from Weber State University and has used SOLIDWORKS for design and drafting in the aerospace, architectural and machine design industries.
Get our wide array of technical resources delivered right to your inbox.
Unsubscribe at any time.