SOLIDWORKS STL Import Settings Overview
When importing STL files into SOLIDWORKS, checking the import settings you are using can avoid issues when editing the files, taking measurements, and inserting them into Assemblies. To access the import settings, go into the SOLIDWORKS System Options > Import, and adjust the dropdown to STL/OBJ/OFF/PLY/PLY2.
This article provides an overview of the different STL import options in SOLIDWORKS including:
- Solid and Surface Body
- Mesh Body
- Graphics Body
- Units
Solid and Surface Body
When going to import an STL file as a Solid/Surface body, SOLIDWORKS will attempt to bring it in as such. If the file is too large, SOLIDWORKS will recommend importing the file as a Mesh Body or Graphics Body instead. When importing the file as Solid/Surface body with Mesh Body options selected, you can choose each individual face, edge, vertex, and midpoint. If the body can’t be fully imported as a Solid Body, SOLIDWORKS will bring it in as a mix of Surface and Solid Bodies. (Figure 1)
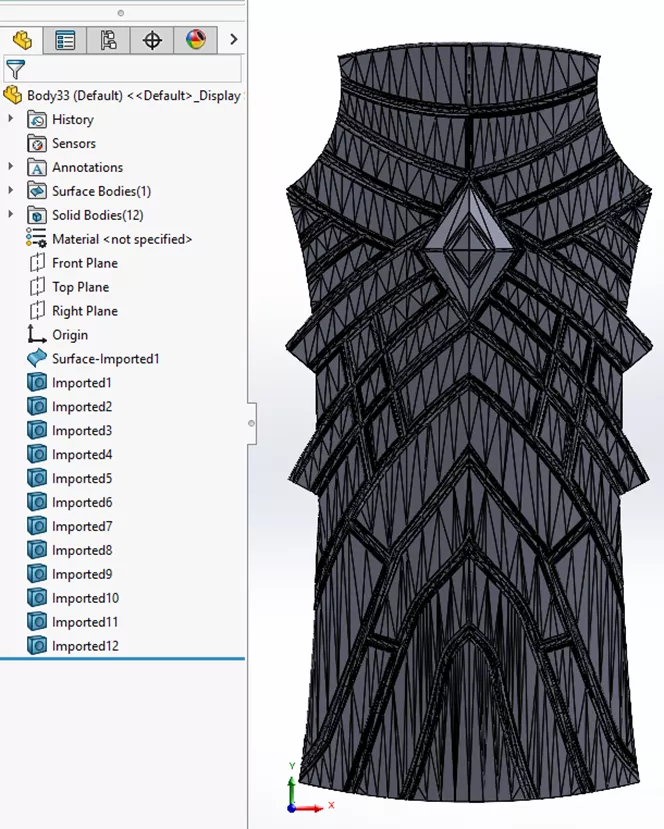
Figure 1: Solid Body import
Mesh Body
Mesh Body options are only available when importing a body as a Solid or Surface Body and largely affect how you can select faces, edges, and vertices. When the option to “Create mesh bodies bounded by single faces” is active during import when you select the part, it will highlight the entire model and you will need to utilize different filter options to select the edges and vertices.
With the second option, “Group Facets into Faces”, during import, SOLIDWORKS will attempt to group the faces together using its best estimate based on the facets. Figure 2 below shows how differently the model looks when these options are selected. Having both options active can also change how many Solid Bodies and Surface Bodies are created based on the groupings.
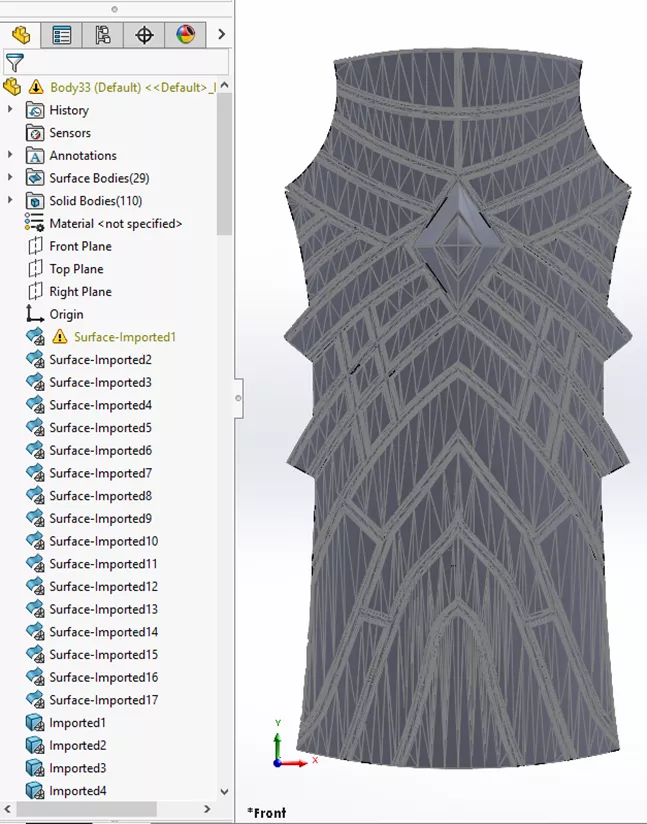
Figure 2: Solid Body import with Mesh Body options active
Graphics Body
Loading an STL as a Graphics Body is fast because it is not yet converting the graphics data into model data. Depending on the size of the STL file, SOLIDWORKS will trigger this mode automatically. When importing the file as a Graphics Body, it will look similar to the Solid and Surface Body imports but will have a Graphics Body icon in the FeatureManager Design Tree folder. (Figure 3)
With Graphics Body, the main difference is that you can begin to decimate the mesh and lower the facet count before converting the Mesh Body into a solid.
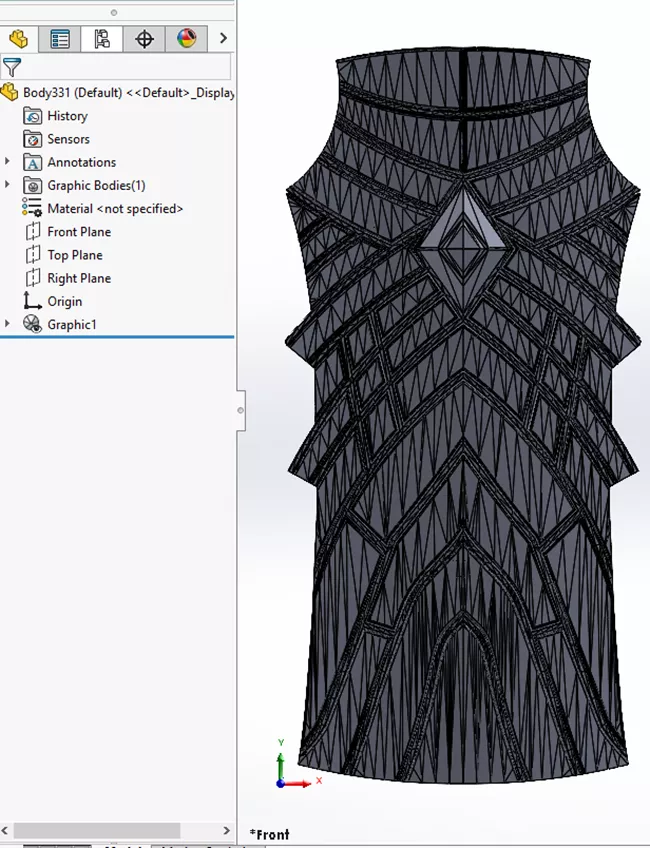
Figure 3: Graphics Body import
Units
The last STL import option is Units. To import properly, this option must match the setting used to create the STL. Incorrect Units can lead to large size differences in the scale of the part (e.g., a 1mmx1mmx1mm measuring as 1inx1inx1in or greater), resulting in manual adjustment later.
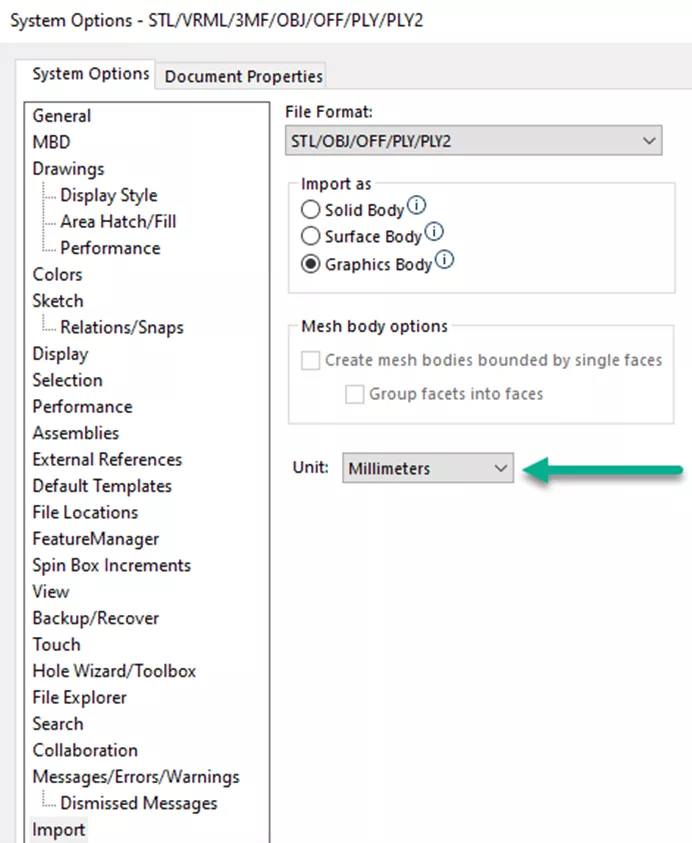
Figure 4: Units location
I hope this information discussing the different import options for STL’s in SOLIDWORKS has been helpful.
Working with mesh models? Check out the YouTube videos below.
![]() Do You Mesh Well with Others? Using Mesh Data in SOLIDWORKS
Do You Mesh Well with Others? Using Mesh Data in SOLIDWORKS
![]() Working with Mesh Files in SOLIDWORKS
Working with Mesh Files in SOLIDWORKS
More SOLIDWORKS Tutorials
How to Save a SOLIDWORKS Assembly as an STL File
Insights of SOLIDWORKS Surfacing: Tips & Tricks
How to Create an Extrude-Cut on a Curved Surface in SOLIDWORKS
Solving Mesh Failures in SOLIDWORKS Simulation with Mesh Controls
![]()
About Blaze Johnson
Blaze Johnson is a Sr. SOLIDWORKS Support Engineer at GoEngineer.
Get our wide array of technical resources delivered right to your inbox.
Unsubscribe at any time.