SOLIDWORKS Wrap Feature Tutorial
The SOLIDWORKS Wrap feature allows you to remove or add material to a part by projecting a sketch around a surface.
Where is the Wrap Feature Located?
The Wrap feature is located in the Features toolbar next to the rib and intersect tools. You can also find the wrap tool under Insert > Features > Wrap in the drop-down menu.

How to Use the Wrap Feature
To use the wrap feature, you first need to create a reference plane tangent or parallel to the part surface. For this example, we made the plane by selecting the right plane as the first reference and the part surface for the second reference with the perpendicular option enabled.
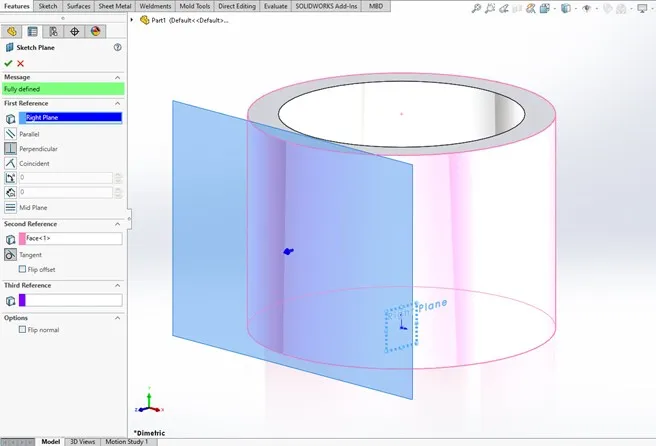
There are many ways to create planes in SOLIDWORKS. If you want to learn more about creating reference geometry, please follow the link below.
 SOLIDWORKS - Creating Reference Geometry & Planes
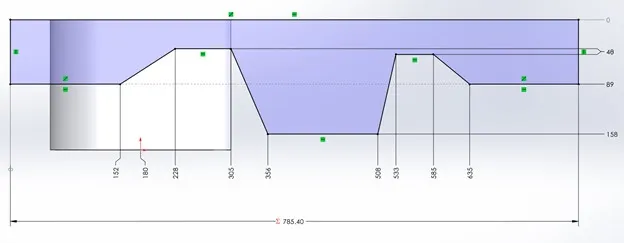
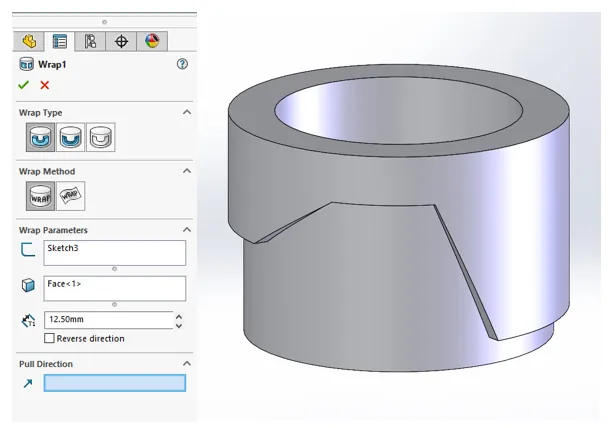
Next, draw a closed contour sketch on the reference plane created in the last step. In the example below, there is a dimension controlling the overall length. The value of this dimension is set equal to the circumference of the part with a simple equation. The equation guarantees that the Wrap feature will cover the whole circumference of the cylindrical face.
After exiting the sketch, the setup is complete, and you are ready to use the wrap tool.
Wrap Types
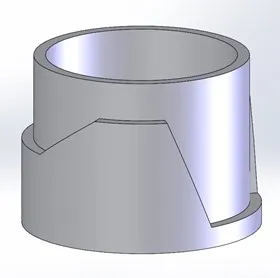
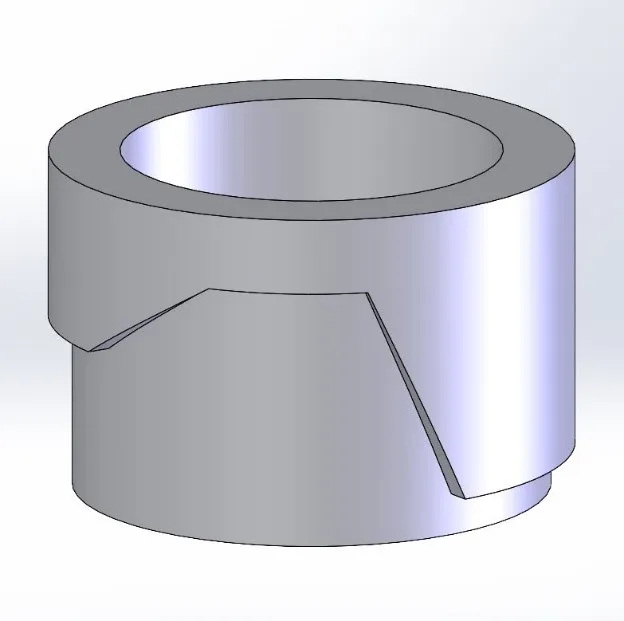
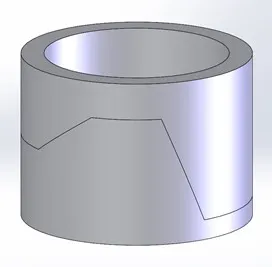
Several wrap types are available in the PropertyManager: emboss adds material, deboss removes material, and the scribe option splits the face following the sketch contour.
The examples below show the difference between the wrap types on our model.
Deboss
Emboss
Scribe
You also need to consider two wrap methods when using the wrap tool: analytical and spline surface.
Before the release of SOLIDWORKS 2017, the wrap feature could only accommodate conical and cylindrical surfaces. In 2017 the spline surface method was added, allowing the wrap tool to project onto any surface.
The spline surface option will project a sketch onto complex faces, but it will not wrap around a model.
Since we wanted our extrusion to wrap around the model, we chose the analytical method for this example.
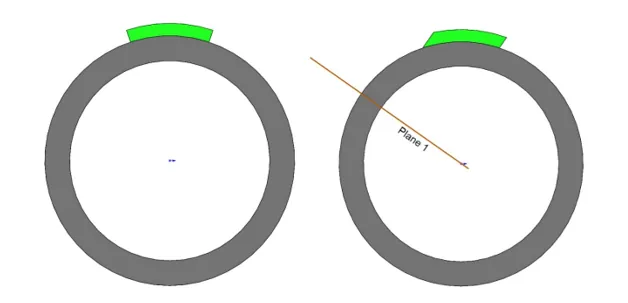
By default, emboss and deboss will extrude the feature normal to the sketch plane, but we can specify a pull direction to change the extrusion direction. You can select a line, linear edge, or plane to specify a pull direction. The example below shows the effect of choosing an angled plane (Plane 1) for the pull direction compared to no selection.
I hope that you found this SOLIDWORKS tutorial helpful. Please see the links below to view more useful SOLIDWORKS tips and tricks.
Learn More About SOLIDWORKS
SOLIDWORKS Convert Entities Quick Tips
Top Three Causes of the SOLIDWORKS Journal File Warning
Auto-Ballooning Hidden Components in SOLIDWORKS

About Brady Daniels
Brady Daniels is a CSWE and Application Engineer at GoEngineer, specializing in SOLIDWORKS Sheet Metal, Weldments, Drawings, Surfacing, and MBD. He has been an avid SOLIDWORKS user since 2015 and earned a degree in Mechanical Engineering from Iowa State University in 2019.
Get our wide array of technical resources delivered right to your inbox.
Unsubscribe at any time.