Kinetic Art Project: Using SOLIDWORKS and Casting Fins
Thank you for returning to my Kinetic Art Project series. In this final segment of the series, I’ve used SOLIDWORKS to check for mass properties and documented the process for casting the fins.
For reference, links to each article in this series are listed at the bottom of this post.
Prep Work for Casting the Fins
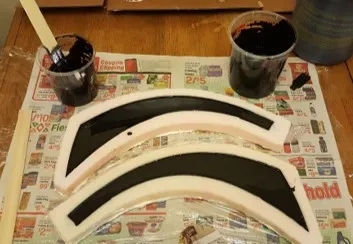
Due to the disaster from creating the mold, I was a bit paranoid, so I did more homework to make sure I had all the necessary tools to complete the job. Since I was working on my kitchen table, I was worried about spillage onto the wood. So, I put down a generous sheet of plastic, followed by a newspaper for easier cleanup. Making sure the mixing buckets were properly sized, I also gathered adequate stir sticks. And, safety first, so I thoroughly read over the material datasheet and all instructions.
There was some mold prep involved. I trimmed some flashing that got under the master fin during the pour. Along with that, I applied a mold release to ensure a clean release of the plastic.
The Plastic for Casting the Fins
For my plastic, I used AlumiRes RC-3 Black. Some admirable traits of this material are a shore hardness of 74D, low shrinkage (.008 in/in), a de-mold time of 10-15 minutes, and as a plus, it is one of the cheaper options I found. The AlumiRes RC-3 requires a 1:1 mix ratio (by weight or volume), making it easy to measure, and its very low viscosity makes it easy to stir and pour. It also has a pot life of 2 minutes. After my silicone hardened faster than expected, I was a bit scared. Fortunately, that was not an issue, and it turned out kind of nice.
Using SOLIDWORKS
In SOLIDWORKS, I checked the mass properties for the pair of fins to find the volume of the part. The fin is 9.4 fl oz, and 18.8 fl oz per pair. Because I was pouring two identical volumes, and the mix ratio was 1:1. The math is very easy. I measured 10 oz of part A, and 10 oz of part B. The technical document suggested pouring part B into part A. This is useful because part B is less viscous than A. Therefore, by using SOLIDWORKS to check the mass properties I was likely to have less material hanging around in the cup after the pour,while providing a more even mixture.
When mixing the two materials, it is important to scrape the sides and bottom of the mixing container. It is vital to have the material thoroughly mixed, but I needed to pay attention to the 2-minute pot life. Once I was convinced it was properly mixed, I started pouring. I poured at the lowest point, making sure the molds were properly filled, then I waited at least 15 minutes to remove my new parts.
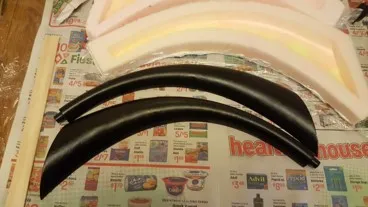
Quick Demold time!
The 15-minute demold time was fantastic; I was able to get many parts cast in a relatively short time. The whole process was rather exothermic. The part was warm (almost hot) as I removed it from the silicone. There was a small bit of -post-processing, as the plastic was razor-sharp along the back of the part. I accidentally cut my hand just grabbing the part, so I took that edge down with a deburring tool and finished it up with a quick pass using sandpaper. Now the new parts are ready for use.
Texture of the Fins
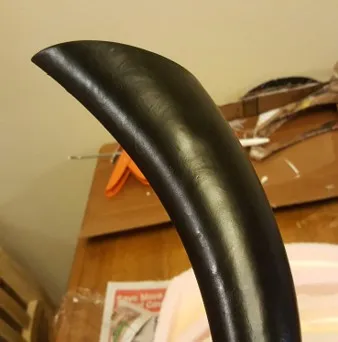
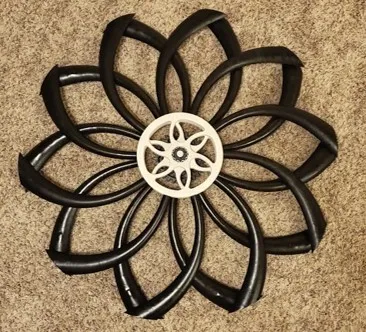
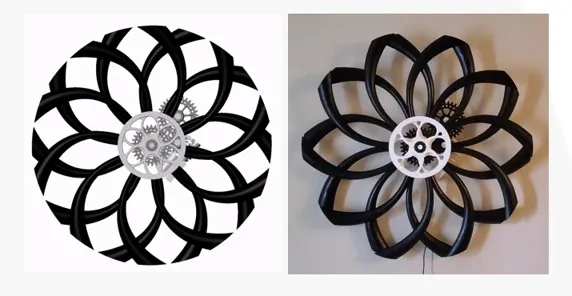
In all, there were some physical flaws to the part. There was some added texture to the surface and a bulge corresponding to the locations where the silicone had been rather thin. These are due to my innocence in never doing this before. Still, I think they came out fabulous, and I believe I will do better next time. I attached the fins to a hub, and they fit perfectly. I might try a non-circular mounting post next time; they tend to spin in the holes on the hub making it troublesome to get them aligned correctly.
The main flaws in my mold are the bulges and the unexpected texture. The bulges can be remedied by mixing the silicone properly and getting a uniform pour.
As for the unexpected texture, I believe this is a product of the mold release I used. I applied it a bit thick and was afraid the silicone would bond to the part if I wiped it off. So, I left it as it was, and the texture it created on the part was reproduced on the mold, and consequently, every part.
Kinetic Art for the Win!
Although the fins did not come out even or as smooth as expected, I still think this was a complete success. Therefore, I proudly display this kinetic art creation in my living room to wow my visitors.
List of Kinetic Art Series links for your reference:
Part I: Introduction
Part II: Toolbox Gears
Part III: Worm Gear
Part IV: Modeling the Fin
Part V: Creating the Silicone Mold

About Brandon Harris
Brandon is a BYU-Idaho graduate with a Bachelor’s Degree in Mechanical Engineering. He is an avid tinkerer, and consummate rapid prototype hobbyist with prior experience designing for the Architectural/Construction industry. Brandon is part of the technical support team for GoEngineer serving as a PDM specialist since August 2018.
Get our wide array of technical resources delivered right to your inbox.
Unsubscribe at any time.