3D Printing Color Models from SOLIDWORKS Assemblies
This guide will demonstrate how to properly save SOLIDWORKS assemblies for color 3D printing.
Saving STL files for color 3D printing
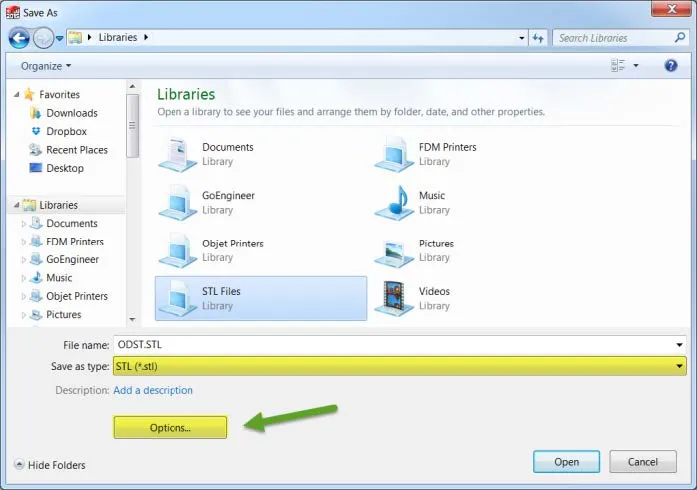
When the SOLIDWORKS assembly is ready for 3D printing, change the file Save as type to STL then click on the Options box.
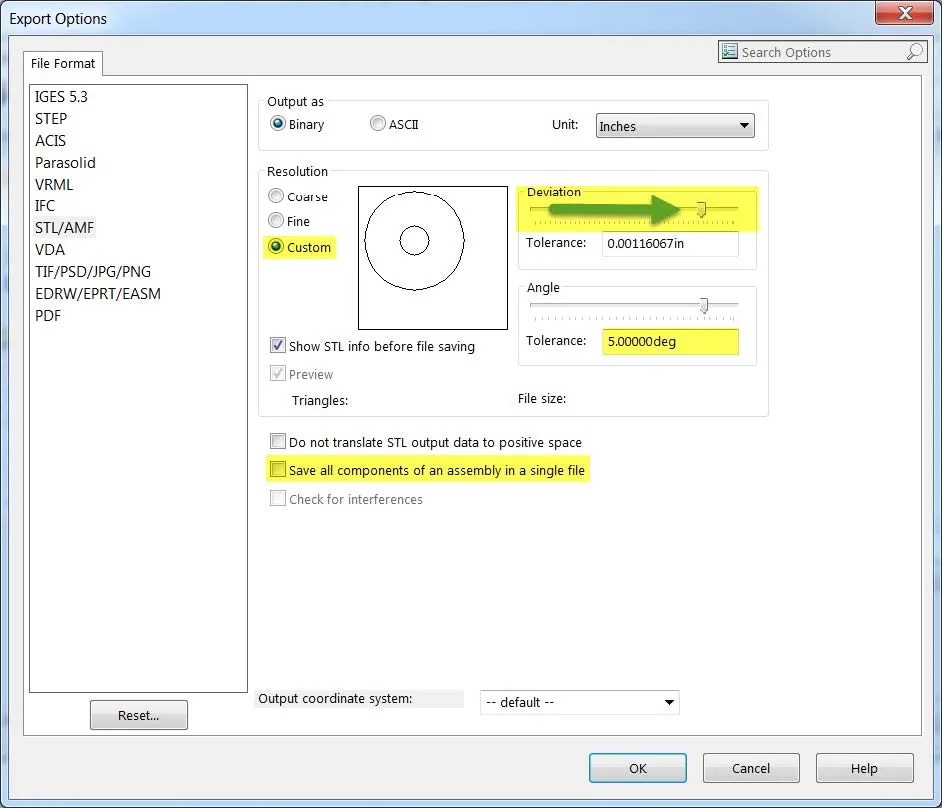
Select the Custom bubble, set the Angle Tolerance to 5°, and match the Deviation slider bar to the Angle bar for a good resolution file. Make sure the Save all components of an assembly in a single file box is unchecked. This will output multiple STL files for each body.
Loading the files in Objet Studio
Select: Insert model

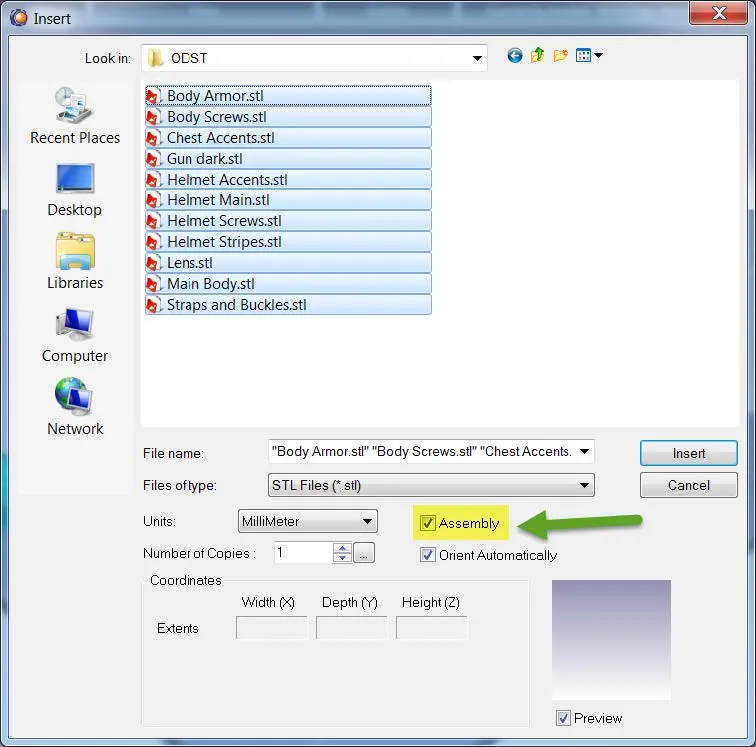
Browse your STL files and select all the STLs that pertain to the desired assembly. Make sure the Assembly box is checked so that Objet Studio recognizes that all the selected files belong to an assembly. Objet Studio then uses the SOLIDWORKS assembly coordinates to stitch each file together as one while maintaining separate bodies/shells.
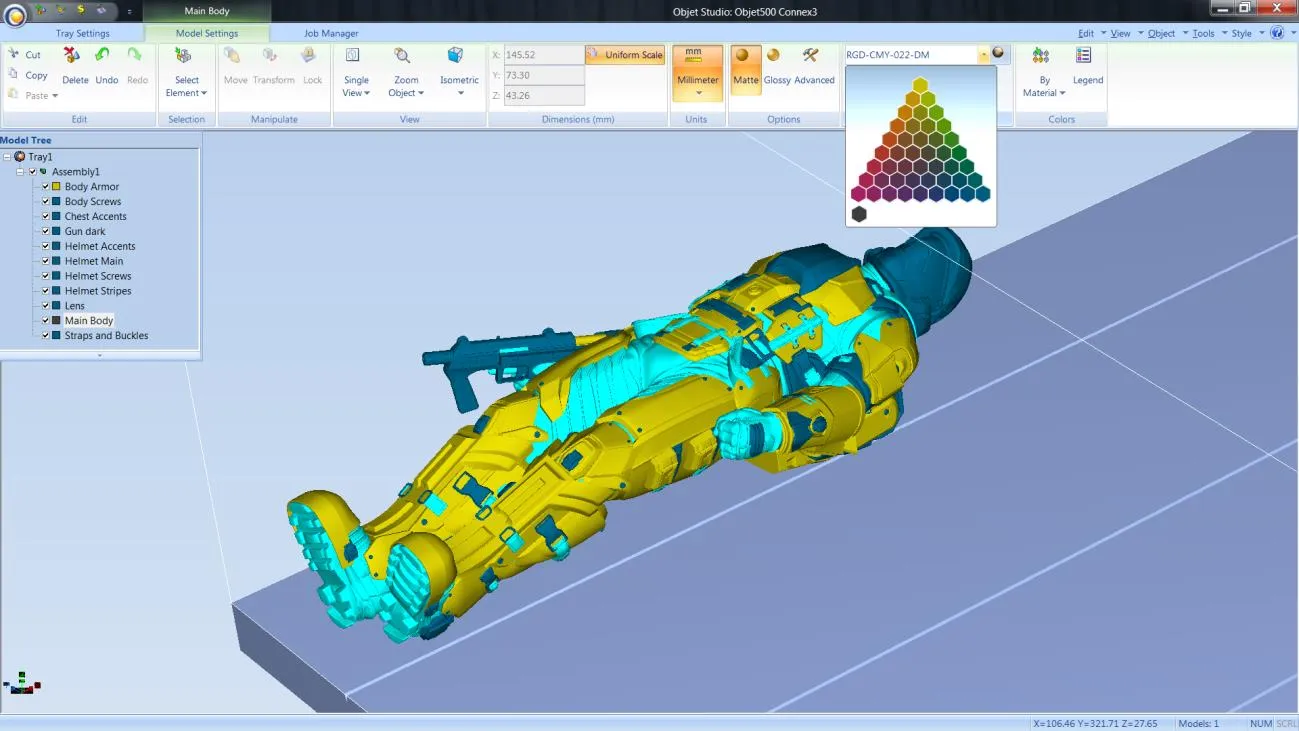
This will allow us to screen-select individual shells or use the Model Tree to assign different colors as opposed to selecting the entire model.
Click on the desired body, and a pop-up triangle of choices will allow color selection. You can select multiple bodies by holding the shift key.

You can also select a body from the Model Tree and change the color under the Multiple Materials menu shown in the image below.
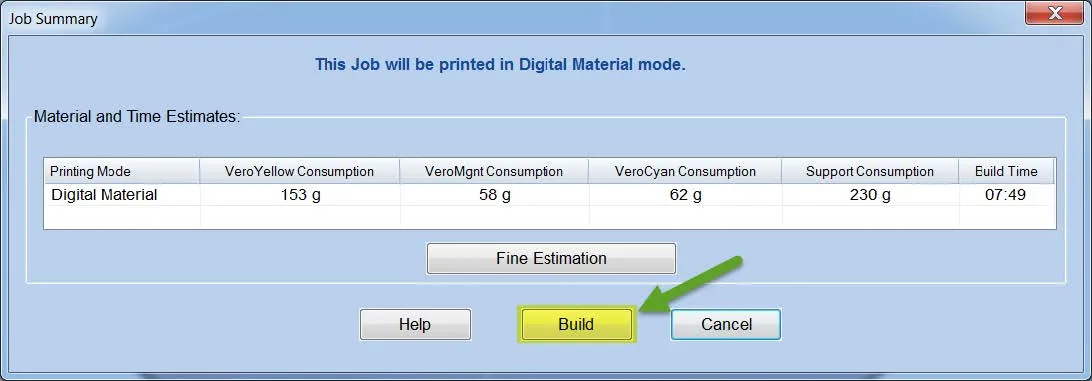
Once you are satisfied with all the color selections, we can now move on to the next steps. Click on the Placement button. Keep in mind that this will auto orient your part, so if you want to keep a certain orientation, make sure you lock the orientation. Then click on the Validate button, to make sure there are no problems with the file. Finally, click on the Build button to save the tray and send it to the Job Manager tab.

When you hit the build button, you will get the window shown below. Go ahead and click on the Build button to save the tray.
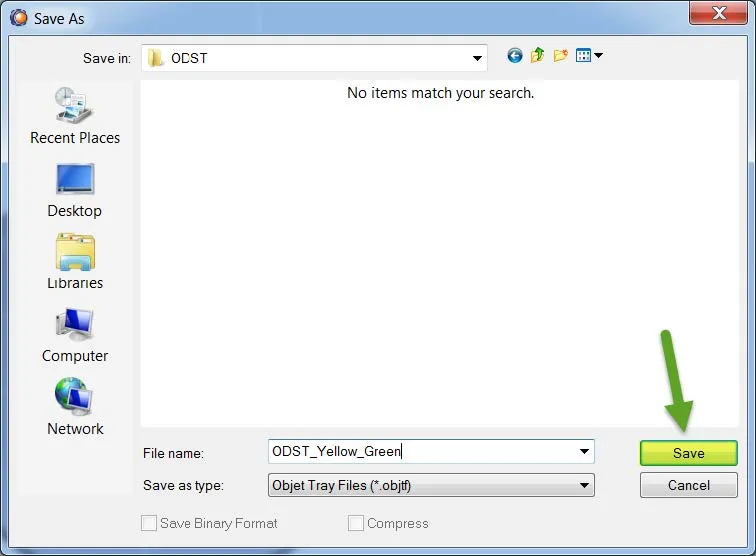
Rename the tray if you wish and save it in the desired location.
The tray will Automatically go to the Job Manager tab and will be ready to build.
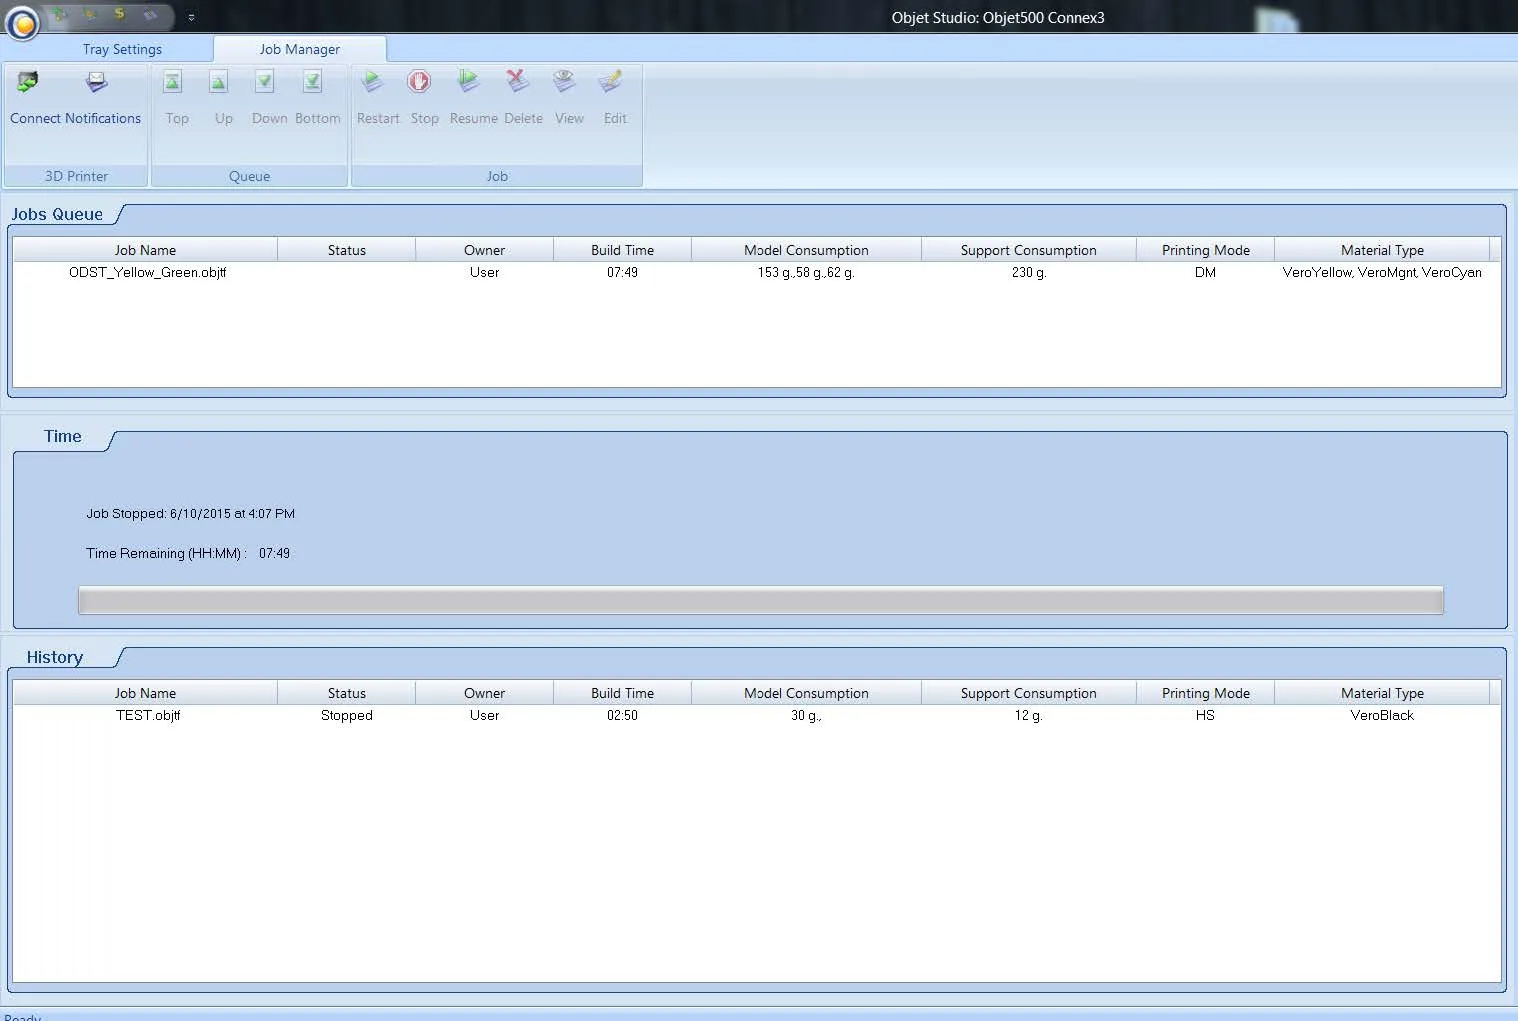
The job will now start printing if the Connex is online. If not, switch your screen to the Connex console and select the online button.
More 3D Printing News
Meet the Stratasys H350 3D Printer
Stratasys J35 Pro Material Configurations
Painting Clear PolyJet Parts: 3D Printing Hacks
Stratasys VeroUltra White and Black Materials for Color 3D Printing
![]()
About GoEngineer
GoEngineer delivers software, technology, and expertise that enable companies to unlock design innovation and deliver better products faster. With more than 40 years of experience and tens of thousands of customers in high tech, medical, machine design, energy and other industries, GoEngineer provides best-in-class design solutions from SOLIDWORKS CAD, Stratasys 3D printing, Creaform & Artec 3D scanning, CAMWorks, PLM, and more
Get our wide array of technical resources delivered right to your inbox.
Unsubscribe at any time.