Create Engraved Lettering in SOLIDWORKS Visualize
SOLIDWORKS Visualize is an excellent go-to for photorealistic renderings for marketing announcements and brochures for your company’s product(s), among many other use cases. It became the standard photorealistic software offered by SOLIDWORKS following the retirement of PhotoView360. Starting in 2024, SOLIDWORKS Professional and Premium now include a SOLIDWORKS Visualize Standard seat.
This article provides some tips and tricks for how to make your engraved lettering stand out in your product marketing.
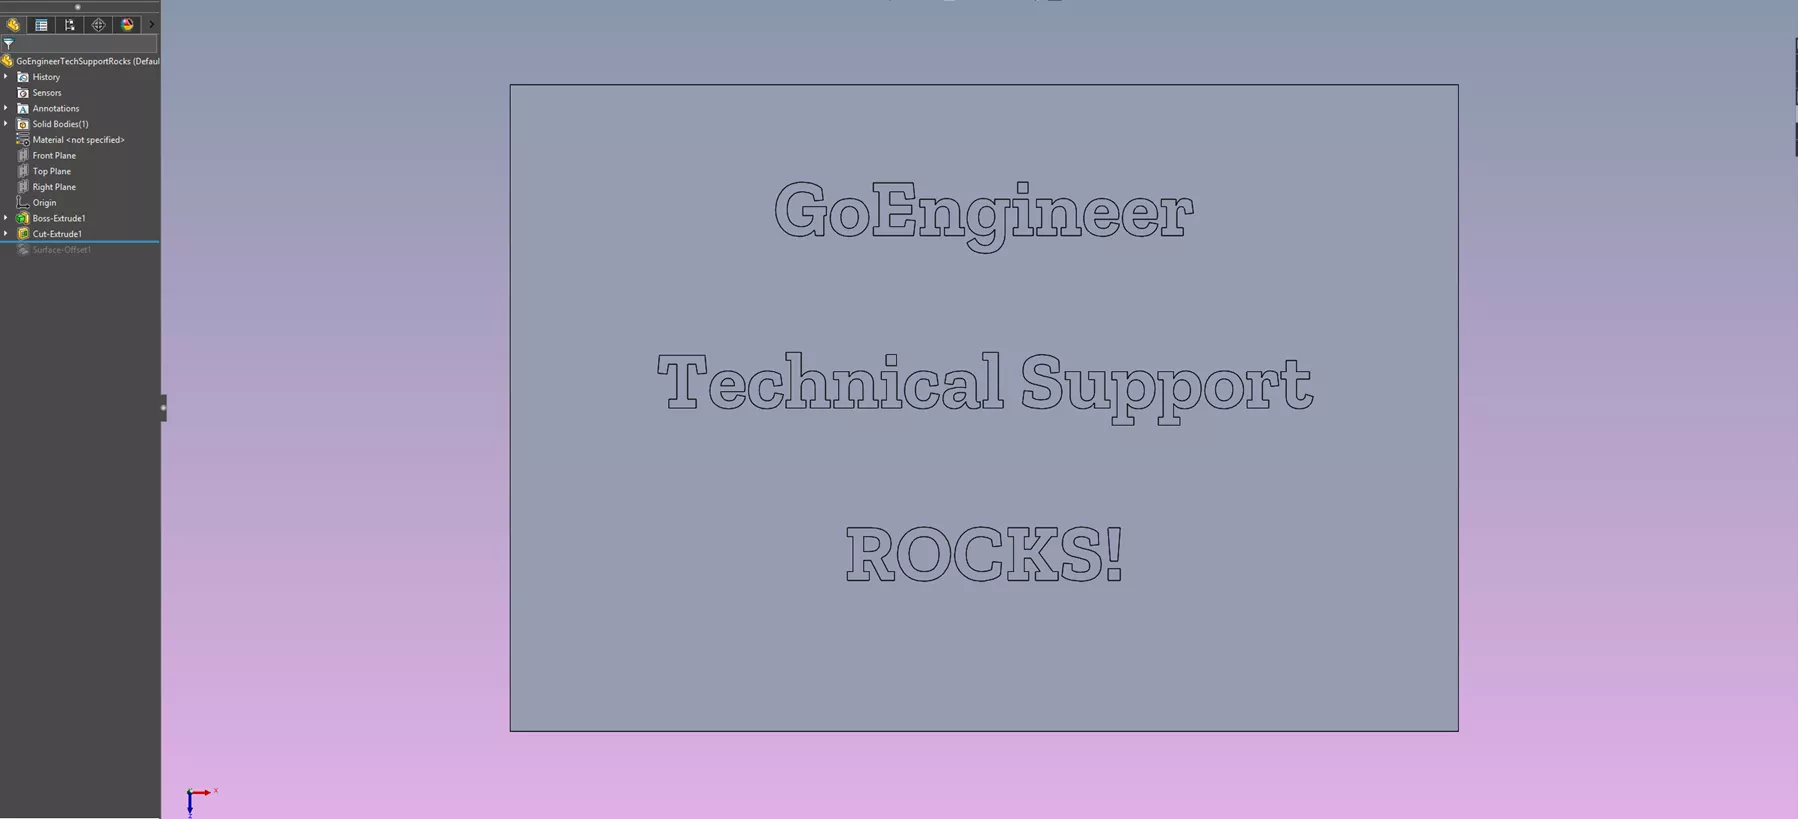
Here we will start with an example of how SOLIDWORKS and SOLIDWORKS Visualize treat models. This plate model was created with a Boss Extrude, and some engraved lettering, created as Sketch Text and a Cut Extrude.
Once saved, this model can be brought into a SOLIDWORKS Visualize by three differing methods outlined below:
- Save the part in SOLIDWORKS (.sldprt) > select the SOLIDWORKS Visualize tab > Export Advanced.

- Save the part in SOLIDWORKS (.sldprt) > open SOLIDWORKS Visualize > File > New > File > Import > find your recently saved file and select Open in the Import… dialog box.
- After saving your SOLIDWORKS file, and you are in the SOLIDWORKS Visualize interface > Project > Models > Import Model > select your model and Open.
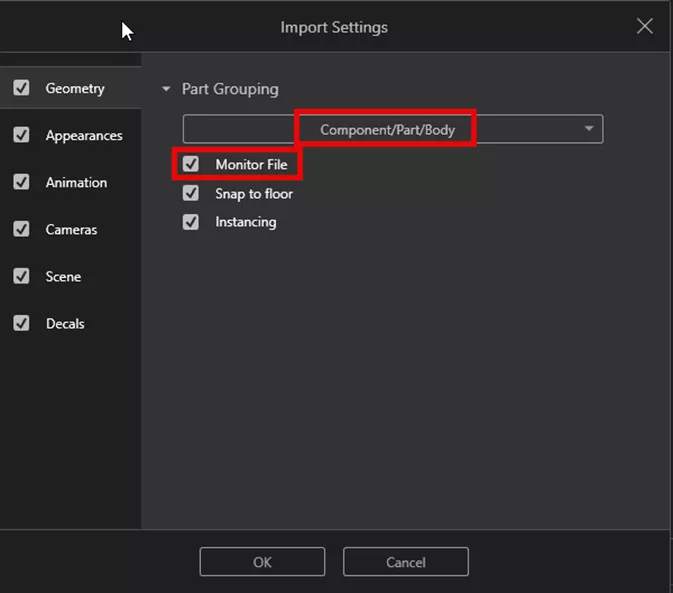
For Options 2 and 3, you will receive an Import Settings dialog box. It is important here to select Component/Part/Body in the Part Grouping dropdown and to check the box for Monitor File, as you will be updating your SOLIDWORKS part in future steps. Go through the other selections as desired and click OK. This will import your model into SOLIDWORKS Visualize.
Once imported, if you apply an appearance to the faces of the engraved lettering, it will change the appearance of the entire model. This is because it is a single-body part, and each face of the engraving comprises that part. In this case, I'll apply a Glossy Rubber appearance (Libraries > Appearances > Rubber > Glossy Rubber) by dragging the Glossy Rubber appearance swatch onto the model.

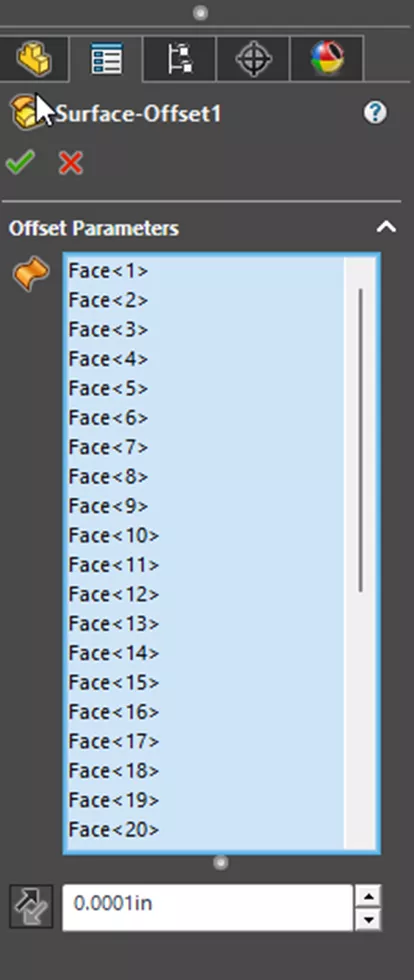
Here I will jump back over to SOLIDWORKS and create a Surface Offset (Insert > Surface > Offset…) on the bottom of each letter, then offset a surface by a trivial amount (here I chose 0.0001 inches).
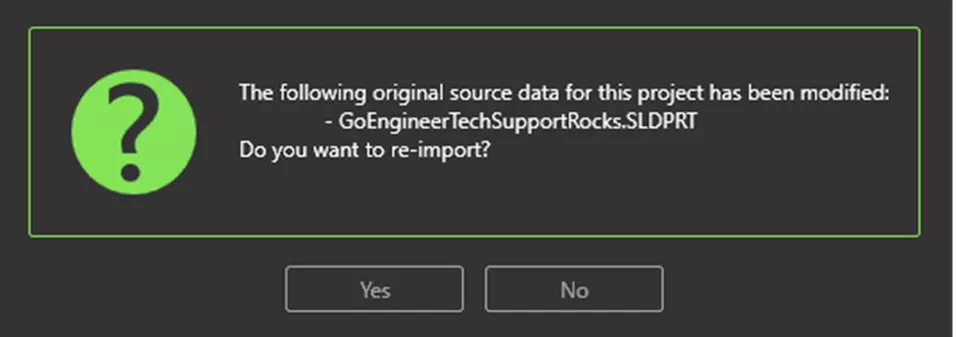
After you save (CTRL+S) your part file in SOLIDWORKS and navigate back to SOLIDWORKS Visualize, you will be prompted to update your file. Select Yes.
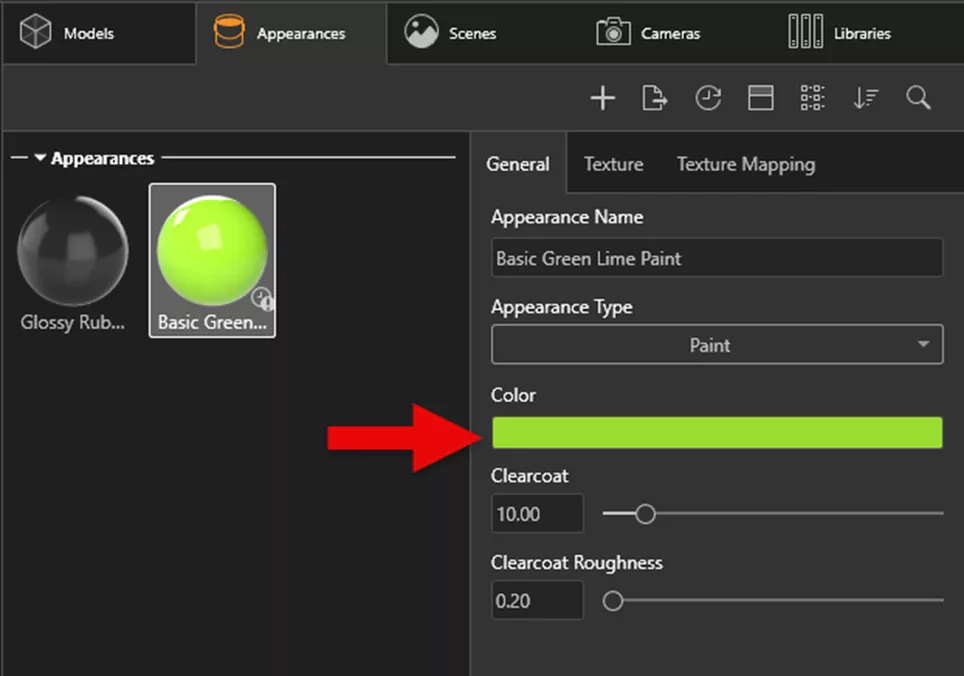
Once the file is updated in SOLIDWORKS Visualize, you must select an appearance for the faces of the engraving. Navigate to your Libraries tab and select an appearance. In this case, I chose the Paint appearance folder, then Basic Green Lime Paint.
Here, we advise the following workflow to keep your Appearances pane in Visualize from getting cluttered and to speed up the process:
- Toggle your Selection Tool to Part in the Heads-up Display

- Apply the desired appearance to one engraved letter’s face, so it looks like the following:

- Right-click on the face to which you just applied an appearance > Edit > Copy Appearance.
- Next, hold CTRL while selecting the faces to “select” all surfaces to which you will apply the appearance. Once complete, your SOLIDWORKS Visualize model will look something like this:

- Finally, right-click on one of the selected faces > Edit > Assign Appearance: {your chosen appearance}, yielding:

At this point, if the color I have chosen is not “quite right,” I can quickly change it. Navigate to your Appearance pane, find the appearance you just applied to the surface offset faces, and click on it. In this example, if I want to change my Basic Green Lime Paint to purple, I'll simply click on the color bar and select a new color.
The above-mentioned workflow allows you to make minimal keystrokes to make a vastly different appearance:


I hope you found this tutorial explaining how to create engraved letters in SOLIDWORKS Visualize helpful. Check out more tutorials below.
Additionally, join the GoEngineer Community to participate in the conversation, create forum posts, and answer questions from other SOLIDWORKS users.
Visualize Training
Want to take your SOLIDWORKS Visualize skills to the next level? Our SOLIDWORKS Visualize training course covers how to leverage 3D CAD data to create photo-quality content in the fastest and easiest way possible, from images to animations, interactive web content, and immersive virtual reality.

Related Articles
How to Create a Sunlight Environment in SOLIDWORKS Visualize
SOLIDWORKS Visualize 2025 - What's New
Adding Color to SOLIDWORKS Visualize Projects
SOLIDWORKS Visualize: Applying Textures & Texture Mapping

About Camille Johnson
Camille Johnson is a Certified SOLIDWORKS Expert based out of Atlanta, Georgia. She earned her Bachelor of Science in Biomedical Engineering and Master of Science in Mechanical Engineering from the Georgia Institute of Technology in Atlanta, Georgia. She has been with GoEngineer, helping customers with SOLIDWORKS, SOLIDWORKS Visualize, SOLIDWORKS Composer, and DraftSight needs since January of 2024.
Get our wide array of technical resources delivered right to your inbox.
Unsubscribe at any time.