Creating and Adding Weld Beads in SOLIDWORKS Models & Drawings
In this quick tip, we review the steps to add weld beads to a weldment file. The Weld Bead feature allows you to add the bead and weld symbol to your SOLIDWORKS model and drawing. The Weld Bead feature is a simple graphical representation and will not affect the performance of the model.
Suggested Article >> SOLIDWORKS - Weldment Configurations
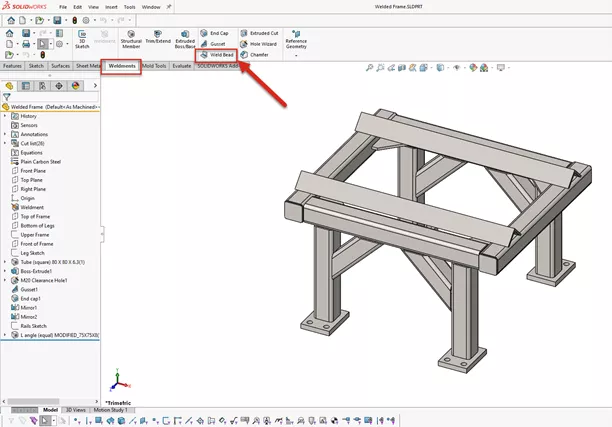
With a weldment open in SOLIDWORKS, start by going to the Weldment CommandManager toolbar and selecting the Weld Bead tool.
Select the Smart Weld selection tool. This tool will allow you to select adjacent faces of the weld, and SOLIDWORKS will apply the weld bead to the joint where the two meet.
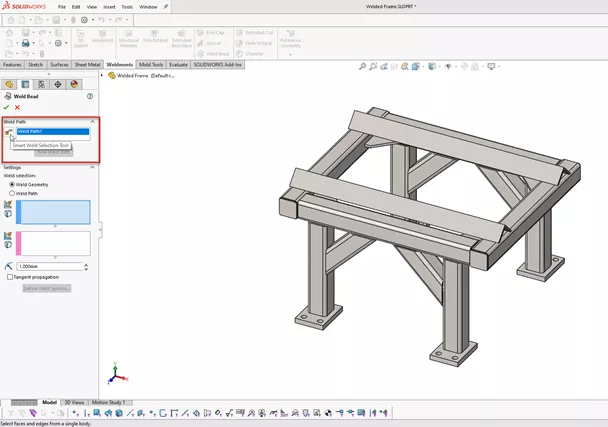
Below, you will see the difference between having the Smart Weld Selection tool on or off.
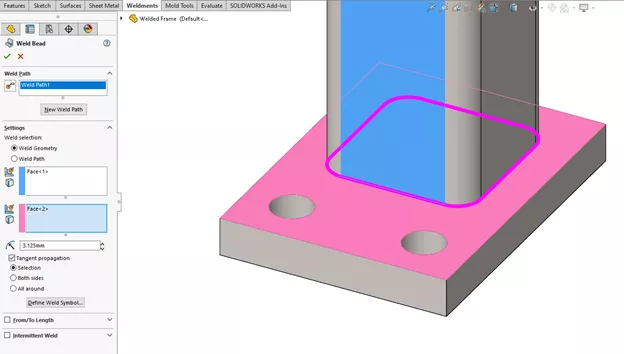
With the tool on, you can click and drag a line to automatically select adjacent faces.
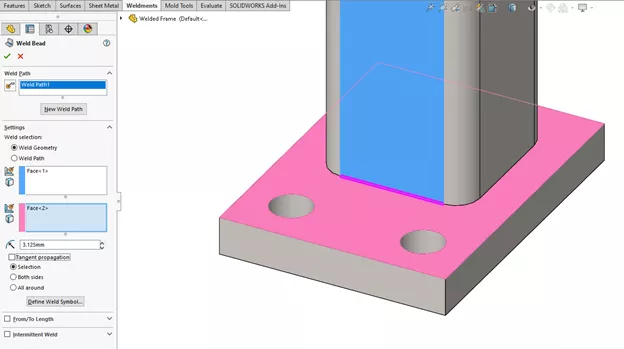
With the Smart Weld Selection Tool off, the user manually selects the faces.
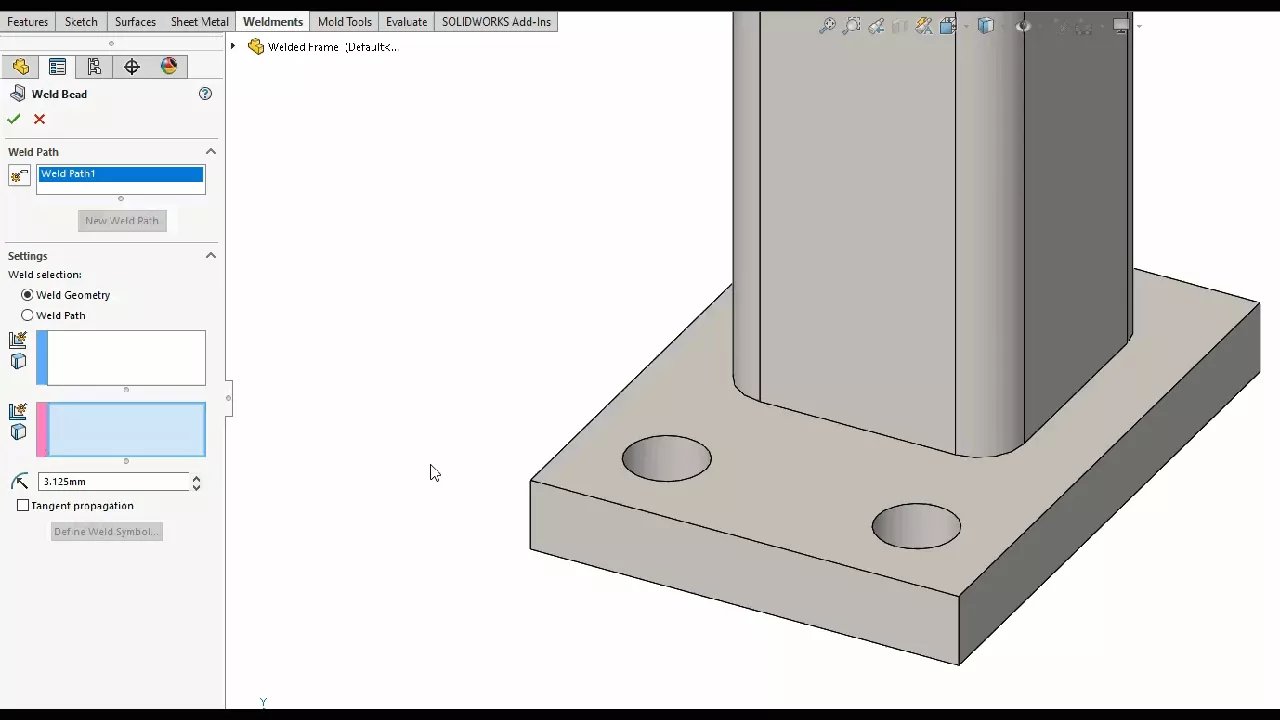
As you can see, the edge where the structural member and plate meet has been highlighted as a welded joint.
Select Tangent Propagation to create a weld bead around the entire structural member where it meets the plate.
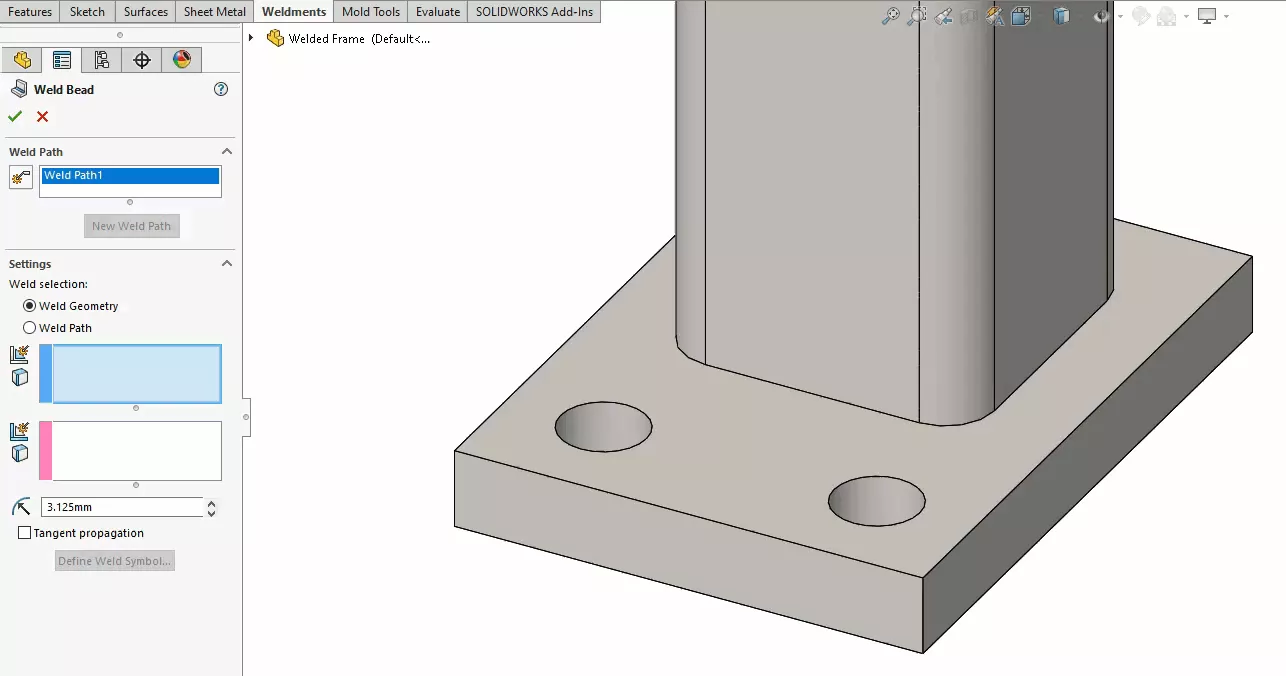
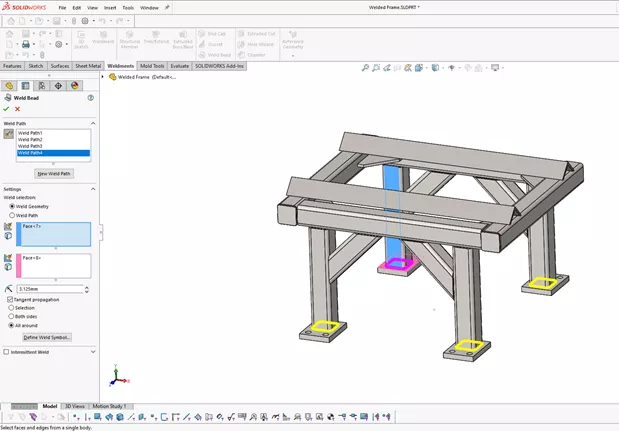
Next, select faces of other structural members and plates to add weld beads to the Weld Path list.
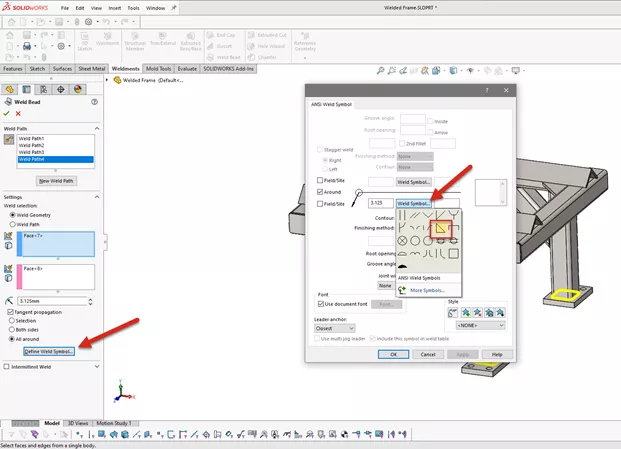
Click Define Weld Symbol to create and edit the weld symbol to be used for the selected weld.
Note that when you click Weld Symbol, the default weld symbol is recognized for the type of weld to be added.
Click OK to close the Weld Symbol tool and click the green checkmark to close the Weld Bead tool.
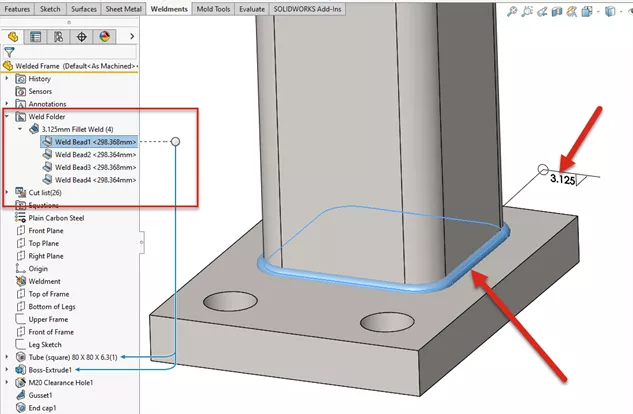
Notice that a new folder appears in your FeatureManager Design Tree labeled Weld Folder.
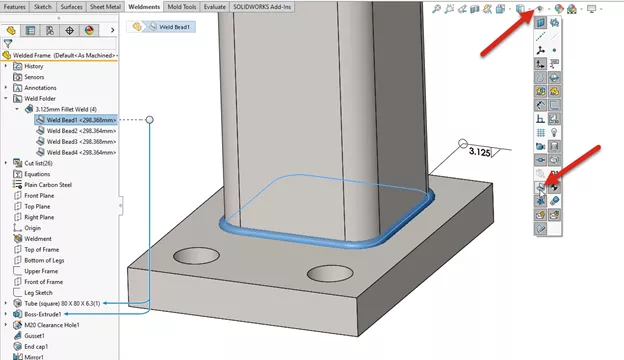
Click to expand the folder to view the weld beads that were created. If you click on a weld bead in the list, the bead highlights in the model.
Note that the overall length of each weld bead is shown in the Weld Folder.
If the welds and weld symbols aren’t visible in the graphics area, click the Hide/Show icon in the heads-up view toolbar and select Weld Beads.
Suggested Article >> SOLIDWORKS Weldment Profiles & Weldment Tools Guide
Importing Weld Beads into a SOLIDWORKS Drawing
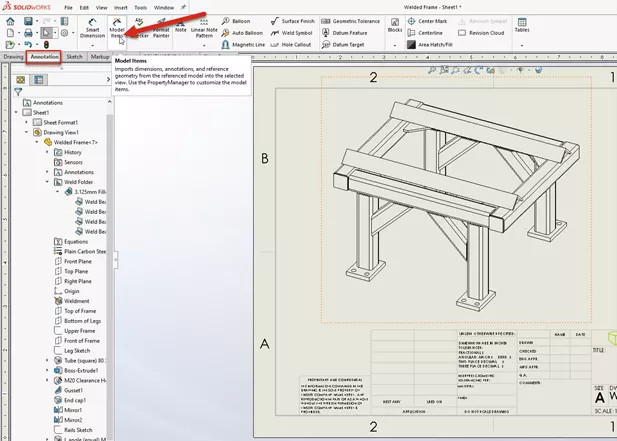
The weld beads and weld symbols can be imported into your SOLIDWORKS drawing through the Model Items tool.
Under the Annotations tab of the CommandManager Toolbar, select Model Items.
Click the Weld Symbols icon and the icon labeled Caterpillars.
The Caterpillars annotation is the graphical representation of the weld bead in the drawing. After making your selections in the Model Items menu, click the green checkmark to confirm.
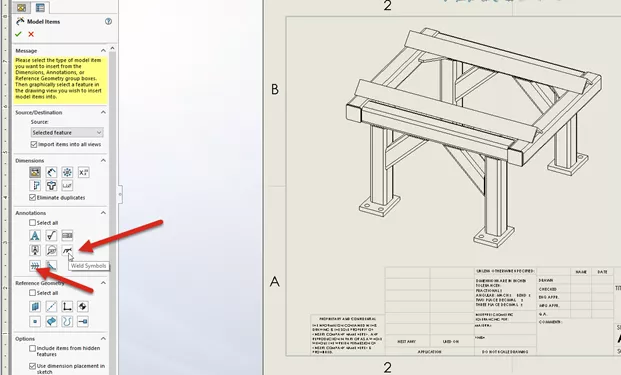
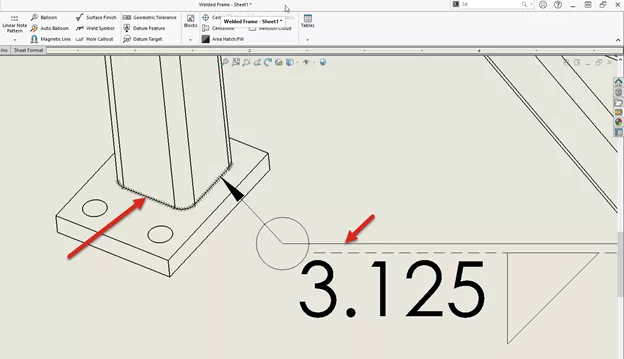
As you can see, the weld bead Caterpillar and Weld Symbols are imported into the drawing view.
The weld bead is a graphical representation and does not affect performance.
Weld Bead Video Tutorial
Wanto to see these steps in action? Check out the weld beads video below.
I hope you found this SOLIDWORKS tutorial helpful. Check out more tips and tricks below.

SOLIDWORKS CAD Cheat Sheet
Our SOLIDWORKS CAD Cheat Sheet, featuring over 90 tips and tricks, will help speed up your process.
More SOLIDWORKS Tutorials
Record a Basic SOLIDWORKS Macro
Favorite SOLIDWORKS Tips from Tech Support
Inserting Logos Into SOLIDWORKS Parts and Drawings
SOLIDWORKS Copy and Paste Features: Same or Different Parts

About Brad Hakeman
Bradley Hakeman is an Application Engineer at GoEngineer. When he isn’t helping customers with their SOLIDWORKS related challenges, he is keeping up on the latest features of SOLIDWORKS. In his spare time, he’s trying to sort out his kids’ soccer schedules and working on household projects, many of which were designed in SOLIDWORKS. Most recently, he has taken up woodturning, currently focusing on pen making.
Get our wide array of technical resources delivered right to your inbox.
Unsubscribe at any time.