SOLIDWORKS Copy and Paste Features: Same or Different Parts
When working in SOLIDWORKS , there are times when we need to repeat a feature that has already been created. If using a linear pattern or the Mirror Feature does not produce the desired geometry, another option is to copy the feature, and paste it where needed. This guide explains ways to copy and paste features from your SOLIDWORKS FeatureManager Design Tree in the same part and from one part to another.
Copy and Paste on the same part
Here we have our SOLIDWORKS part and the Cut Feature that we would like to copy.
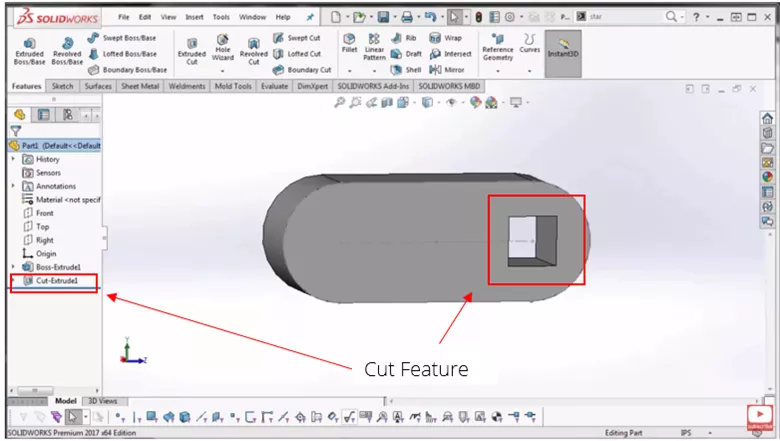
Figure 1: Initial Part
We can see how the feature was created, and that it is defined to be coincident with a horizontal line.
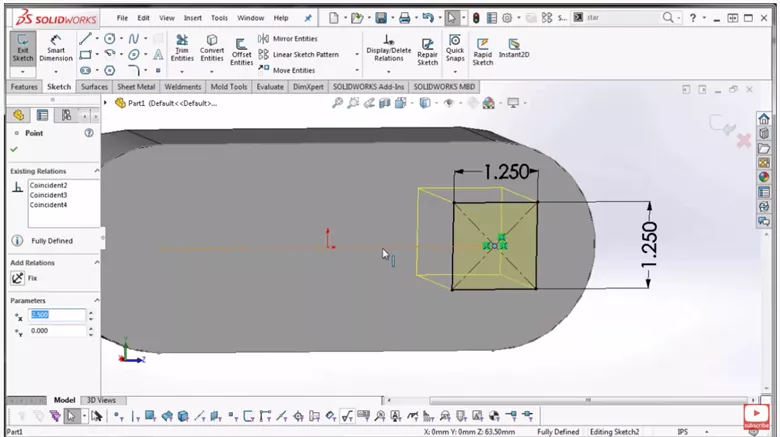
Figure 2: Feature Creation
To copy the feature to the part, hold CTRL , and select the Cut Feature in the FeatureManager Design Tree. While holding CTRL and the left mouse button, drag and drop the feature in the desired location.
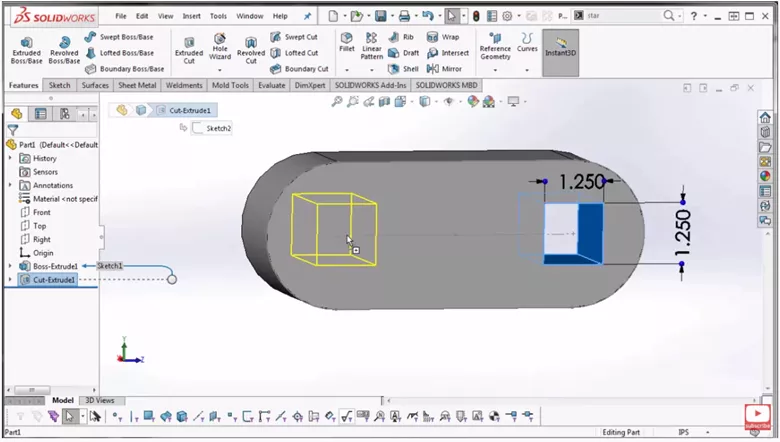
Figure 3: Drag and Drop Feature
Once in place, a Copy Confirmation dialog box will appear asking whether you would like to break (dangle) the relations that we mentioned before or if you want to delete them. In this instance, we will delete them.
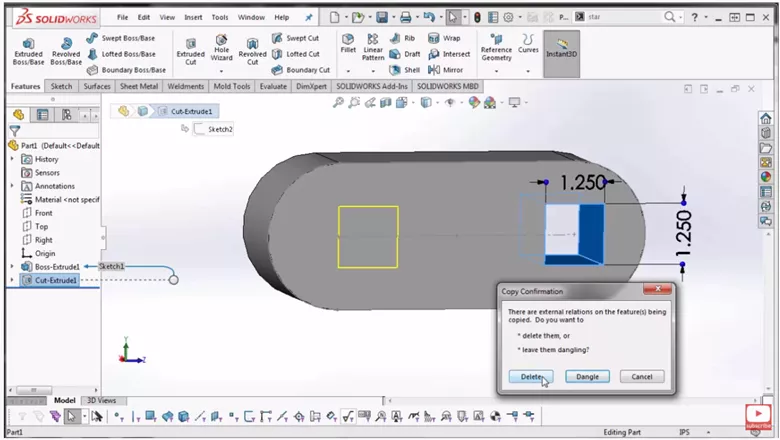
Figure 4: Copy Confirmation
Once we delete the relationships, the copied feature is then created. From there, we can edit the sketch and define the location as needed.
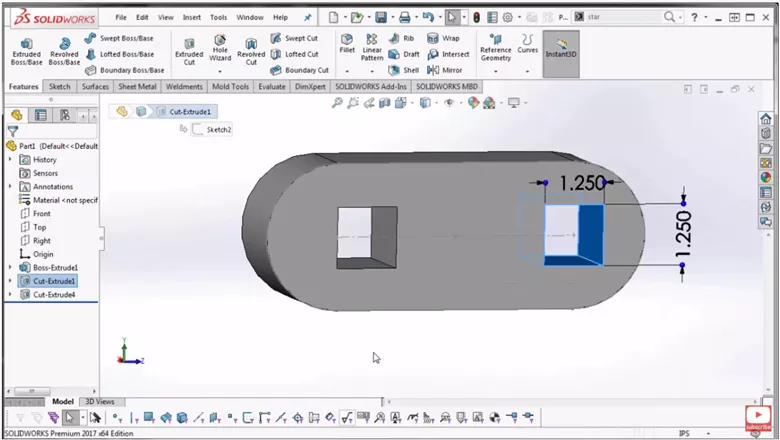
Figure 5: Feature Creation
Copy and Paste on Different parts
To copy a feature from one part to another, follow the same steps as above, but with some slight changes. First, we want to have both parts open and Tile Vertically.
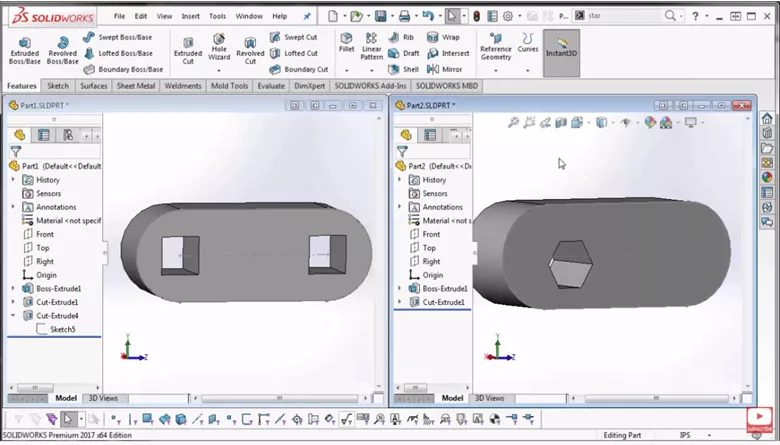
Figure 6: Tiled View
Repeat the same steps of holding CTRL and dragging and dropping the feature from the original part to the second part.
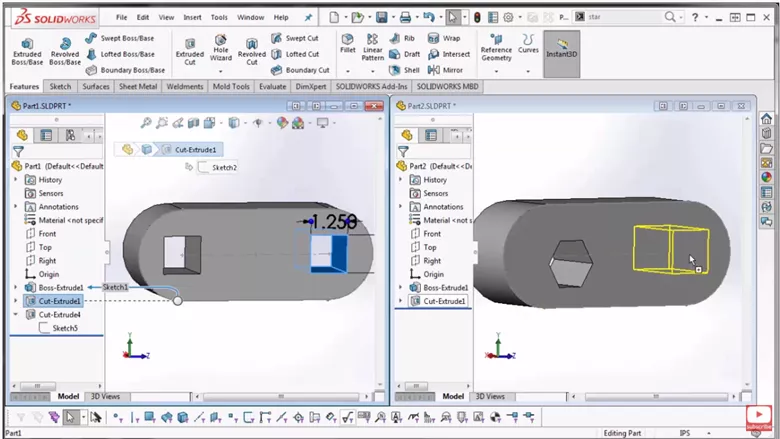
Figure 7: Drag and Drop Across Components
Once we have the feature in place and release it, the Copy Confirmation dialog box will appear again. We can make the same selection as before.
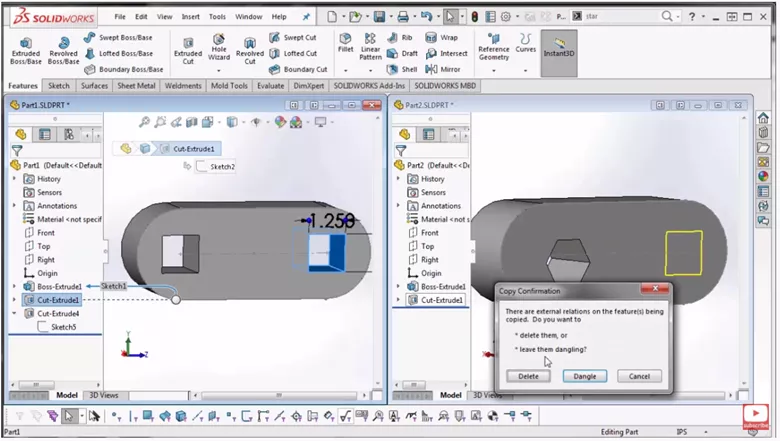
Figure 8: Copy Confirmation
From there, our feature is made, and we can edit the sketch as needed.
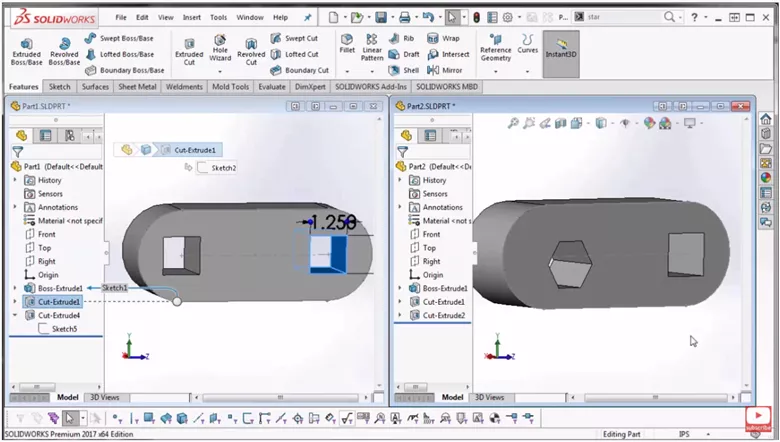
Figure 9: Feature Creation
With that, we can copy features in the same part or from one part to another.
That's it! I hope you found this tutorial helpful. Check out more SOLIDWORKS tutorials below.
More SOLIDWORKS Tips & Tricks
SOLIDWORKS Convert to Sheet Metal Command Explained
How to Create a Lip/Groove Feature in SOLIDWORKS
Scanto3D Add-in Explained: Activation, Wizards, and Tutorial
SOLIDWORKS Combine Feature Tutorial
![]()
About Nathen Blas
Nathen Blas is a SOLIDWORKS Technical Support Engineer based out of our Headquarters in Salt Lake City, Utah. He earned his Bachelor’s degree in Mechanical Engineering at the University of Utah in 2018 and joined the GoEngineer family that same year.
Get our wide array of technical resources delivered right to your inbox.
Unsubscribe at any time.