Getting Started with 3DEXPERIENCE: Setup, Dashboards, Connectors & More
Connecting with your team remotely is important now more than ever. We need effective tools that are dynamic enough to keep up with the ever changing world. With Dassault Systèmes 3DEXPERIENCE platform, you have access to these very tools. In this blog, we’ll cover five helpful tips for getting started with 3DEXPERIENCE. Let’s dive in.
In this article, we’ll cover the following topics:
- Setting up your 3DEXPERIENCE platform
- Setting up your 3DEXPERIENCE Dashboards
- Getting your data to the 3DEXPERIENCE platform
- Installing the SOLIDWORKS connector and
- The SOLIDWORKS Connected Installation
Setting up your 3DEXPERIENCE Platform
Before getting started, make sure your account manager knows who should be in charge of your platform. That person will receive an email with a confirmation link to accept the license agreement and start the process.
This will take you to your order consent page. If you already have a 3DEXPERIENCE ID, you can log in using that, otherwise you’ll need to create a new login. Agreeing to terms finalizes the purchase and you’ll receive a confirmation email indicating that you should keep your eye out for the final and most important email. You or your designated administrator will click the link and become administrator for your platform.
It’s important to note that this does not have to be the same person who received the email.
3Dexperience login
If you already have a 3DEXPERIENCE ID you can now log in using that, otherwise create a new account. Once logged in, go to Platform Management and add the GoEngineer administrator assigned temporarily to your platform and they’ll take care of the rest.
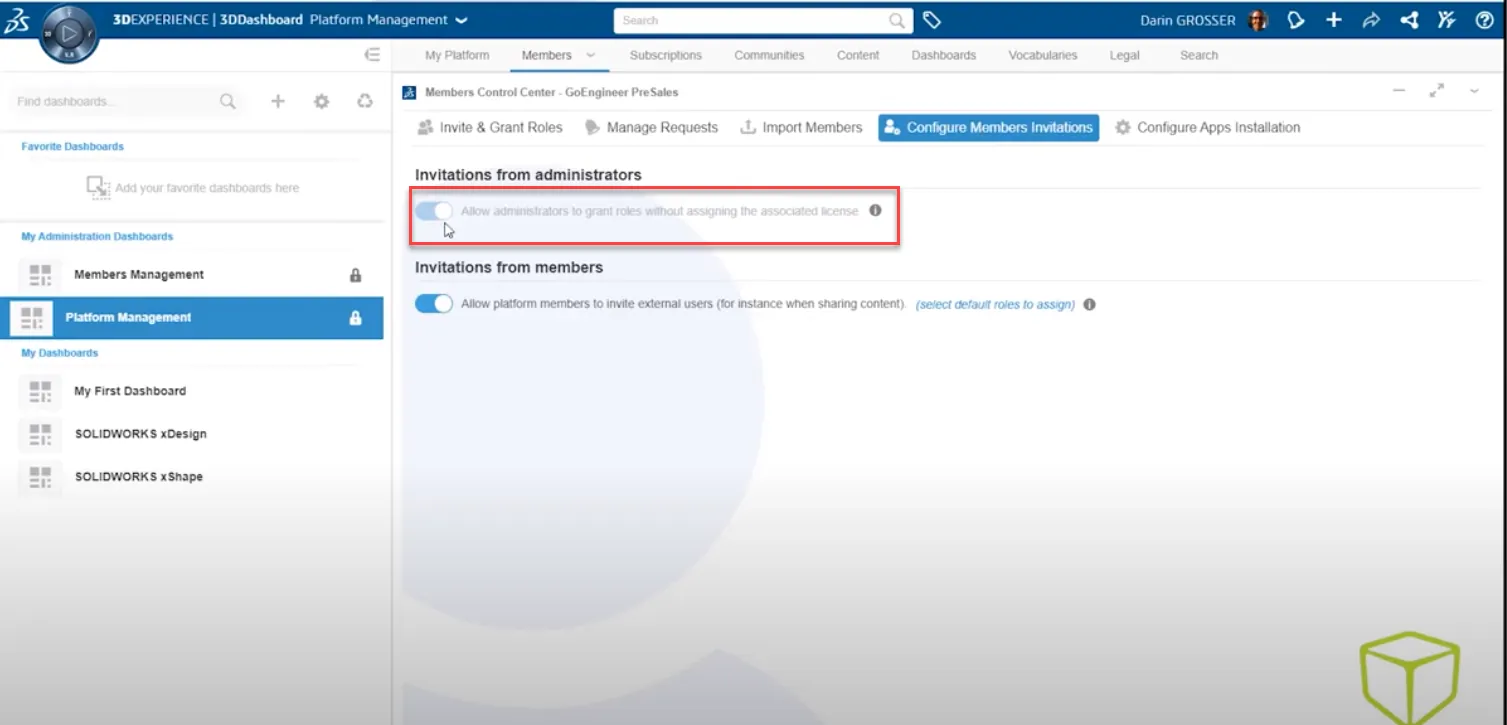
To do this, go to Platform Management, click Members and go to Configure Member Invitations.
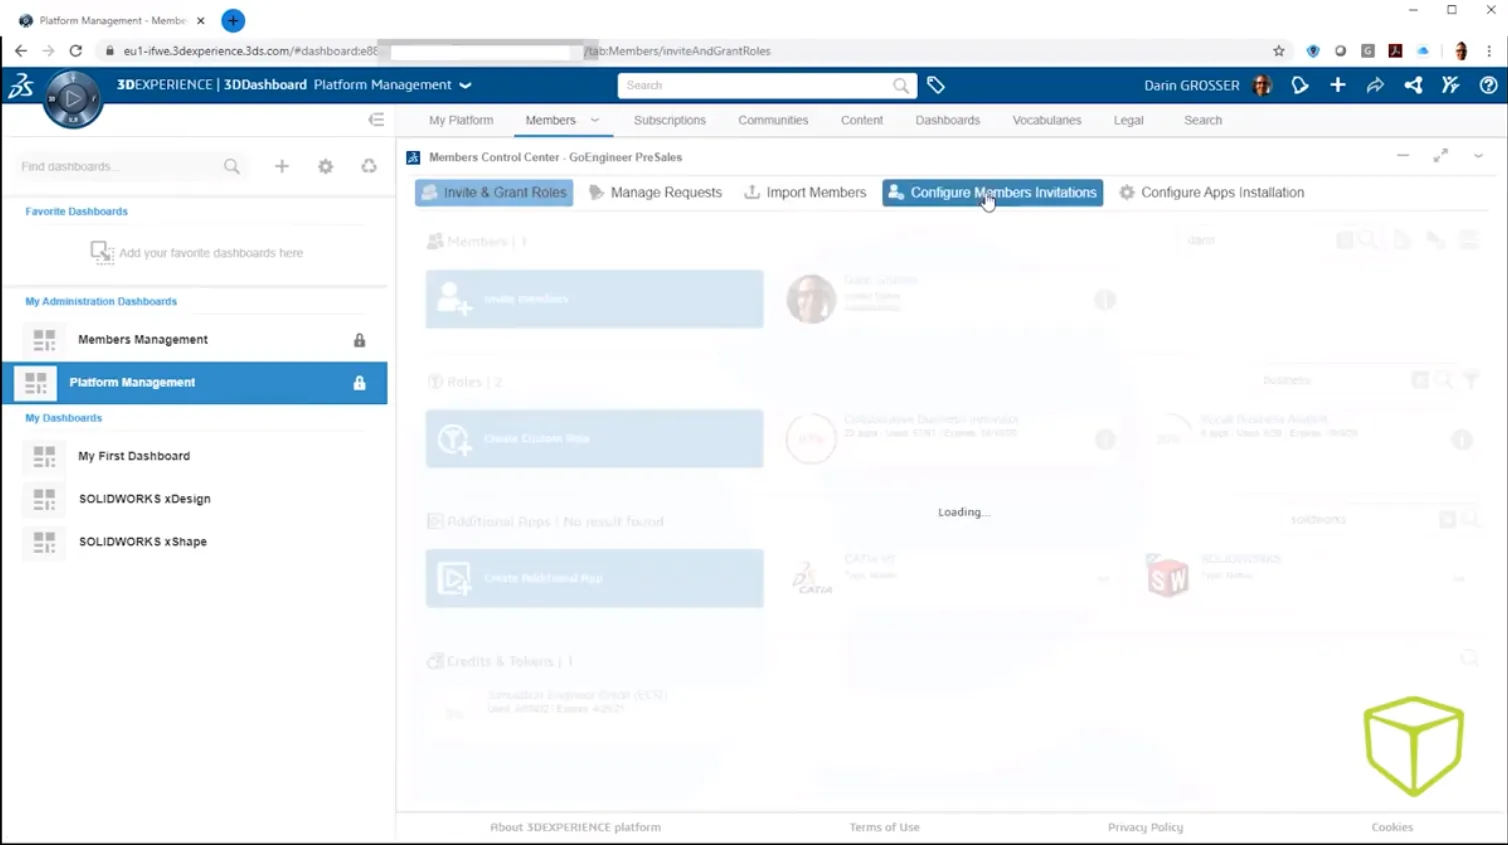
Important: Make sure you turn on ‘Allow Administrators to grant roles without assigning the associated licenses’, as this allows us to work within your platform without consuming a license.
Next, go to Invite & Grant Roles and invite your GoEngineer administrator. We’ll assign a specific admin to help get you set up and you’ll receive their contact information directly.
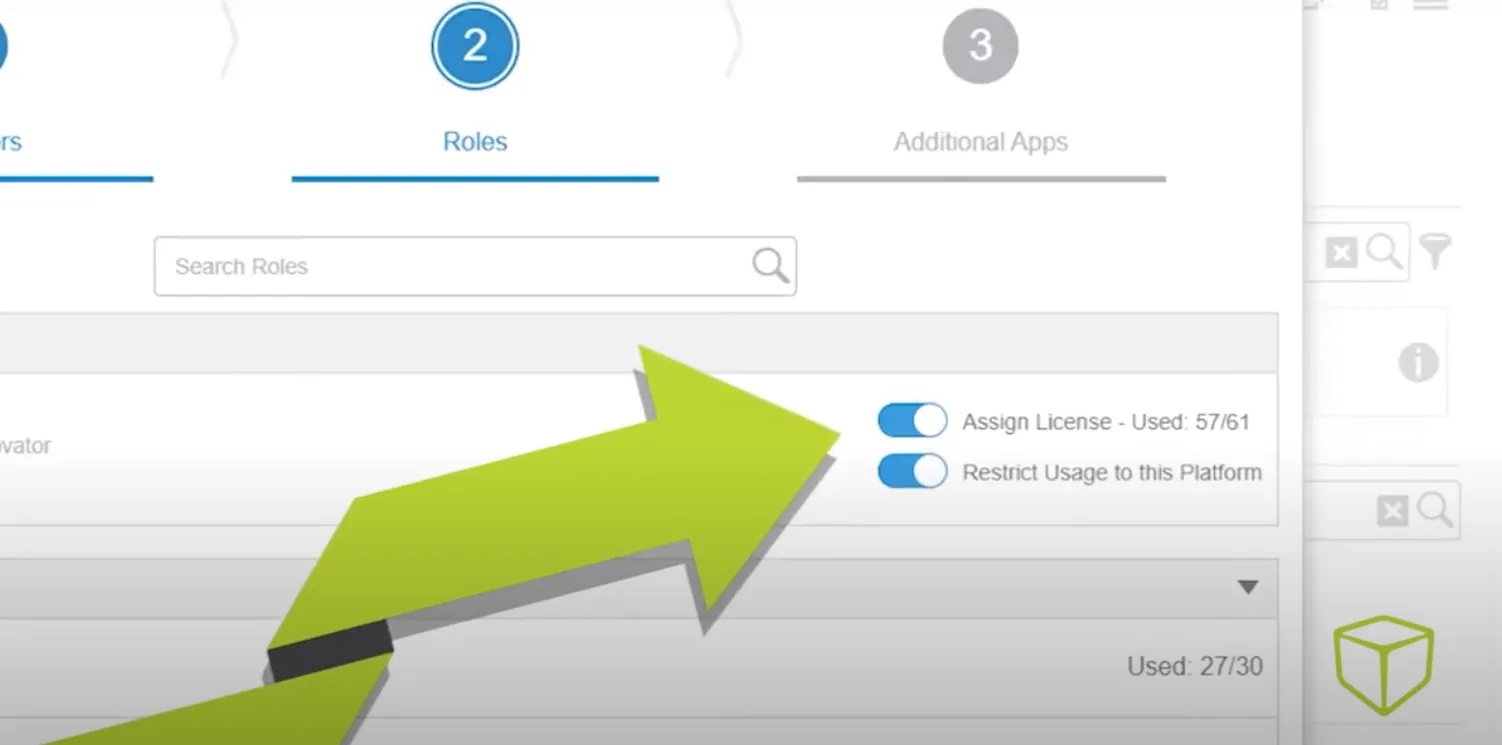
Make sure you clear this switch too, so it doesn’t assign your GoEngineer admin a license.
Once we’ve set up your default dashboards, you’ll receive a confirmation email from us that you’re free to remove us from your platform and you can take control of your own 3DEXPERIENCE.
You can watch this entire process in this video.
Now that you’re set up, let’s take a look at dashboards and how to create new ones to capture the unique experience your team needs.
Setting Up 3DEXPERIENCE Dashboards
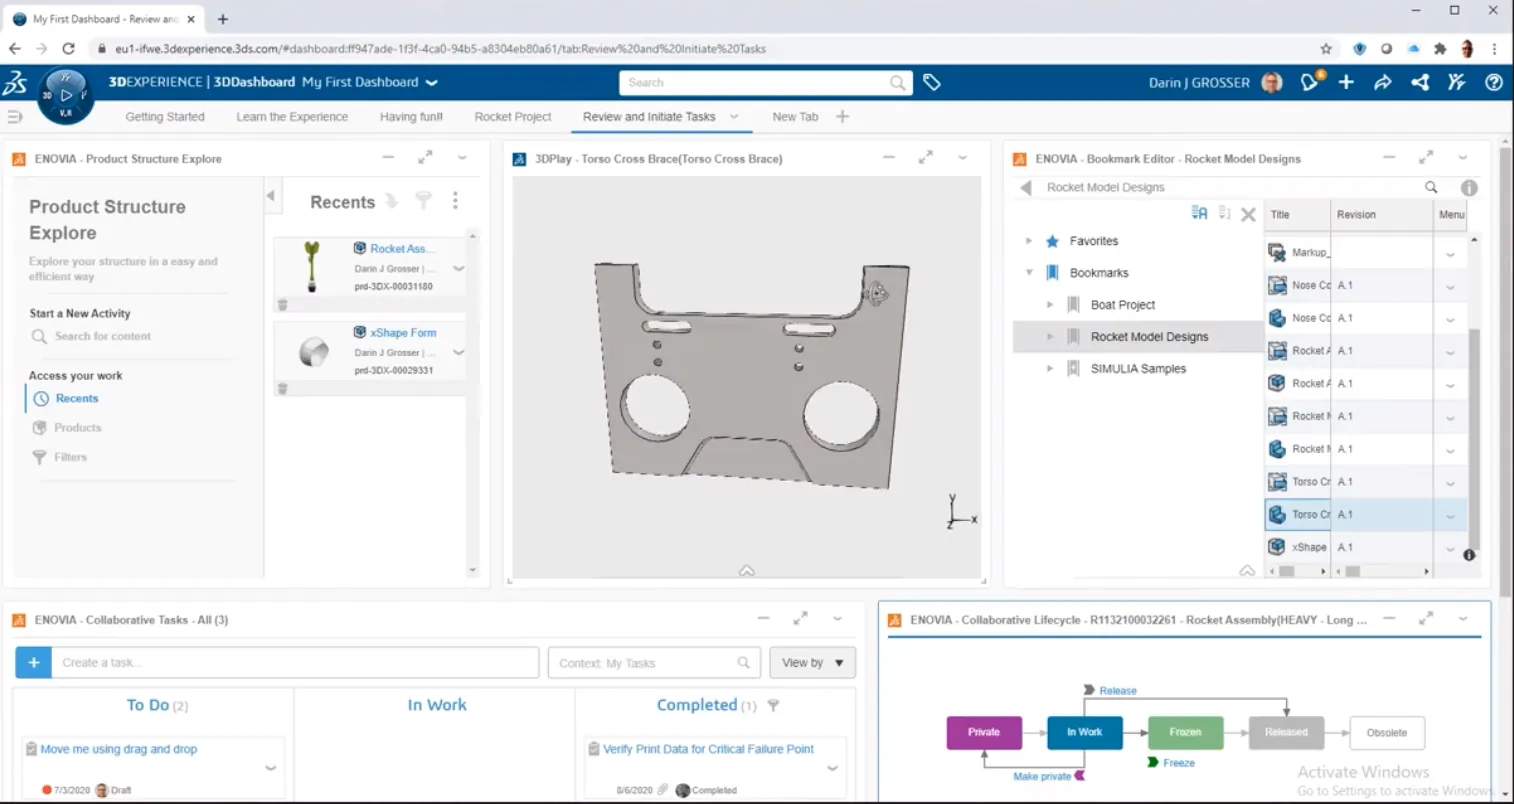
Dashboards are a flexible and dynamic way to organize your workspace. Think of dashboards as the layout of the programs on your computer, only you can have different dashboards set up for different groups of tasks. For instance, one moment you might be working on design and idea integration, while at another moment (or even at the same time), you might be working on correspondence and market research. Dashboards allow you to quickly switch between the task at hand.
Following the GoEngineer administrative setup service, you’ll be able to take immediate advantage of what the platform has to offer by using the provided dashboards. As you grow, you’ll be able to further organize your experience and streamline your own process. You can even securely share your dashboard with anyone.
The default My First Dashboard contains links to learning tracks that show you how to use each feature in the platform.
Get a demo of setting up your 3DEXPERIENCE dashboards here.
Getting Your Data to the 3DEXPERIENCE Platform
Whether you’re transitioning to the 3DEXPERIENCE platform or you’re new to design altogether, it’s helpful to know just how to get your data on the 3D collaborative spaces so other stakeholders can access your models. Let’s go over a few ways to upload your data to the 3DEXPERIENCE platform.
The first method uses either SOLIDWORKS Connected or SOLIDWORKS desktop with the SOLIDWORKS Connector add-in installed (we’ll discuss this in further detail later).
For this, simply install the SOLIDWORKS connector, turn it on, connect to the 3DEXPERIENCE platform, and select your desired collaborative space.
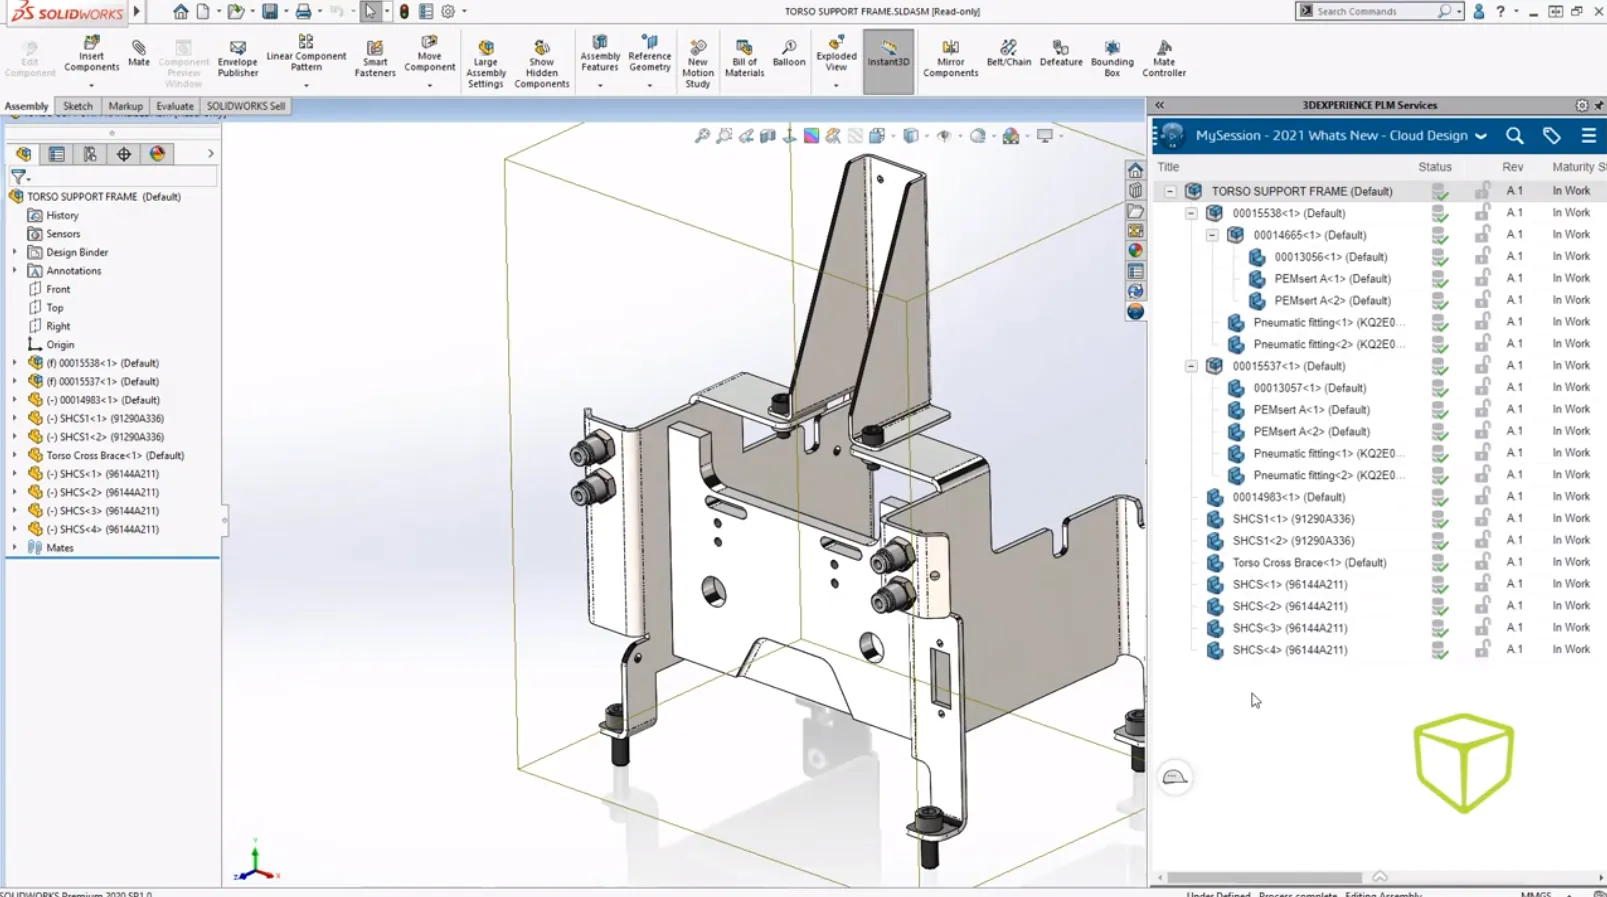
Whether the data is new or existing, a right-click save initiates the process that gets your data uploaded and secure so you can leverage all that the 3DEXPERIENCE platform has to offer. As you refresh your 3DSpace, you can see the files appear.
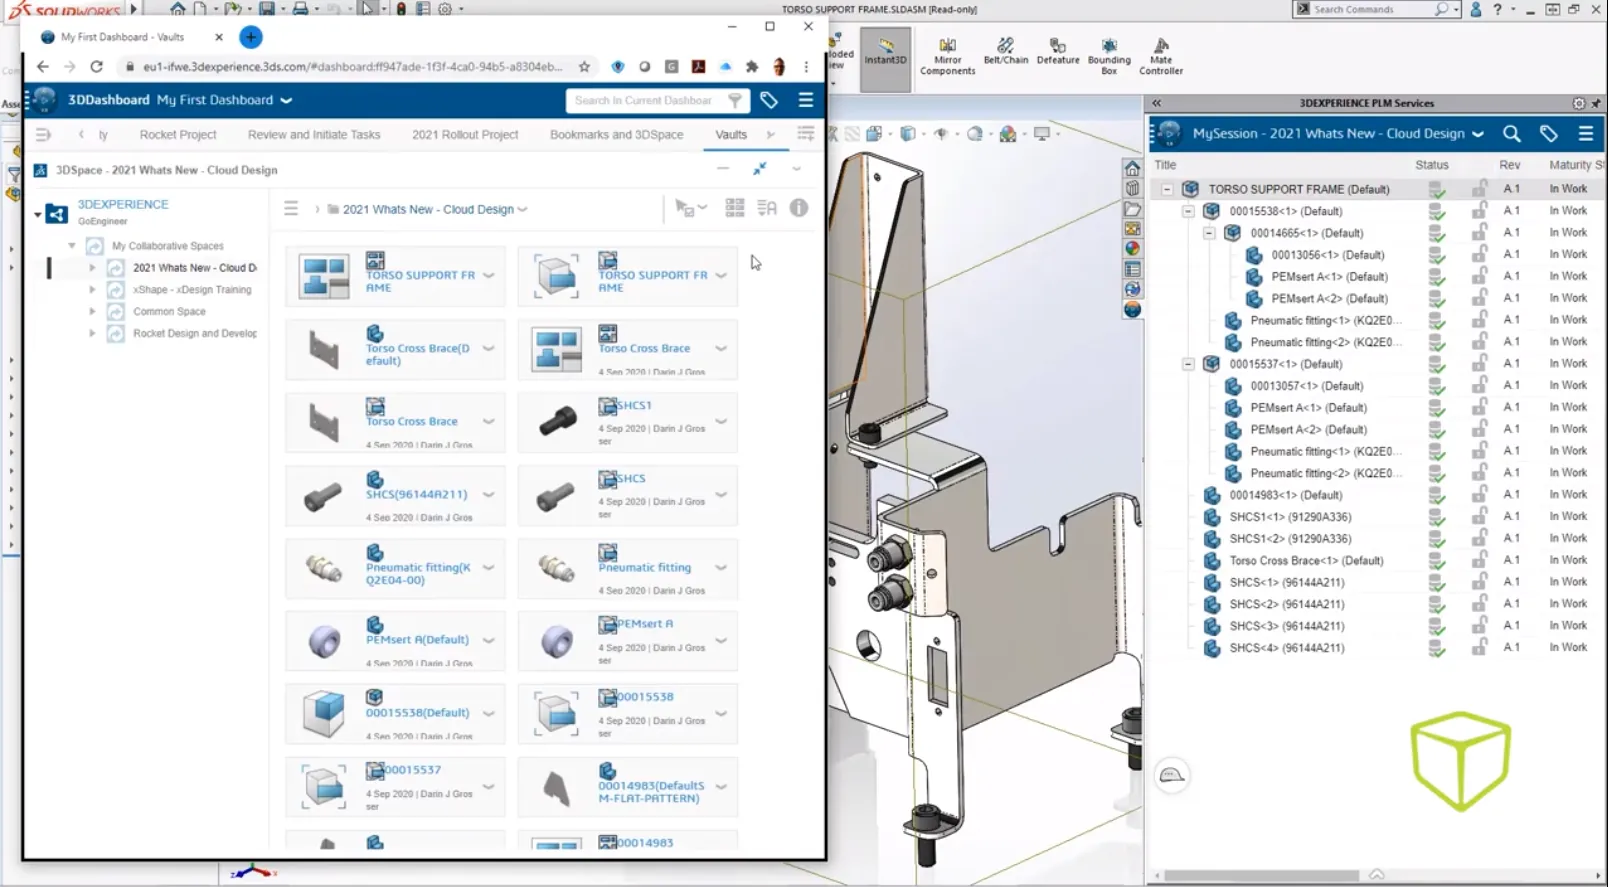
A second method is a basic windows drag and drop. We can do this for pretty much any other non-CAD file. You can also use the simple pull-down menu and browse to the folder with your selected files.
The third, and possibly the most powerful way, depending on your needs, also involves a drag and drop, but uses a zip file full of parts and assemblies. You can make them yourself by zipping up the contents of a folder, or create them by using functions like Pack and Go directly from SOLIDWORKS, SolidEdge, Inventor, or CATIA.
These can be dropped directly into any of our X apps, and will result in the creation of a featureless physical product for each and every file. If you toggle back over to your 3DSpace and refresh again, you’ll see your files appear.
See this functionality in action in this video.
Installing the SOLIDWORKS Connector
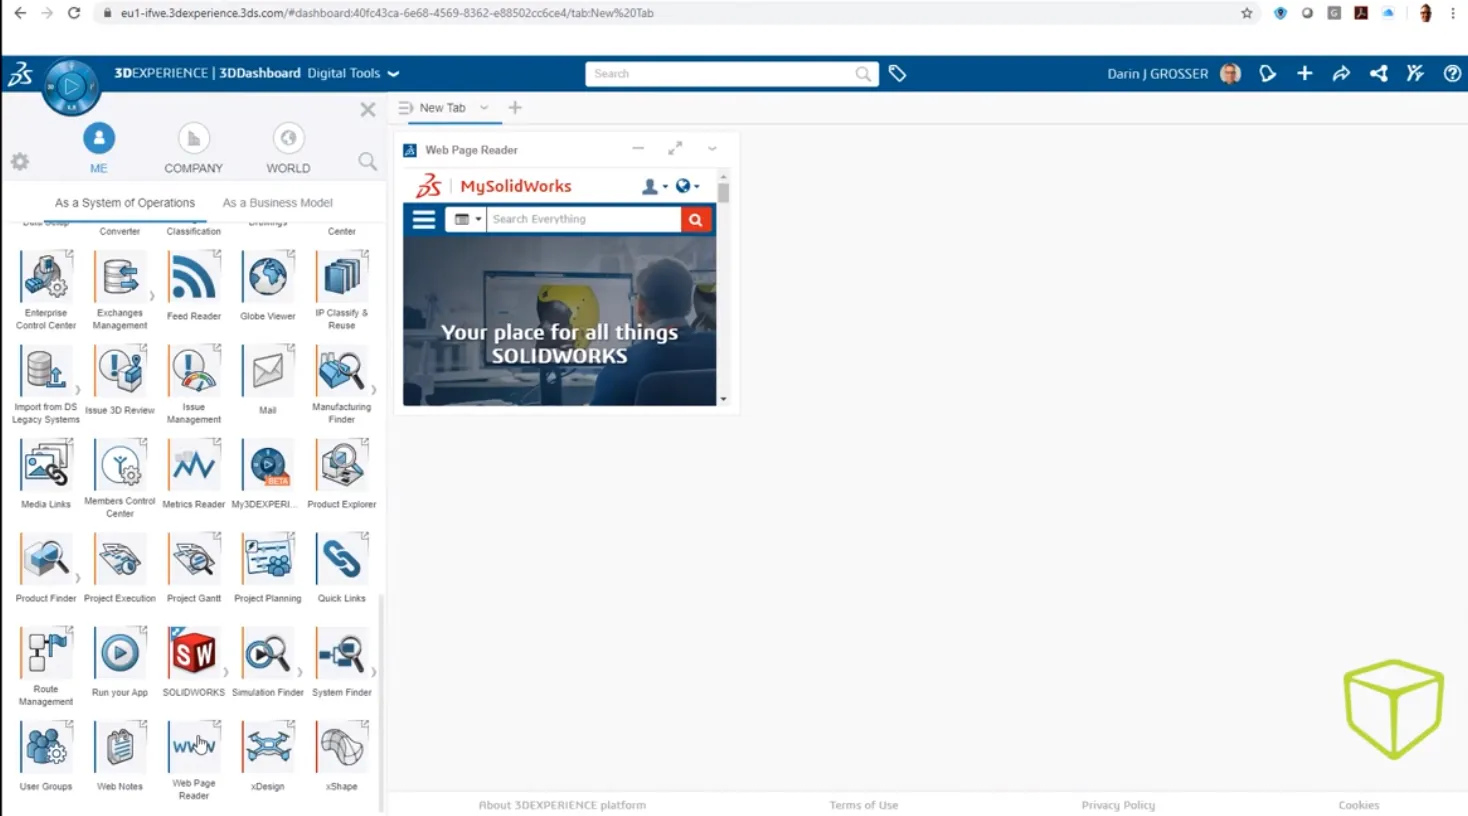
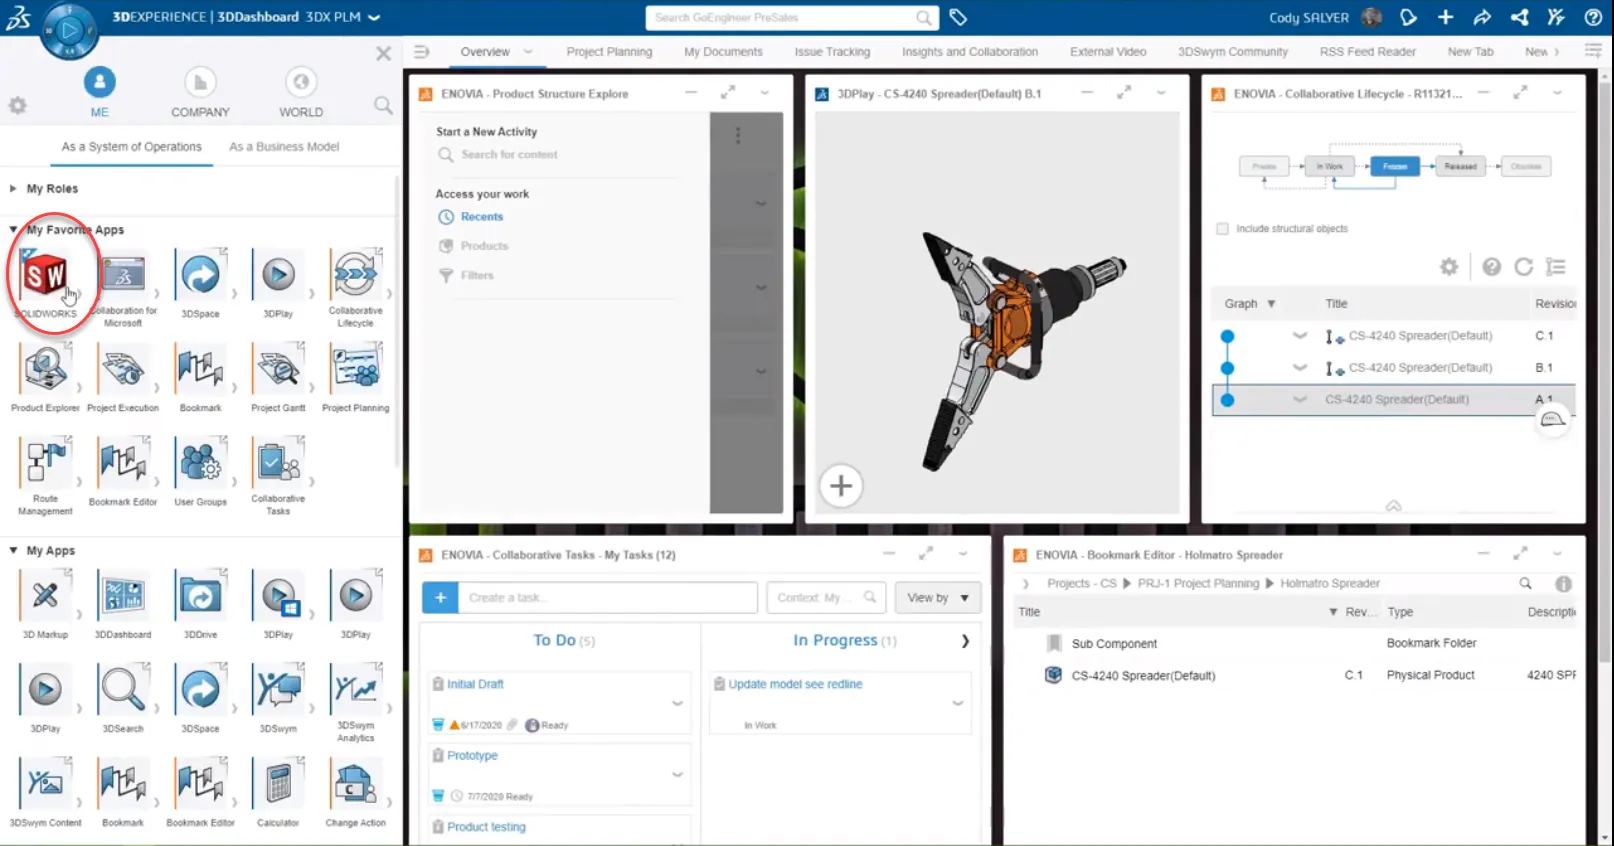
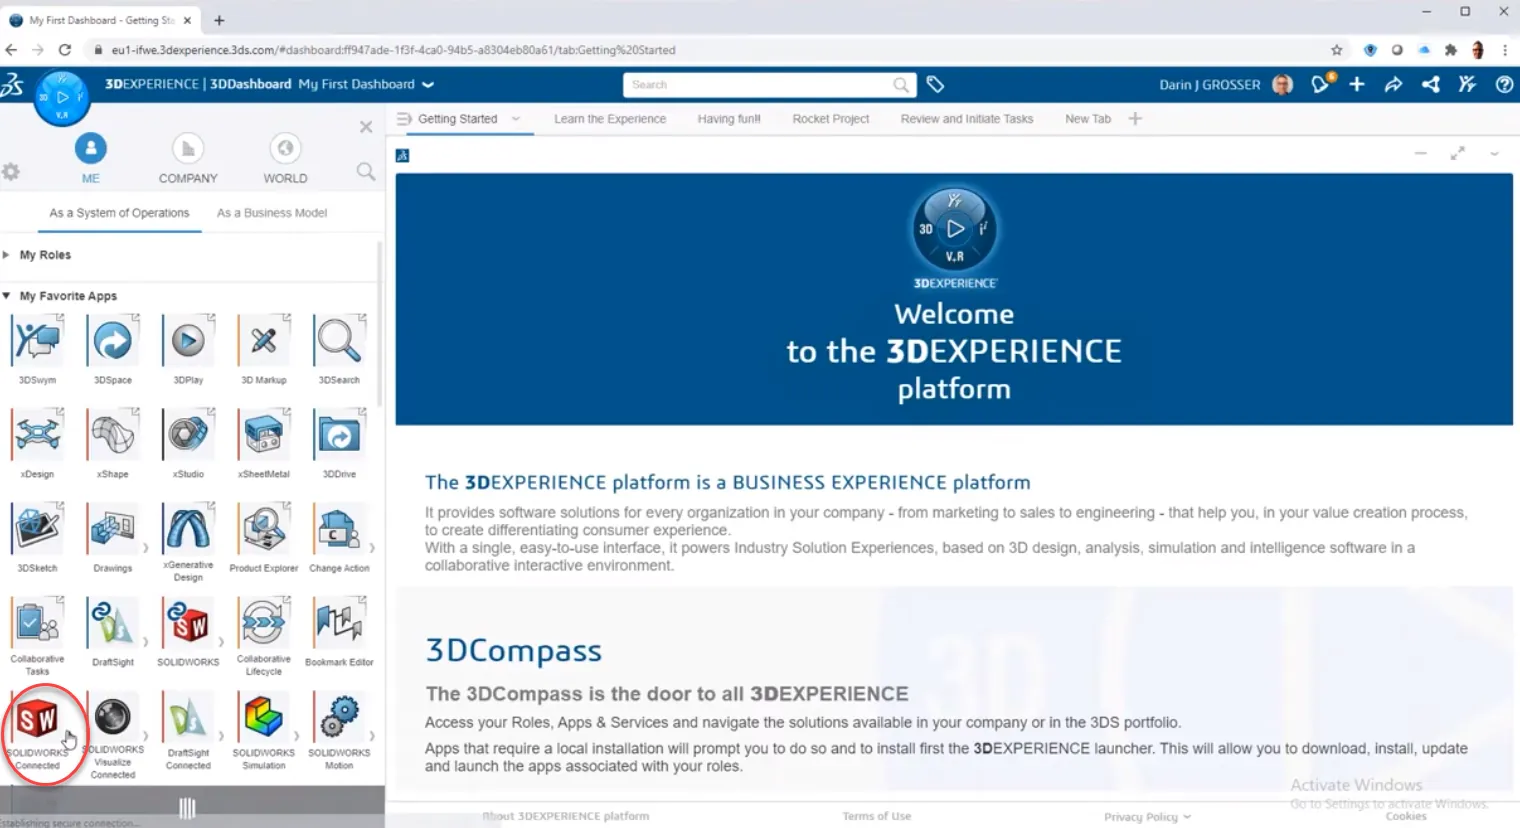
From inside the 3DEXPERIENCE platform, select the compass and locate the SOLIDWORKS icon. Choosing the icon, the system will prompt you to download the 3DEXPERIENCE launcher.
Choose the download link in your taskbar to run the download after it is completed to install.
Once the launcher has been installed, choose Continue to complete the original installation. You will be prompted to install either all granted roles or all roles that contain SOLIDWORKS.
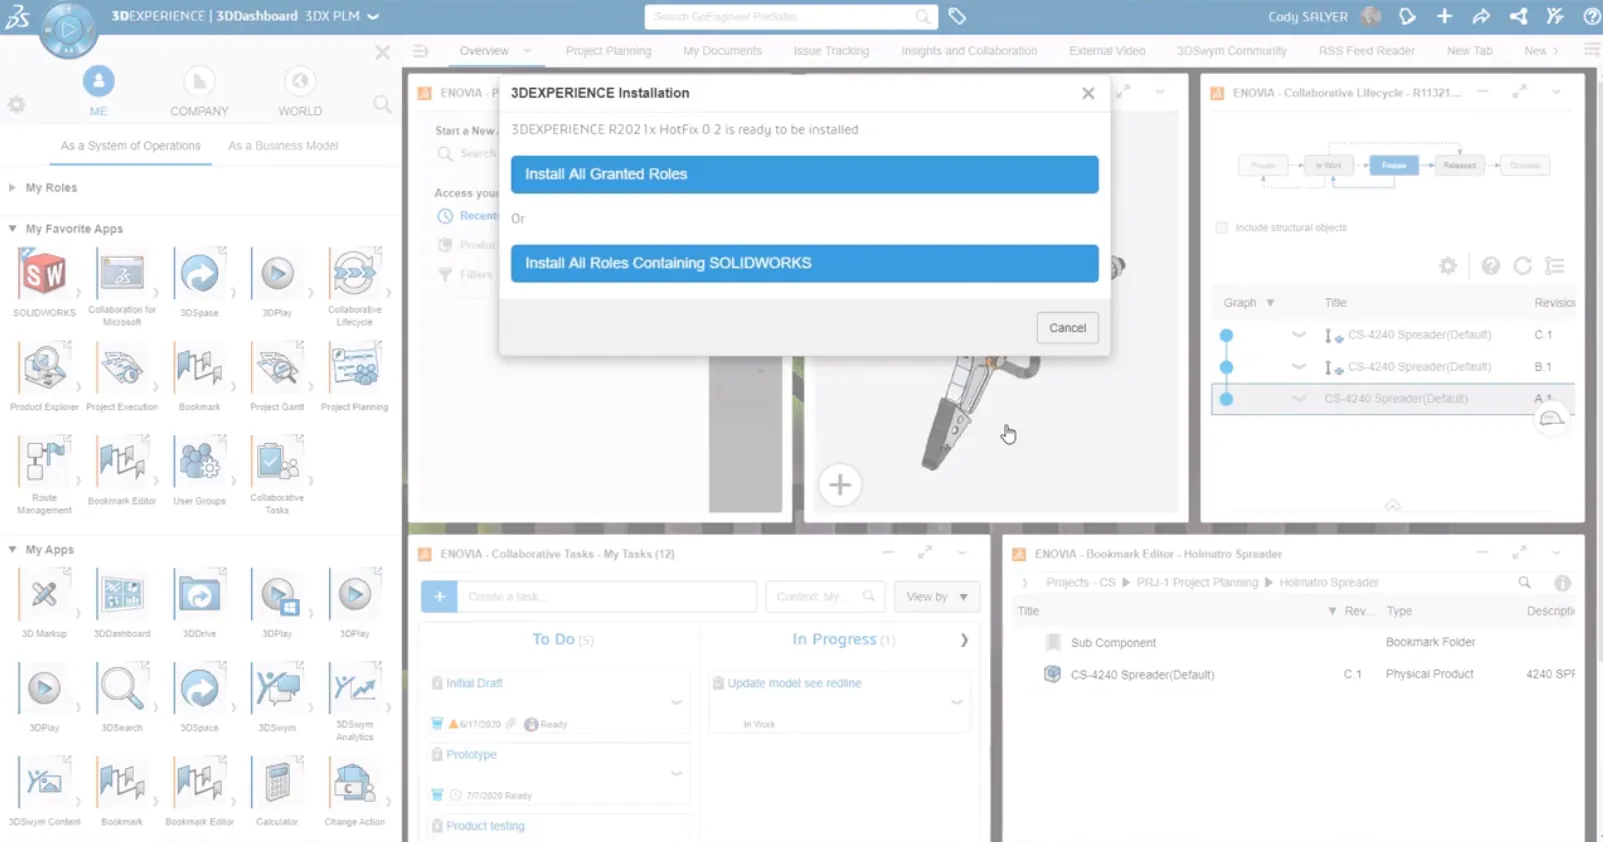
In this example, we’ll select to only install roles containing SOLIDWORKS and will use the default installation location.
Choose Next to begin.
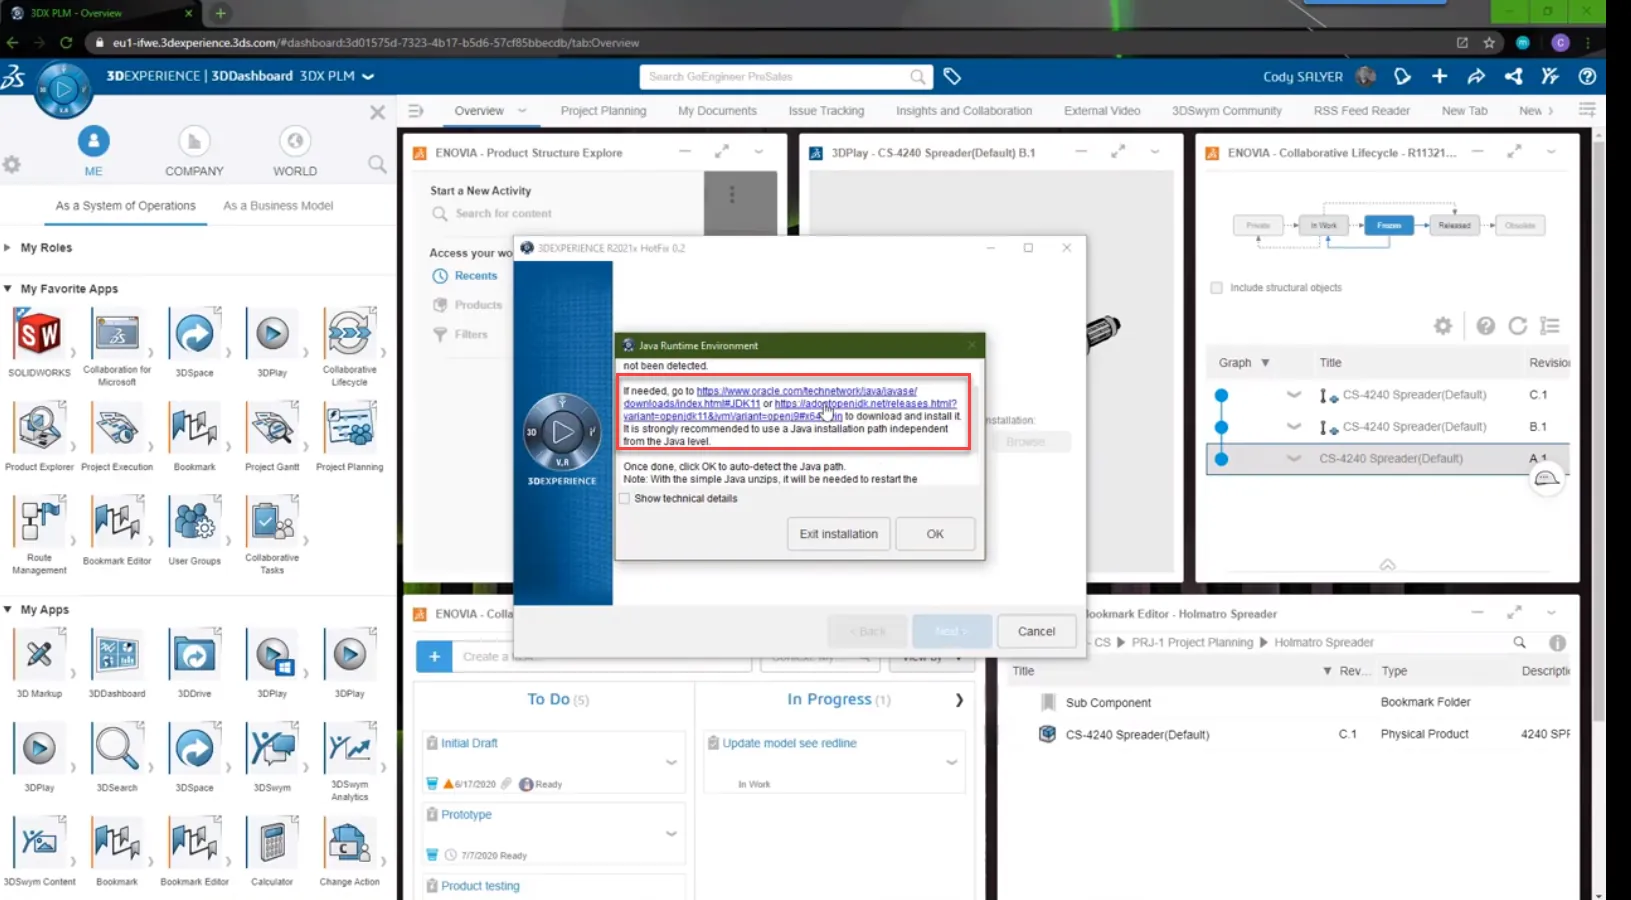
You’re likely to be presented with an error during the installation stating that you do not have Java Runtime installed on your machine. Do not exit the installation. The error message contains two links to download Java Runtime. Clicking the second link will open a webpage to download and install Java Runtime.
Make sure to select the Windows x64 and choose the JRE option. Once the download is complete, select the file to launch it, and it will start a separate installation of Java Runtime. (The default settings are sufficient.)
Once the installation of Java Runtime is complete, go back to your 3DEXPERIENCE installation and click OK.
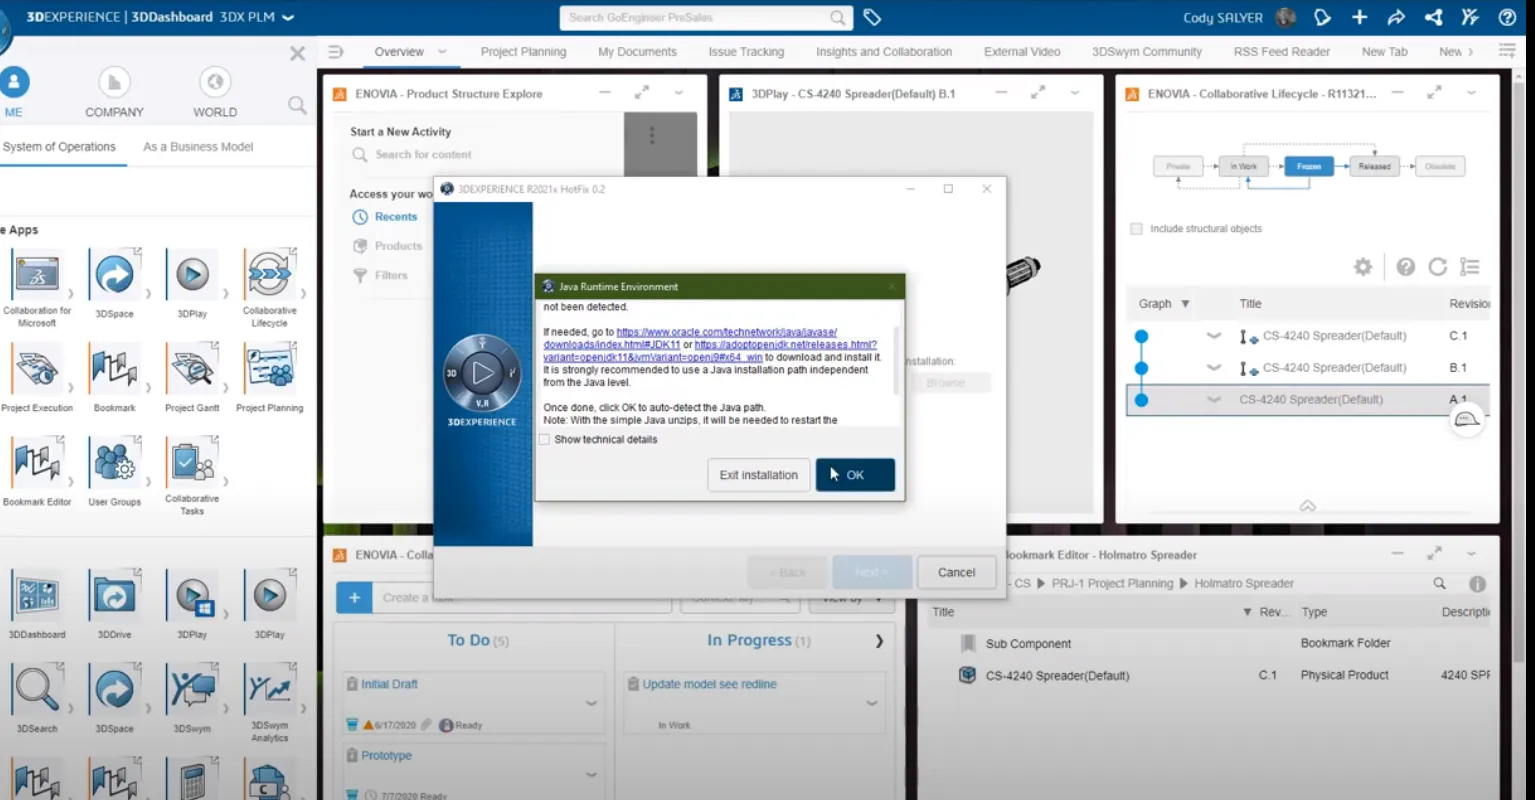
It will prompt you for the path of the local 3DEXPERIENCE folder. This defaults you to the C: drive. We recommend you leave it in the default location.
After confirming the installation, it will download and install the required files onto your computer. Once this installation is complete, it will prompt you to restart your machine.
Press OK to continue.
Next, you will be prompted for a second installation for 3D Drive. If you choose Next, it will begin a second download installation process. Once you choose Close, you will be prompted to create your 3D Drive folder location on your computer.
Once installed, select the SOLIDWORKS app on the 3DEXPERIENCE platform to launch the connector. (This is just for a first time run. Once you’ve completed a first time run, you can simply launch SOLIDWORKS natively on your computer).
You should now have access to the 3DEXPERIENCE add-in inside of SOLIDWORKS.
To watch us perform this installation, check out the video below.
SOLIDWORKS Connected Installation
SOLIDWORKS Connected combines online, cloud-based PLM collaboration and our flagship 3D CAD tool in a single installation item. And, just like SOLIDWORKS desktop, if you get Professional or Premium, you get SOLIDWORKS Visualize connected as well.
Remember, there is no serial number because it’s tied to your user login, and because it’s cloud-based, it ensures that your software is always up to date.
Begin the installation by logging into your 3DEXPERIENCE account and clicking on the compass. Select SOLIDWORKS Connected to start the installation.
The first time you visit the platform, you may have to install the 3DEXPERIENCE Launcher, which will be located in your task tray for easy access to the platform in the future. (Now when you hit SOLIDWORKS Connected, you’ll start the installation). Select the roles you’d like to install for and you’re on your way.
The Java Runtime update process is the same as the steps described in the SOLIDWORKS Connector instructions above. Select the proper download to update your installation (some systems may only require a JDK update). Click OK on the dialog box and after around 20 minutes your download should be complete.
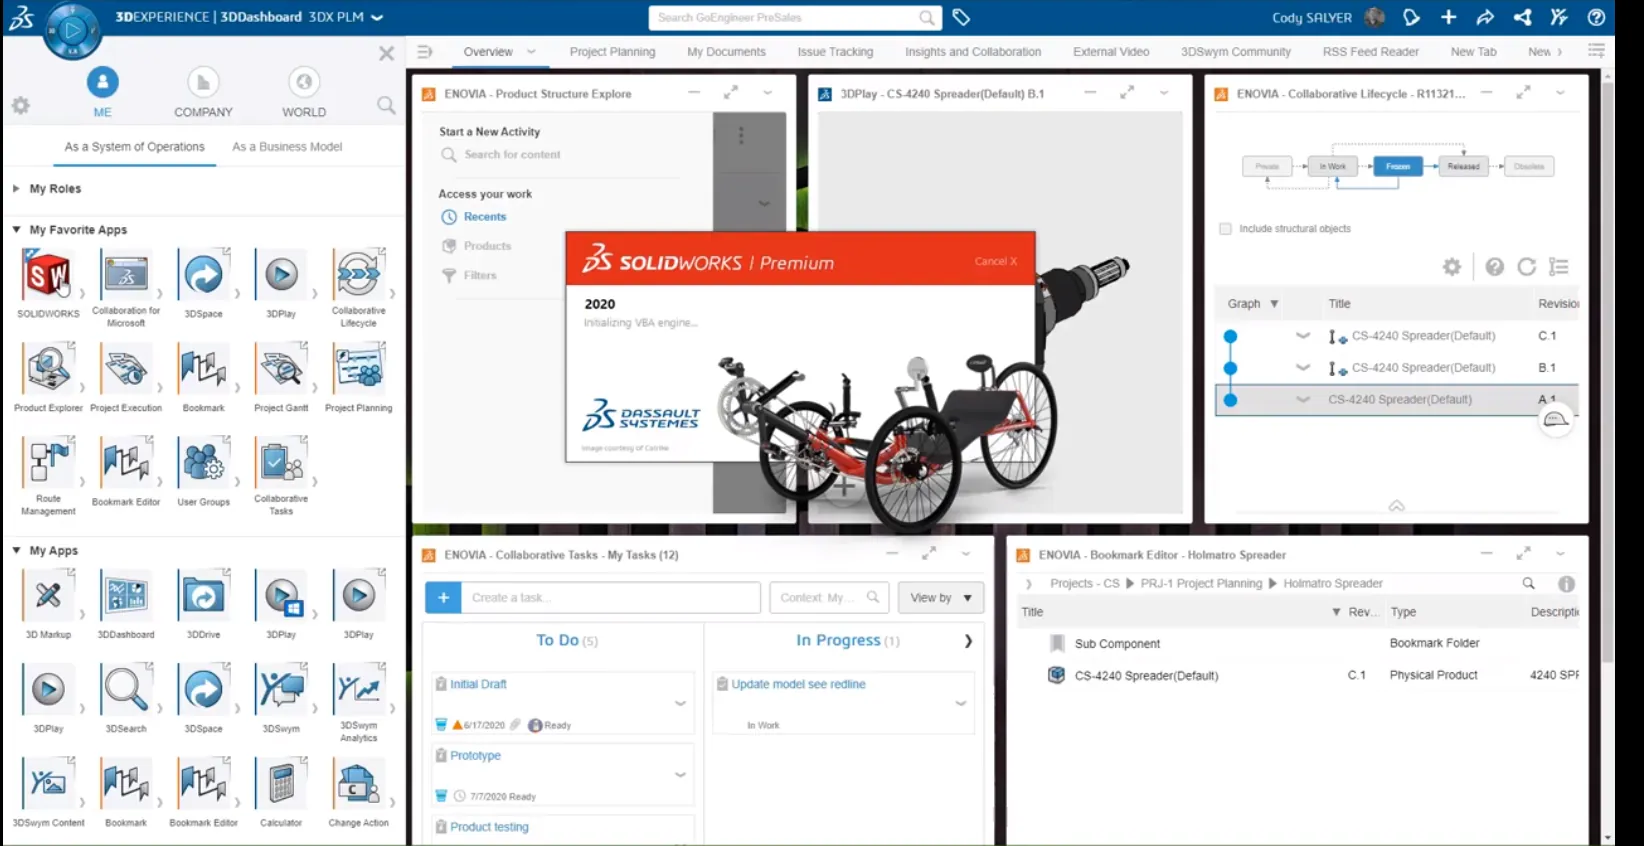
Use the 3DEXPERIENCE launcher in your task tray to log into the platform. Select your compass and launch SOLIDWORKS Connected. This will start SOLIDWORKS and log you in automatically to your collaborative space.
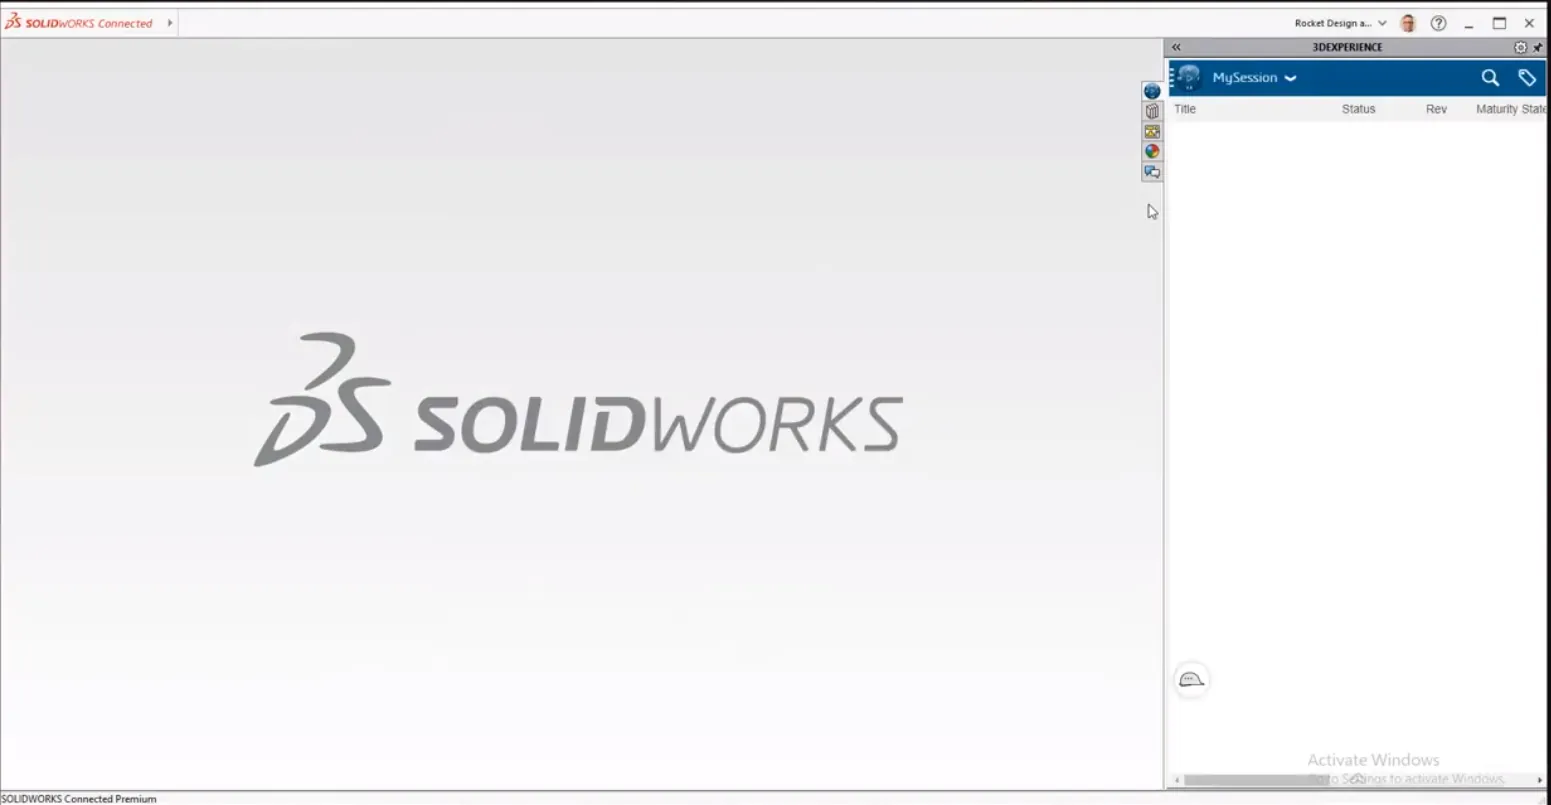
The quick access toolbar is where it all starts. If you click File > Open, you’re automatically connected to your collaborative space and MySession is always on for PLM interaction.
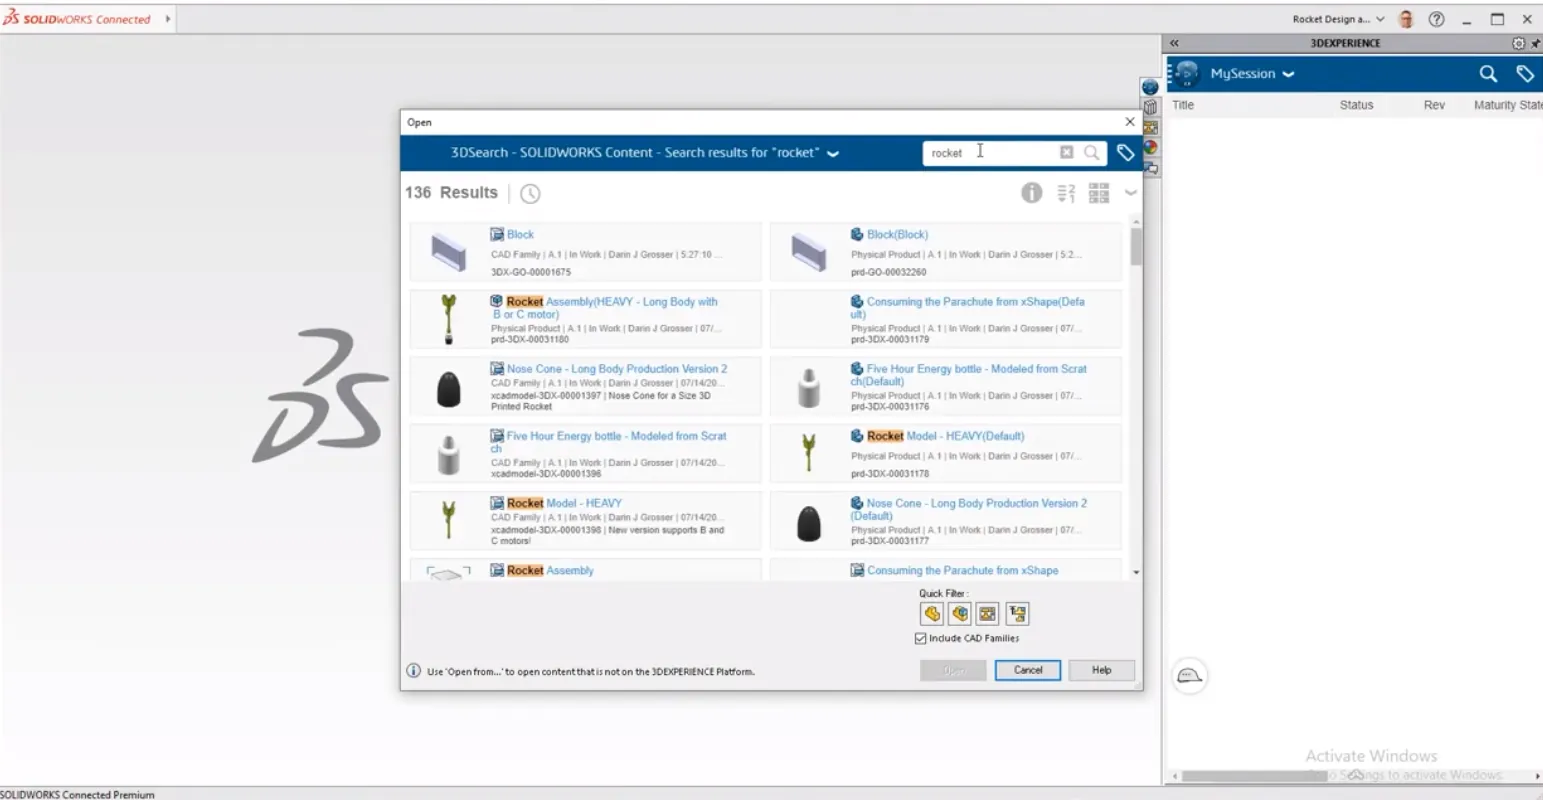
You can also open data from your local drive and then save it directly to the cloud. To do that, you’ll need to save it to the 3DSpace.
In order to make changes, you’ll have to reserve the file and take ownership. Now you can make changes and save those changes locally as necessary. Once you’re ready to put a version in the vault, you can save to the cloud.
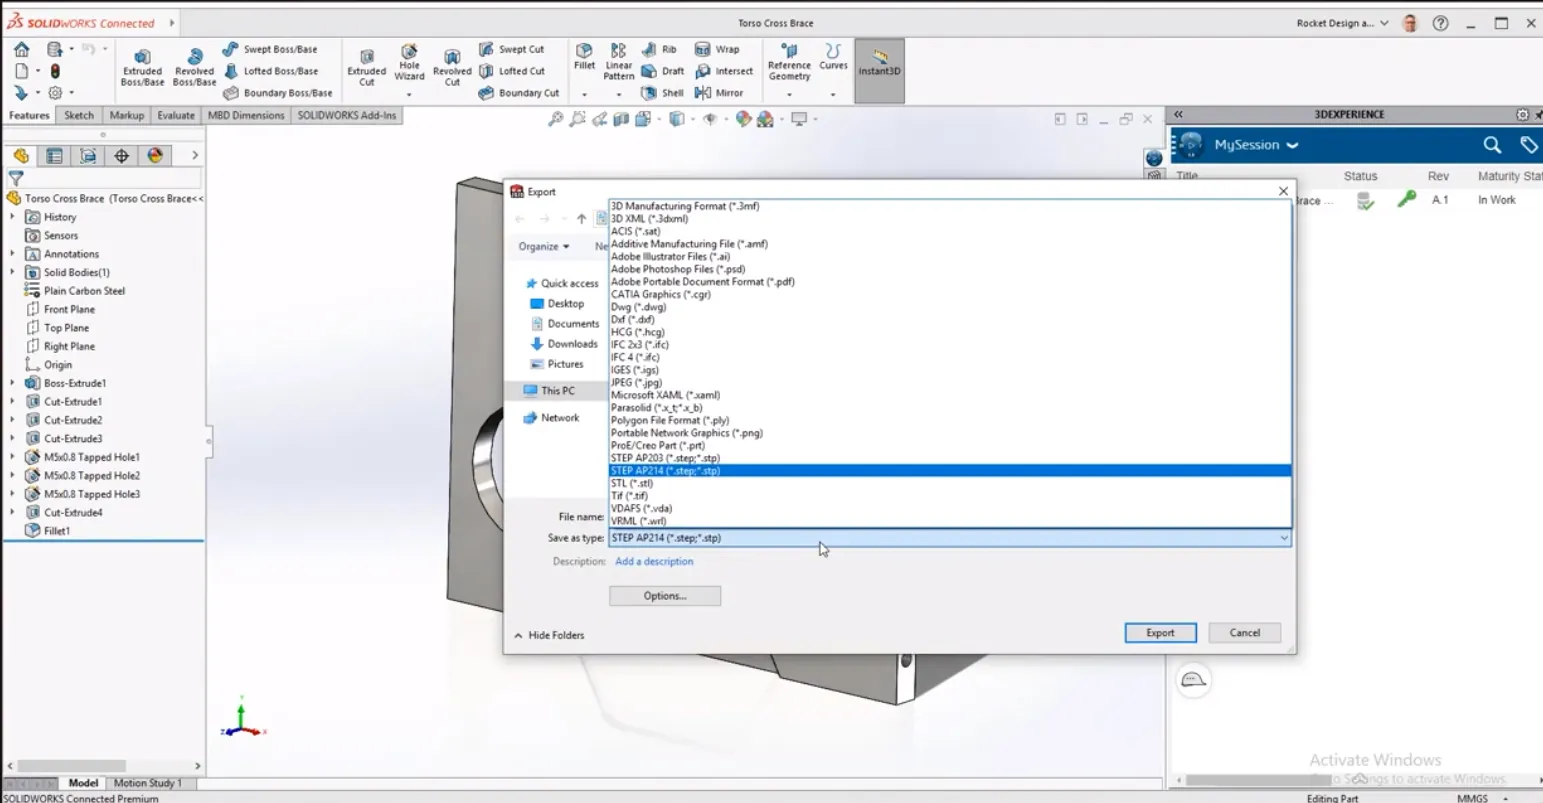
Once the data is saved to your 3DSpace, you can export in all the typical file formats as needed. You can save out SOLIDWORKS native data or export to all of the popular file formats.
Your data is now available anywhere, where you can start collaborative actions and interact with other colleagues.
It’s the local SOLIDWORKS Performance and feel that you know and love combined with online PLM communication and storage.
You can watch us perform this installation process below.
I hope you found this guide to getting started with 3DEXPERIENCE helpful. Be sure to check out our 3DEXPERIENCE Tutorials YouTube channel to learn more.
![]()
About GoEngineer
GoEngineer delivers software, technology, and expertise that enable companies to unlock design innovation and deliver better products faster. With more than 40 years of experience and tens of thousands of customers in high tech, medical, machine design, energy and other industries, GoEngineer provides best-in-class design solutions from SOLIDWORKS CAD, Stratasys 3D printing, Creaform & Artec 3D scanning, CAMWorks, PLM, and more
Get our wide array of technical resources delivered right to your inbox.
Unsubscribe at any time.