How to Install DraftSight
How to Install DraftSight
This guide will walk you through installing DraftSight using a Standalone Serial Number as well as a Network 'SolidNetWork' License types.
For DraftSight Enterprise users , we will also discuss how to use the DraftSight Deployment Wizard to create Admin Images for multi-user deployments.
Enterprise or network licenses of DraftSight are activated on a server for use with many users (clients):
- Follow these instructions to set up a new server - https://www.goengineer.com/blog/network-license-management-solidworks
- Follow these instructions to add a new network license to an existing server already running the SolidNetWork License Manager Server application -
https://www.goengineer.com/blog/how-to-add-another-solidworks-license-to-your-license-server
Ensure client computers are able to communicate with the server. After this is complete, you are ready to install DraftSight on the client computers!
Install DraftSight
To install the application to client machines, you will need the DraftSight installation media. You can find this by contacting Technical Support ( technical support with link to page) or from https://www.draftsight.com/support/draftsight-download. Select and download the appropriate version for your system.
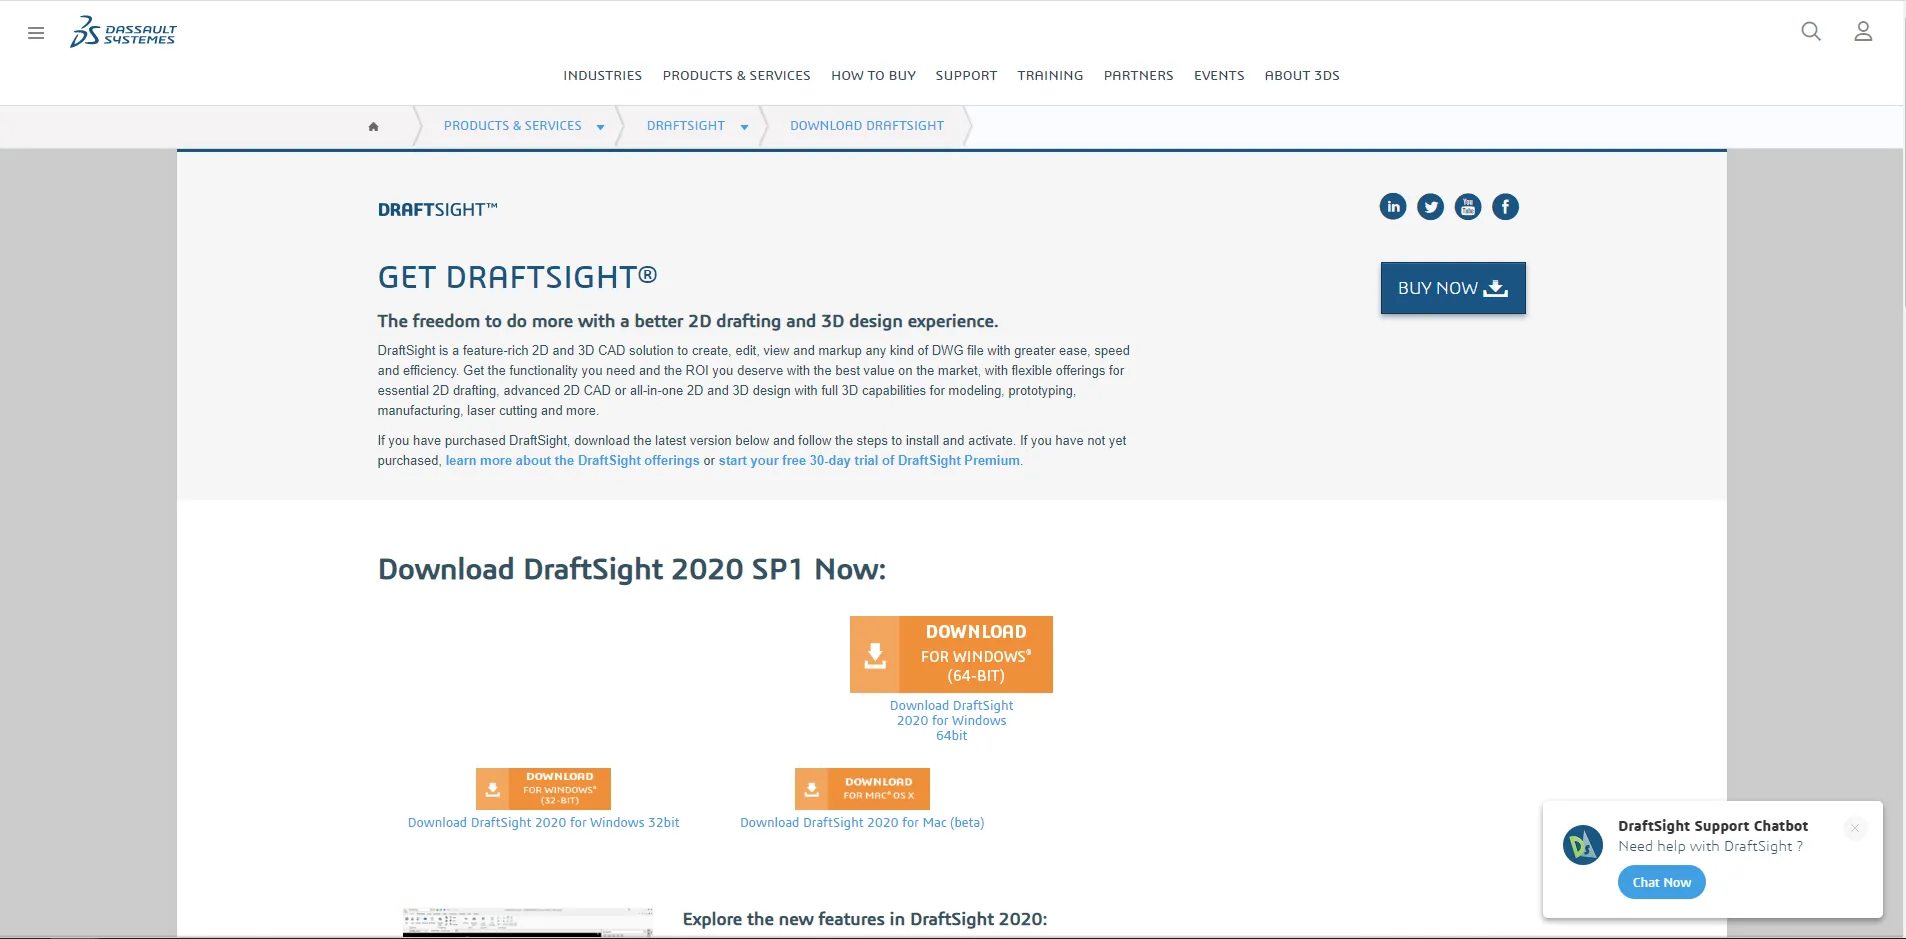
Figure 1. DraftSight Download page.
Now that we have the executable downloaded, let’s launch it and install. Here is where you get the option to decide between the two licensing options. The first is if you have a standalone DraftSight serial number, which means you can select and enter it in the Serial Number field.
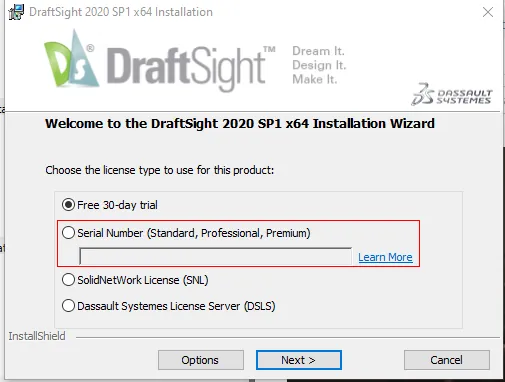
Figure 2. Standalone License option.
If the DraftSight serial number is a network serial number, and we have followed the SNL install guide above, select SolidNetWork License. Hit Next.
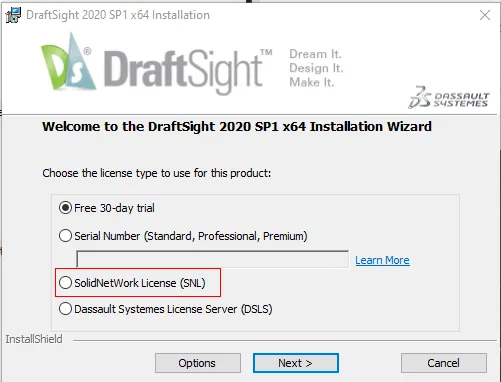
Figure 3. Network License option.
If we are using the SNL, the next screen will prompt you to enter in the sever information. The default port is 25734. Enter in the server information in the format of 25734@<Servername>. Hit Next.
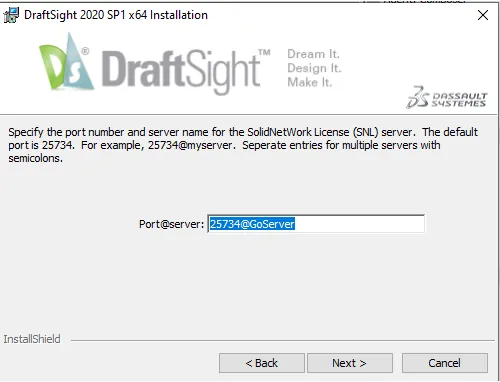
Figure 4. Enter in the server information.
Proceed through the installation and finish installing. Once finished, DraftSight will be installed and ready to use. If you have any questions or ran into any issues during the installation, reach out to our GoEngineer Technical Support team .
Setup the DraftSight Deployment Wizard
This is for DraftSight users that wish to create admin images for fast deployment across multiple users. The Deployment wizard must be requested from SOLIDWORKS and is given out on a one-time basis once Enterprise status has been verified. If this is something you wish to do, contact GoEngineer tech support. Once this process has been completed and you have the DraftSight Deployment Wizard (DDW) you are ready to create the admin images for DraftSight.
The first step to setting up the DDW is launching the .exe. The first page is the welcome page. This page describes the use of the DDW. Hit Next.
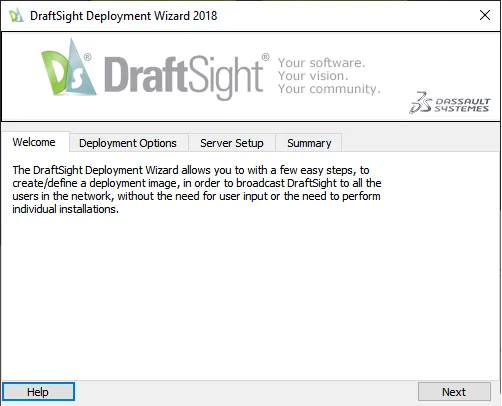
Figure 5. Opening screen of the DDW.
The next step is the Deployment Options. This is where we will point the images to look for the DraftSight installer and the shared Data Path.

Figure 6. Deployment options.
For the DraftSight installer location, select Browse and go to the network location where the installer is saved.
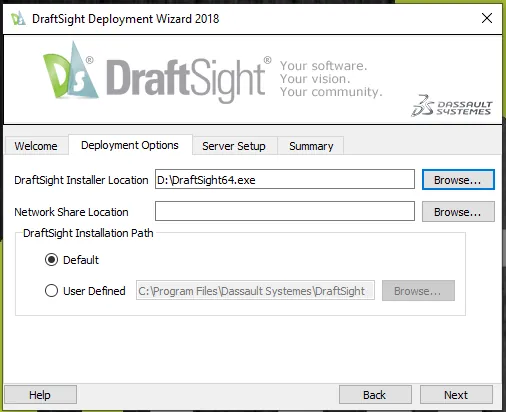
Figure 7. DraftSight installer location.
Next, we want to add the Network Share Location. This is the location where the DDS will create the Deployment Package. Select Browse and go to the location where these files will be stored. The section below is where we can use the default path or make a user defined installation path. This is the path where the installer will install the program files for DraftSight on the client. We will use the default path. We can now hit Next and proceed.
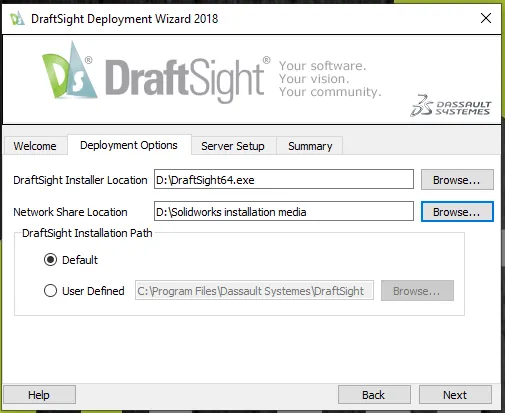
Figure 8. Network Share Location.
The next step is the server setup. This is referring to the License Server. There are two options: the SNL and the DSLS. As stated above, we will not be discussing the DSLS, so we will use the SNL option.
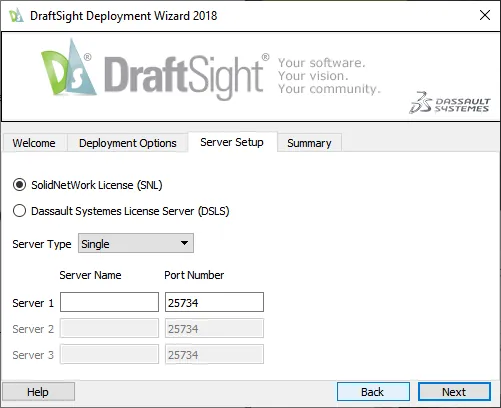
Figure 9. Licensing options.
Now let us enter in the sever name and the port number. We can see that the default port number for the SNL is already entered. Hit Next.
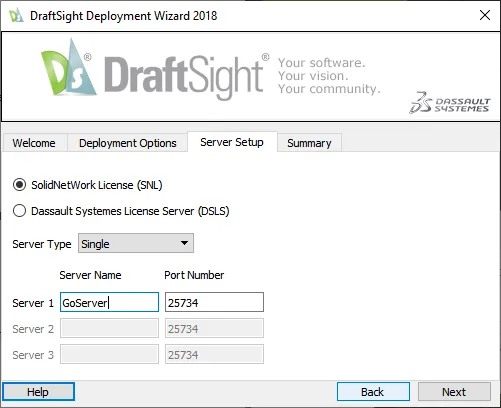
Figure 10. Server Name and Port Number entry.
Finally, we are at the summary page. Review the information to confirm it is correct and click finish to create the administrative image.
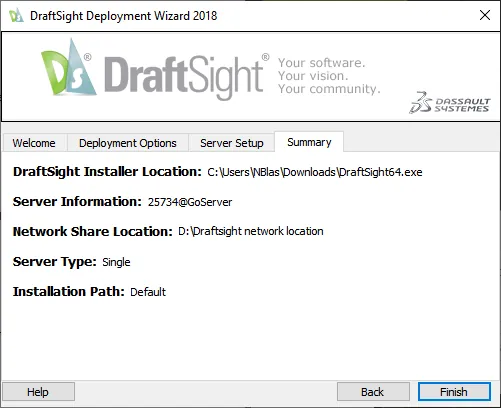
Figure 11. Finishing creating your Deployment images.
Once the files are created you can deploy these to the client machines. Since this is saved in a network location, we can send the users the Network Share Location or a link and have them double-click the deploydraftsight.exe executable. This will launch and install DraftSight on the client.
I hope you found this DraftSight installation guide helpful. Fore more information, check out our DraftSight FAQ.
![]()
About Nathen Blas
Nathen Blas is a SOLIDWORKS Technical Support Engineer based out of our Headquarters in Salt Lake City, Utah. He earned his Bachelor’s degree in Mechanical Engineering at the University of Utah in 2018 and joined the GoEngineer family that same year.
Get our wide array of technical resources delivered right to your inbox.
Unsubscribe at any time.