How to Upgrade SOLIDWORKS to Professional or Premium
You just purchased an upgrade to your SOLIDWORKS license, and now it’s time to reap the benefits. To upgrade your existing SOLIDWORKS installation to the package you’ve purchased, please take the following steps (please make sure to have your SOLIDWORKS serial number on hand):
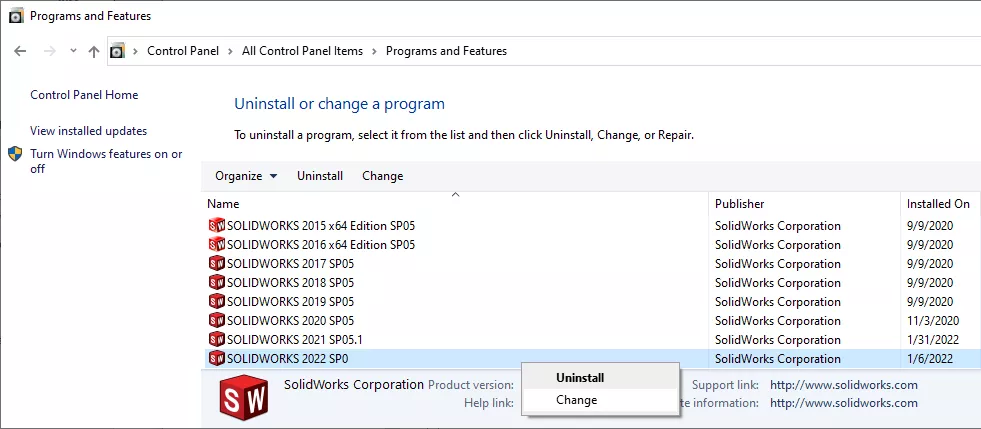
Step 1: Open your Programs and Features window
Windows 10/11: Press the Windows key, type Control Panel, go to Control Panel, then select Programs and Features.
Step 2: Modify your SOLIDWORKS installation
To change your SOLIDWORKS installation to a different version, this will require changing the programs that are installed, and will normally require changing the serial number as well.
Changing the Installation
To start this process, right-click on SOLIDWORKS in your list of programs and select Change.
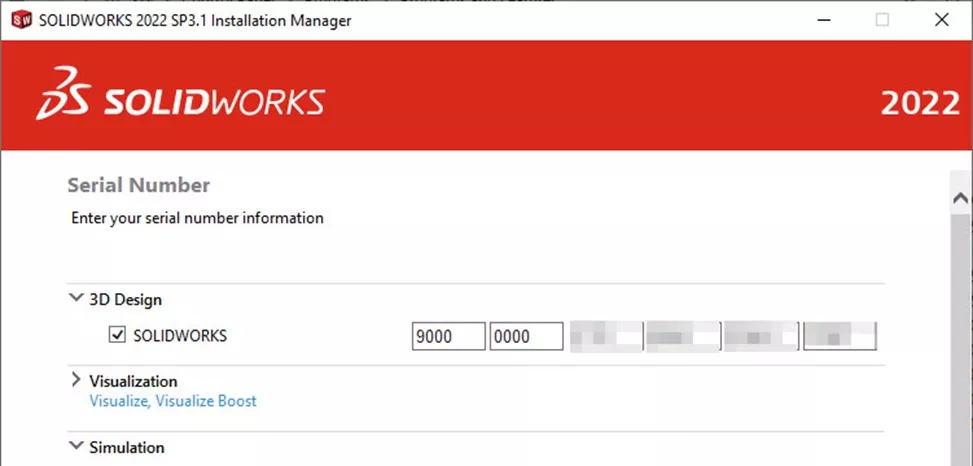
Serial Number
This will start the SOLIDWORKS Installation Manager. Choose Modify the individual installation (on this computer) and click Next.
If your serial number is different than the one that is currently on your computer, please change it now, but make sure that the old license has been transferred from the computer first. If the number is the same, leave the entry as it is.
Other add-ins, such as the ones listed below your SOLIDWORKS serial number, are external products and only to be entered if that product has been purchased separately from your SOLIDWORKS package.
Click Next. This will take you to the Product Selection screen.
Product Selection
The difference between the various SOLIDWORKS packages is defined by what components of the software are going to be installed. On a brand new installation, this is dictated by the initial entry of the serial number. When modifying an installation, we need to make sure that the proper software components are installed. To select the SOLIDWORKS package, click on the Select different packages or products as indicated below.
A small window will pop up with a dropdown menu where you can select the SOLIDWORKS package that you wish to install.
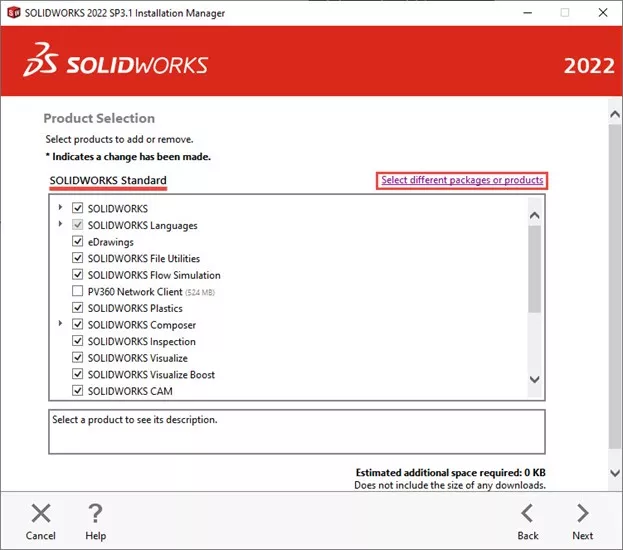
SOLIDWORKS Standard Product Selection
Once you have selected the package you wish to upgrade to, click OK. You will see that there are more modules available underneath SOLIDWORKS.
Check the box for each of these modules and click Next. This will bring you to the Summary screen.

SOLIDWORKS Premium Product Selection
The Summary screen will allow you to decide the locations of the additions to the software. After clicking Download and Modify, the Installation Manager will download and install the additional modules for use the next time you open SOLIDWORKS.
That wraps up how to upgrade SOLIDWORKS to Professional or Premium. For more helpful articles, please see the related articles below.
Editor's Note: This article was originally published in March 2014 and has been updated for accuracy and comprehensiveness.
Related Articles
![]()
About GoEngineer
GoEngineer delivers software, technology, and expertise that enable companies to unlock design innovation and deliver better products faster. With more than 40 years of experience and tens of thousands of customers in high tech, medical, machine design, energy and other industries, GoEngineer provides best-in-class design solutions from SOLIDWORKS CAD, Stratasys 3D printing, Creaform & Artec 3D scanning, CAMWorks, PLM, and more
Get our wide array of technical resources delivered right to your inbox.
Unsubscribe at any time.