Managing Non-CAD Documents on the 3DEXPERIENCE Platform
This article explains how to add and use non-CAD documents on the 3DEXPERIENCE platform, covering everything from adding files to Collaborative Spaces to converting those files upon release. Let’s get file-ing in 3DEXPERIENCE!
Adding Files
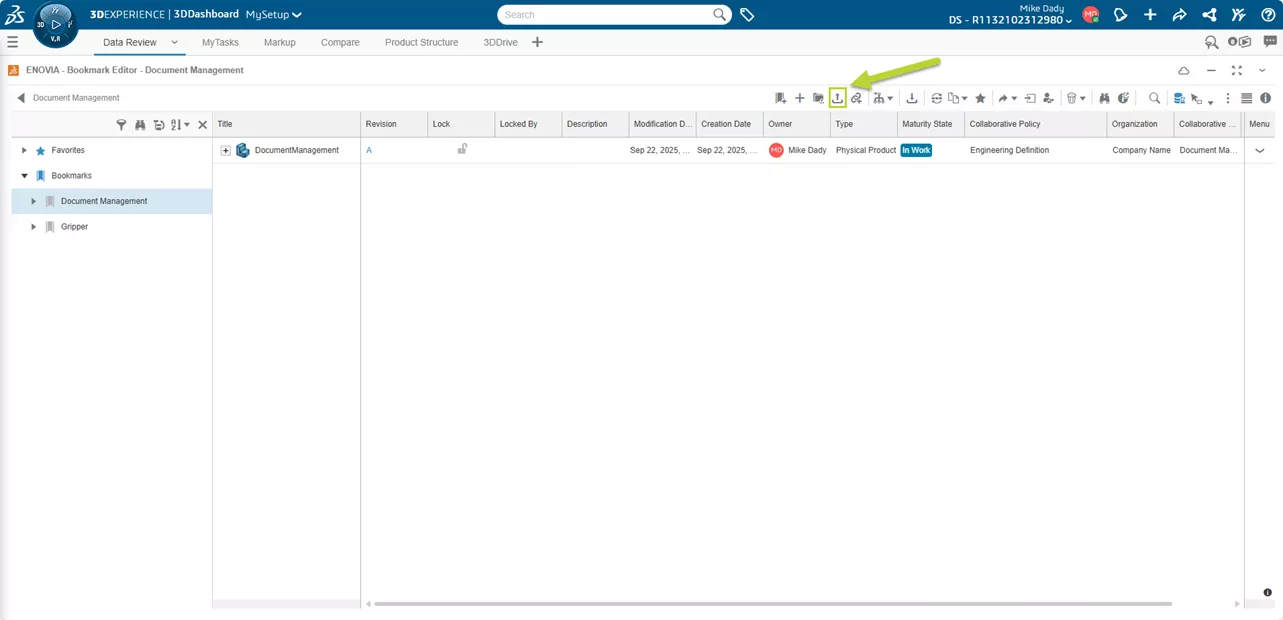
Let's start by discussing how to add non-physical products to the 3DEXPERIENCE platform. Anyone who is a Collaborative Designer with SOLIDWORKS is familiar with how to add Physical Products, but how can we use specifications or additional information for the products that are not CAD data? There are various ways to add these files using apps. In this example, we will use the Bookmark Editor to add a material specification file for our product. By using the Bookmark Editor, the file is automatically added with a bookmark.
Steps to Add a File to a Collaborative Space in the Bookmark Editor:
- Click Upload from the Bookmark Editor.
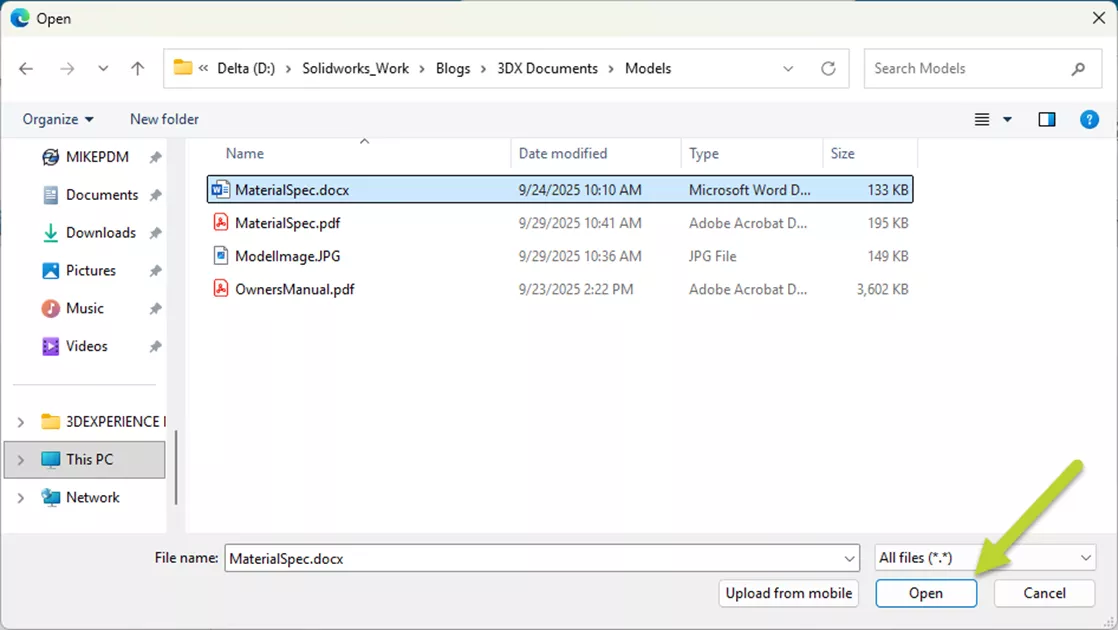
- Select the file needed from the local computer and hit Open.
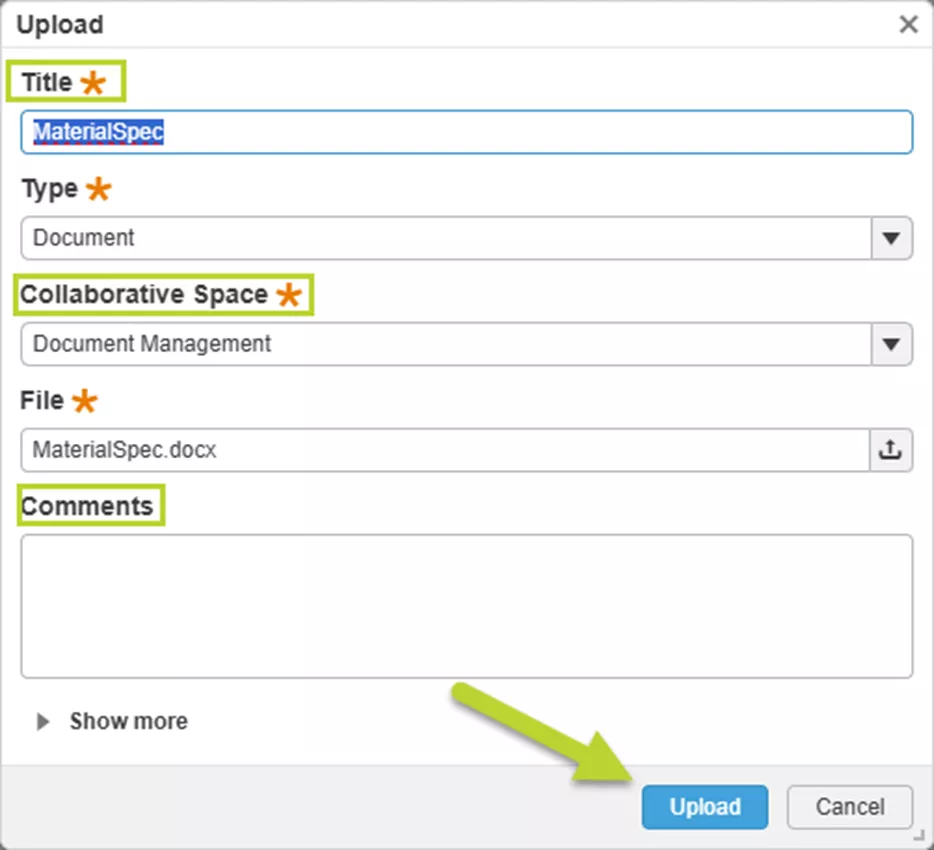
- In the Upload window, set the Title, Collaborative Space, and make any Comments needed.
- Select Upload to complete the process.
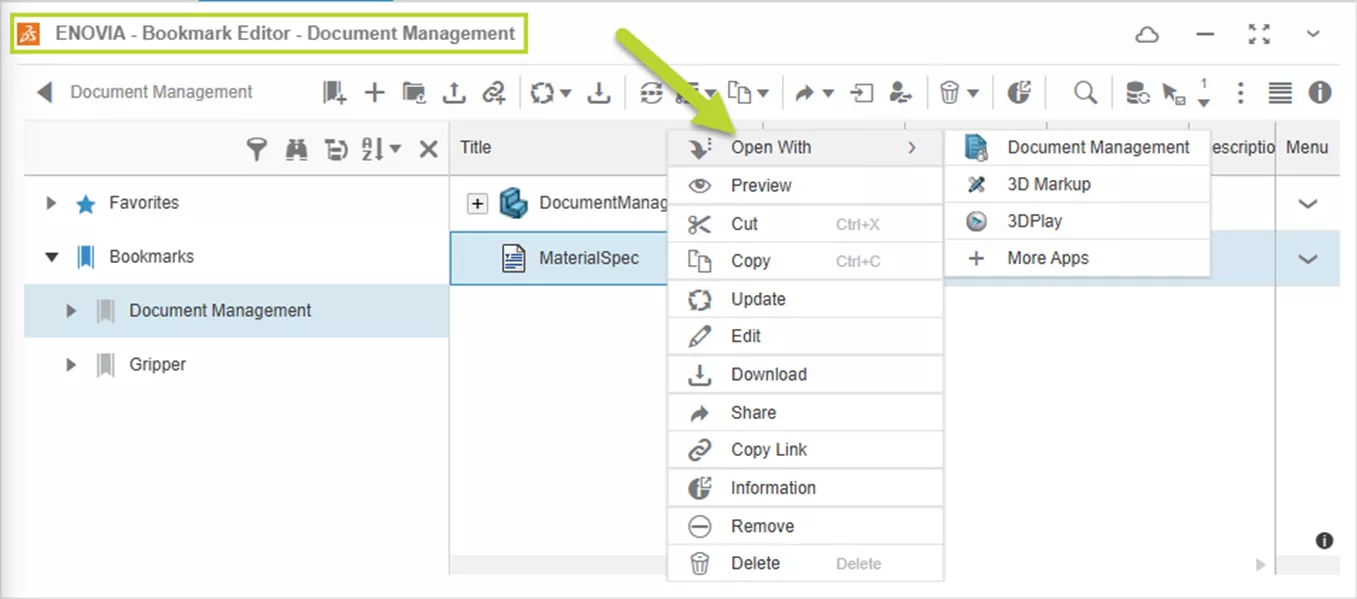
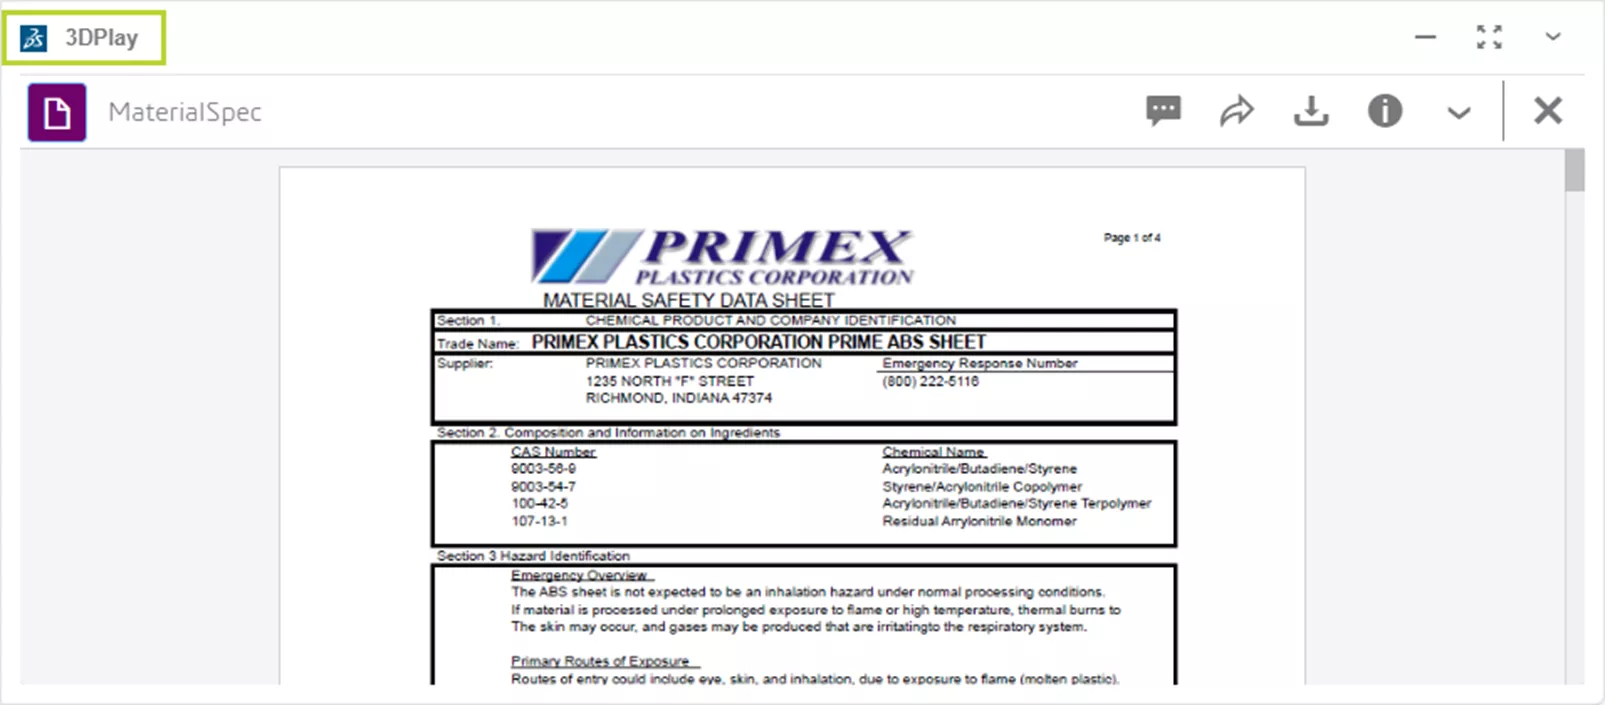
Viewing Files
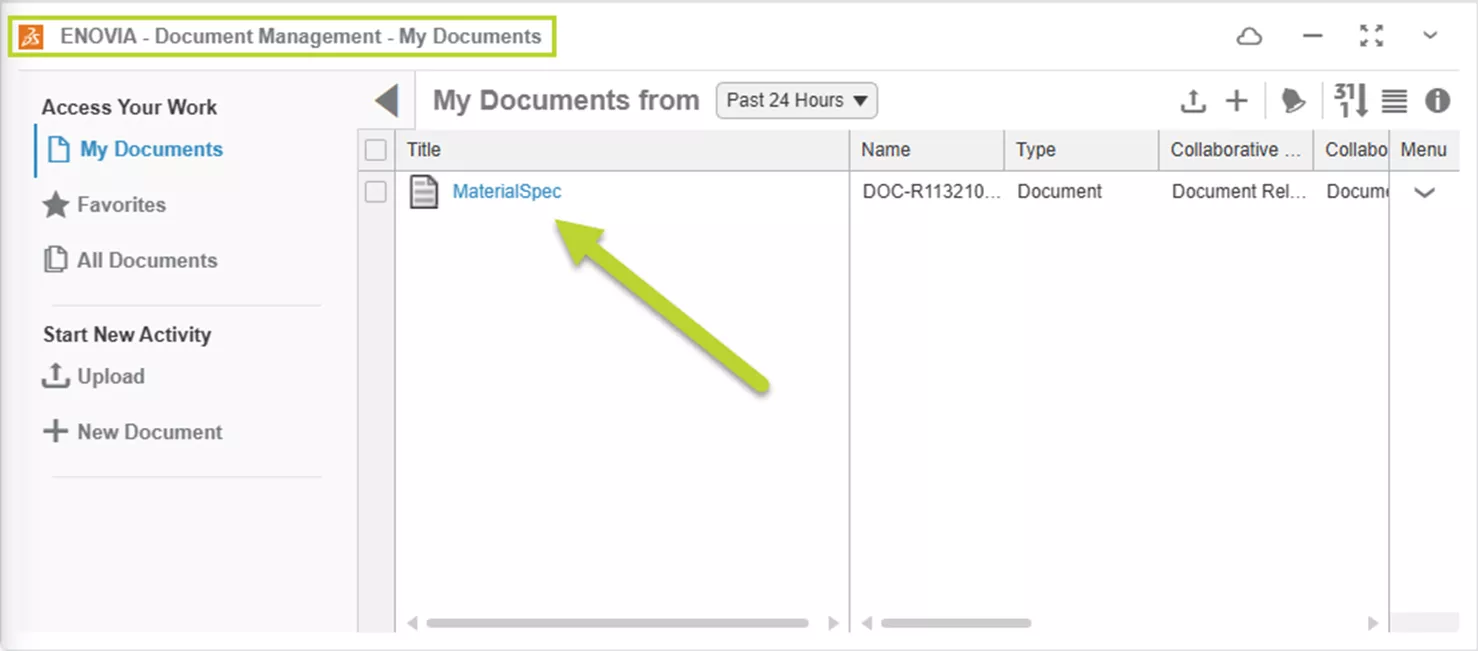
Once a document is added, there are multiple ways to view it. Use the Document Manager App and click on the document name, right-click in the Bookmark Editor and Open With multiple Apps, or simply drag and drop the file into 3DPlay to view the document.
Attaching Specifications to Objects
Now that we have a material specification added to the Collaborative Space, we can add it to our Physical Product. Specifications are documents that influence the design and downstream processes. Because of this, Specification Documents must be reviewed and approved. Specification Documents are also considered a Child Object of the Physical Product.
Adding a Specification can be done in multiple apps. Fortunately, the Bookmark Editor is one of the apps that provides the necessary tools.
Steps to Attach a File to an Object as a Specification:
- Select the Physical Product.
- Open the Information for the Product selection.
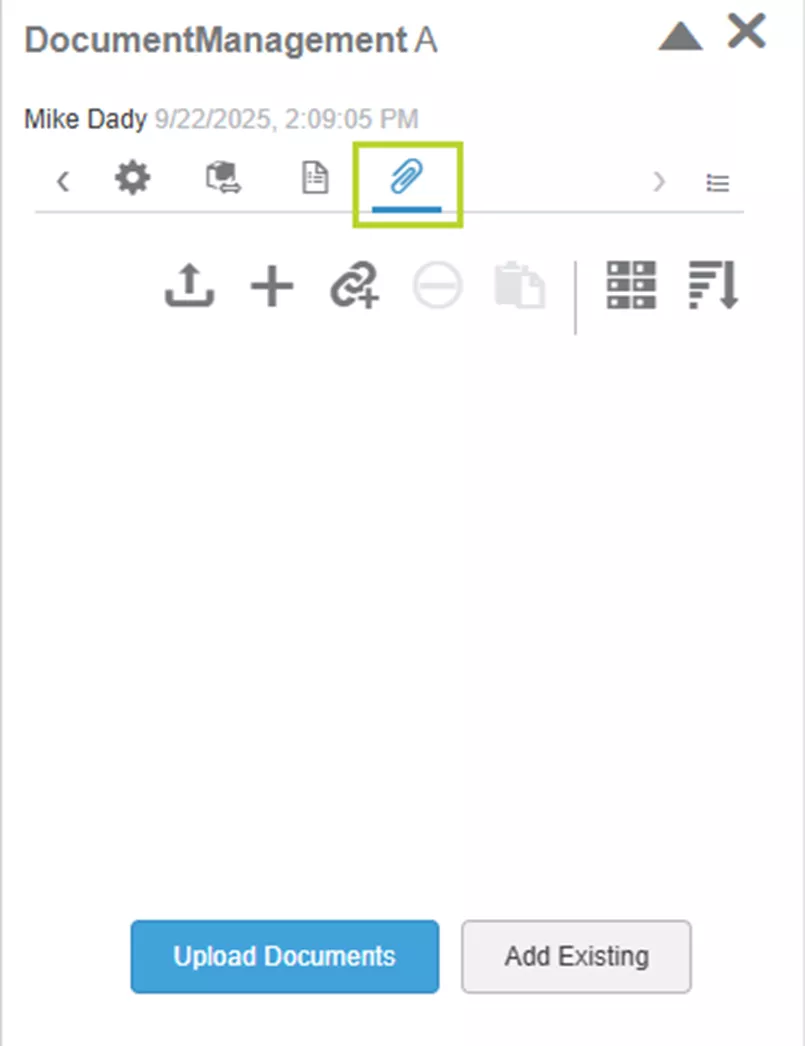
- Use the Next Items arrow in the information panel to show the Specification Documents icon.

- Select the Specification Documents icon.
- Since we already uploaded the file to the Collaborative Space, use Add Existing.
Note: The document could be uploaded to the Collaborative Space using Upload Documents in this step.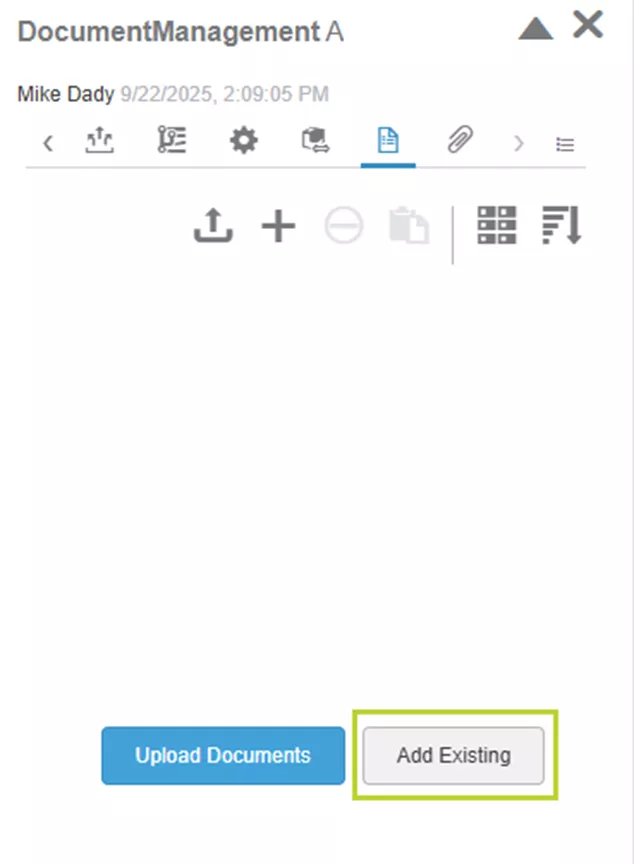
- Select the desired file and hit OK.
Note: Specifications can only be removed from an object before that object is released. Also, the company tenant may be set up to prevent objects from being released if a child object, like a Specification Document, is not released. Care must be taken when working with Specifications.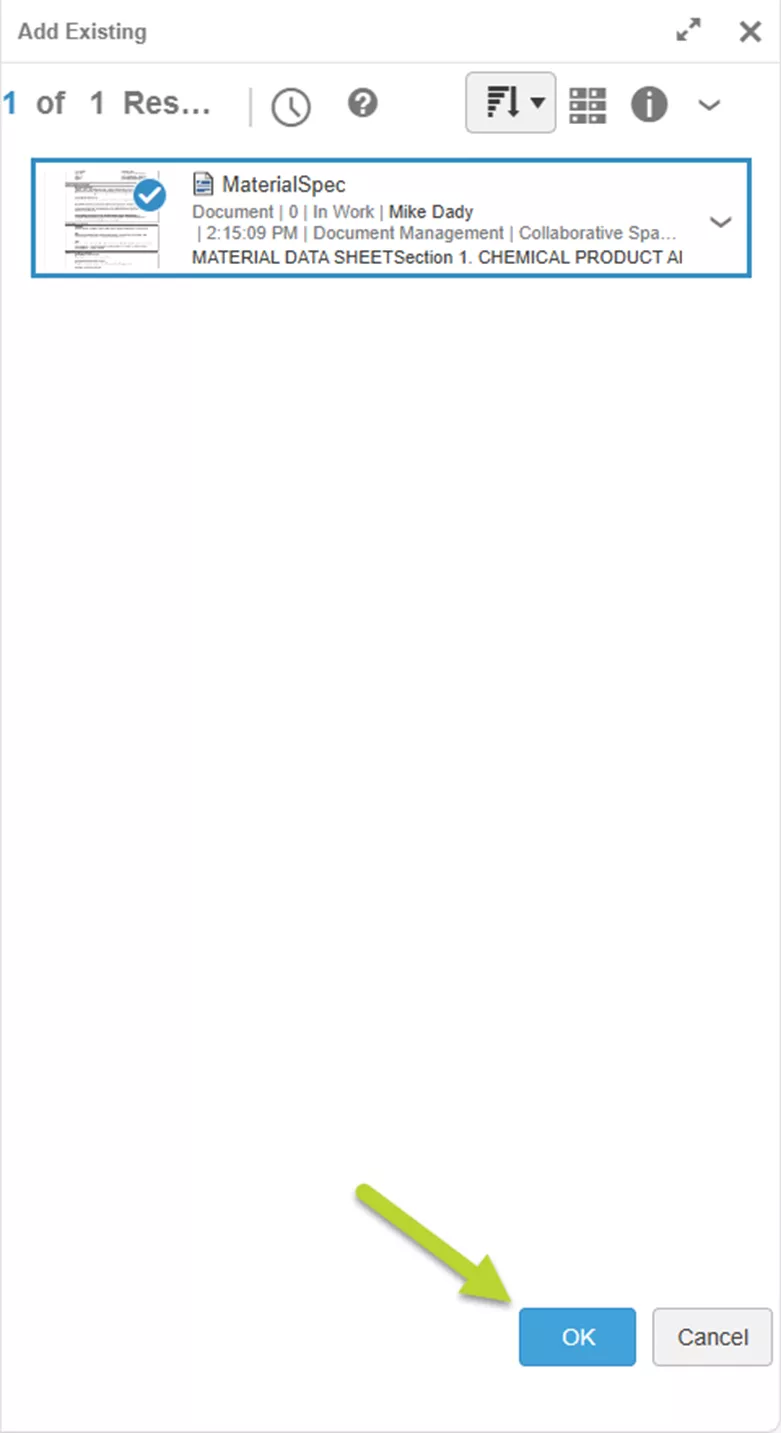
Adding Attachments to Objects
Attachments can be used for other requirements that do not contribute to the definition of the Physical Product and, therefore, are not a Child Object of the Physical Product. Because of this, they can be removed from the Physical Product at any stage in the Product Maturity.
Adding an attachment to an object works similarly to a specification. Select the Attachments icon in the information panel and either Upload Documents from the local drive or Add Existing files from the Collaborative Space.
Adding Specifications - Method 2
Another method to add documents to a Physical Product is through the Engineering Release App.
Steps to Add a Specification in the Engineering Release App:
- Open the Product in the app.
- Select the plus icon, then either Upload or use an Existing Document.
- Complete the upload from a local drive or add an existing document.

Converting Documents on Release
Like Physical Products, documents can be converted on release to other formats for downstream use. As with any administrative action, this process will require Platform Admin rights to the company tenant.
Steps to add a Conversion Rule for Documents:
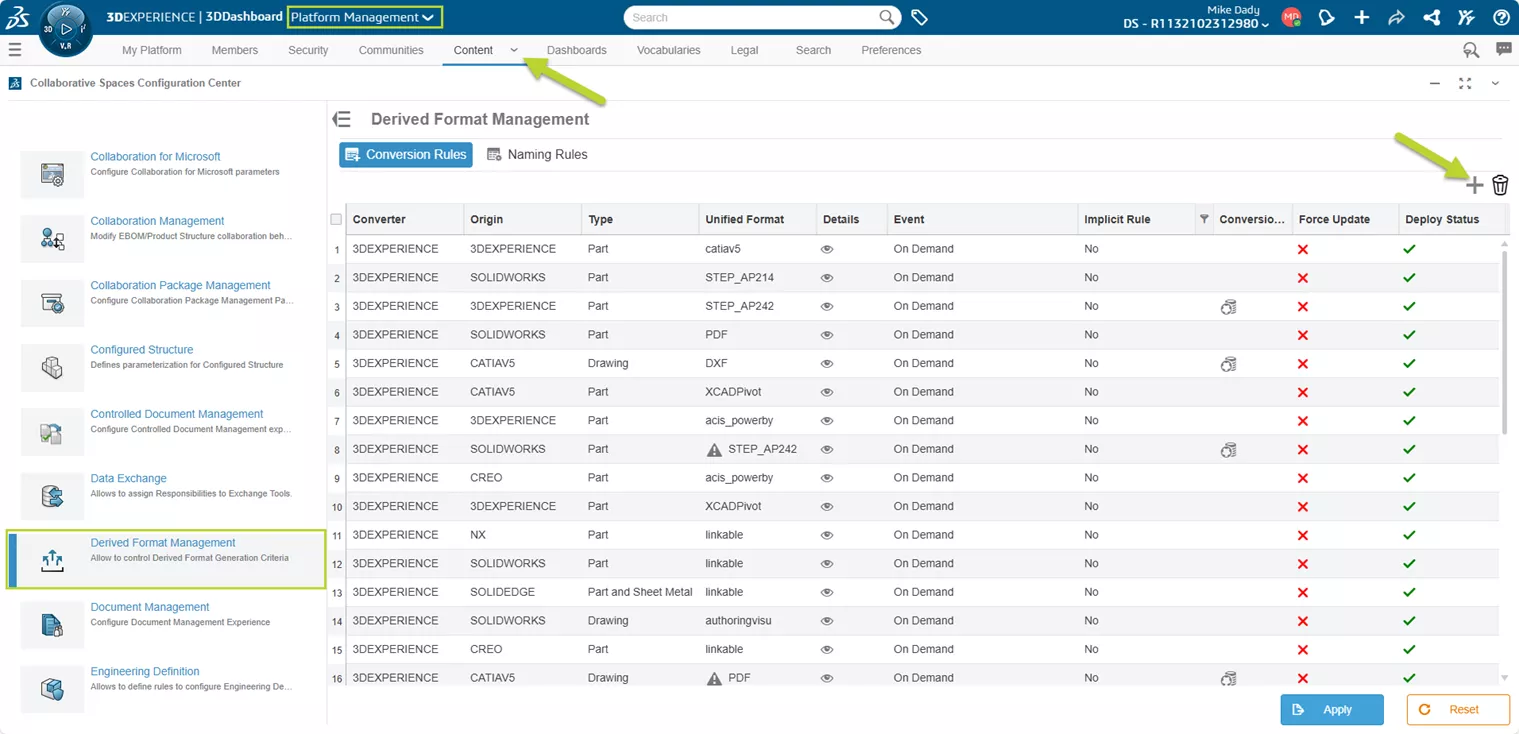
- Go to the Platform Management Dashboard.
- Select the Content tab.
- Scroll down and double-click on the Collaborative Spaces Configuration Center.
- In the left panel, scroll down and select Derived Format Management.
- Select the plus icon to add a rule.
- In the New Conversion Rule dialog, set the Converter to OfficeDocumentConverter (Asynchronous).
- Ensure the Type is Word Processor Document.
- Check the Force Update checkbox.
- Ensure the Event is set to On Status Change.
- Change the Target State to Released.
- Hit OK.
- Scroll down to the bottom of the Derived Format Management rules list, and we can see the new rule.
- Select Apply to add the rule.
Note: To make use of this conversion rule, XXC (Enterprise IP Integration Credits) will need to be purchased for use on the Company Tenant.
Revising Documents
The last item to cover is how to revise documents in a Collaborative Space. Again, this will be accomplished in the Bookmark Editor app.
Steps to Revise a Document:
- Select the item in the app.
- Click the Revise dropdown and select New Revision.

- Hit Revise when prompted in the pop-up.
- Select the new Revision from the list.
- Click on the Modification Commands dropdown.
- If a modified local copy of the file exists, select Update from the dropdown and upload the modified copy.
- Otherwise, select Edit, and the file can be downloaded for modification.
- Note: Once Edit is chosen, the document will automatically be locked for modification.
- Once the file is modified locally, return to the modification dropdown and select update to upload the modified copy.
I hope this blog has helped with managing documents in a Collaborative Space when using the 3DEXPERIENCE platform.
Want to learn more? Check out more tips and tutorials listed below. Additionally, join the GoEngineer Community to participate in conversations, create forum posts, and answer questions from other 3DEXPERIENCE users.
Related Articles
Understanding Collaborative Spaces in 3DEXPERIENCE
Customize Drawings to Use 3DEXPERIENCE Platform Attributes
How to Create a 3DEXPERIENCE Dashboard with Analytics
Assign 3DEXPERIENCE Roles & Manage Members

About Mike Dady
Mike Dady is a Senior Application Engineer at GoEngineer. Mike spends his days working with customers to resolve their manufacturing issues and helps them to improve on existing product designs. If he’s not solving customer challenges, he’s probably at home customizing his snowmobile or working on a home improvement project.
Get our wide array of technical resources delivered right to your inbox.
Unsubscribe at any time.