Manually Install the SOLIDWORKS PDM Office Add-in Tutorial
SOLIDWORKS Enterprise PDM 2015 (now known as SOLIDWORKS PDM Professional) includes a Microsoft Office add-in for Excel, Word, and PowerPoint that allows you to perform vault operations on documents opened in the Office application. Normally, you would select the Office add-in (Microsoft Office Integration) option during the client installation if Office is detected on the system.
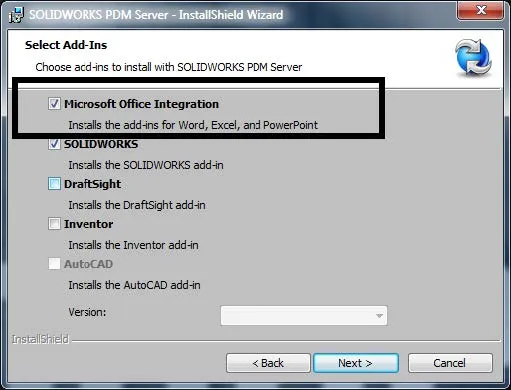
From time to time, the option is grayed out in the installation window due to the inability of the install wizard to detect the office edition that you have on your machine, even though you may have Microsoft Office installed. If, for this reason, you are not able to select the option via the install wizard, you can manually install the Office add-in. In this article, I am going to give you instructions on how to accomplish this task.
*Important - If you had the pre-2015 standalone office add-in installed, ensure it is uninstalled via programs and features.
How to Manually Install the PDM Office Add-in
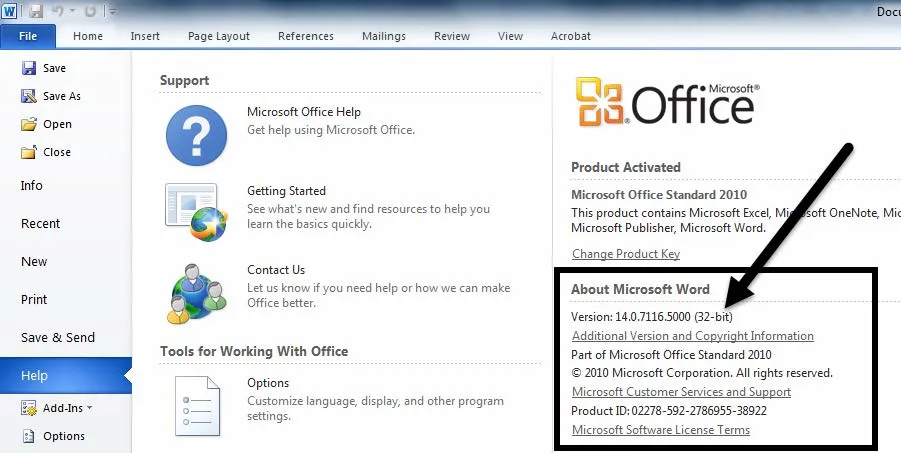
- Verify the version of Office that you are using. The best method is to open the Office application and go to File > Help. In the About Information section, it should state if the application is 32-bit or 64-bit.
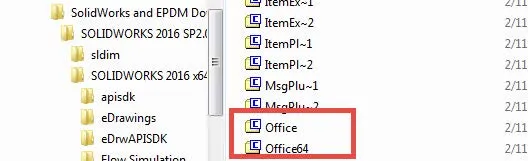
- Browse to ..\Setup64\ folder (for EPDM 2015) or ..\ swpdmclient\ (for PDM 2016) in the installation media and locate the Office add-in .CAB files.
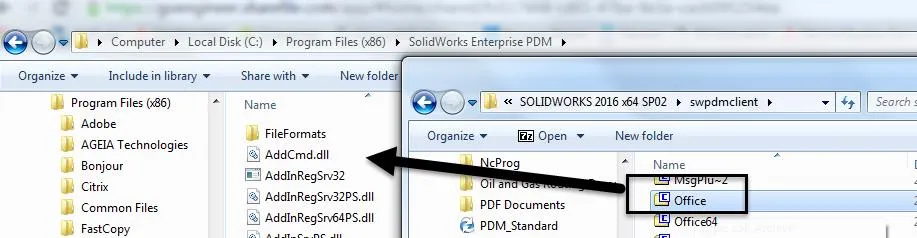
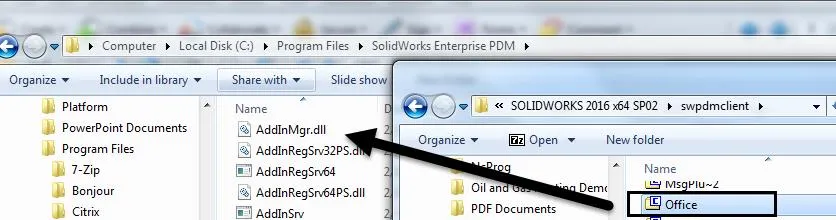
- Open Office.cab for 32-bit Office. Extract epdmlib.dll and office.dll into the Enterprise PDM 32-bit install folder (c:\Program Files (x86)\SolidWorks Enterprise PDM).
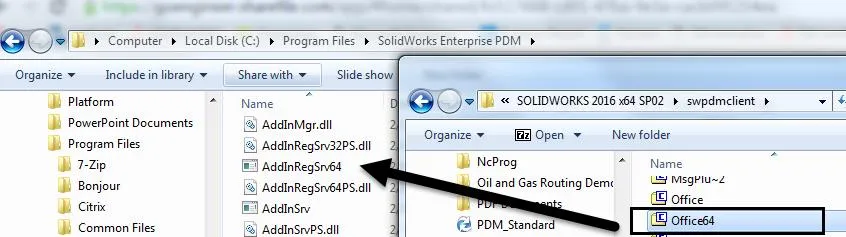
- Open Office64.cab for 64-bit Office. Extract epdmlib.dll1 and office.dll1 into the Enterprise PDM install folder (c:\Program Files\SolidWorks Enterprise PDM) and rename the files to epdmlib.dll and office.dll.
- Open Office.cab. Extract epdmlib.dll and office.dll into the Enterprise PDM install folder (c:\Program Files\SolidWorks Enterprise PDM).
- On a 64-bit operating system
- On a 32-bit operating system
- Open Office.cab for 32-bit Office. Extract epdmlib.dll and office.dll into the Enterprise PDM 32-bit install folder (c:\Program Files (x86)\SolidWorks Enterprise PDM).
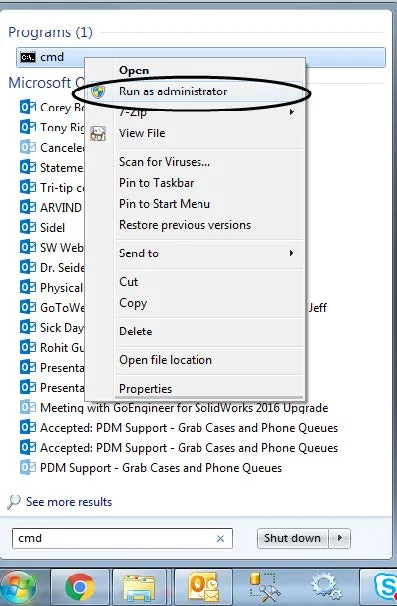
- Start a command prompt using the Run as Administrator option.
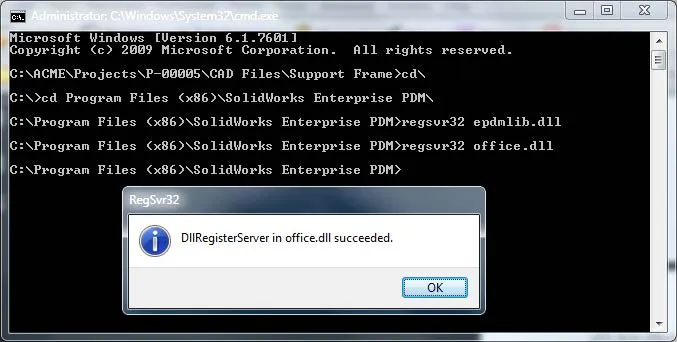
- Step into the install folder where the two files were extracted and type the following commands (Hit the Enter key after each command.):
- regsvr32 epdmlib.dll
- regsvr32 office.dll
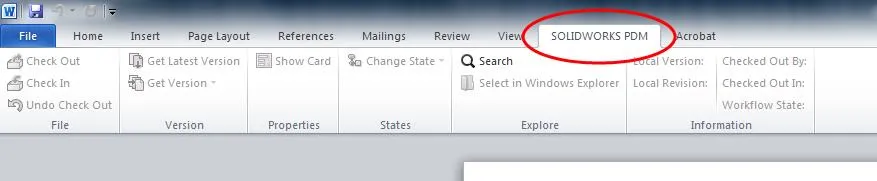
- Start the Office application, and the PDM Add-in tab should now show.
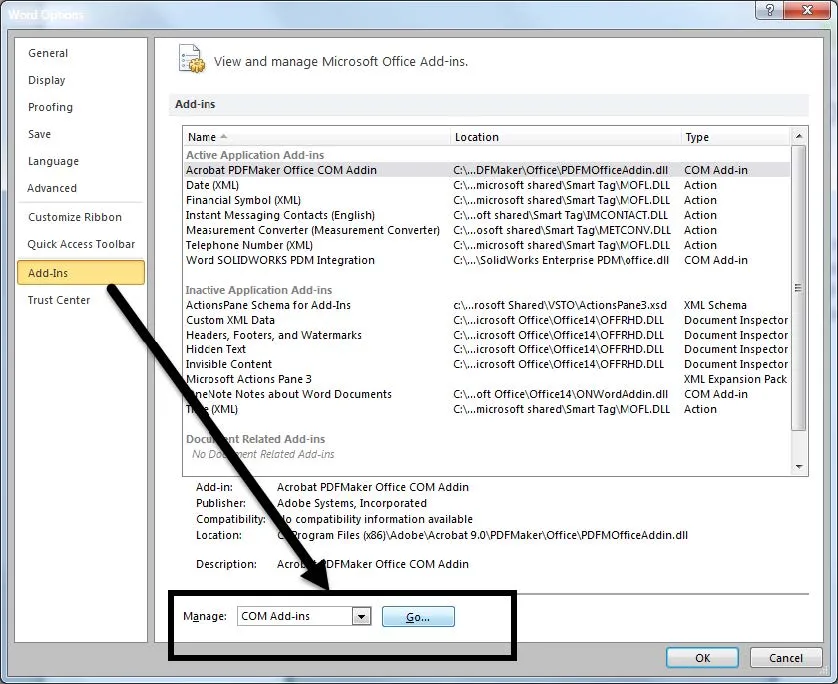
- If the PDM Add-in tab does not show, go to File > Options > Add-Ins > COM Add-ins and press GO.
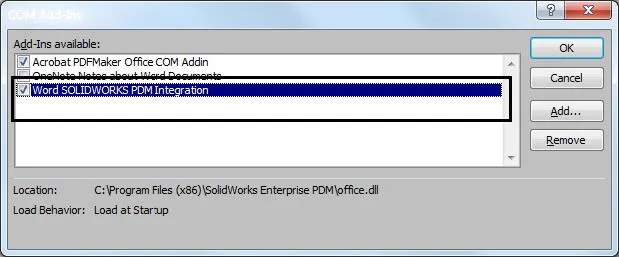
- Make sure the PDM integration add-in is listed and enabled.
Learn More About SOLIDWORKS PDM
SOLIDWORKS PDM Undo Checkout By Other Administrators
How to Change the Language in SOLIDWORKS PDM
Creating Custom Reports in SOLIDWORKS PDM
Managing SOLIDWORKS PDM Licenses
How to Update PDF Documents in SOLIDWORKS PDM with a New Revision

About Derrick Franklin
Derrick is an Engineering Manager in Northern California. He assists in both pre-sales and post-sales capacities for the SOLIDWORKS software as well as serves as an Enterprise PDM Product Specialist. Derrick received his Bachelor’s degree in Biological Engineering from Mississippi State University and has a Master’s degree in Mechanical Engineering from the University of Utah. He is also a Certified SOLIDWORKS Expert and a Certified PDM Professional.
Get our wide array of technical resources delivered right to your inbox.
Unsubscribe at any time.