SOLIDWORKS Assembly Hole Series Explained
In this article, we cover what an assembly hole series is and how to create one. The SOLIDWORKS Assembly Hole Series is a Hole Wizard type feature that will intelligently create hole features through multiple components in an assembly. It gives you a large amount of flexibility for hole type and features within the hole to fasten your assembly components together.
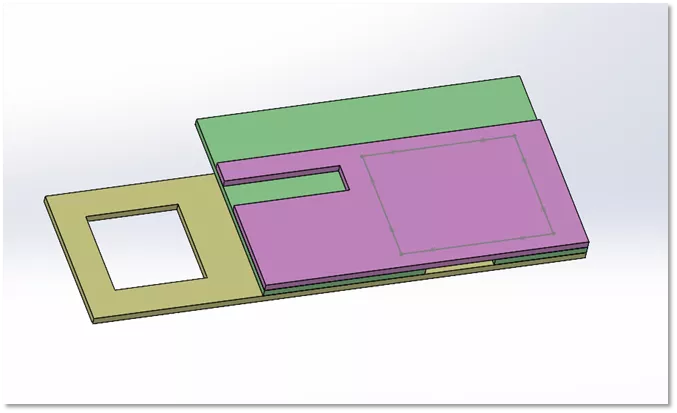
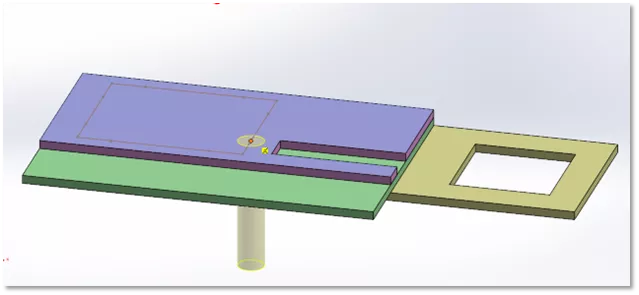
Let’s create an example to show how we would go about creating an assembly hole series. In this example assembly, we have three plates that we are planning to fasten together. I’ve already prepared a sketch to locate our Hole Series.
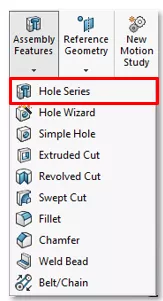
The Hole Series feaure can be accessed in the Assembly Feature dropdown on the Assembly tab of the CommandManager. For this example, we will preselect the face of the part that we want our holes to start on before selecting the feature - this will ensure we start on a 2D sketch.
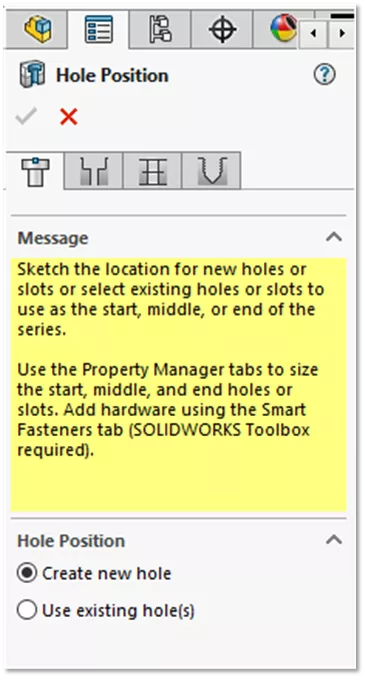
Once selected in the left pane, we have a dialogue become active. Using this dialogue, we can locate the positions of our holes. You can locate the holes with a sketch to create new holes or with an existing hole feature in one of the parts. For this example we will choose the option Create new hole.
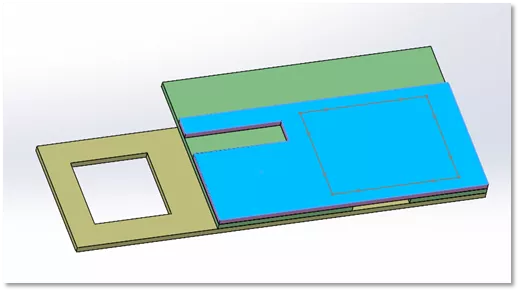
While this dialogue is active, select the sketch points that are laid out on top part of the assembly to locate the holes. Simply hover over the point of the sketch you want to apply it and left click.
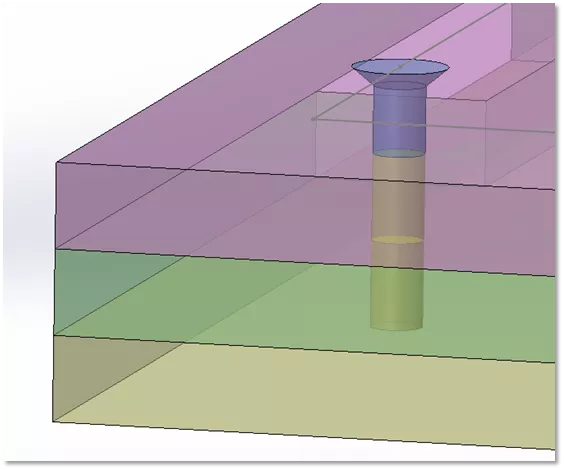
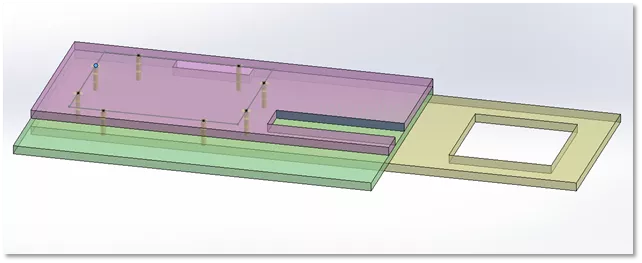
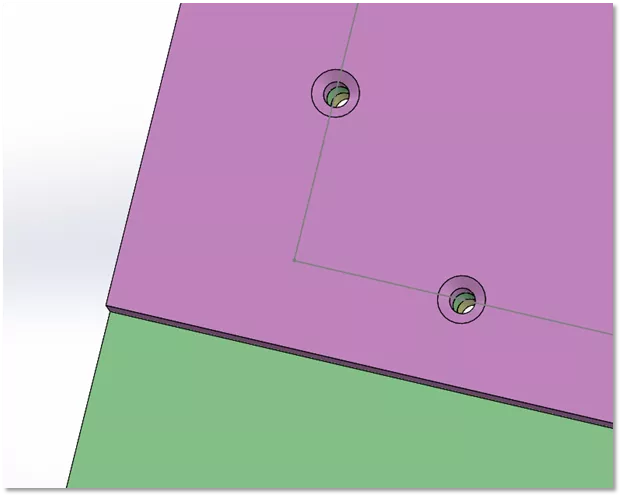
It will look similar to the below example when you have selected multiple holes.
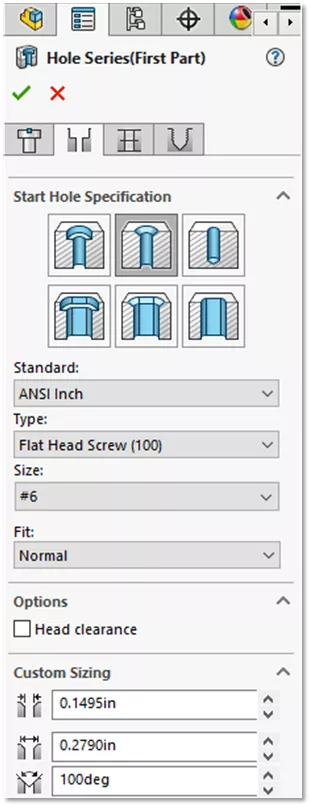
The second tab will bring us into the Hole Wizard hole type selection. In this tab, we can select the hole start type, whether it's counter bore, countersunk, slotted etc. You can also select the standard, type, size, and fit. There are also options for custom sizing and head clearance to make the fastener flush with the part face.
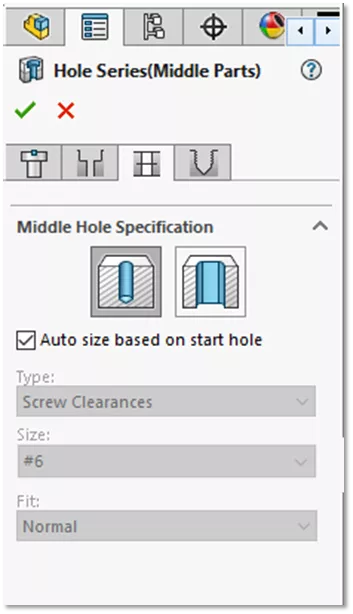
On the third tab, we can define what our middle hole will be. You can change the holes independent of the entry. We can set it to a hole or slot, and if we deselect the auto size based on start hole option, we can choose a different size.
The final tab will cover the end condition of the hole. Mmuch like the middle, we can set a bespoke size for the or type for the end hole. Here we can also define our fit. This field does require you to select the end component to be able to finish the feature. The options for end condition are: Through All, Blind, Up to Surface, and the option to add a countersink on the end of the feature.

Once you've select the green check to finalize the hole, you can expect to see something similar to the following.
External Reference
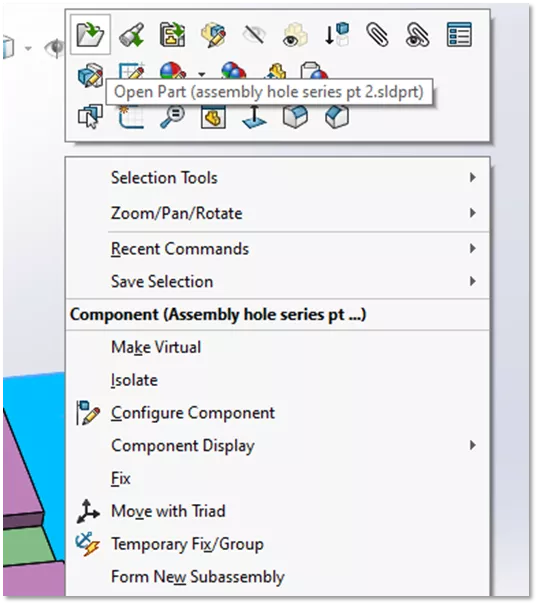
Since we have edited the assembly with an assembly level feature, the part files will reflect this change. For example, let’s open the bottom plate part file by right-clicking on the part in the graphics area and selecting Open Part.
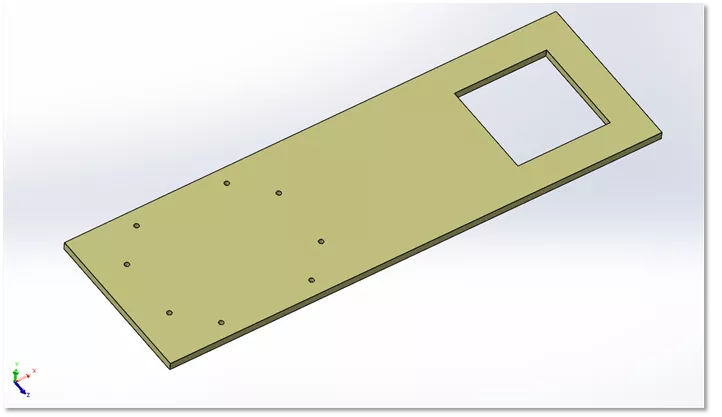
The part file now has holes that match the placement from our assembly.
You can always tell which features in the FeatureManager Design Tree have been produced in an assembly or by using some external reference, as they will have the arrow symbol after the feature name.
![]()
That covers how to create an Assembly Hole Series in SOLIDWORKS. Check out more of our latest SOLIDWORKS tutorials below.
![]() Want to see this in action? Check out our YouTube video tutorial discussing SOLIDWORKS Assembly Hole Series for a live demonstration.
Want to see this in action? Check out our YouTube video tutorial discussing SOLIDWORKS Assembly Hole Series for a live demonstration.
More SOLIDWORKS Tutorials
Create a SOLIDWORKS Assembly from a Multibody Part
How to Link Values with External Files in SOLIDWORKS
Quickly Create a Radial Explode in SOLIDWORKS
How to Use SOLIDWORKS Feature Freeze
![]()
About Nick Stanley
Nick Stanley is a SOLIDWORKS Technical Support Specialist at GoEngineer.
Get our wide array of technical resources delivered right to your inbox.
Unsubscribe at any time.