SOLIDWORKS PDM - Create Custom Columns in a Revision Table Driven by Workflow Transition Actions
This article outlines the steps required to define custom columns in a revision table that is populated by inputs from a PDM data card and actions in the PDM Workflow. To complete all these steps listed below, you will need SOLIDWORKS to create revision table templates and administrative permissions in the vault to create variables and update data cards.
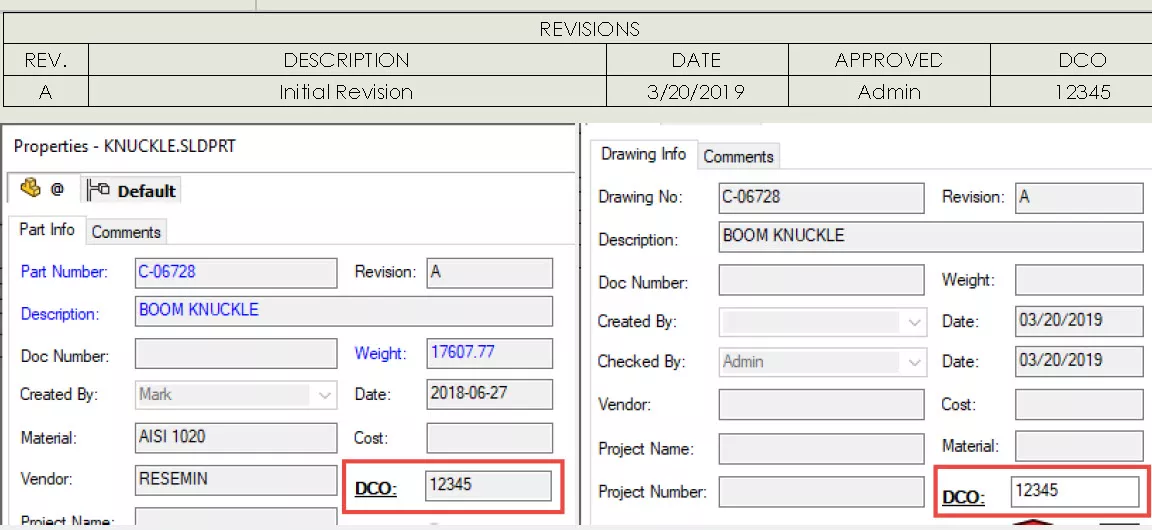
In this scenario, the revision table is automatically updated with a new row when and only when the document has received a new revision through the Approved for Release workflow transition and will contain the following values. The DCO field in parts and assemblies must be filled out before a file is initially submitted for release or approved.
- REVISION — Newest Revision in PDM
- DESCRIPTION — Transition comment for the “Approved for Release” Transition
- APPROVED — Username of user who initiated the “Approved for Release” transition
- DATE — Current Date
- DCO — Manual input text-field corresponding to CustomProperty “DCO”
Required Steps
- Create SOLIDWORKS Revision Table Template
- Enable Revision Tables in PDM Administration tool
- Configure Variable Mapping for Custom Property “DCO”
- Add a Card Control to our File data cards
- Add transition actions that update the Revision Table
Result:
Step 1: Create the Revision Table in SOLIDWORKS
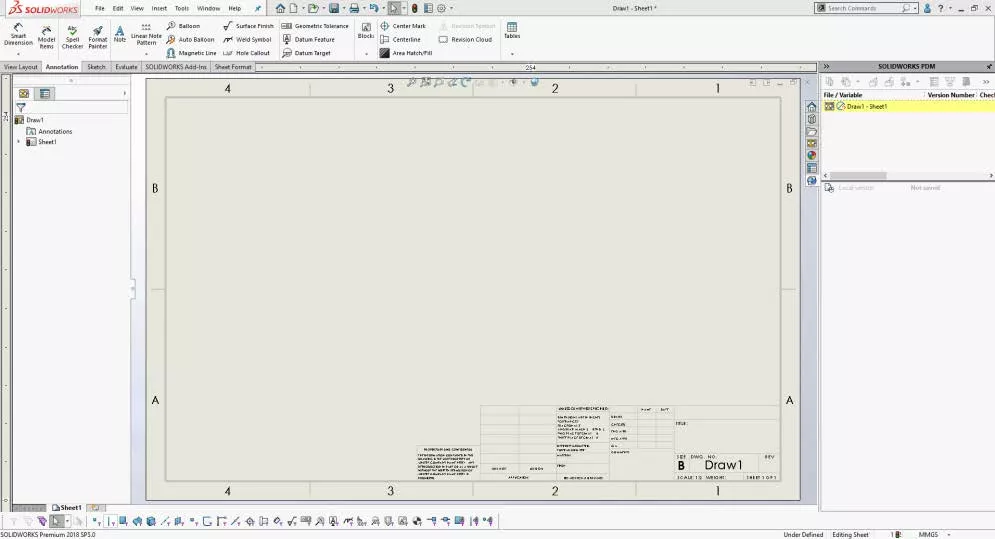
- Open a SOLIDWORKS Drawing or an existing Drawings Template (.drwdot)
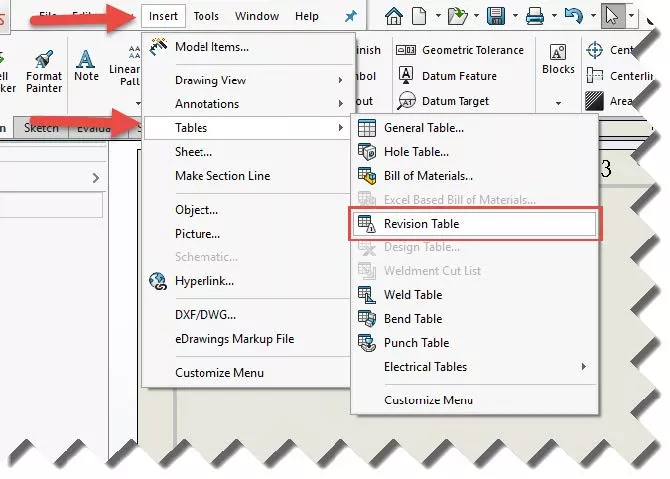
- Insert > Tables > Revision Table > Place the Revision Table in the Drawing.
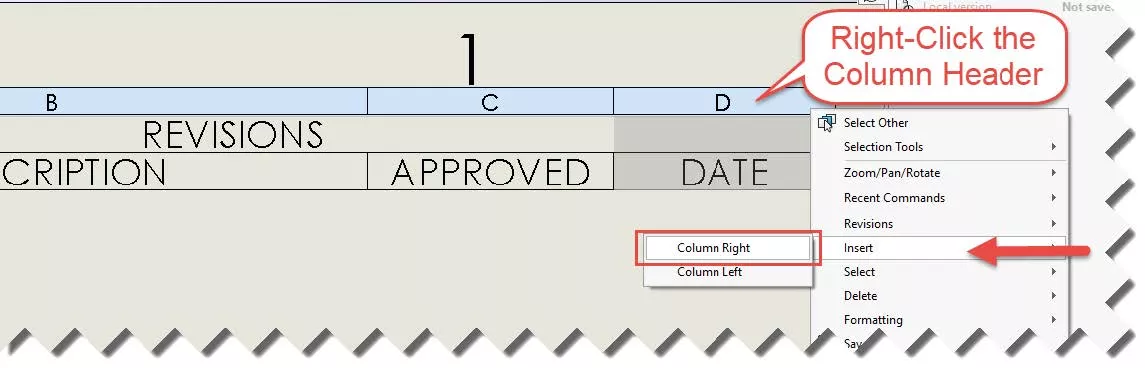
- Right-click a column > Insert Column > Select the new Column Header.
- On the PropertyManager select Custom > Title > Type “DCO”.
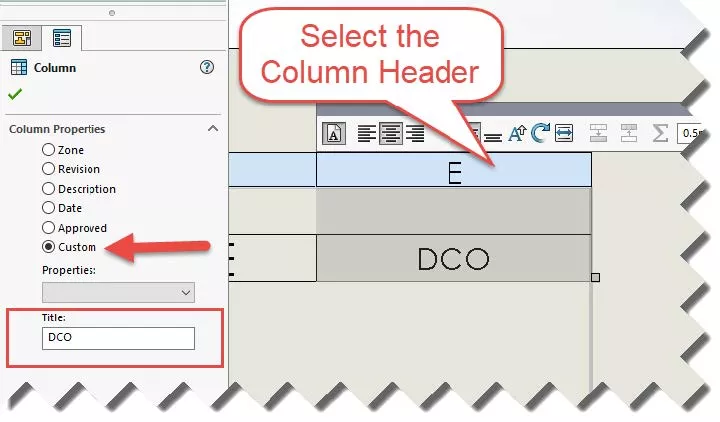
- Note: You must remember the title of this column as it will be used in the variable mapping later.
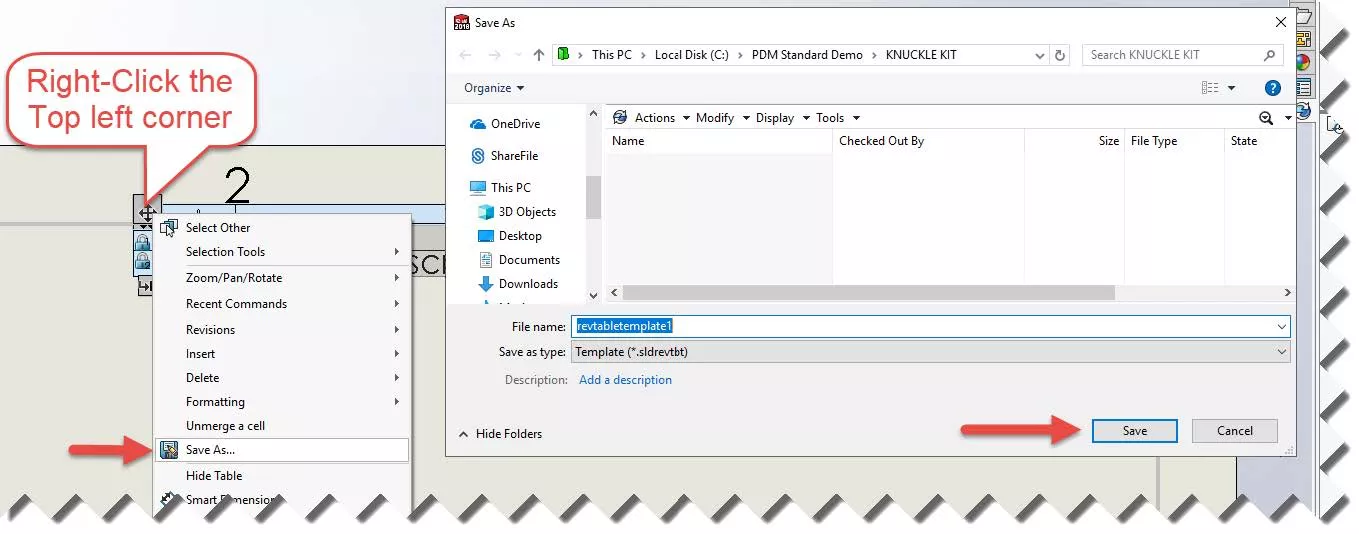
- Save the revision table as a template or save the drawing as a drawing template.
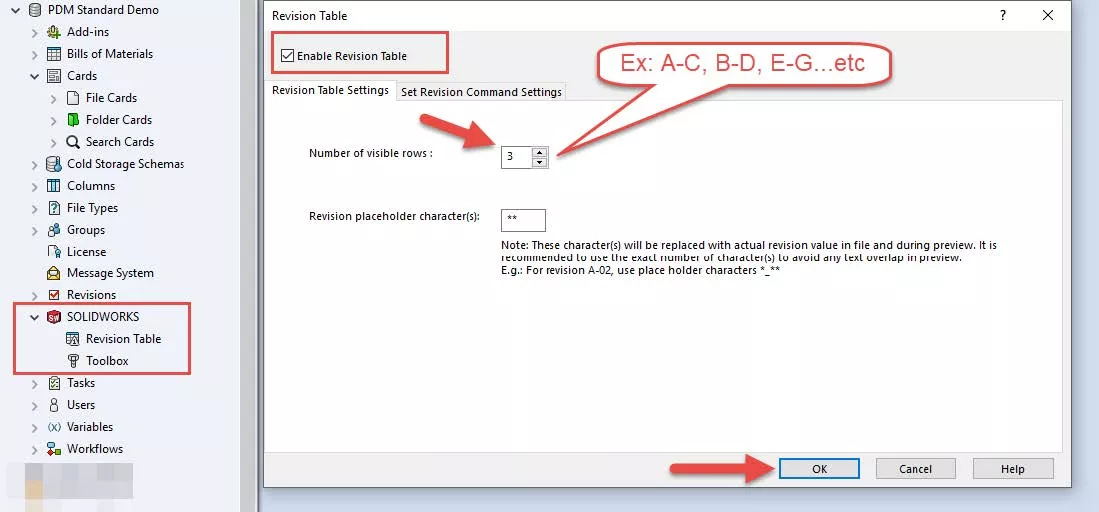
Step 2: Enable Revision Tables in SOLIDWORKS PDM
- Open the Administration Tool > Log into the vault.
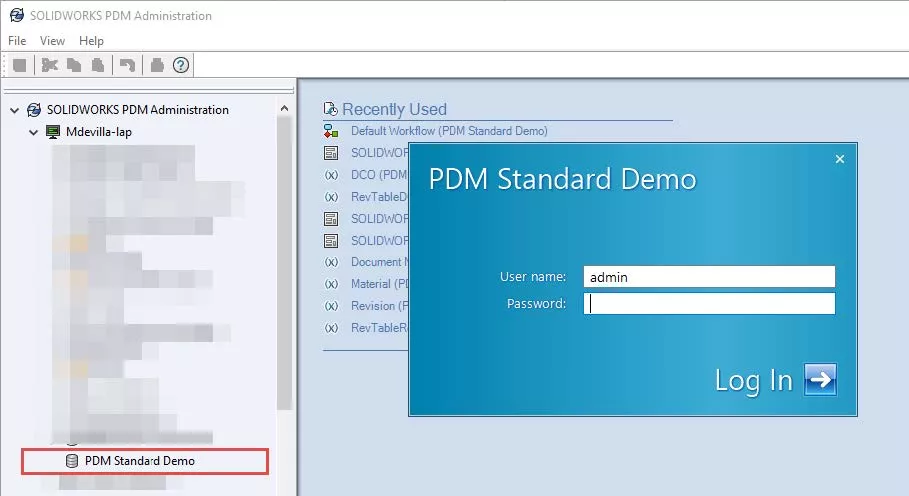
- Open SOLIDWORKS > Open Revision Table > Enable Revision Table.
Step 3: Variable Mapping for Custom Property
- Open the Administration Tool > Log into the Vault > Open Variables.
- Right-click on Variables > Select New Variable > Fill out the variable information as seen below for DCO.

- We create the variable DCO with the above Custom Property because values for this Custom Property already exist in our parts and we would like them to reflect in the data cards. Additionally, the $PRPSHEET mapping seen above is to guarantee that, the DCO number of the part/assembly is reflected in their respective drawing’s data card.
- Right-click on Variables > Select New Variable > Fill out the variable information as seen below for RevTableDCO.
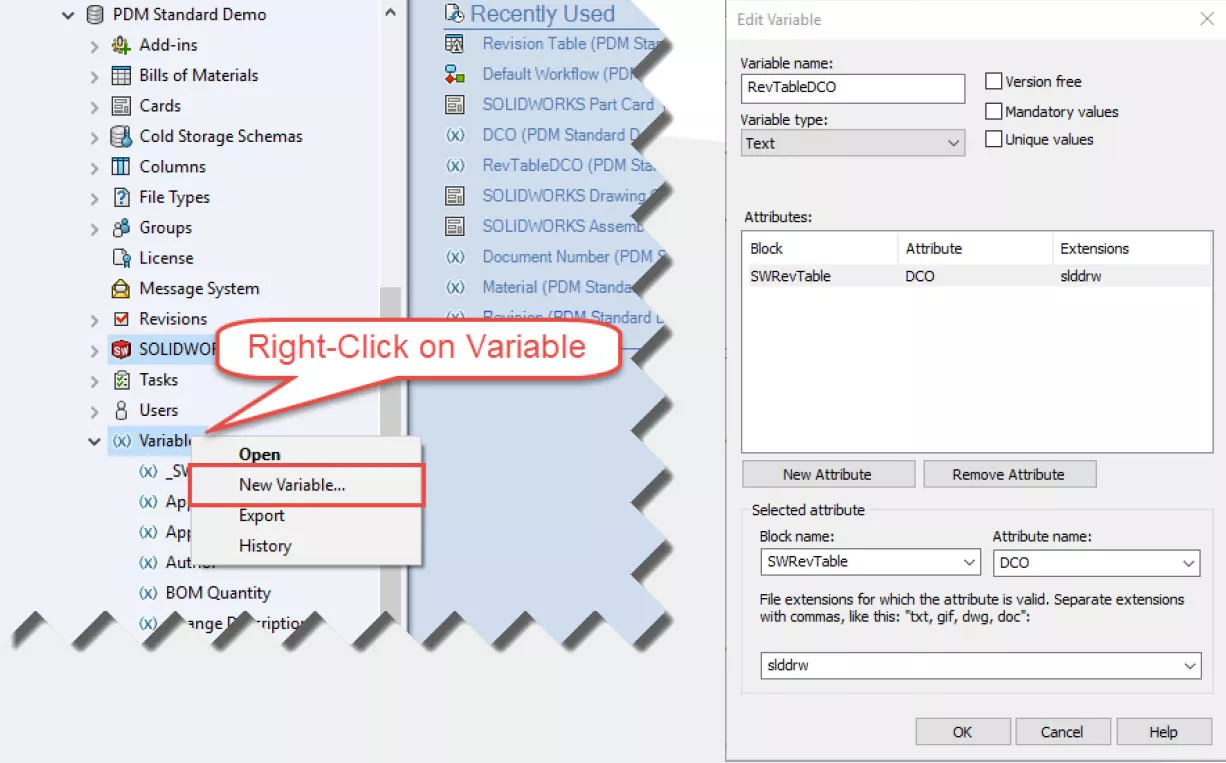
RevTableDCO is actually a placeholder variable that will contain only the SWRevTable mapping, the crucial component required for SOLIDWORKS PDM to push a value into the revision table. It is important that in the Block Attribute mapping for RevTableDCO, we refer to the attribute DCO. This allows it to populate to the column in the revision table with the column header “DCO.”
Note: We can technically add the SWRevTable mapping directly to the variable DCO itself, but we purposefully disconnect the variable we expect the user to be manipulating from the variable being written to by PDM using a placeholder. This is because PDM will create or update the values in a row depending on the following conditions as stated in the PDM Administration Guide.
- Condition 1: A placeholder row exists in a SOLIDWORKS drawing. The row exists for the details of the upcoming revision.
- Condition 2: The value in the Revision column of the revision table matches with the revision variable in PDM.
If one or both conditions are true, the values in the existing row will be updated. If both are false, then PDM will create a new row; such as in the case when the revision variable is updated as part of a workflow transition action to the next revision in the scheme.
If we had added the SWRevTable mapping to the variable “DCO” itself, then there is the possibility that as the user edits the data card the next time the file becomes available for editing in the workflow, they will be overwriting an existing value in the revision table corresponding already existing revision.
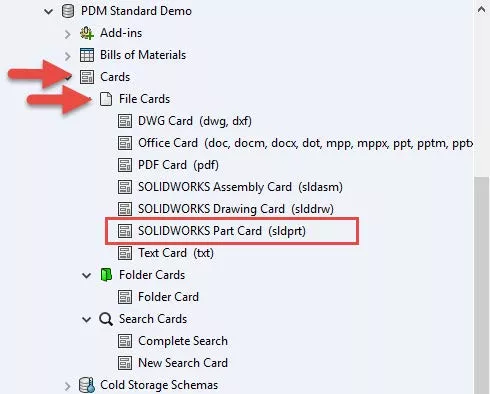
Step 4: Add a Card Control to our File Data Cards
- Log in to the Vault > Open Cards > File Cards > Open your Part Card.
- On the Card Editor CommandManager > Select Editbox > Place editbox on your card.
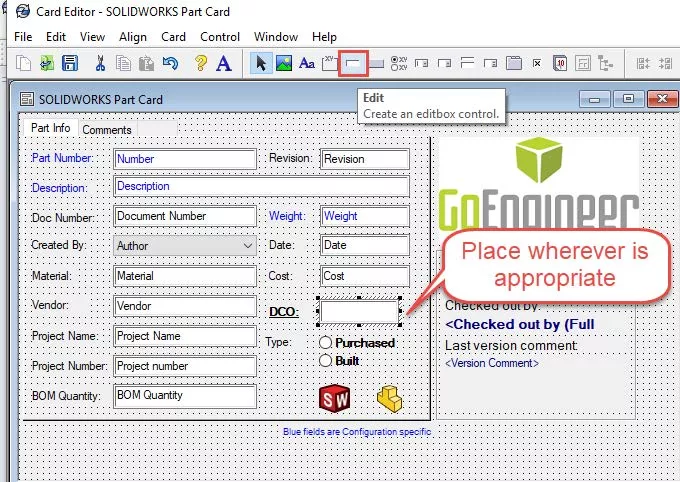
- Select that editbox > Variable Name > Select the variable “DCO” from the dropdown list.

- You now have a manual text field on your Part data card. Repeat steps 1-3 for your Drawing and Assembly data cards.

Step 5: Add Workflow Appropriate Actions
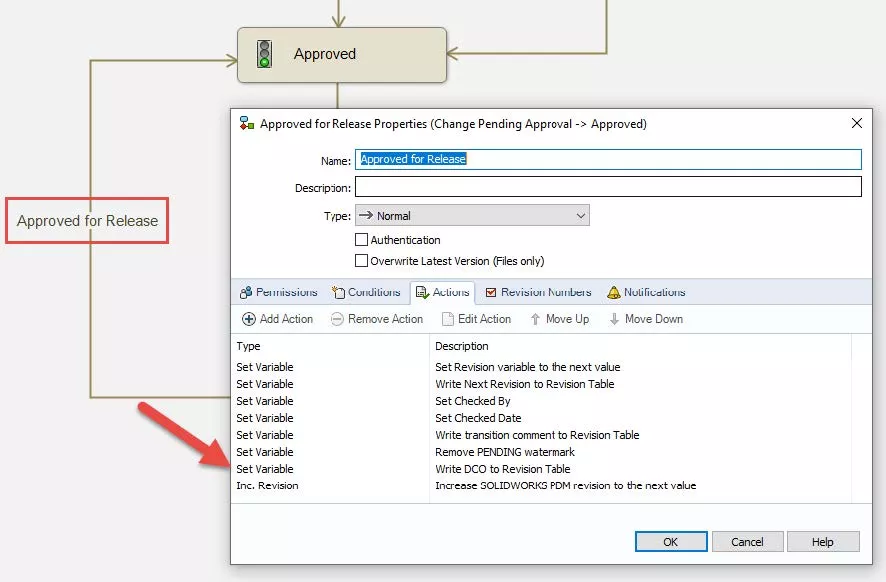
- Open the Administration Tool > Log in to the Vault > Open your Workflow.
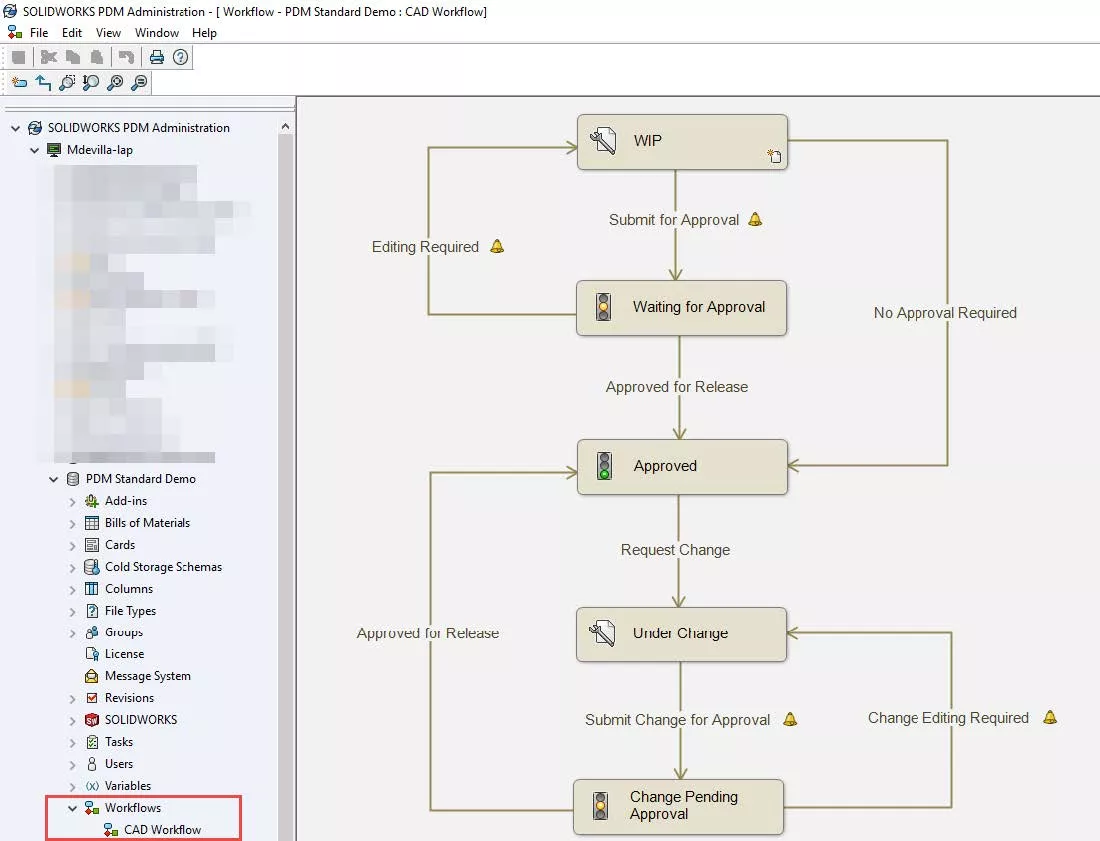
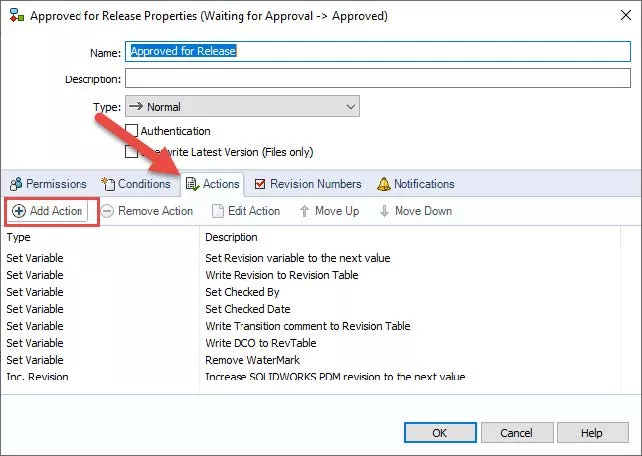
- Left-click on your Transition which will update the Revision table with a new row.
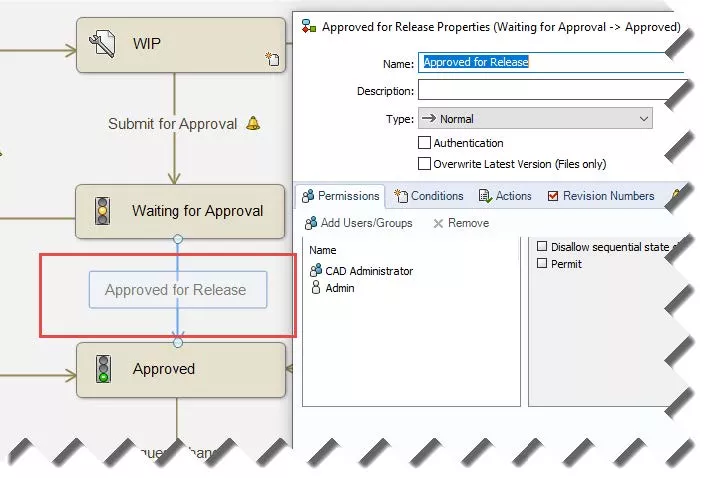
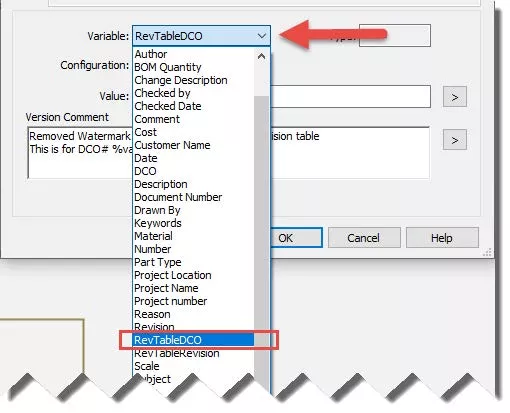
- Add Action > Set Variable > Select the variable RevTableDCO.
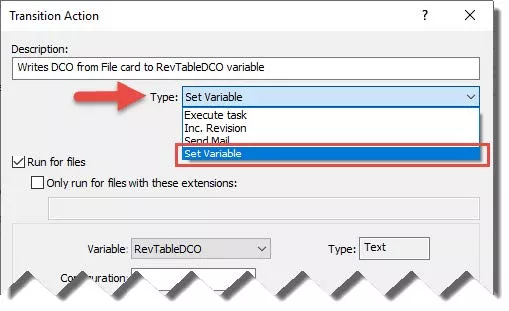
- Value > Select the arrow > Select Variables > Select our “DCO” variable.
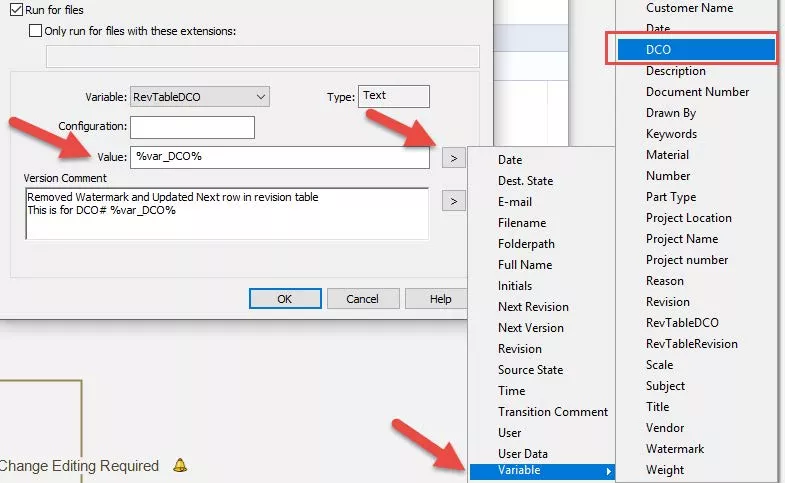
- This step is telling PDM to take the existing contents of the “DCO” field in our data card and to write it into the “RevTableDCO” variable. As PDM updates “RevTableDCO,” PDM is triggered to write to the latest row of the revision table column with the same name as our attribute “DCO” for the block SWRevTable.
- Repeat steps 2-4 for as many transitions as you have that increment the revision of your part.
- Save your Workflow
Note: If part of your existing workflow involves previewing the next revision in your drawing titleblock as a document is submitted for review, you should consider creating a similar placeholder variable called “RevTableRevision” solely for the SWRevTable mapping to prevent a new row from being created when sending a file to a Pending Approval state. Refer back to the conditions stated in step 3 of this guide for a review of why this could happen.
Summary
In conclusion, this guide covers how to add a custom column to a SOLIDWORKS Revision Table in a drawing, how to create a variable with the appropriate SWRevtable mapping, and finally how to create a transition action in our workflow that will push an existing value from our data card to the revision table itself.
The end result is we now have an area of our revision table populated by inputs from our data card exclusively during a certain transition.
It’s important to note that this is only one example of populating the revision table with inputs from PDM. As long as you have the appropriate SWRevTable variable mapping to a particular column of your revision table, you can use any number of types of card controls and inputs to populate your revision table, even outside of a transition. To see an example of this, check out the video by Jim Ward linked below.
More SOLIDWORKS PDM Tutorials
Understanding SOLIDWORKS PDM Data Card Tabs
SOLIDWORKS PDM Full Revision Table in Drawing Data Cards
How to Map PDM Variables into Microsoft Excel

About Miguel de Villa
Miguel de Villa is a SOLIDWORKS Elite Applications Engineer with a B.S. in Mechanical Engineering from the University of California, San Diego. He’s been working at GoEngineer since 2017 helping customers with all their SOLIDWORKS, Simulation and PDM needs. In his free time he enjoys working with his 3D printer, playing video games and building model kits.
Get our wide array of technical resources delivered right to your inbox.
Unsubscribe at any time.