SOLIDWORKS Tutorial: Creating and Dissolving Subassemblies
While modeling in SOLIDWORKS, users can quickly and easily speed up the building of assembles by making a selection of parts into a subassembly. Learn how in this SOLIDWORKS tutorial.

Creating a Subassembly in SOLIDWORKS
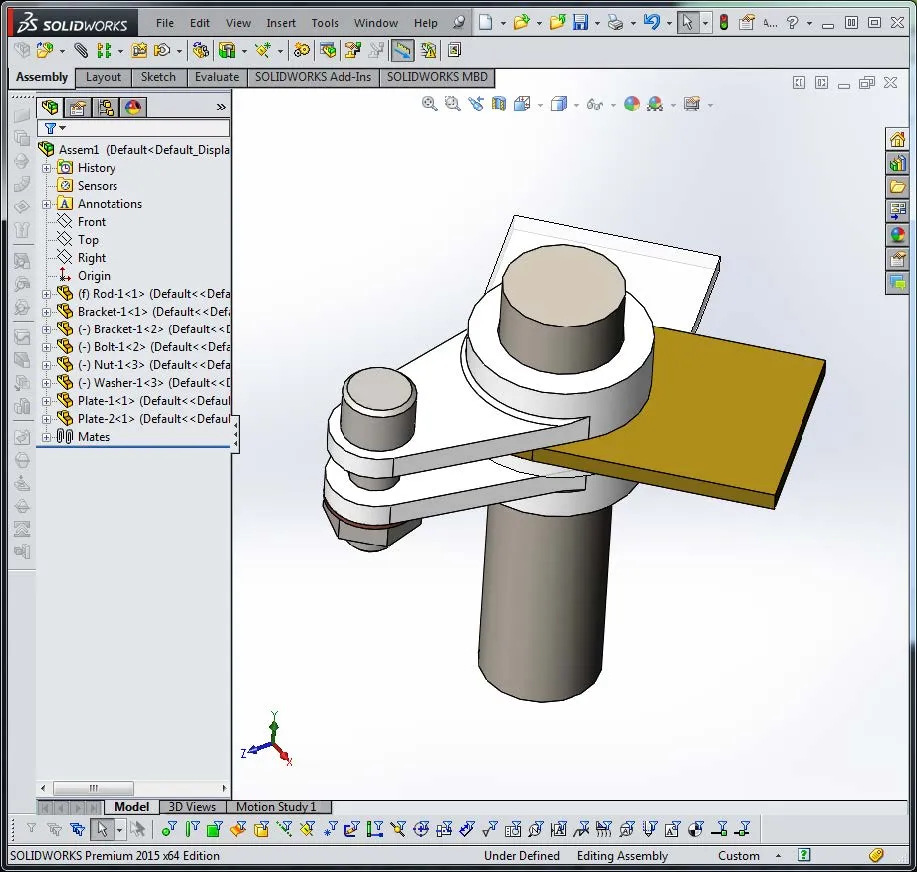
First, you have a standard collection of parts built into a simple assembly. Over the course of building multiple assemblies of a similar style, you notice that the combination of the Bolt-1, Nut-1, and Washer-1 are always used in the same grouping.
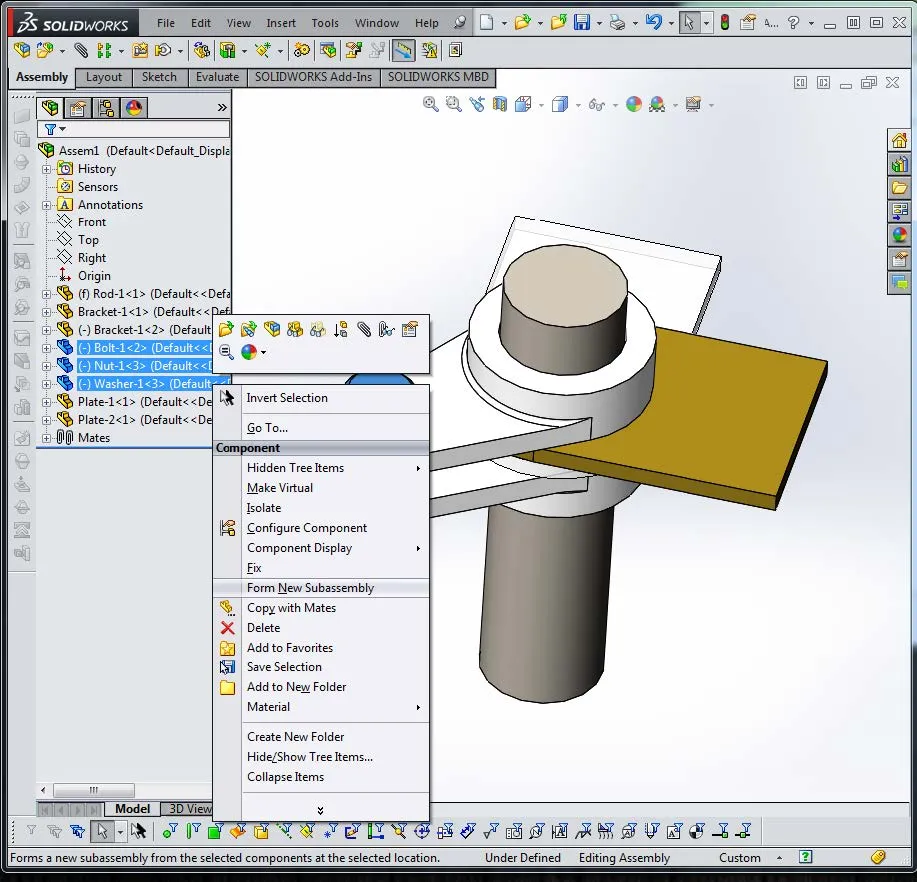
If you hold down the Shift key and select all three components then right-click, the option for Form New Subassembly becomes available.
Usually when this is performed, there is a warning that some of the mates are now redundant and will need to be cleaned up.
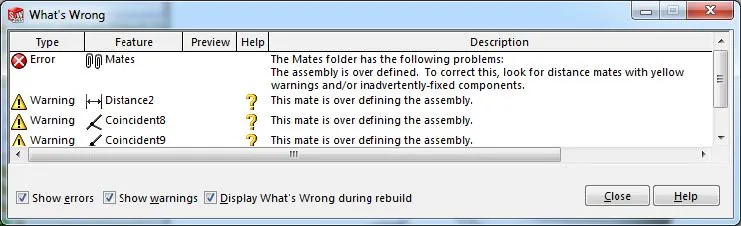
Clean up the offending mate(s) one at a time until all warnings are gone.
Once this is taken care of, you now have a subassembly built within the assembly that consists of the three selected components.
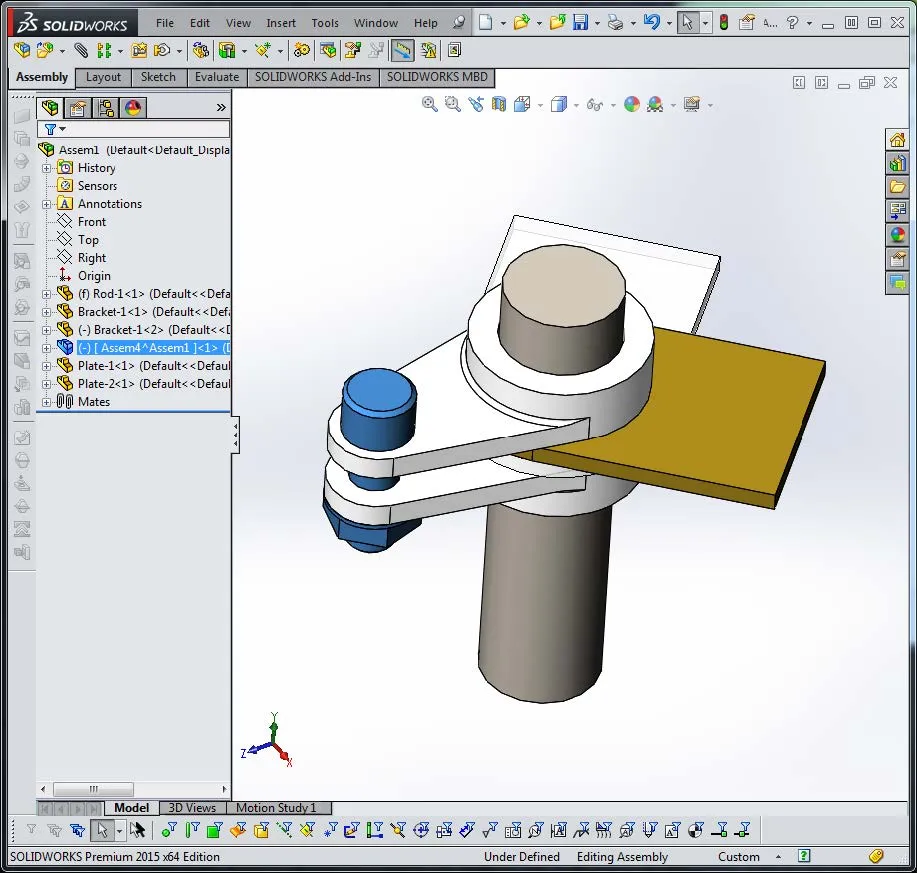
Note that while the sub assembly is created, it is not yet named or saved to be used as an assembly outside of this assembly that it was created in.
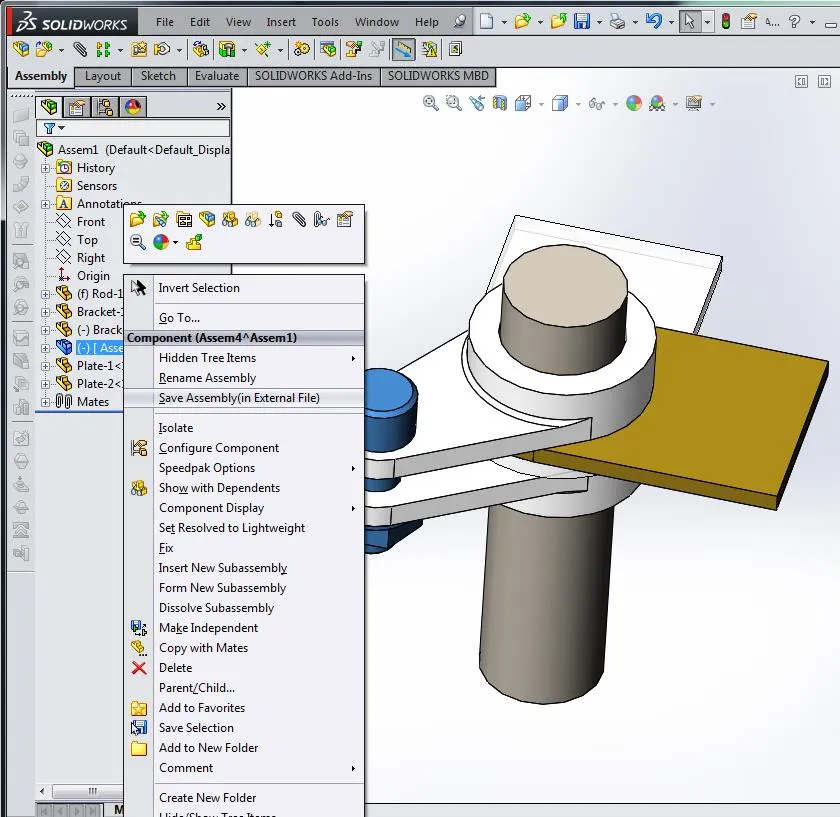
To do this, right-mouse click on the newly created assembly and select Save Assembly (in External File).
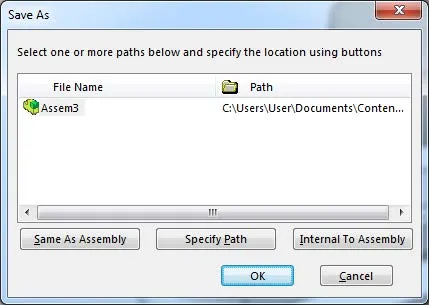
The dialog box appears to allow specifying both name and location of the newly created subassembly.
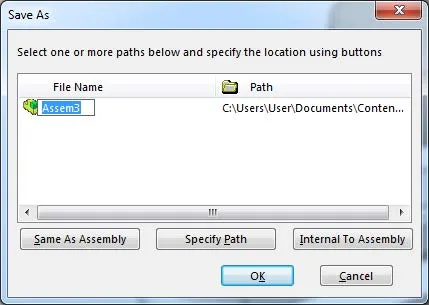
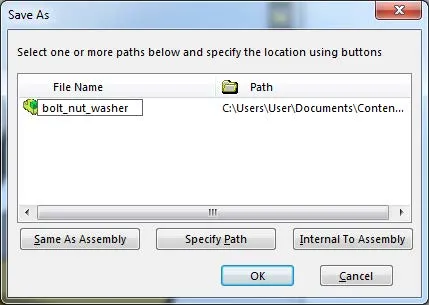
Double click on the File Name to rename it.
Click on the Specify Path radio button to locate where you want the new assembly to be saved.
The new assembly is now available to be loaded into any other assembly as a component.
Dissolving a Subassembly in SOLIDWORKS
Sometime later, in a differernt assembly that you have inserted your subassembly into, you may need to change out one of the components in this assembly. Changing a component in the assembly you created previously would, however, make the change everywhere that this asssembly is used. You don’t want to do that. The option now is for you to dissolve this sub assembly in the current assembly and replace the components as needed or desired.
This is a very simple, one step process.
Right mouse click on the sub assembly and select Dissolve Subassembly.
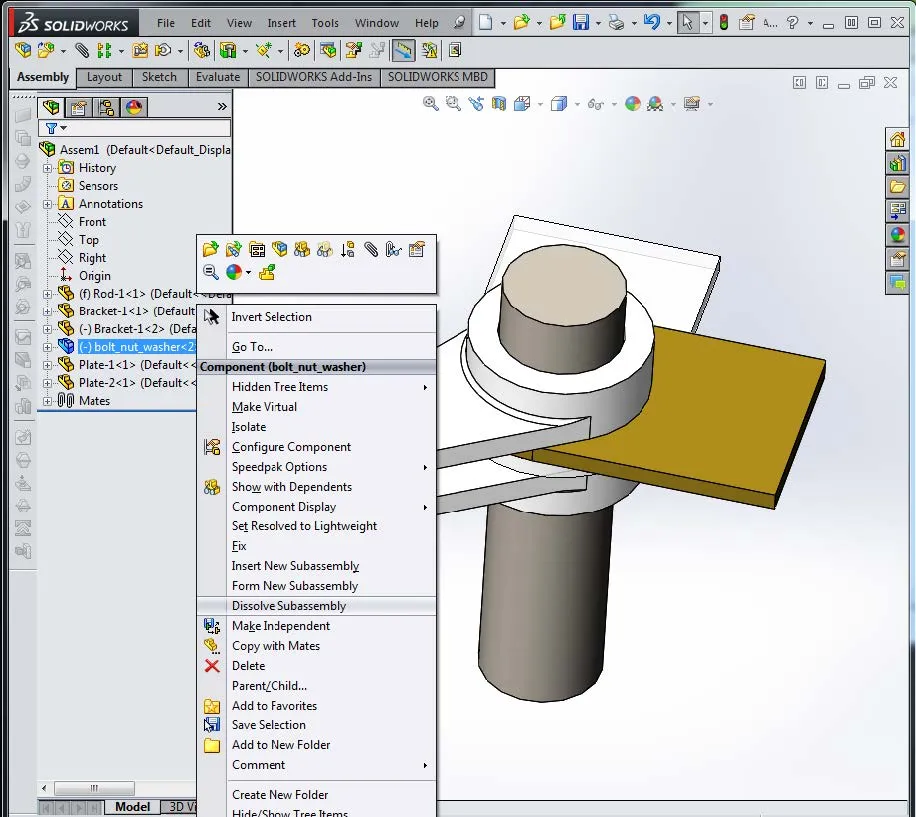
This now breaks the assembly down into its individual components and the files can now be dealt with as individual entities.

I hope this demonstration of how to create and dissolve subassemblies was helpful. Check out more SOLIDWORKS tutorials from GoEngineer below.
More SOLIDWORKS Tutorials
Easy Way to Link Properties to a SOLIDWORKS Drawing
Auto-ballooning Hidden Components in SOLIDWORKS
Simple Way to Rename SOLIDWORKS Files
Creating a Non-circular Helix in SOLIDWORKS with Surfacing Commands
![]()
About GoEngineer
GoEngineer delivers software, technology, and expertise that enable companies to unlock design innovation and deliver better products faster. With more than 40 years of experience and tens of thousands of customers in high tech, medical, machine design, energy and other industries, GoEngineer provides best-in-class design solutions from SOLIDWORKS CAD, Stratasys 3D printing, Creaform & Artec 3D scanning, CAMWorks, PLM, and more
Get our wide array of technical resources delivered right to your inbox.
Unsubscribe at any time.