Easy Way to Link Properties to a SOLIDWORKS Drawing
Have you ever wondered if there was an easy way to have your SOLIDWORKS Drawing fill in the title block automatically? This can be achieved by using Custom Properties from your Part or Assembly Model.
In this example, we will have the fields for Material, Finish, and Weight fill in automatically in the Drawing title block. As you can see, the drawing title block is empty with a single drawing view inserted.
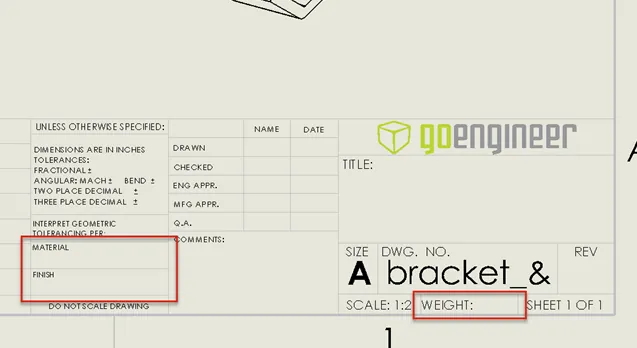
Empty Title Block fields to be filled in with Custom Properties from the Part file.
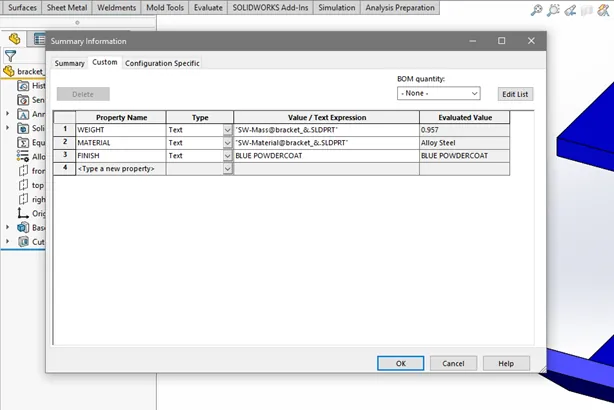
The Custom Properties to be added to the drawing shown here. The Material Property is driven by the Material selected in the Feature Manager Tree.
To make the necessary changes, the Sheet Format of the Drawing template will need to be edited. The Sheet Format (.slddrt) is a file referenced within the Drawing Template (.drwdot). The Sheet Format contains the Title Block, Border, Notes, Embedded Images (e.g., Company Logo), Anchor Points, and Custom Properties.
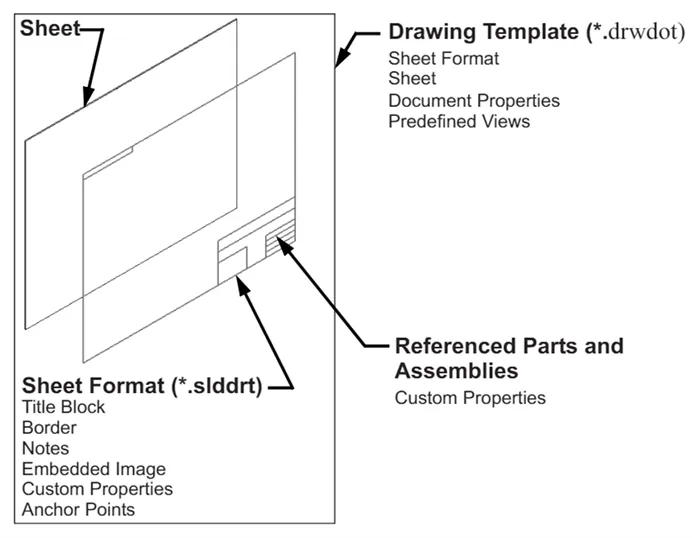
Components of a Drawing file: Sheet, Drawing Template, and Sheet Format.
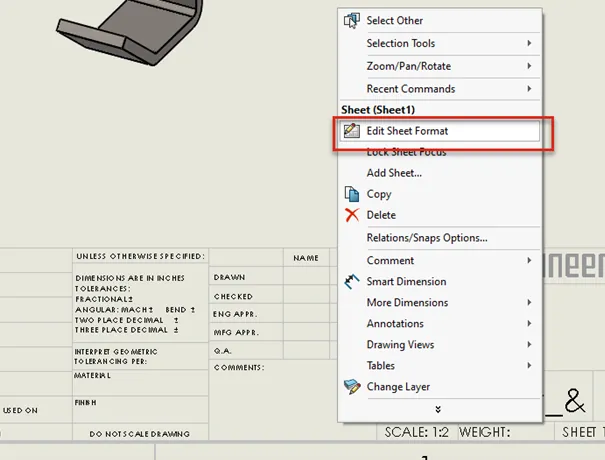
Right-click on the Drawing title block and select Edit Sheet Format. Right-click a second time and select Edit Title Block. The title block references annotation note fields in the sheet format.
Edit Sheet Format
To add the text boxes, click on the Note tool in the Annotations tab in the CommandManager Toolbar.
To add the Custom Property to the Note, click Link To Property and change the selection from Current Document to Model Found Here.
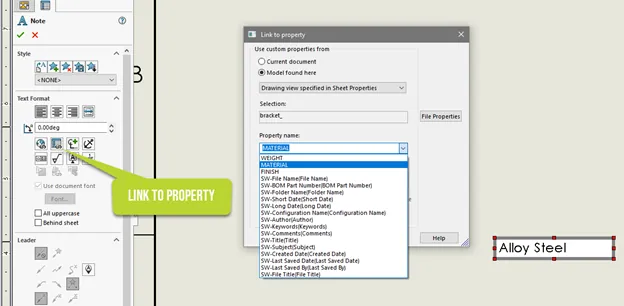
Using Link to Property to show the Custom Property in the Note.
Once completed, the Weight, Material, and Finish fields will be shown in the Title Block.
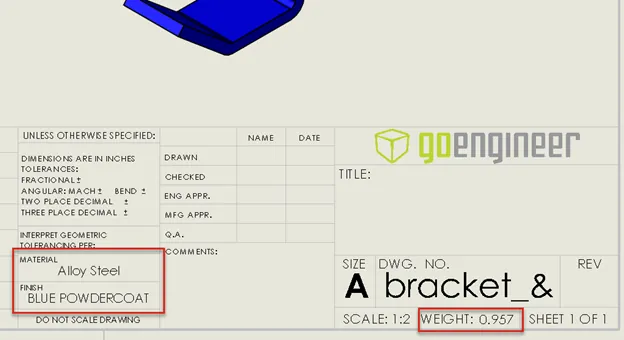
Material and Weight fields are complete.
To save the updates to your title block for future use, delete the part view from the drawing. Go to File > Save as and change the file type from Drawing (.slddrw) to Drawing Template (.drwdot).
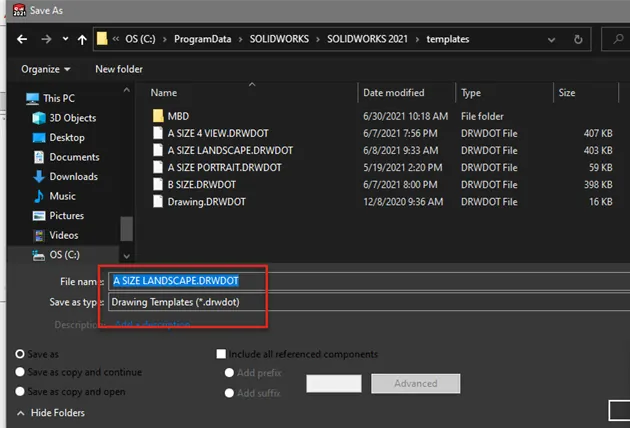
Overwrite your original title block or create a new file name for the template.
Now that the Drawing Template has been saved, every new drawing you create using this Template will auto-fill with the information driven by the Custom Properties of your Part.
I hope you found this quick tip helpful. Learn more about the topics discussed in this article by checking out the articles below.

SOLIDWORKS CAD Cheat Sheet
Our SOLIDWORKS CAD Cheat Sheet, featuring over 90 tips and tricks, will help speed up your process.
Want to Learn More?
SOLIDWORKS Error Message: The Sheet Format Could Not Be Located
Customizing Colors in SOLIDWORKS Drawings
Creating a Multi-Sheet Drawing Template in SOLIDWORKS
Link Sketch Text to File Properties in SOLIDWORKS

About Brad Hakeman
Bradley Hakeman is an Application Engineer at GoEngineer. When he isn’t helping customers with their SOLIDWORKS related challenges, he is keeping up on the latest features of SOLIDWORKS. In his spare time, he’s trying to sort out his kids’ soccer schedules and working on household projects, many of which were designed in SOLIDWORKS. Most recently, he has taken up woodturning, currently focusing on pen making.
Get our wide array of technical resources delivered right to your inbox.
Unsubscribe at any time.