Upgrading Your SOLIDWORKS Electrical PDM Integration
In my previous blog, I discussed how to identify the SOLIDWORKS products that you have, specifically Electrical, PDM, and connectors. If you are reading this article, then you have found that your company does have SOLIDWORKS Electrical Integration.
In this article, I will review the steps that it takes to get your SOLIDWORKS Electrical Integration upgraded. There are steps that need to happen BEFORE you or PDM Administrator upgrades PDM on the server.
PDM Vault Server – Backing Up Electrical Integration
When working with the PDM server, you will need someone who is an Administrator. The administrator needs to log into the Administrator of PDM application on the server.
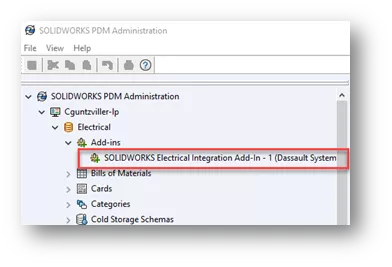
After logging in, proceed to the proper vault that is getting upgraded or moved and log in a second time. Under Add-ins you will find the SOLIDWORKS Electrical Integration Add-In.
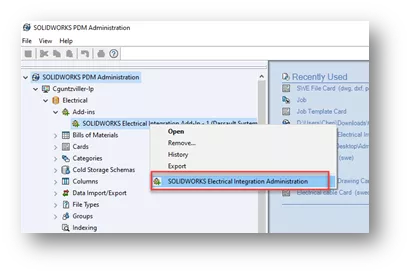
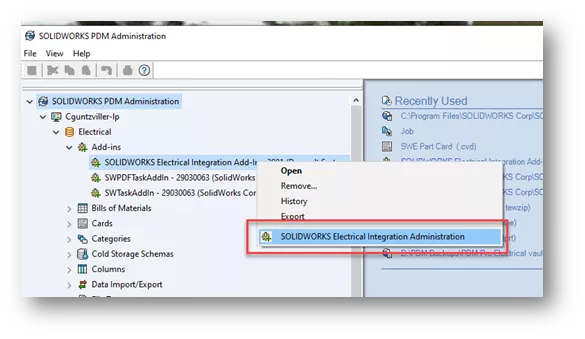
When creating a CEX (backup) of your PDM Vault, the settings inside of the Electrical Integration Add-In are not captured. To retrieve these settings, run the add-in. To do so, right mouse click on the add-in and select SOLIDWORKS Electrical Integration Administration.
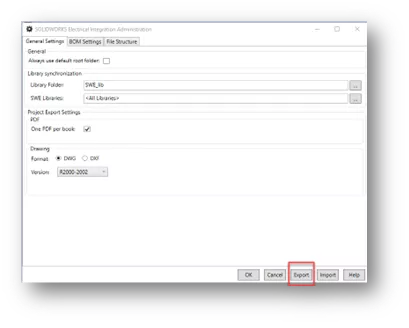
Once opened, you will need to capture the settings.
This can be done from the General Settings Tab using the Export button at the bottom of the dialog box.
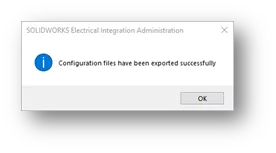
You will be prompted where to save the exported settings. Select OK after your location selection.
We suggest an empty folder for each time you do the export to not overwrite any previous export(s). You will receive a notification that it was successful.
PDM Vault Server – removing Electrical Integration FIRST
The PDM Server can now be upgraded or moved.
The SOLIDWORKS Electrical Integration Add-In is version-specific (i.e., if PDM is 2022, then the Electrical Integration Add-in needs to be version 2022).
If you are running an early version of the SOLIDWORKS Electrical software and PDM (2018 or earlier) you will find that there is no add-in inside your vault. The settings are located on the client side only. Each client might be different from the other. You will still follow the steps above but by doing this on a client.
You will need to make sure that you choose a client that is working correctly before capturing those settings. Those settings can then be used on the server after the PDM upgrade is complete.
If you are running 2019, or newer, then the settings are inside of the vault and the above steps will need to be followed.
Once the Vault is upgraded, then the Administrator can revisit the Electrical Integration Add-in. You will need to contact your VAR to receive the proper version of the Integration application since this is a separate software package that can be provided to you. At the time of this article, there is no additional cost for this software package.
Once you have received the installation files for the Electrical Integration, the package can be unzipped. There are two folders inside the ZIP file: Installer and Manuals. Under the Manuals, there are a few documents that can be used.
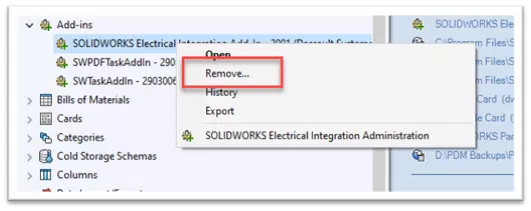
You will need to remove the existing SOLIDWORKS Electrical Integration from your vault. This should only be done once the settings have been retrieved. To remove the Add-in from your Vault, you right-click on the add-in and select Remove...
PDM Vault Server – Installing Electrical Integration
Now that the electrical integration is removed, the new integration can be installed. The files that are provided to you from the VAR will be in ZIP format.
Make sure that the Properties of the file are unblocked you can then unzip the file.
Note: Make sure you have the proper version of Integration compared to the version of your Electrical software. Please request from your VAR if you do not have the same major version!
Under the location for the extraction, you will find a folder called Installer. In this folder, you will find an executable named SETUP.EXE – make sure to right-click on the file and run it as an Administrator.
Walk through the dialog box prompts. You will first be asked to select Next to install. The location for the installation files is in the next prompt.
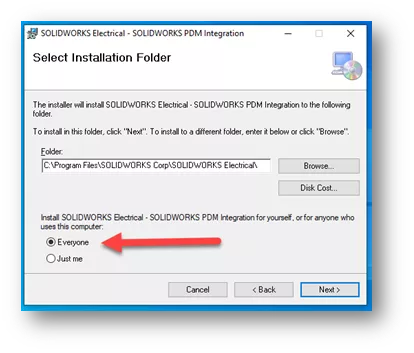
This should be the same folder as the Electrical Program Files. Default is C:\Program Files\SOLIDWORKS Corp\SOLIDWORKS Electrical\. You can browse to select the proper location based on our configuration. Make sure to select everyone in the radio buttons at the bottom of the dialog.

Select Next to advance to the next screen.
Select Next once more for the software to begin its installation. You will then see the progress bar begin. The dialog box will then prompt you to close the box after installation.
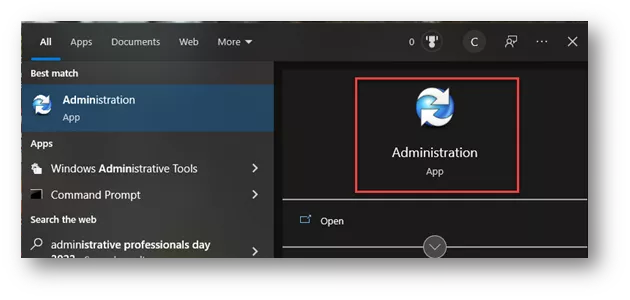
Now that the files are available, you will need to proceed to your Administration Tool for PDM.
Go ahead and select your Vault and log in.
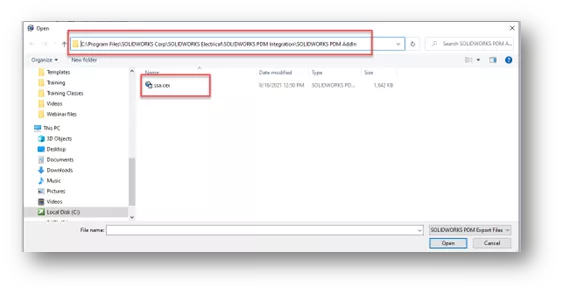
Once logged in, select Open under the File options at the top of your PDM Administration.
Browse to the default location of: C:\Program Files\SOLIDWORKS Corp\SOLIDWORKS Electrical\SOLIDWORKS PDM Integration\SOLIDWORKS PDM AddIn
You will be selecting the ssa.cex file to be opened.
Once this file is opened, your screen should look as shown below.

Highlight the SOLIDWORKS Electrical Integration Add-In, hold down the left mouse button and drag the Add-in into the vault add-ins in your vault. (My vault is called Electrical, yours will be named something else.) Once complete, you can close this dialog box.
The add-in has been added to your vault, you can now put your settings back into the system.
Select the SOLIDWORKS Integration from the Add-in drop-down in your vault.
When you right-click on the Integration, the following dialog box will appear. Select the bottom selection of SOLIDWORKS Electrical Integration Administration.
This will then run the administration tool for the Integration. You will be prompted to login into your vault again.
Once done, the Administration tool will start. At the lower right-hand corner of the Administration tool dialog box will be an Import command – please select this.
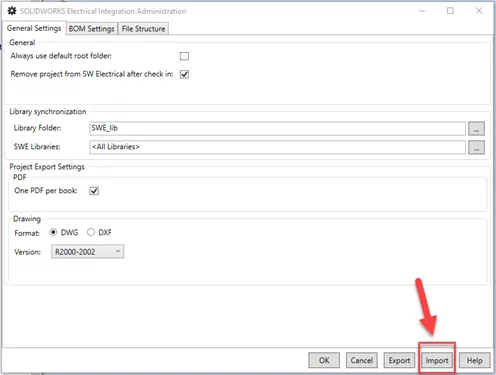
Browse to the location and select the file of the settings that were captured from your previous installation when we started this process. The file name is most likely “swe-swpdm.config”.
You will be selecting the Folder for the location, not the actual file. If the file is located on your Desktop, then you can select that folder as well.
Once you select the folder, the process will begin automatically. You will be prompted if the file does not exist in the location that you have selected.
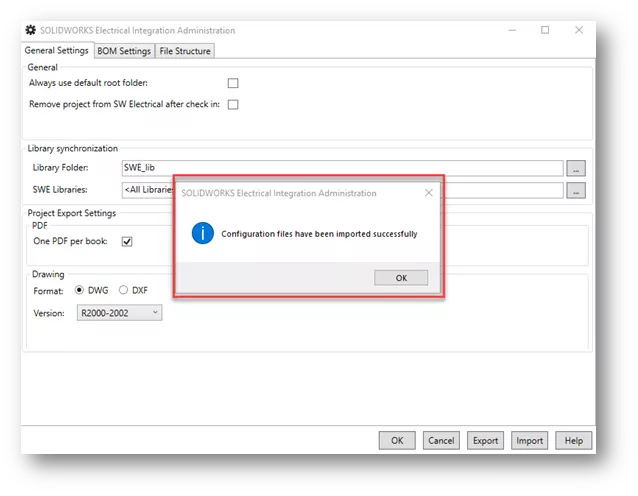
If one does exist, then you will be notified when the configuration settings are completed.
You are now set to run with your SOLIDWORKS Electrical Integration on the server.
You may want to review some of the settings in the Integration Administration.
For example, if you would like to have the projects removed from the client machines when they are checking in, please make sure to check the box for Remove Project from SOLIDWORKS Electrical AFter Check-in on this Window.
We now need to upgrade the client machines to complete the upgrade.
Client Machines – Installing Electrical Integration
This is the final step for completing your SOLIDWORKS Electrical Integration to PDM. The client machines should have their SOLIDWORKS Electrical software upgraded already and a PDM Local Vault view for the user on the machine. You will also need the same installation files that were used on the server accessible to the client machines.
Please make sure to copy the installation files locally onto the client machines.
The first step is to remove the old integration.
To do so, go to the Control Panel and find the SOLIDWORKS Electrical Integration. Uninstall this program from the machine – you will need to make sure the SOLIDWORKS Electrical software is closed.
Now that the electrical integration is removed, the new integration can be installed. The files that are provided to you from the VAR will be in ZIP format.
Make sure that the Properties of the file are unblocked so you can then unzip the file.
Note: Make sure you have the proper version of Integration compared to the version of your Electrical software. Please request from your Value Added Reseller (VAR) if you do not have the same major version!
Under the location for the extraction, you will find a folder called Installer. In this folder, you will find an executable named SETUP.EXE. Make sure to right-click on the file and run as an Administrator.
Walk through the dialog box prompts. You will first be asked to select Next to install. The location for the installation files is in the next prompt.
This should be the same folder as the Electrical Program Files. Default is C:\Program Files\SOLIDWORKS Corp\SOLIDWORKS Electrical\.
You can browse to select the proper location based on our configuration or where your SOLIDWORKS Electrical was installed. Make sure to select everyone in the radio buttons at the bottom of the dialog.
Select Next to advance to the next screen.
Select Next once more for the software to begin its installation. You will then see the progress bar begin. The dialog box will then prompt you to close the box after installation.
This completes the client machine installations.
You will notice that the add-in is now on the SOLIDWORKS Electrical software. If it is not showing on the tab as shown, then there is a way to turn it on.

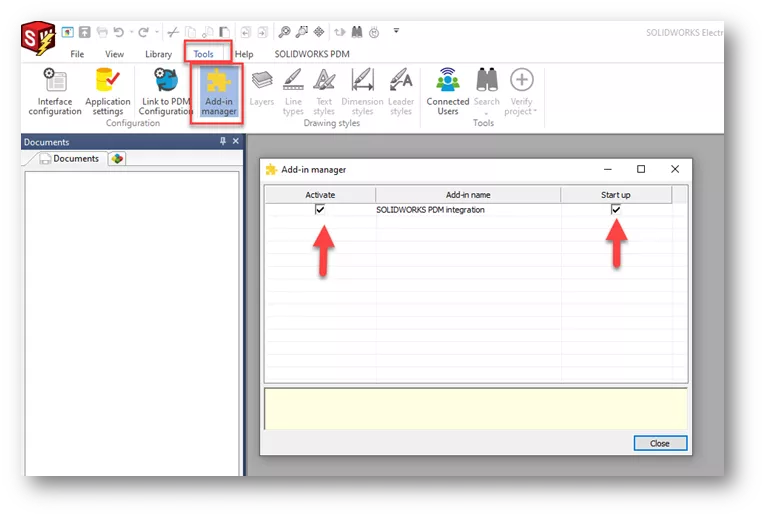
Turning on the add-in in the software if it is not shown can be managed easily. Under the Tools tab of the SOLIDWORKS Electrical software, there is an Add-in Manager.
Once opened, the SOLIDWORKS PDM Integration add-in is shown. There are two boxes that can be checked for Activate and Start-up.
By checking these boxes, the add-in will be available for use in the software. Select the Close button.
Completely close the software. This will ensure that the add-in is running off your software when you reopen.
Your SOLIDWORKS Electrical PDM Integration is now complete. If you have any complications, there are manuals inside the installation software under a folder called Manuals. If you have further requirements, please contact your local VAR.
Learn More about SOLIDWORKS Electrical and PDM
Successful SOLIDWORKS Electrical Client/Server Connection
SOLIDWORKS Electrical License: Standalone vs Network
Moving the SOLIDWORKS PDM Vault Database Yourself? Start Here
Sharing Your SOLIDWORKS PDM Vault Without Sharing Licenses
SOLIDWORKS Electrical Schematics 2021 User Interface Customization Options

About Cheri Guntzviller
Cheri Guntzviller is a Senior Electrical Specialist with over 35 years’ experience. She earned her Bachelor of Science in Electrical Engineering degree from Lawrence Technological University and joined the VAR channel in 2013 with DASI (now GoEngineer). She is a problem solver and is passionate about teaching and helping others solve problems. Based out of Michigan Cheri enjoys gardening, fishing, construction, and spending time with her family and pets. Cheri is a SOLIDWORKS Certified Electrical Specialist, Trainer, and Professional Presenter.
Get our wide array of technical resources delivered right to your inbox.
Unsubscribe at any time.