Using DraftSight Split Dimension
The primary reason for creating drawings is to have a document that provides the most accurate communication of the design intent of a model or assembly to the fabricator. It must be clear and concise with the best and most precise documentation and annotations that convey the details for tolerances and procedure. This article explains how to use the DraftSight Split Dimension feature for cleaning up dimension detailing.
How to Use the Split Dimension (SPLITDIMENSION) Command
Creating detailed drawing views will create annotations with crossing leaders and extension lines. Since the primary purpose of a drawing is to clearly communicate design intent to the fabricator, it is best to eliminate as much confusion as possible.
To facilitate this, we can use a command in DraftSight called Split Dimension (![]() SPLITDIMENSION). This command is found on the Drafting and Annotation Workspace on the Annotate tab. Hover over the icon to see this tooltip.
SPLITDIMENSION). This command is found on the Drafting and Annotation Workspace on the Annotate tab. Hover over the icon to see this tooltip.

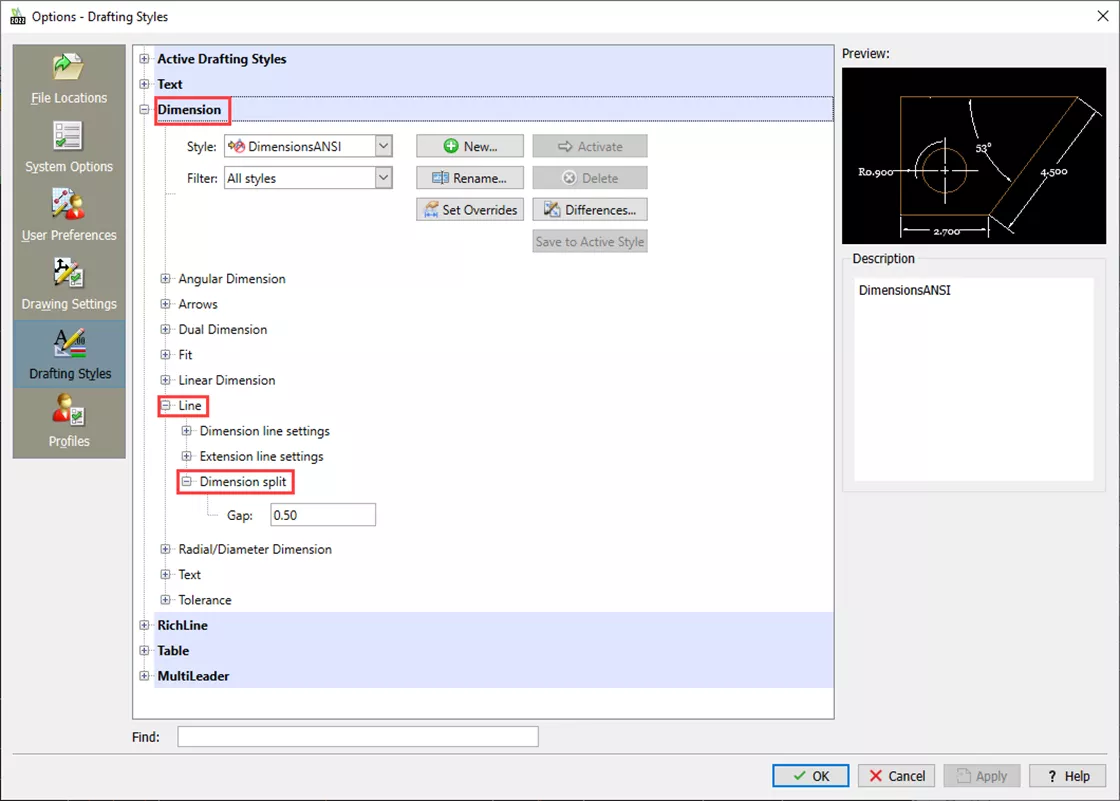
It can also be found on the Classic Workspace menu Dimension > Split Dimension. The default gap for the split is set in the Dimension Styles > Line area by selecting the Dimension Styles tool on the Annotate tab ![]() .
.
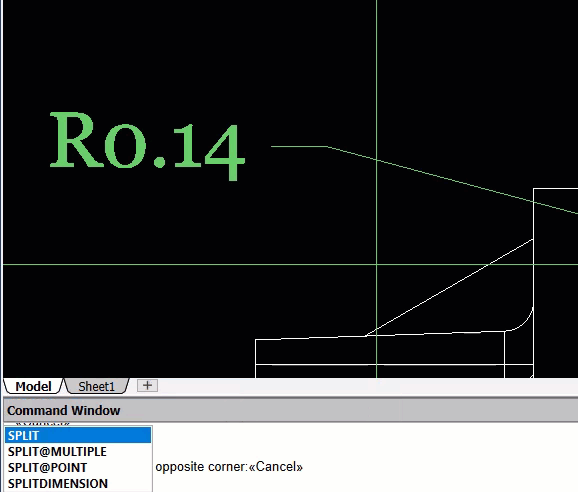
Once the command is initiated, select a leader or extension line to split. The following options are available:
- Default - Splits dimensions using the default gap.
- Specify gap - Apply a split gap in individual cases by specifying a starting point and end point. This option is not available when splitting multiple dimensions and extension lines.
- Join - Joins split dimension and extension lines.
- Exit - Exits the command
Below is a demonstration of each option:
Default
Specify Gap
Join

Review the drawings created in DraftSight and see if there is room for improvement using the Split Dimension command.
I hope this article helped explain using DraftSight Split Dimension. Check out more tips and tricks listed below. Additionally, join the GoEngineer Community to participate in the conversation, create forum posts, and answer questions from other DraftSight users.
Want to take your DraftSight skills to the next level? Enroll in the official DraftSight Essentials training course. This course teaches designers how to make coordinates, create drawings, and modify entities, properties, and layers. Both online and in-person classes are available.
More DraftSight Tutorials

About Dennis Barnes
Dennis Barnes is a CSWE, CSWI and a Sr. Applications Engineer based out of the Albuquerque, NM office since 2012. He has a BS in Computer Science from Chapman University and has been using SOLIDWORKS since 2005.
Get our wide array of technical resources delivered right to your inbox.
Unsubscribe at any time.