Using SOLIDWORKS Copy with Mates
When working with SOLIDWORKS assemblies, the Copy with Mates tool can be used when inserting several instances of a component using the same mating technique. Copy with Mates allows a mated component to be copied to a new location while bringing the existing mates along with it. Let’s look at a couple of examples of how to get started using this tool.
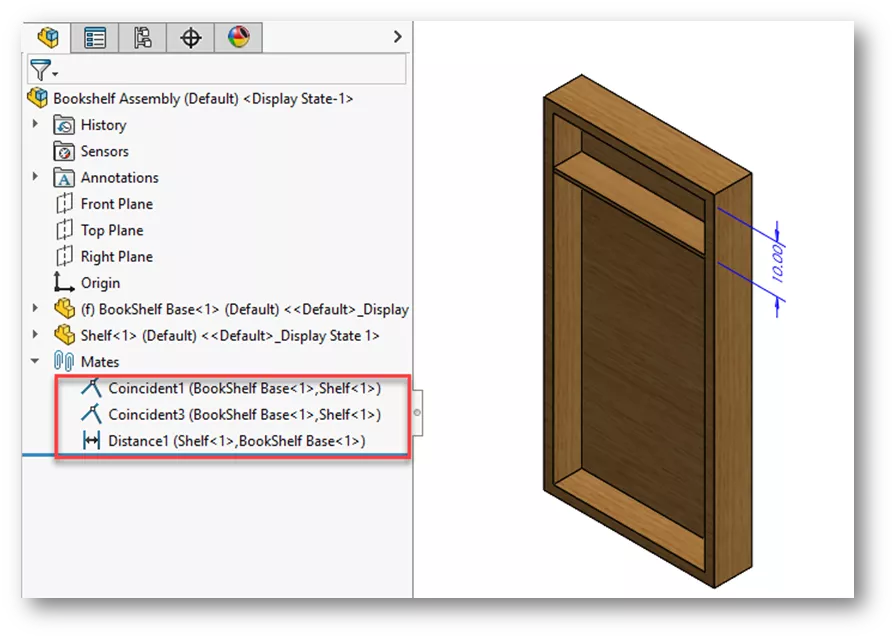
Bookshelf Assembly Example
This example is a bookshelf assembly where one shelf has already been mated in place using two coincident mates; one to define placement and one to define the location. We'll use Copy with Mates to finish adding shelves to the bookshelf.
Where is Copy with Mates Located?
There are a few ways to access Copy with Mates:
- Insert Menu > Component > Copy with Mates
- Assembly Tool Bar > Insert Components drop-down > Copy with Mates
- Right-click a component and choose Copy with Mates.
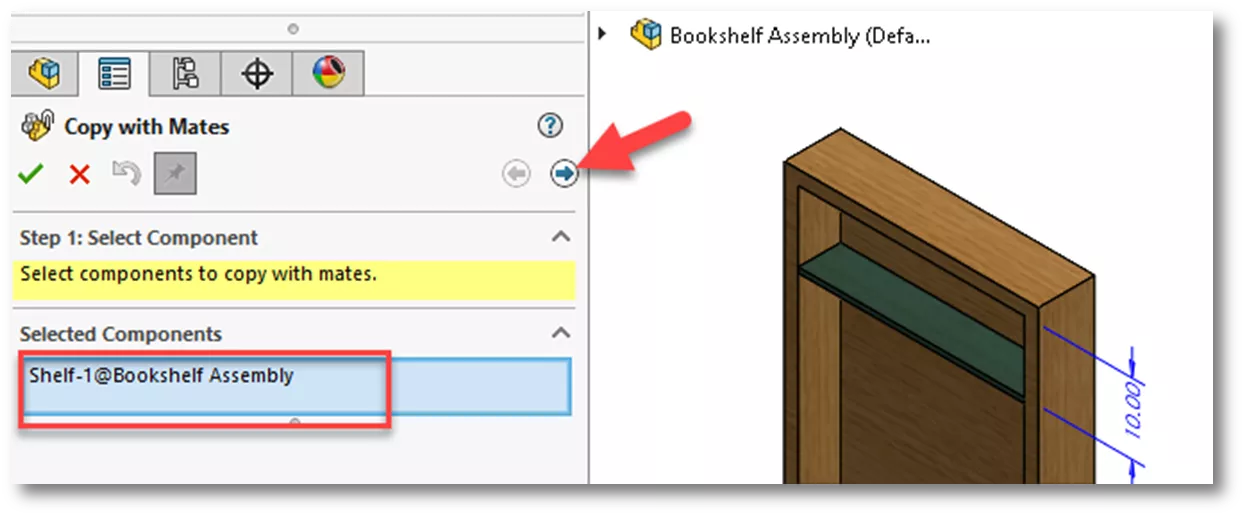
First, right-click the shelf in the FeatureManager Design Tree and choose Copy with Mates. The Copy with Mates PropertyManager appears with the shelf listed in the Selected Components list.
Select the Next button (or blue arrow).
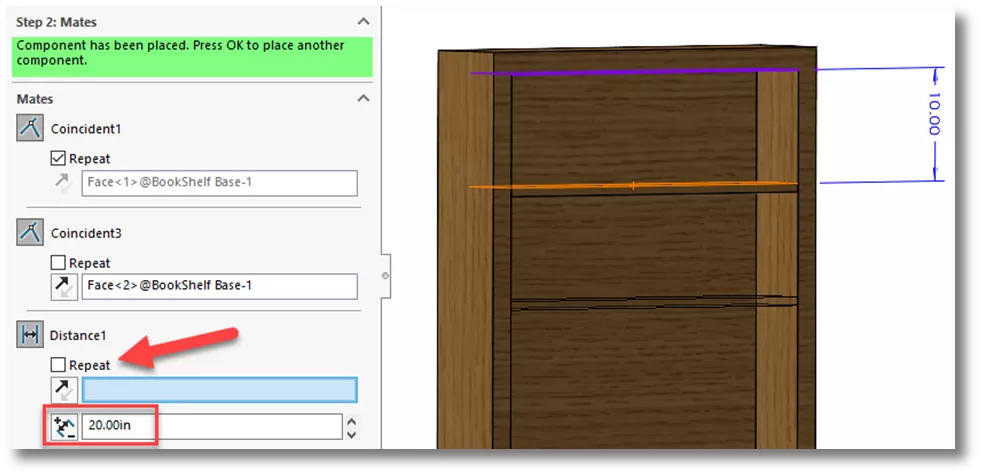
The next page shows the list of mates being copied from the original shelf. The first coincident mate box is highlighted, as well as the faces used in the mate for reference. The face highlighted in purple is the target face. We could select a new face to mate the shelf edge to, but for this example, we will choose the Repeat check box.
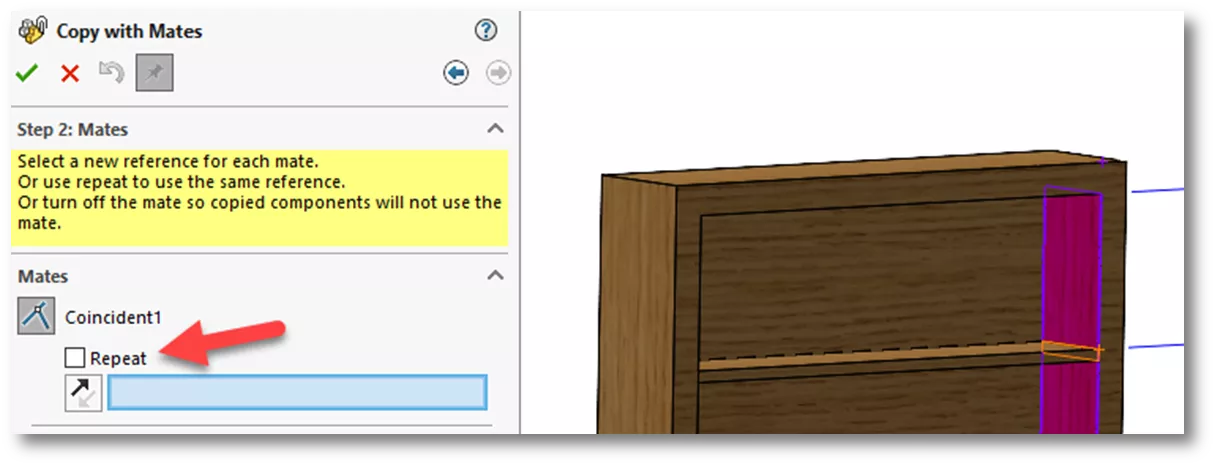
Clicking Repeat auto-populates the field with the same face used in the original mate and highlights the next coincident mate box. We could also select Repeat here as well, but for demonstration purposes, we will manually select the back face of the bookshelf.
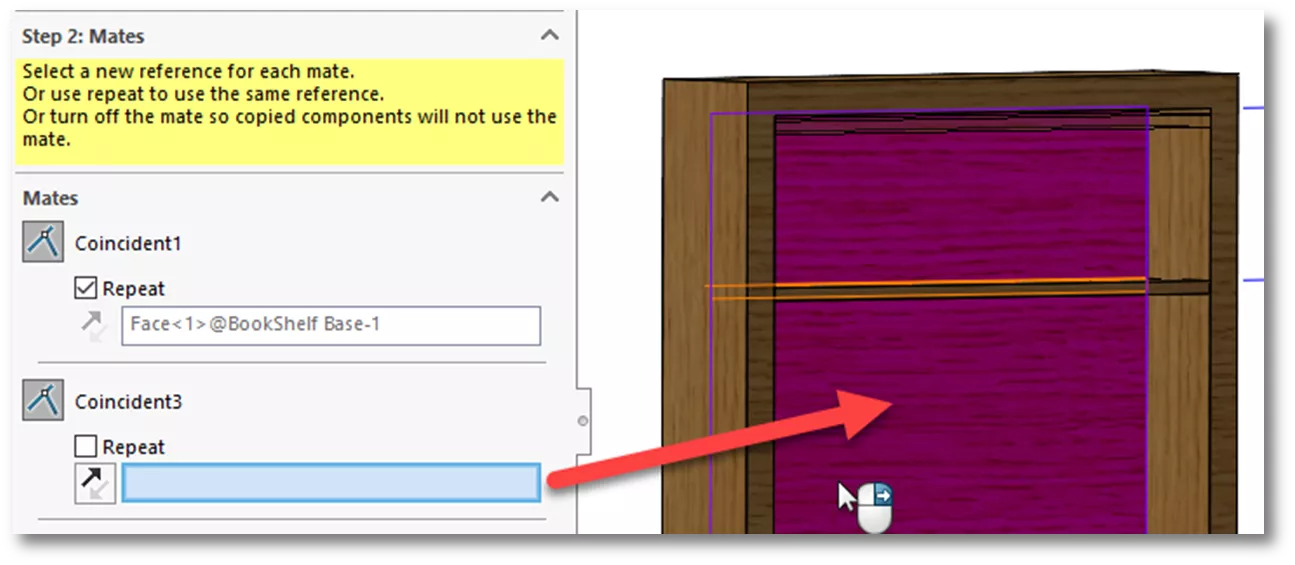
The face is added to the second coincident mate and the distance mate box is highlighted. Since we will use the same face for the distance mate, we'll click Repeat and type a new value of 20 inches.
Click the OK button (green check mark) to continue copying the shelf and defining mating faces. Click the Repeat box for all mates and key in a value of 40 inches for the distance mate. Click OK to place another shelf or use the Escape key to exit the command.
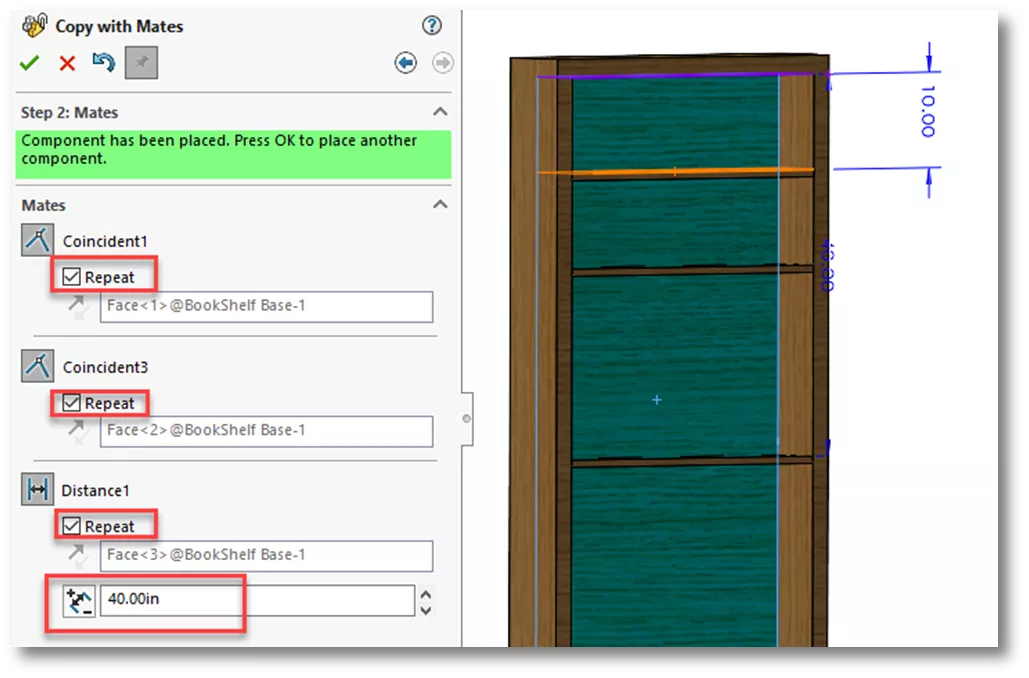
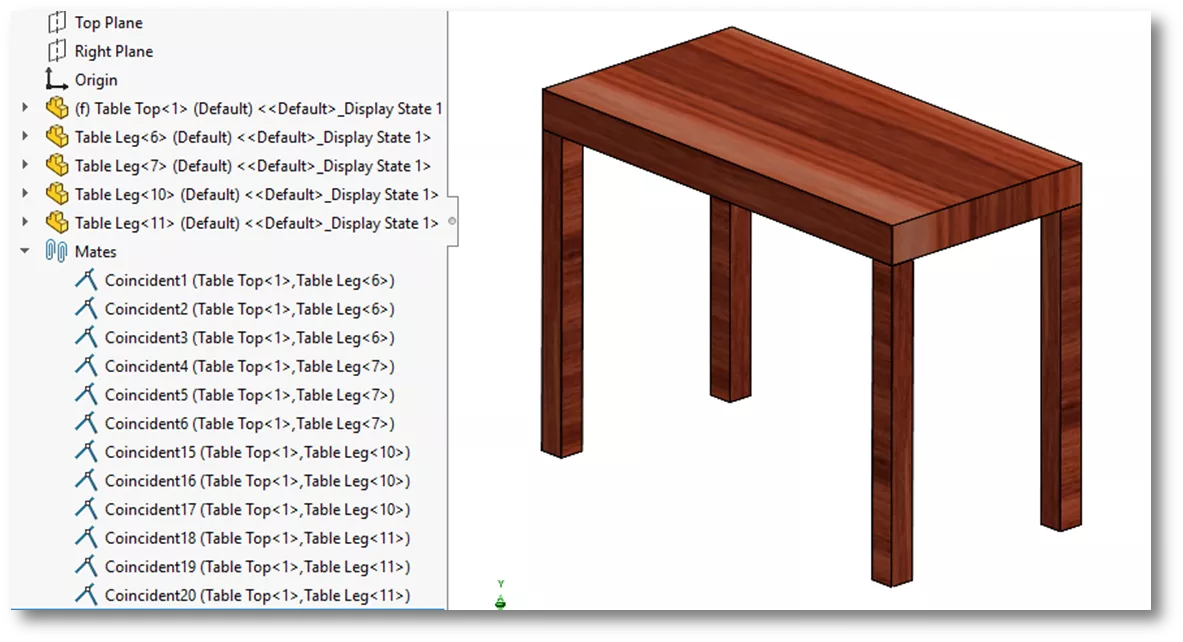
Table Assembly Example
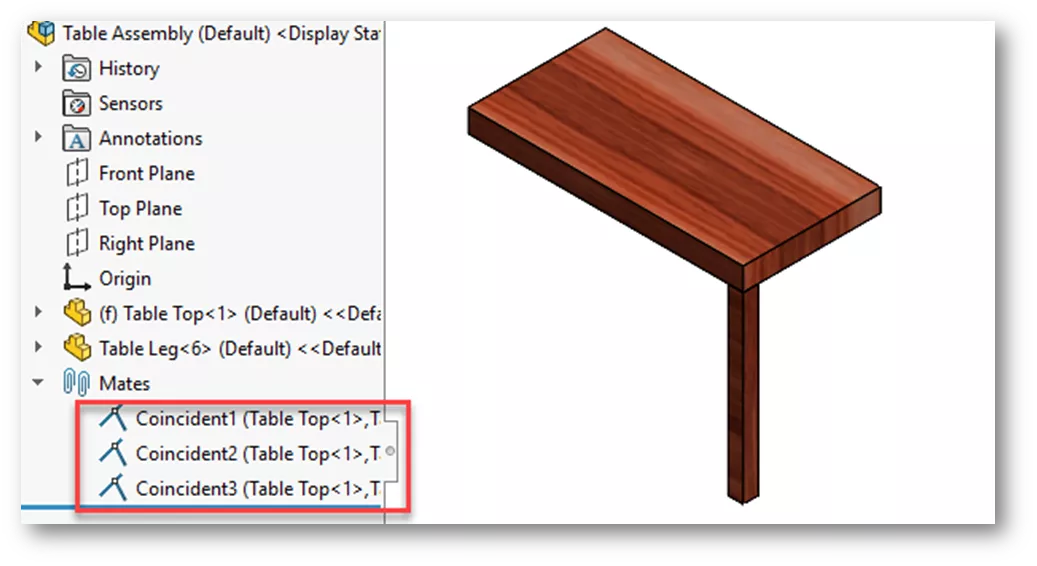
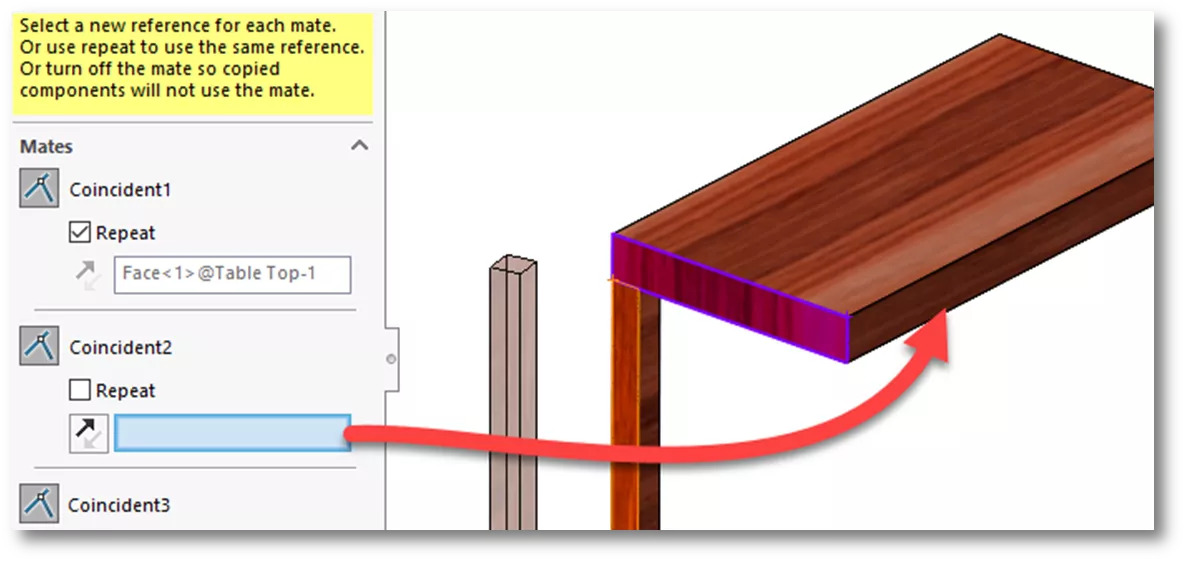
In this example, a table assembly has one leg already mated in place using three coincident mates. The side faces of the legs are coincident with the side faces of the table, and the top face of the leg is coincident with the bottom face of the tabletop.
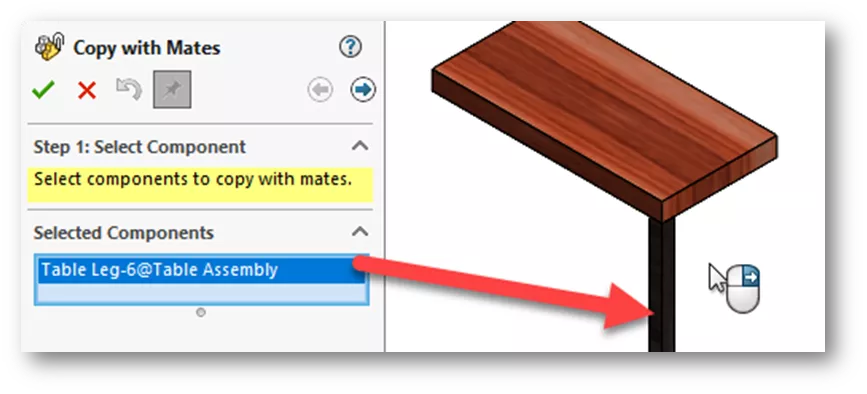
Go to Insert Menu > Component > Copy with Mates, select the leg component from the graphics area, and click Next.
Click Repeat for the top of the leg/bottom of the table mate. For the second mate, select the long face of the table instead. This will ensure the leg gets correctly orientated when selecting the last face.
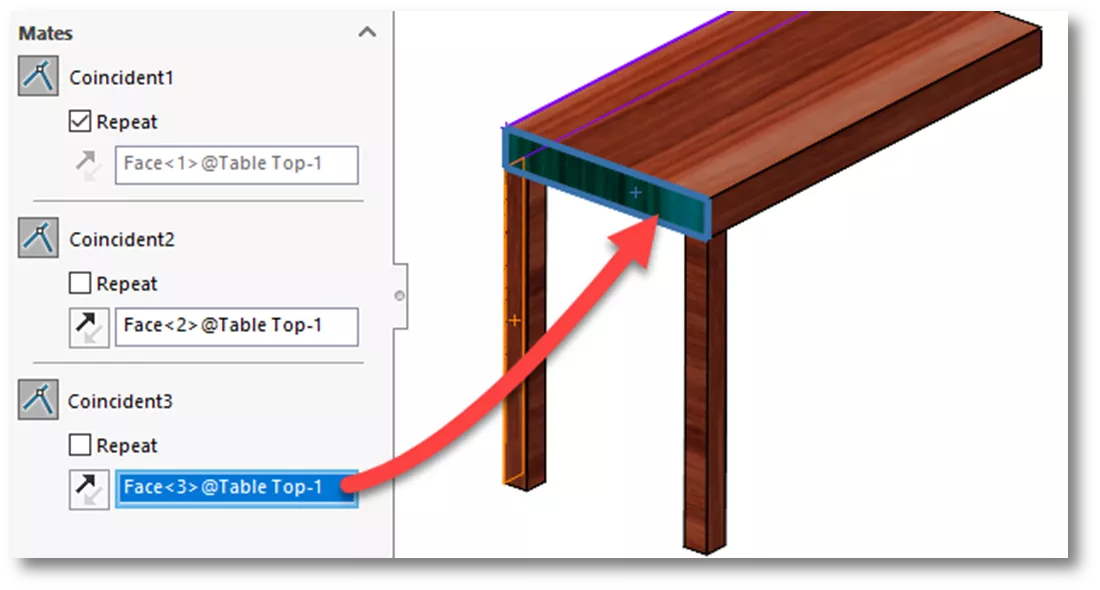
For the last coincident mate, choose the short end face of the table and click OK to add another leg to the assembly.
SOLIDWORKS remembers that we want to repeat the first mate. Earlier, we selected different faces for the last two mates to position the part correctly. As an illustration of what can go wrong, we have selected the similar faces the mates are looking for. As a result, the leg does not line up correctly because we are adding to the opposite side of the tabletop.
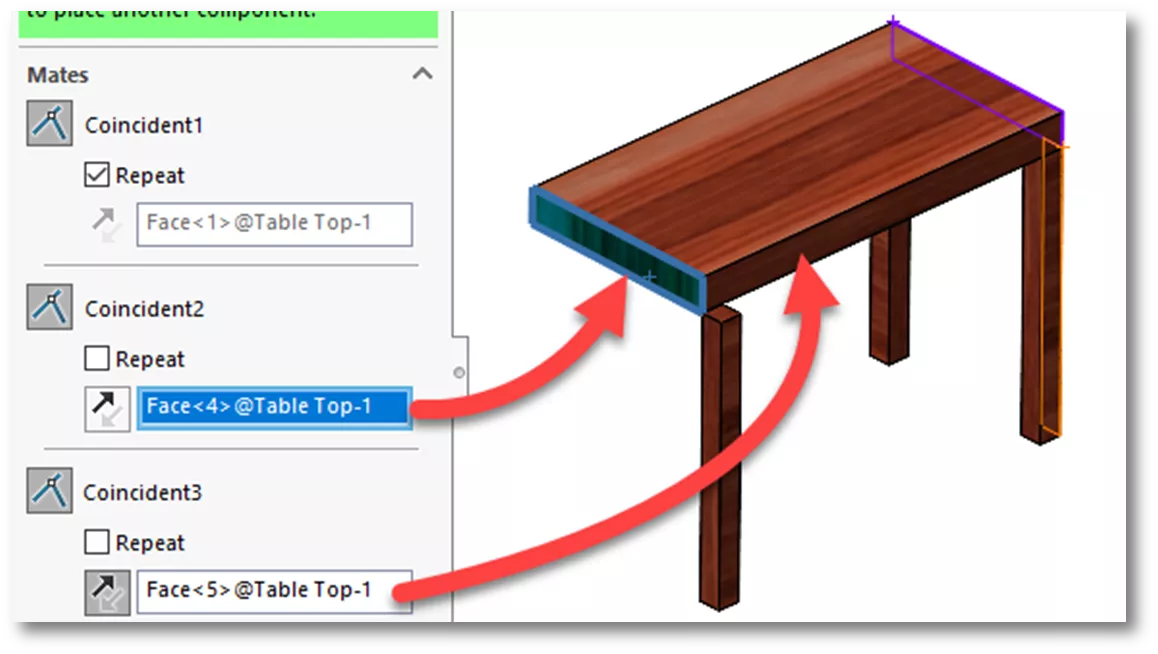
To fix this, right-click in each field, click Clear Selections, and add the right faces to position the leg correctly. Click OK to add another copy.
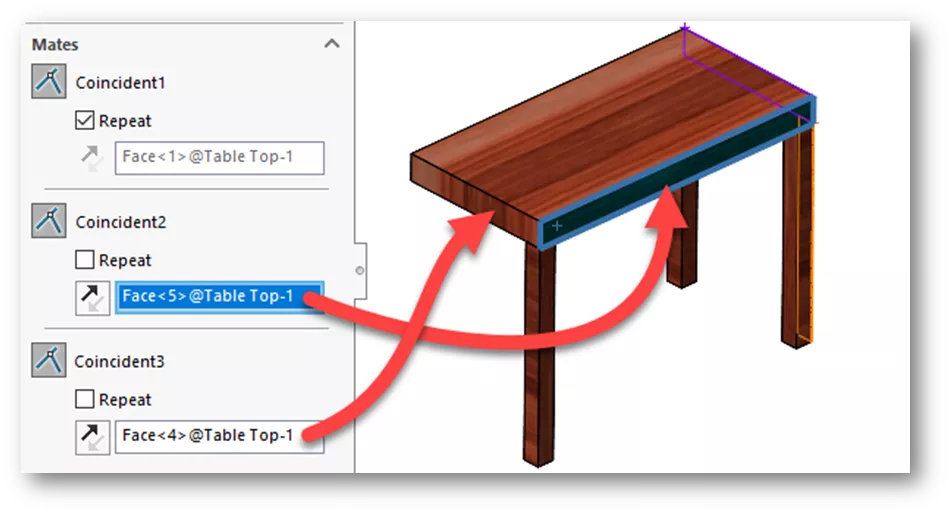
For the last leg, we will keep the Repeat default for the first coincident mate. Because we are working on the same side of the table as the original leg, we will choose the faces as normal for the last two mates. Lastly, click OK to accept and hit Escape on the keyboard to exit the command.

In the FeatureManager Design Tree, all mates were added, and the components are fully defined.
As you can see, Copy with Mates is a great way to quickly add multiple instances of a component without having to manually recreate each mate.
I hope this article helped explain the SOLIDWORKS Copy with Mates command. Check out more tips and tricks listed below. Additionally, join the GoEngineer Community to participate in the conversation, create forum posts, and answer questions from other SOLIDWORKS users.
Want to take your SOLIDWORKS skills to the next level? Enroll in the official SOLIDWORKS Assembly Modeling training course. Both online and in-person classes are available.
More SOLIDWORKS Tutorials
SOLIDWORKS 2024 Sheet Metal Updates – See What’s New
SOLIDWORKS Top-Down Assembly Modeling Quick Tip
Using the Move/Copy Body Feature in SOLIDWORKS
SOLIDWORKS Sheet Metal Fold and Unfold Tools Explained

About Zach Brown
Zach Brown is a certified SOLIDWORKS Expert and a Technical Support Engineer. Prior to working at GoEngineer, he spent 15 years as a mechanical designer, CAD support tech, and instructor using SOLIDWORKS. His hobbies include playing guitar, riding motorcycles, and skiing.
Get our wide array of technical resources delivered right to your inbox.
Unsubscribe at any time.