Assign 3DEXPERIENCE Roles & Manage Members
Table of Contents
Many companies are moving to the 3DEXPERIENCE platform to take advantage of its various benefits. This article reviews Roles within the platform and covers everything from Inviting Members to the Tenant, all the way to assigning Roles by Group.
Platform Administrator
The steps shown below will require the 3DEXPERIENCE user to be an administrator of the company tenant. If the Platform and Member Management Dashboards are unavailable, contact your 3DEXPERIENCE platform admin. If you are the platform admin and cannot access the Dashboards, contact your Technical Support team to help resolve the issue.
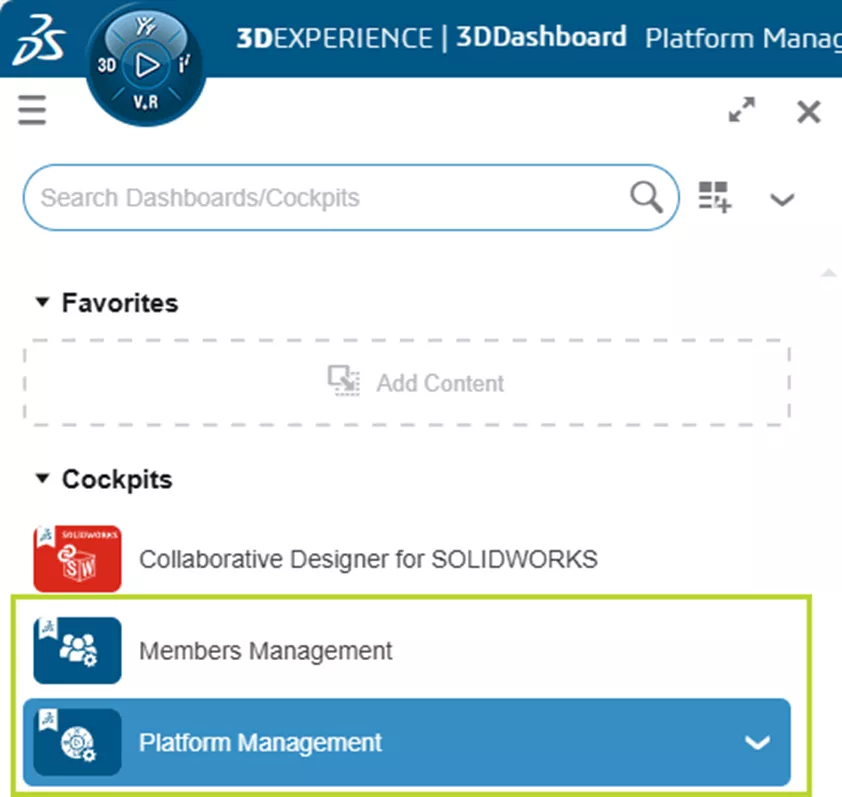
Members Control Center
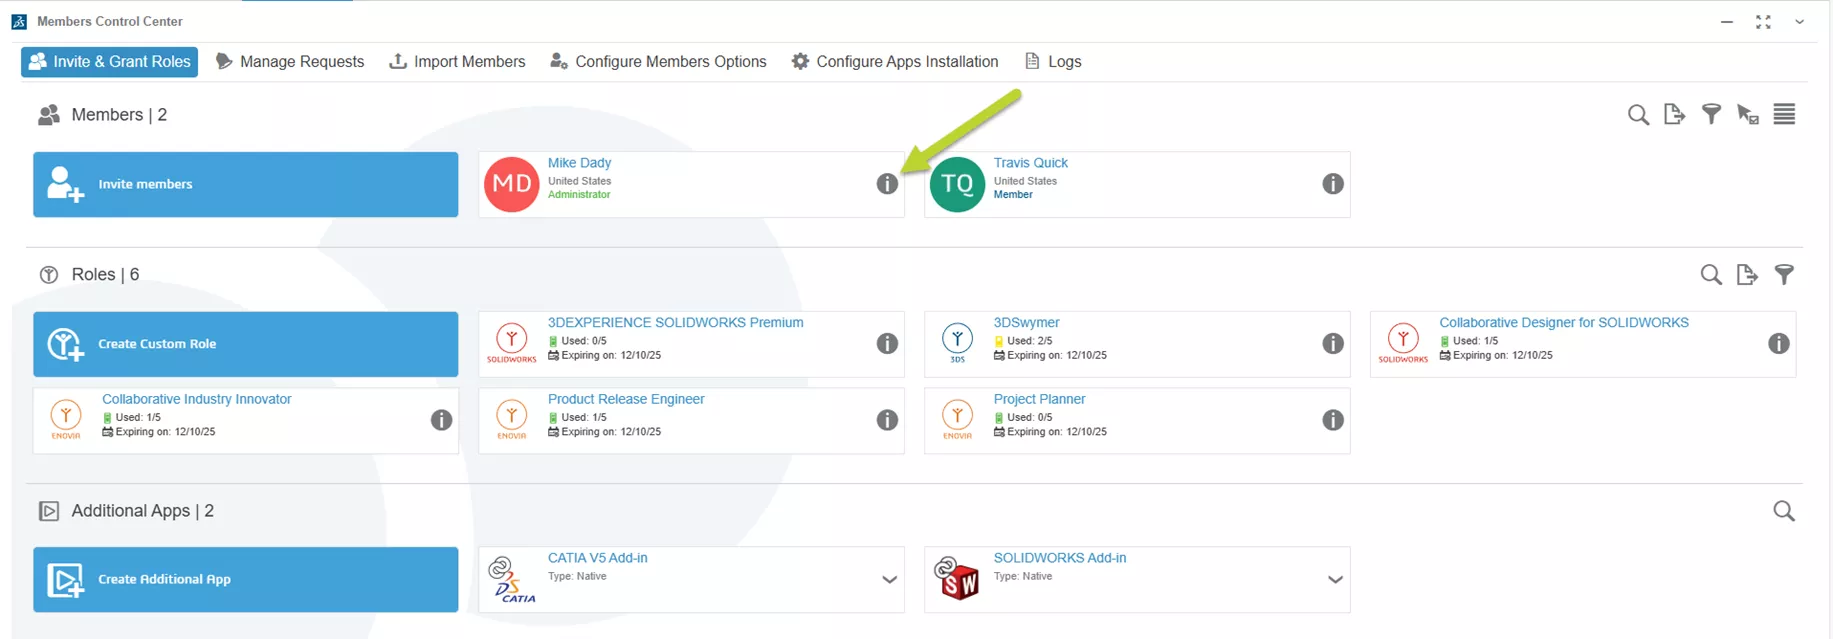
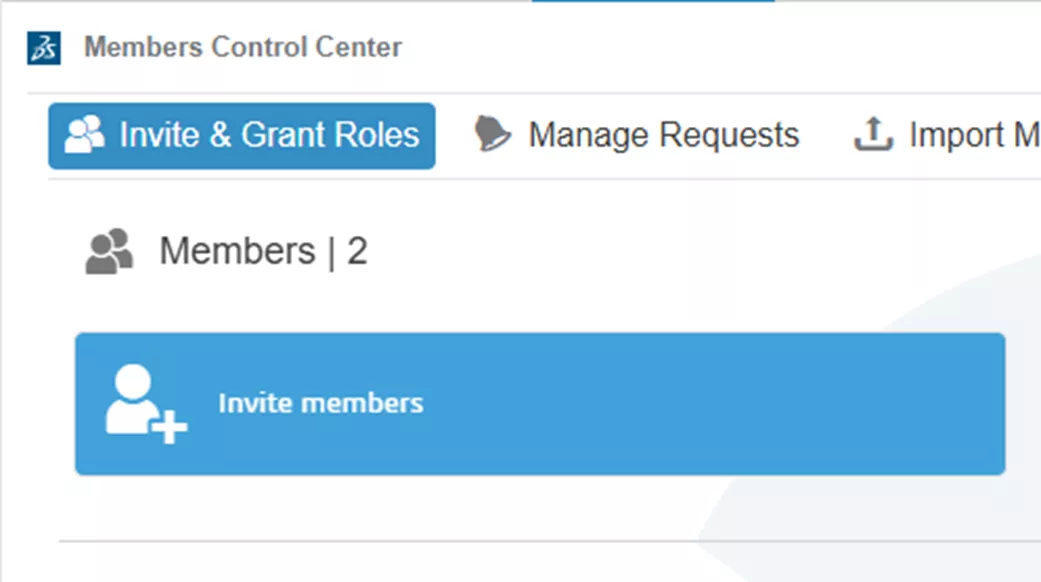
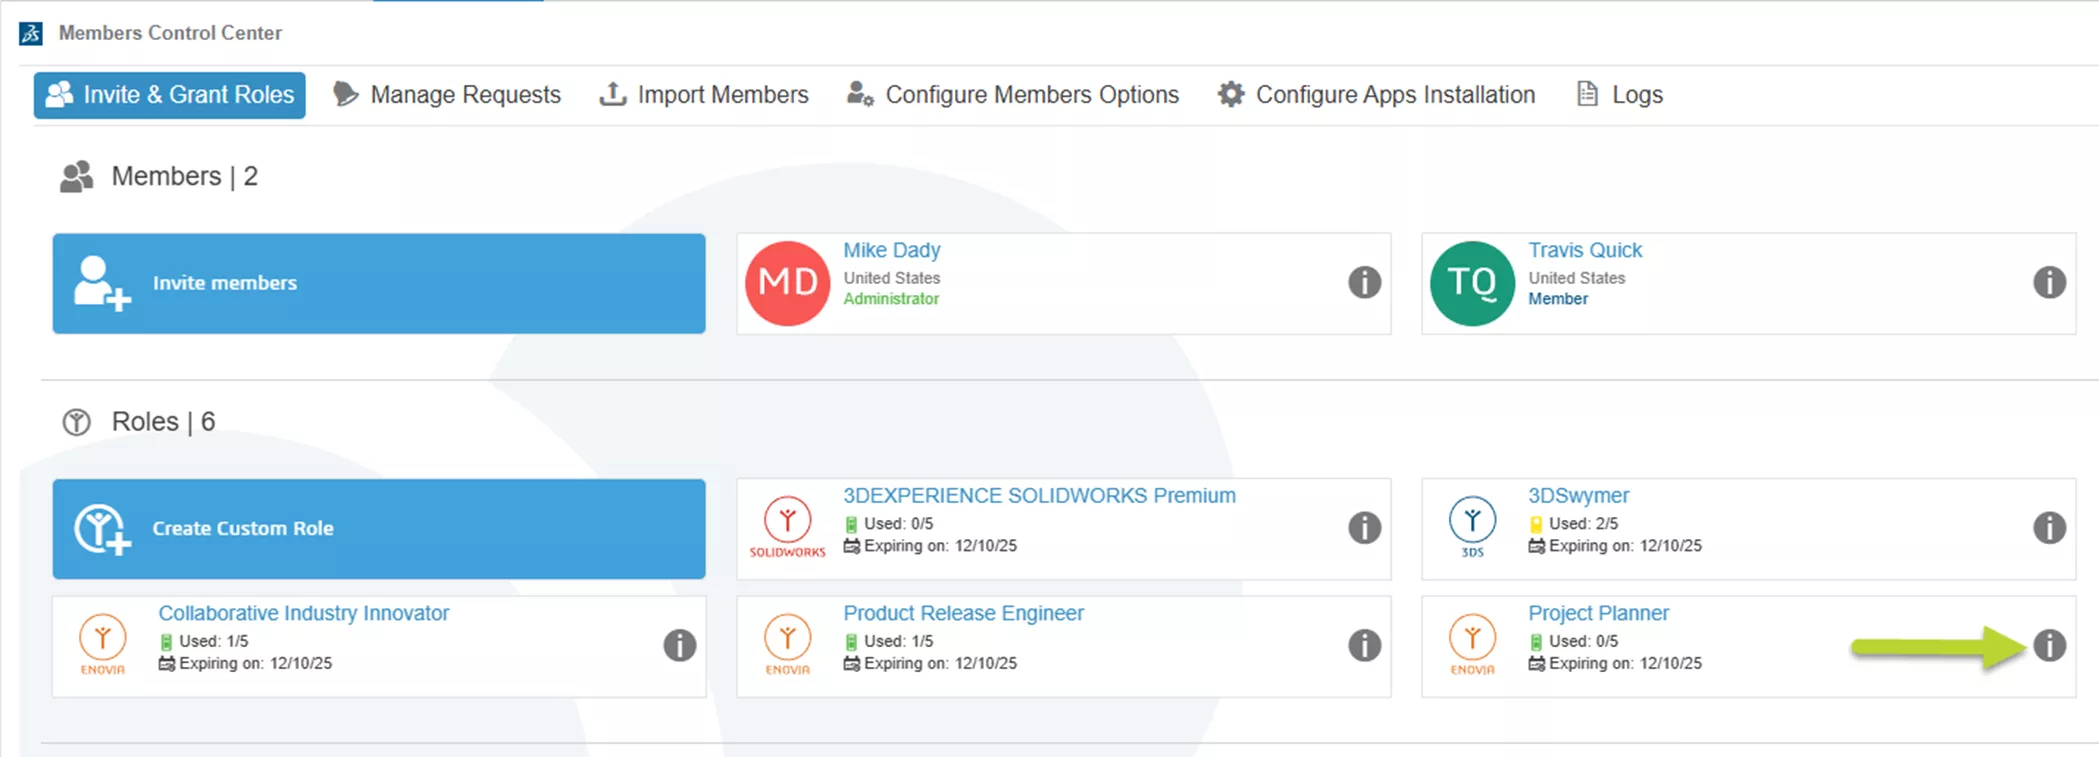
Once you have the proper access, access the Member Control Center from the Members Management Dashboard or the Members Tab of the Platform Management Dashboard. This is where existing Members, the Roles available with License Count, and any additional Apps in the Tenant can be reviewed.

Licensing Options
Before assigning any roles, review the settings that impact licensing on the 3DEXPERIENCE platform. To do so, select Configure Members Options in the Members Control Center App.
The two settings are: Licenses Expiration and Invitations from Administrators.
It is highly recommended to enable Automatically ungrant expired roles from members or groups. This automatically removes Roles from Members if the licensing expires, and will remove any expired licensing errors when trying to access the 3DEXPERIENCE platform.
The other setting, Allow administrators to grant roles without assigning automatically the associated license, controls whether external 3DEXPERIENCE users require licenses on this Tenant or if they will use their own licensing when accessing this Tenant.

Member Information
Let's look at how these options impact Roles for a Member.
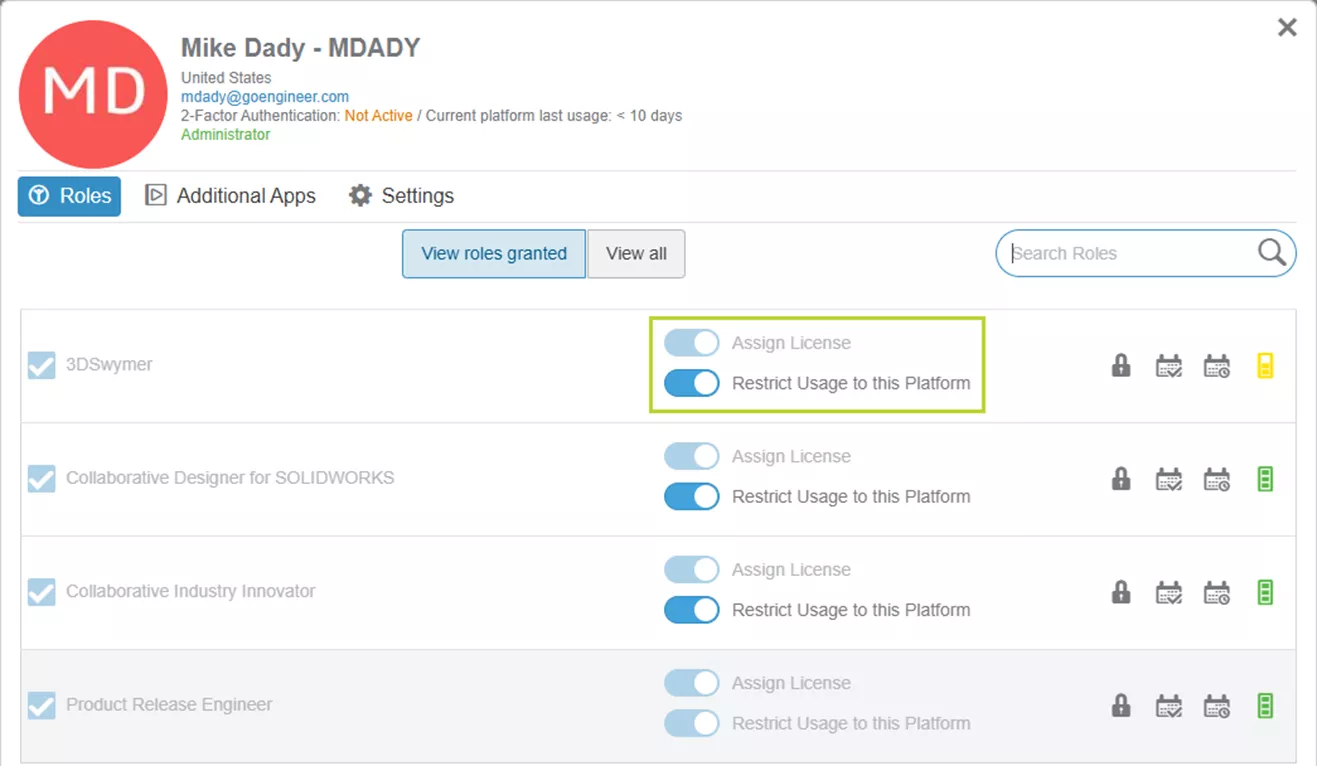
Back in Invite and Grant Roles, select the Details for a Member.
Each Role represents the licensing purchased and grants access to certain applications that perform functions on the platform. The Assign License toggle determines where a license is consumed. If enabled, a license from this Tenant will be used; if disabled, the External Member will use their license from another Tenant.
Restrict Usage to the Platform controls whether the license for that Role can be used on another Tenant. Enabling the option will restrict the License to only be used on this Tenant, disabling the option allows the license to be used on another Tenant.
Assigning Roles
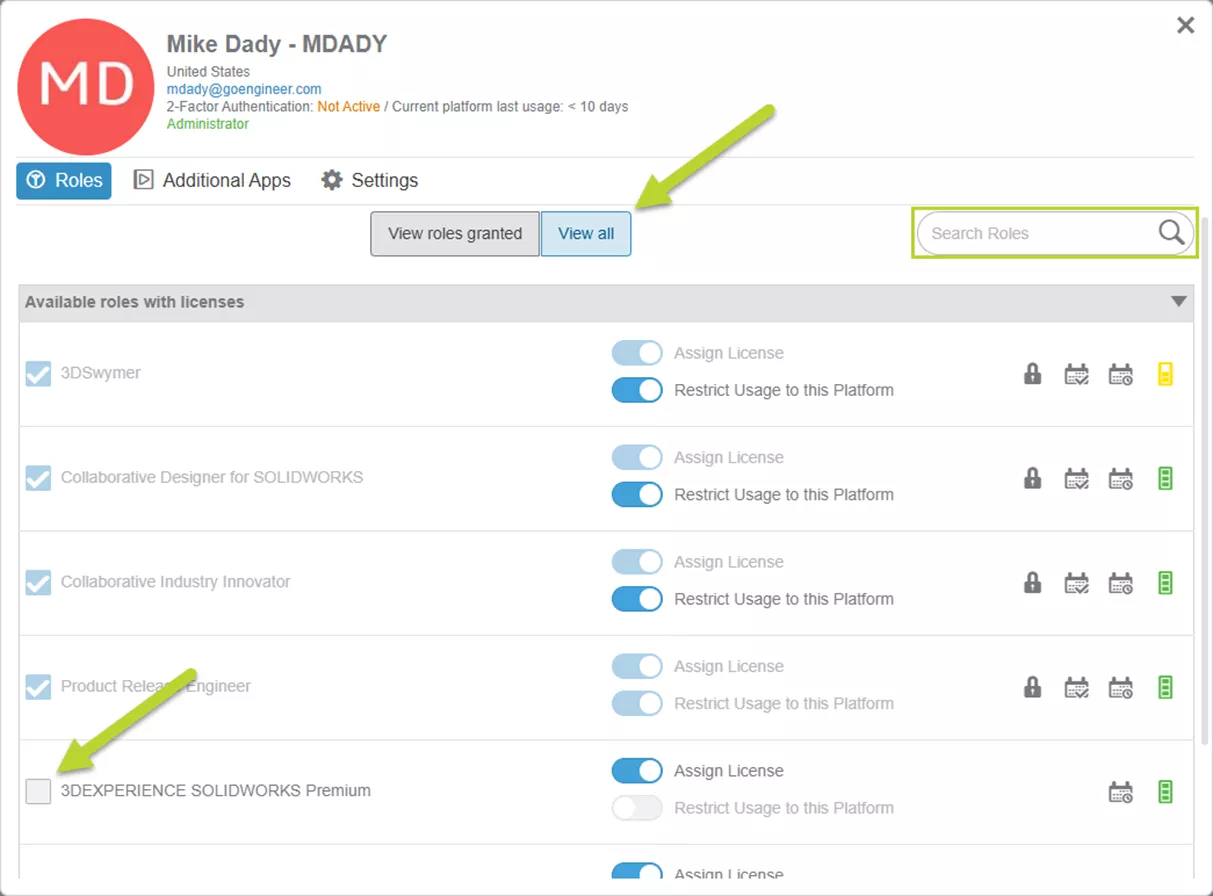
Click the View All button to see all the roles available. If there is an abundance of licenses, search by Role Name or the Trigram for the Role, like “UES” for Collaborative Designer for SOLIDWORKS. Before granting a Role, make sure to set the Licensing Options for the Role, then select the corresponding checkbox.
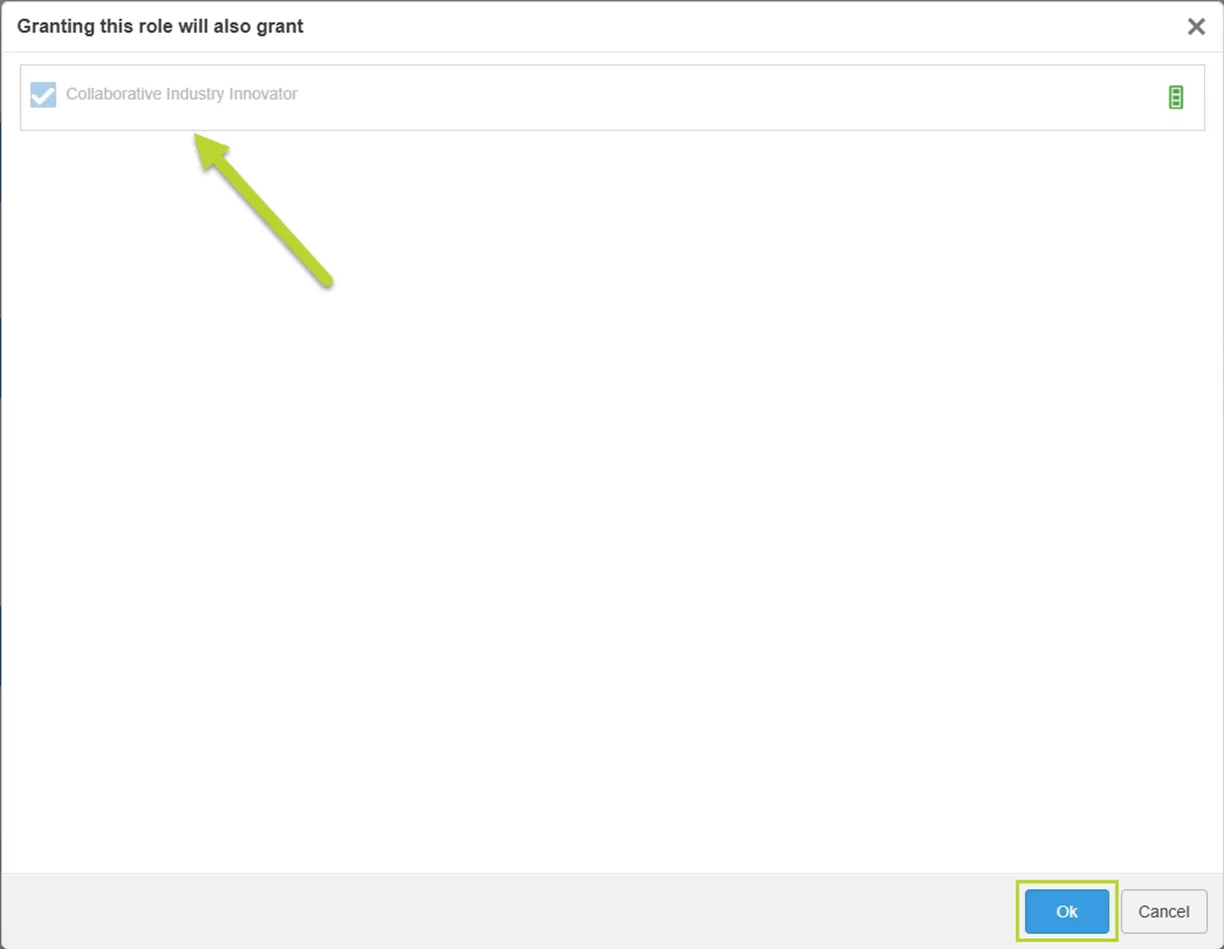
If a Role requires another Role, a window will open stating the prerequisite Role will also be granted as it is required. Select OK to add all the required Roles to the user.
Inviting Members
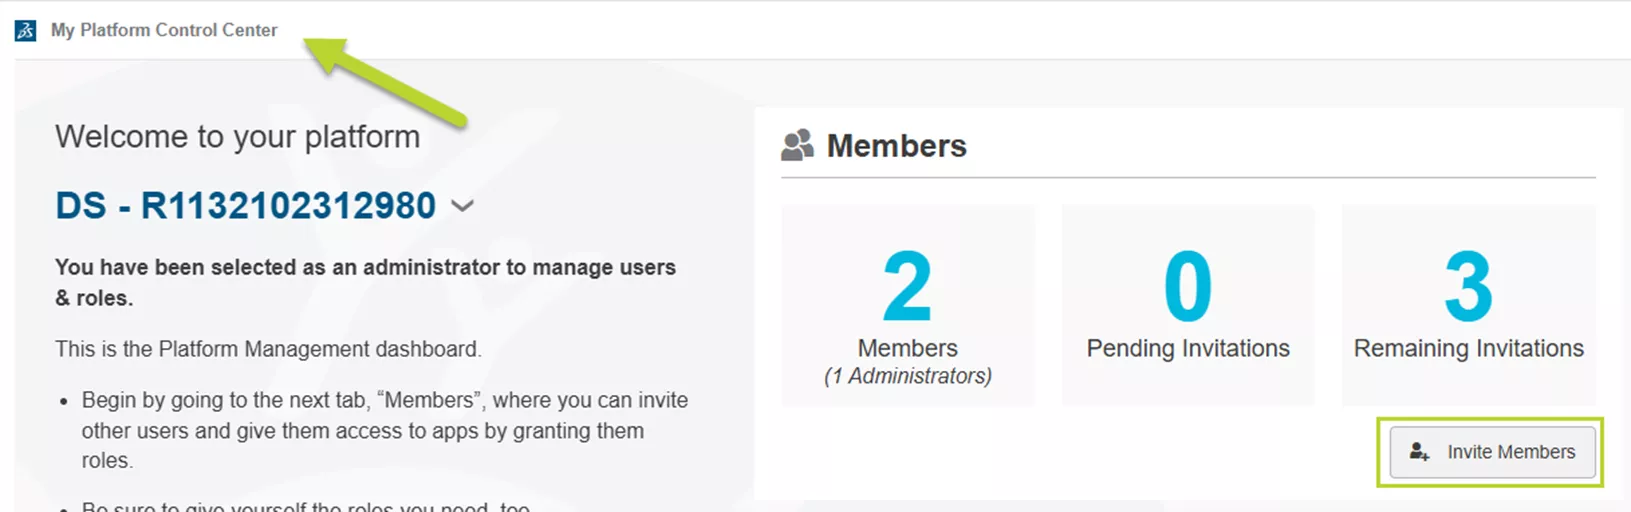
The other way to add Roles to Members is when they are initially invited to the platform. This can be done from either My Platform Control Center or the Members Control Center App.
- Suggested Article >> Managing Members in 3DEXPERIENCE
Steps to Invite a Member:
- Click on Invite Member from the My Platform Control Center or the Members Control Center App.
- Add email addresses for the invitations. More than one email can be entered to assign the same settings for all the new invites.
- Set the User Rights to be a regular Member, Tenant Administrator, or an External User. It is always a good idea to have a backup Administrator. You can also invite External users to the Tenant.
- If desired, add a Personal Message for the invitation.
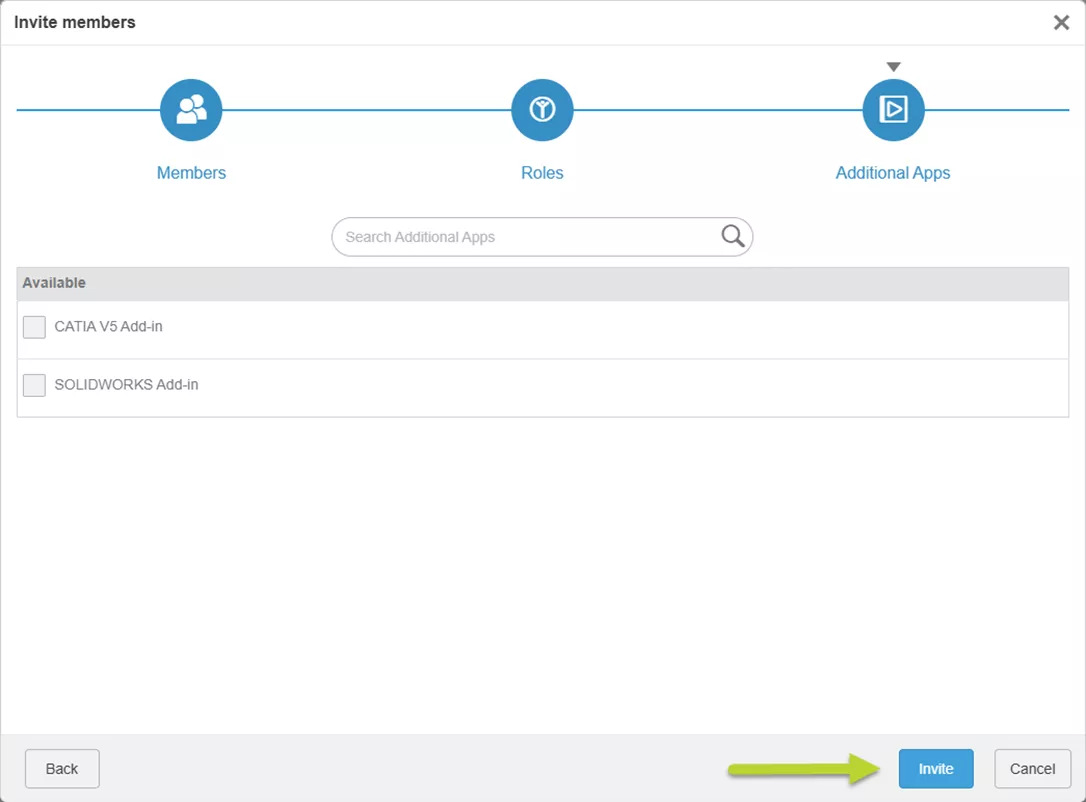
- Once everything is ready, hit Next to move on to the Roles, and you can see all that are available.

- Use the Role checkboxes to add them to the invitation. Again, you will be warned if a prerequisite Role is needed. Optionally, set the Licensing Options at this stage for the user.
- Once everything is ready, hit Next for the final step.

- In the final window, select any Apps that are available. Hit Invite to complete the process.
Requesting Roles
Another method for assigning Roles is via user request. Users can request Roles from the Administrator using the Compass under the Company section.
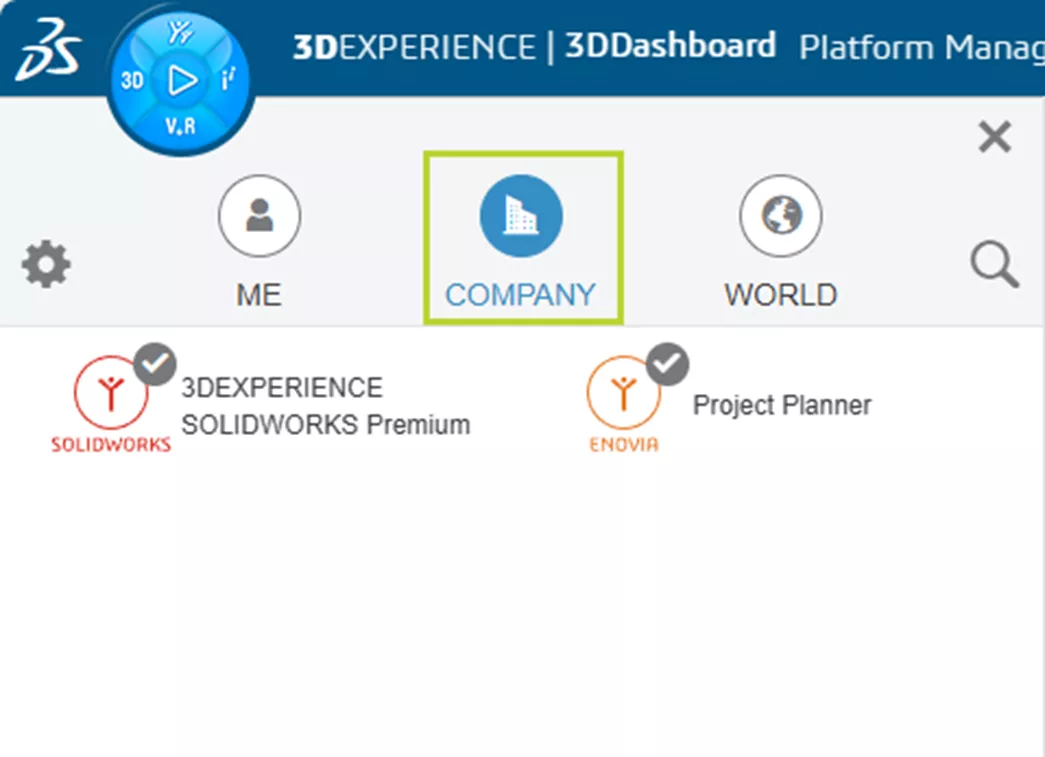
Steps to Request a Role:
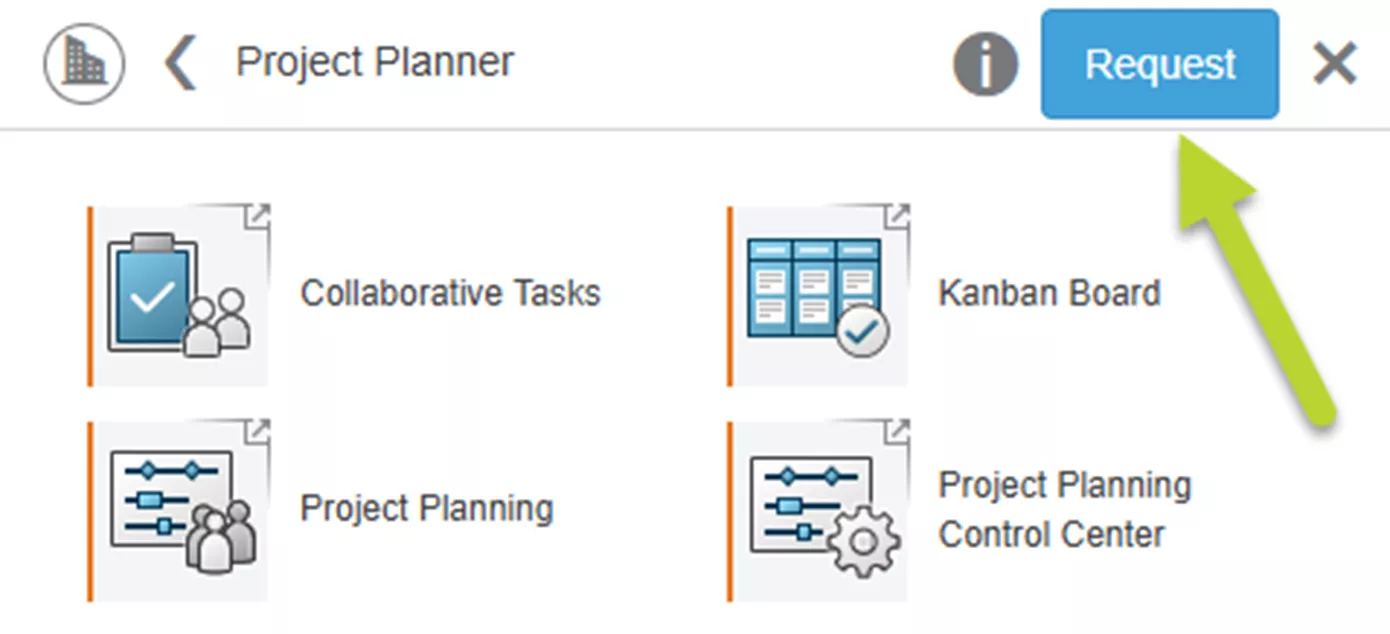
- Select the Role from the Company list.
- Once selected, a panel opens. Click Request. A notification will appear for the user along with an email regarding the request.
Steps to Approve a Request:
- From the Members Control Center, select Manage Requests.
- Once there, select the tile for the request.
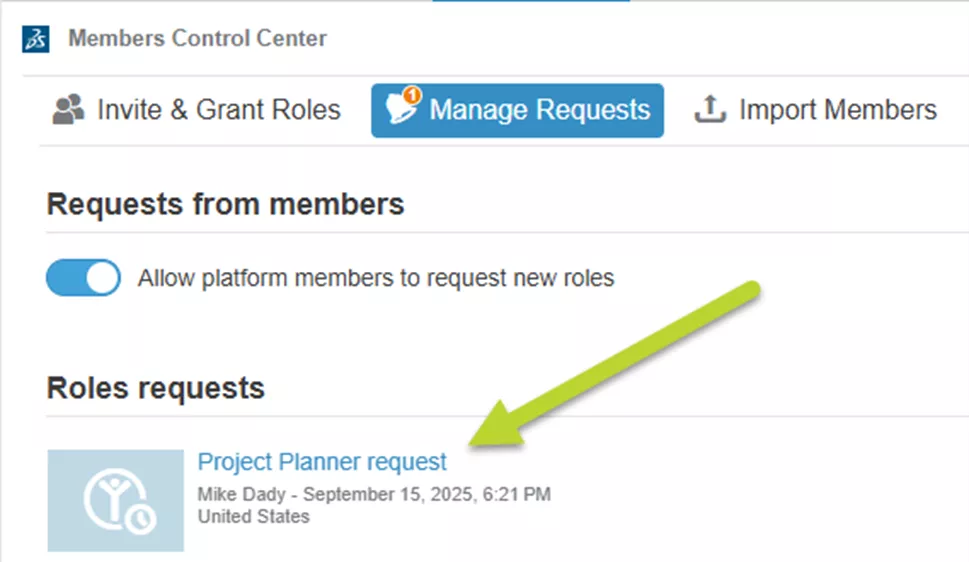
- Select Accept from the slide-out panel.

Groups
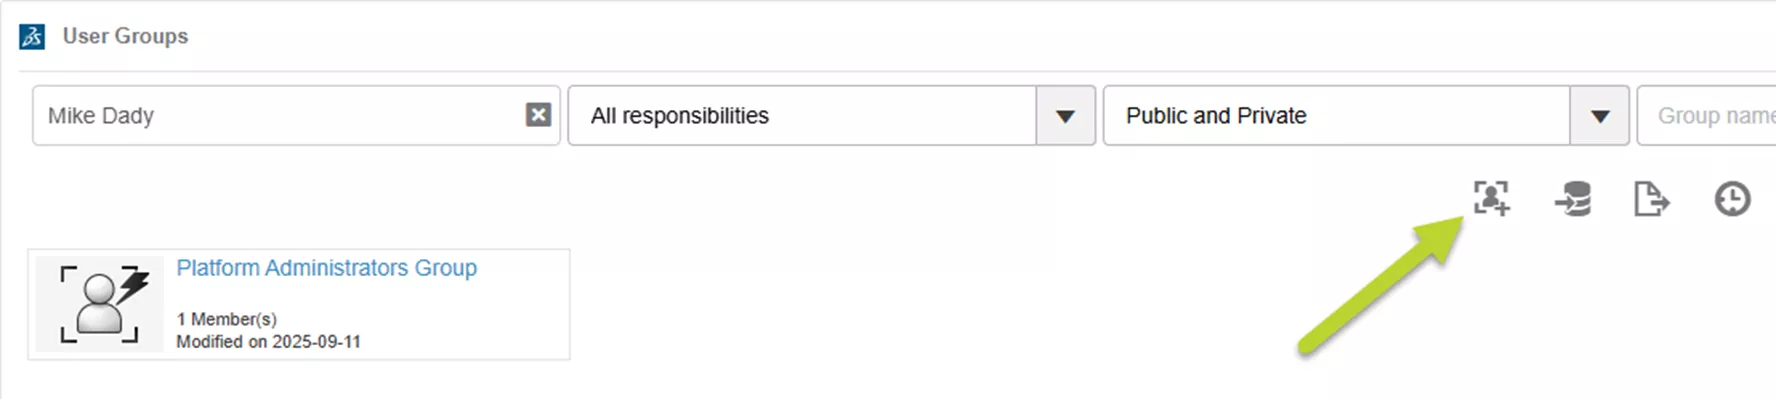
The last method for Role assignment uses Groups. Groups are created with the User Groups App, accessed via the compass and using search.

Steps to Create a User Group:
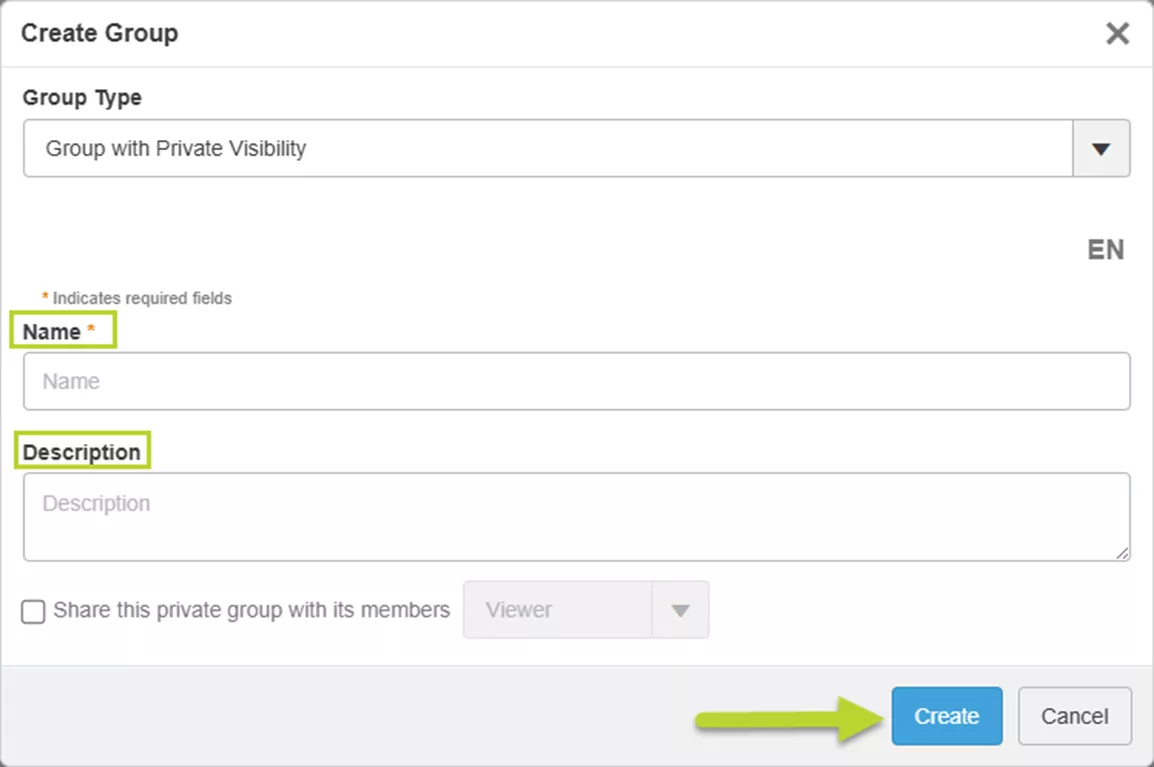
- Select Create Group from the App.
- Create a Name and Description for the Group.
- Note: It is recommended to name the Group after the Role that will be assigned using the Group.
- Hit Create to finalize the Group properties. This will open up a panel to add members.
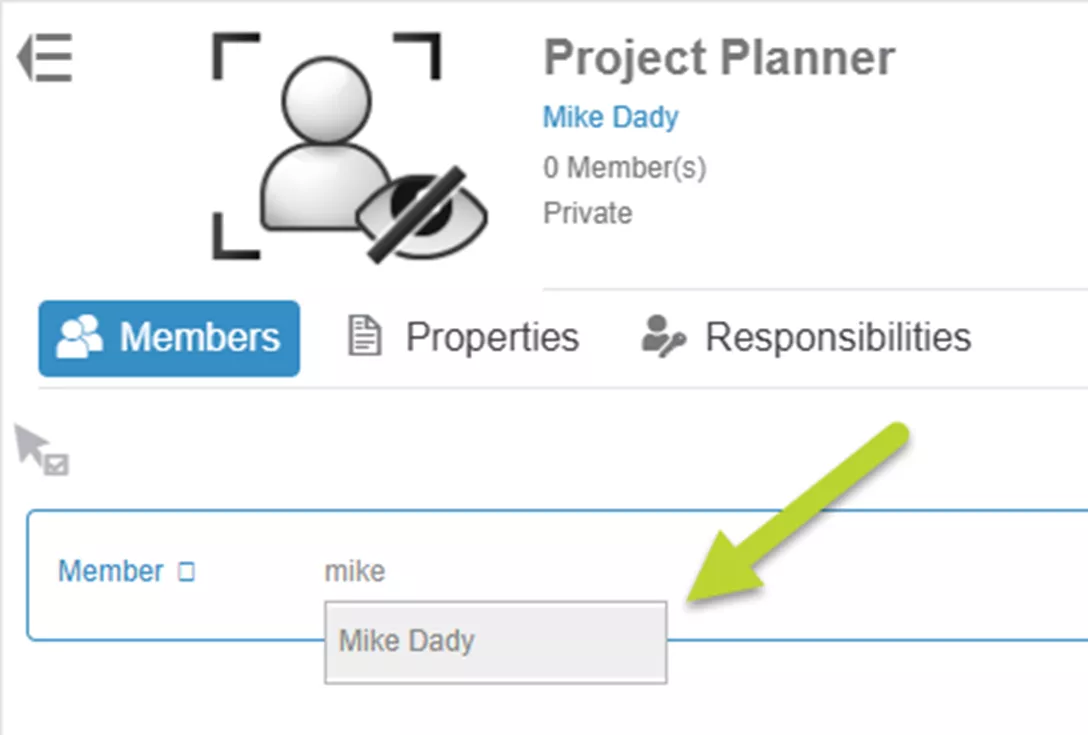
- Click Add Members.

- Add users to the list of members by typing their name for suggestions and selecting the name when it appears.
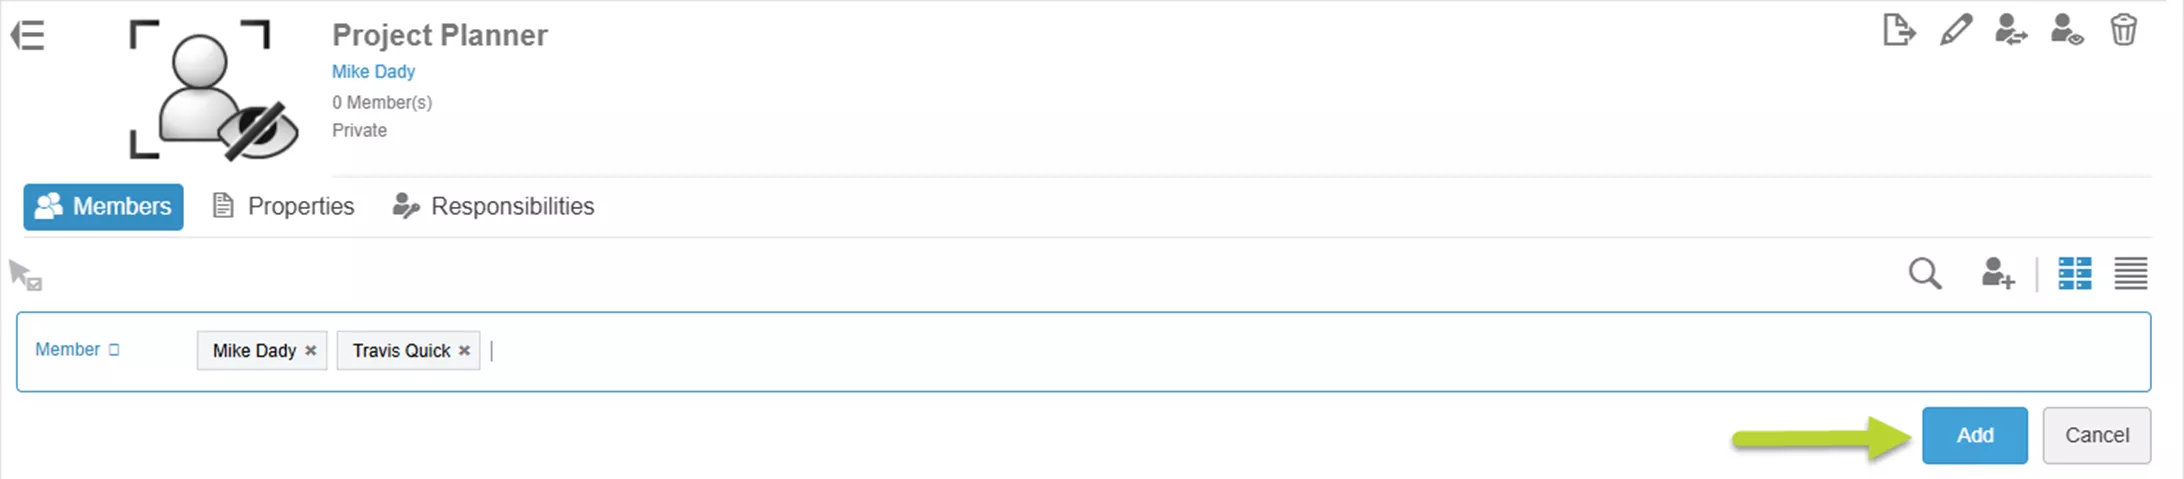
- Once all the Members are in the list, hit Add.
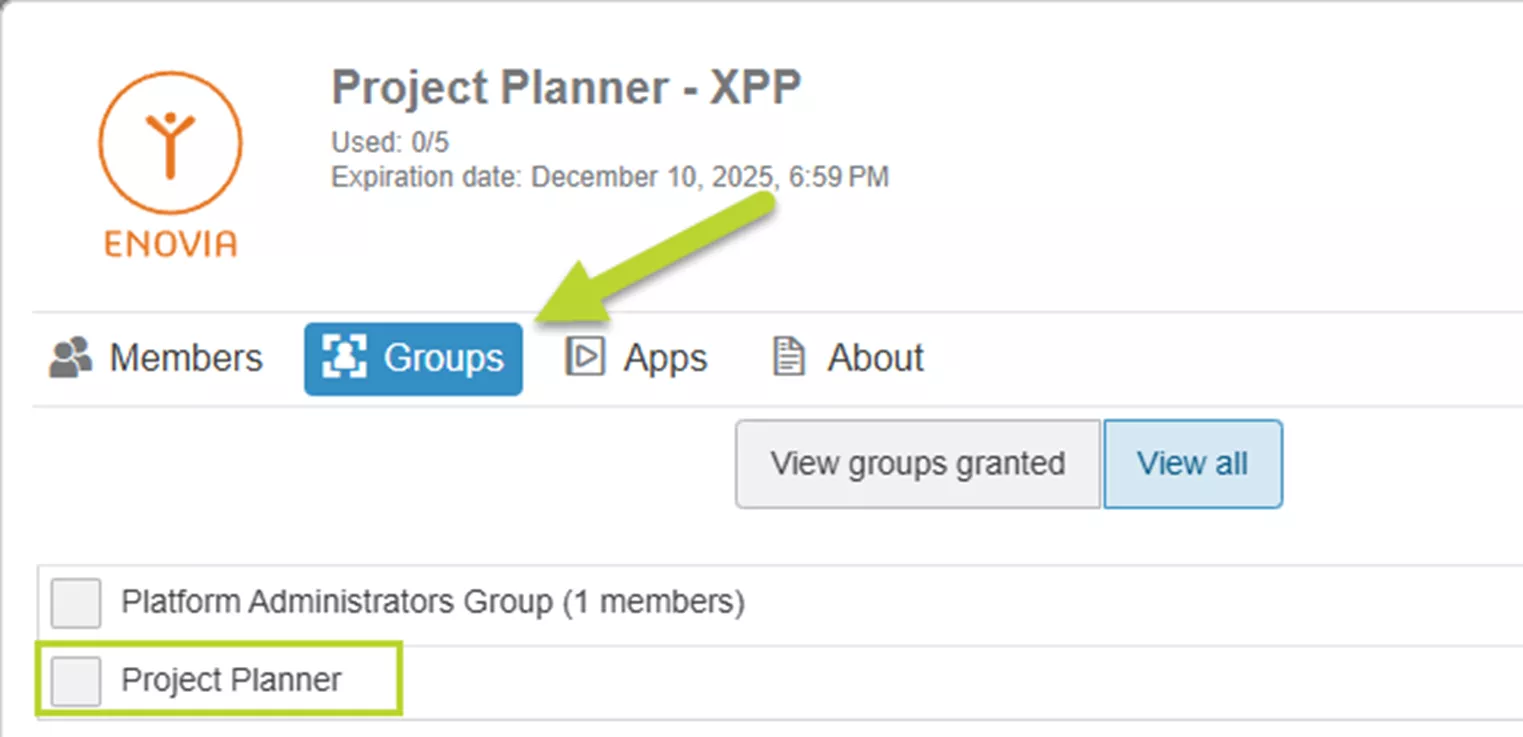
Steps to Add Roles Using a Group:
- Go to the Members Control Center > Invite & Grant Roles.
- Select the Details icon for the appropriate Role.
- Move to the Groups section of the details.
- Select the checkbox for the appropriate Group and select OK if prompted about prerequisite Roles.
Removing Users
Members can be removed from the Tenant from the Members Control Center App.
Steps to remove a Platform Member:
- Select the Details for the Member.
- Go to Settings. Here you can remove the user.

I hope this article has improved your skills when managing the 3DEXPERIENCE platform and Roles. Want to learn more? Check out more tips and tutorials listed below or on our 3DEXPERIENCE YouTube Channel. Additionally, check out the GoEngineer Community, where you can create forum posts, join design contests, and answer questions from other 3DEXPERIENCE platform users.
Related Articles
Exporting Derived Outputs from the 3DEXPERIENCE Platform
3DEXPERIENCE - Release Assembly and All Related Files
Accessing the Cloud Using Design with SOLIDWORKS
Adding Columns to the 3DEXPERIENCE Bookmark Editor App After July 2025 Update
3DEXPERIENCE Engineering Release App to Add or Change Properties

About Mike Dady
Mike Dady is a Senior Application Engineer at GoEngineer. Mike spends his days working with customers to resolve their manufacturing issues and helps them to improve on existing product designs. If he’s not solving customer challenges, he’s probably at home customizing his snowmobile or working on a home improvement project.
Get our wide array of technical resources delivered right to your inbox.
Unsubscribe at any time.