Add Words to SOLIDWORKS Spell Checker
Want to spell-check your drawings? Does the SOLIDWORKS Spell Checker think you misspelled your company’s name? Well, here’s how to find it, use it, and add words to the dictionary so that it knows how your company’s name is spelled.
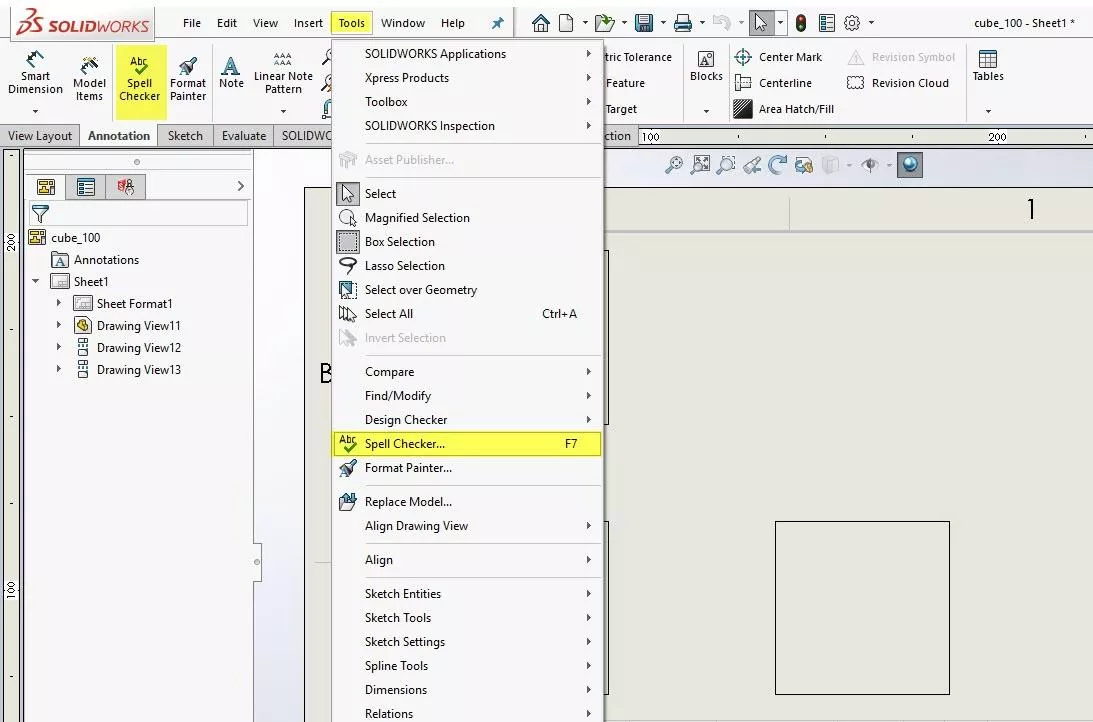
Where is the SOLIDWORKS Spell Checker located?
With a drawing open, the SOLIDWORKS Spell Checker is located under Tools > Options, as well as in the Annotation toolbar. F7 will start the spell checker too.
There are three different ways to add words to the SOLIDWORKS Spell Checker:
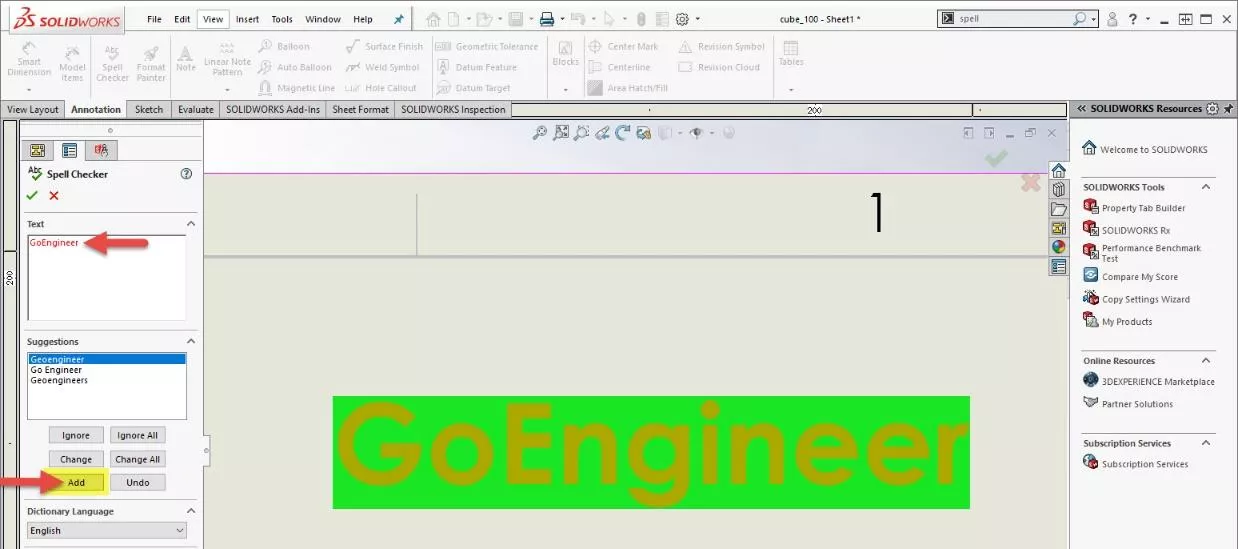
1. Add Words with One Click
The easy way to add words is to select Add under the Suggestions box in the Spell Checker.
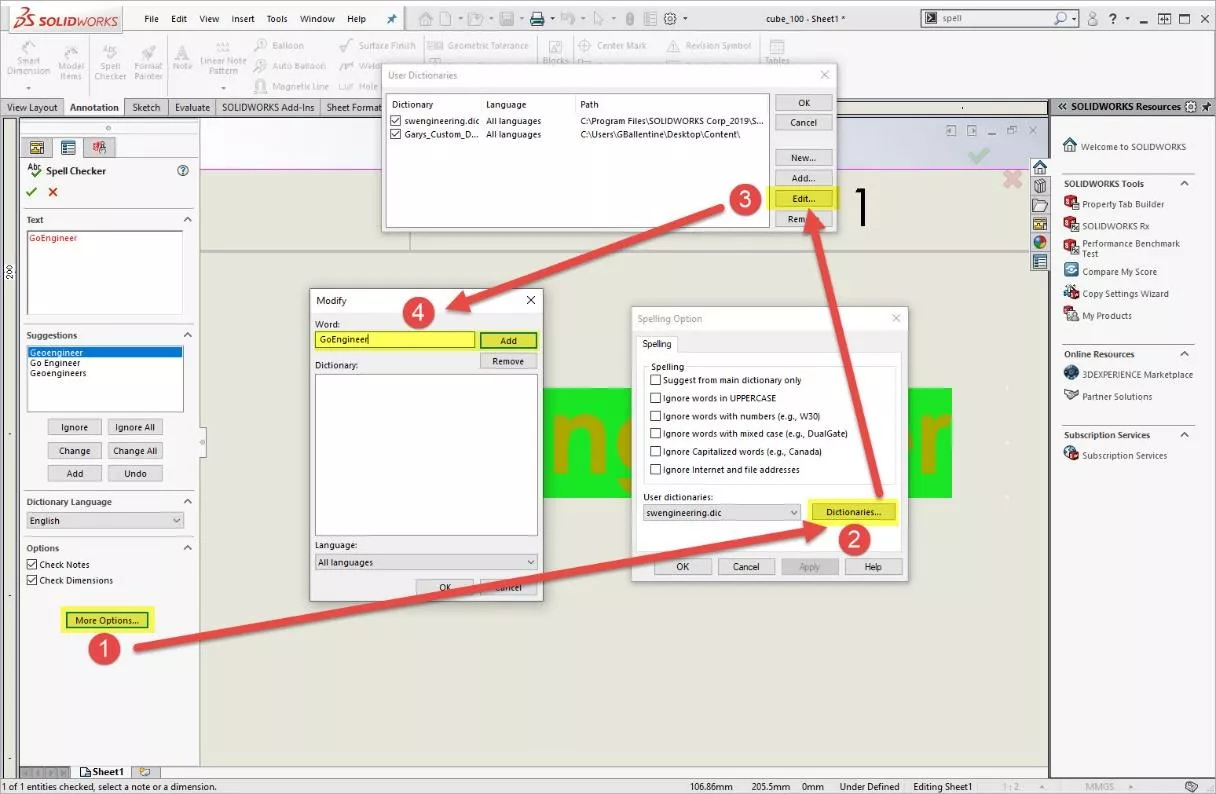
2. Edit to Both Add and Remove Words
You can add and remove words by selecting More Options > Dictionaries > Edit > Add after launching the spell checker. You can even specify which library to add it to (more on this in the next step).
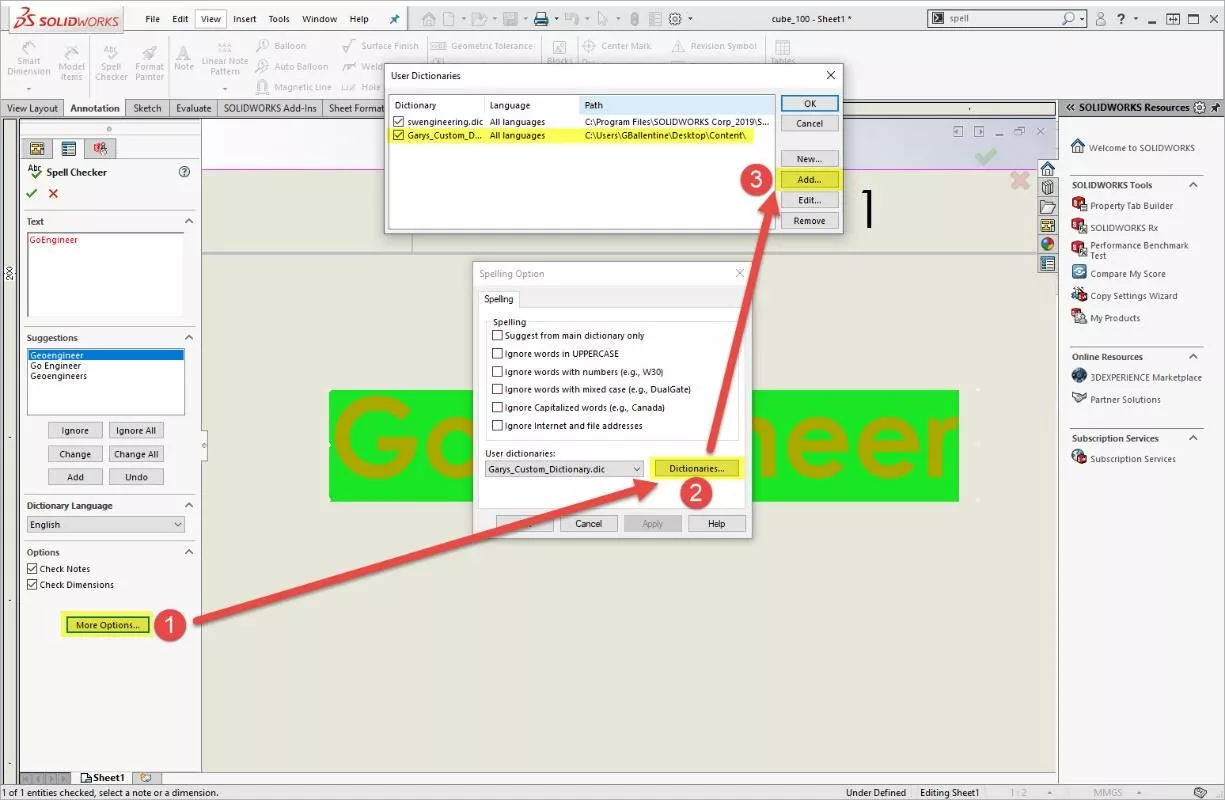
3. Add and Edit Your Own Custom Dictionary File
To have the most control over SOLIDWORKS Spell Checker, you can create your own .dic file and edit it manually. If the previous two options fail for whatever reason, this option should still work.
Click More Options > Dictionaries > Add, and a window will pop up letting you choose the name and location of the dictionary file. This will automatically add the file path to SOLIDWORKS, so you don’t have to add it manually under System Options > File Locations > Spelling Folders.
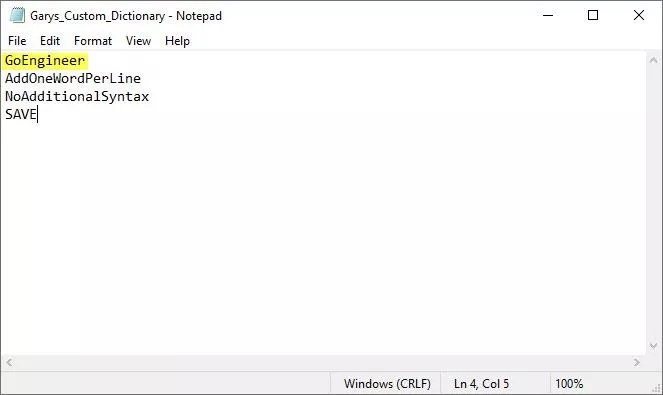
After creating your own .dic file and naming it, you can edit it anytime you want using Microsoft Notepad (navigate to the file in Windows File Explorer and double click on it). Once it’s open in Notepad, type in the word you want to add and click Save. The only syntax you need to remember is this: one word per line. That’s it!
Run the SOLIDWORKS Spell Checker again to make sure it works. If it doesn’t, open Options > System Options > File Locations > Spelling Folders and make sure the correct file path is listed. If it’s not, you’ll need to add it.

More SOLIDWORKS Tutorials
Inserting Logos Into SOLIDWORKS Parts and Drawings
How to Create a Lip/Groove Feature in SOLIDWORKS
Easy Way to Link Properties to a SOLIDWORKS Drawing
How to Color Sketches in SOLIDWORKS
Creating a Non-Circular Helix in SOLIDWORKS with Surfacing Commands

About Gary Ballentine
Gary Ballentine is a Mechanical Engineer based out of our Headquarters in Salt Lake City, Utah. He earned a Bachelor’s degree from the University of California, Davis, a certification in Technical Writing from San Francisco State University, and a Bachelor’s degree in Mechanical Engineering from the University of Utah. Gary has been part of the GoEngineer family since April 2019 as a Support Engineer and Certified SOLIDWORKS Instructor.
Get our wide array of technical resources delivered right to your inbox.
Unsubscribe at any time.