Create Custom Attributes in the 3DEXPERIENCE Platform
If you're looking to go beyond the standard attribute options available in the 3DEXPERIENCE platform, you're in the right place. In this post, we'll walk through the proper steps to create a custom attribute within the Physical Products tab, the most commonly used area for attribute creation.
3DEXPEREINCE Setup
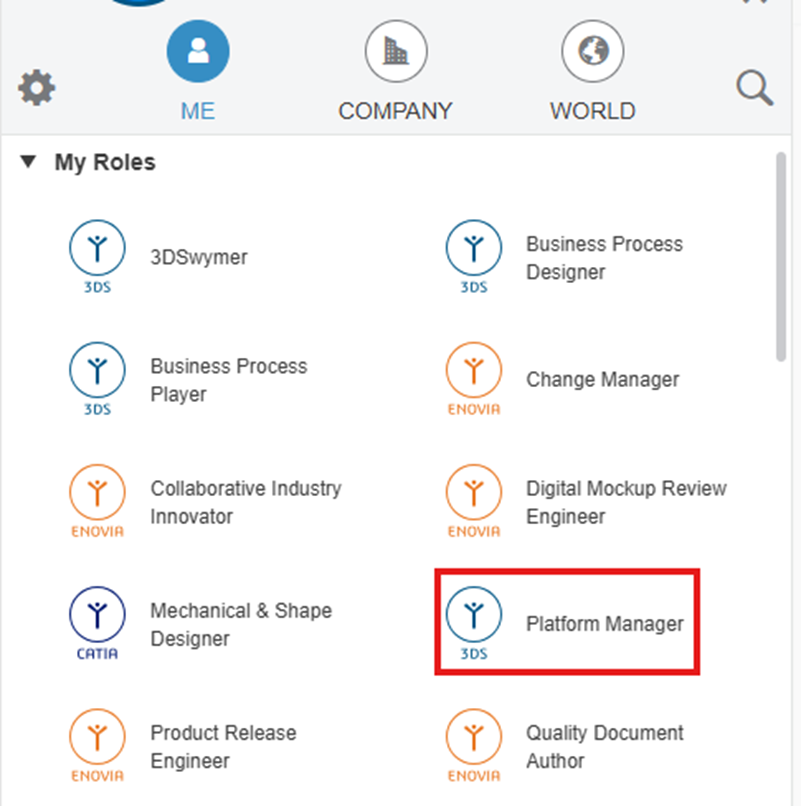
Before getting started, make sure you have administrative privileges on the 3DEXPERIENCE platform and that the Platform Manager role is assigned to your user profile.
Steps for Creating a Custom Attribute
After selecting the Platform Management role, you’ll gain access to a variety of administrative tools. Navigate to the Collaborative Spaces Control Center, then select Attributes Management to begin the customization process.
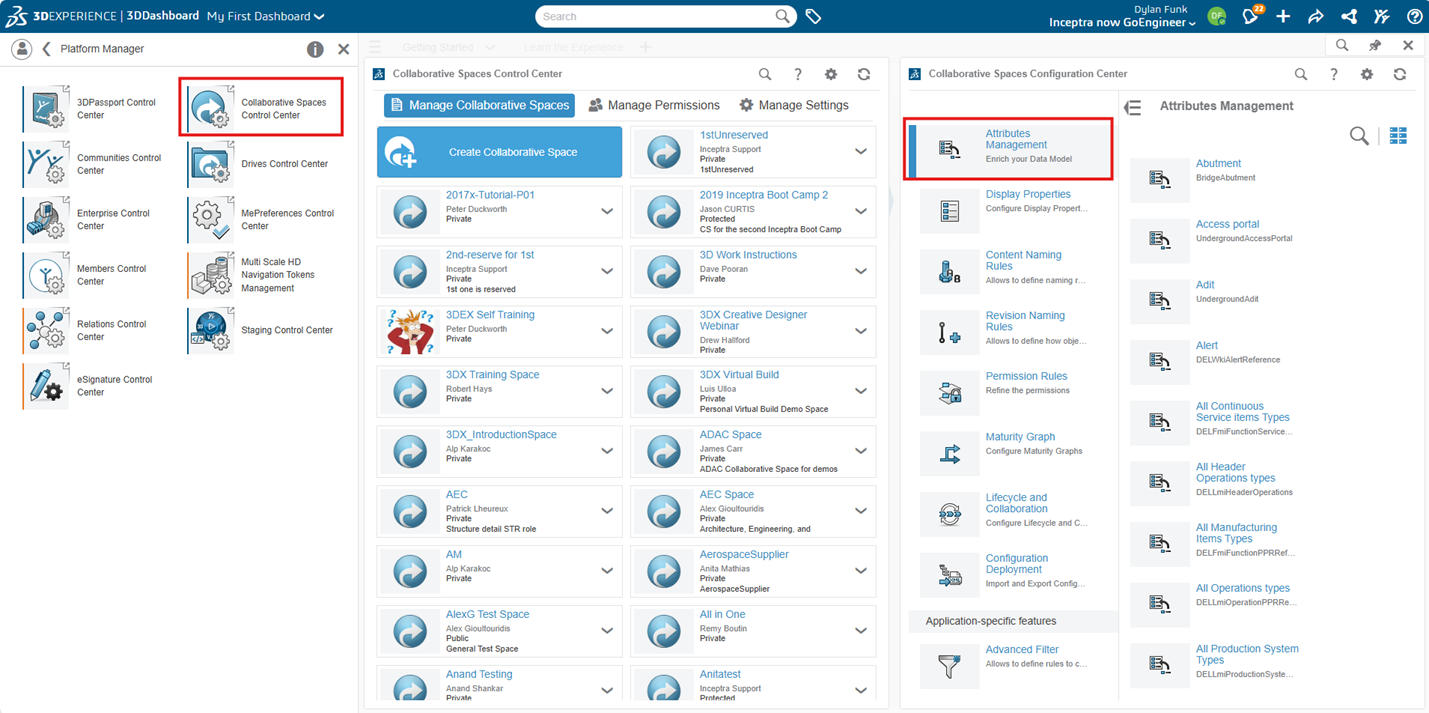
Within the Attributes Management section, click the magnifying glass icon to open the search bar. Type Physical Product to locate the relevant object type for attribute customization.

Under Physical Product, you’ll see some of the standard attributes such as Material, Weight, and others. This is where you'll attach your custom attribute.
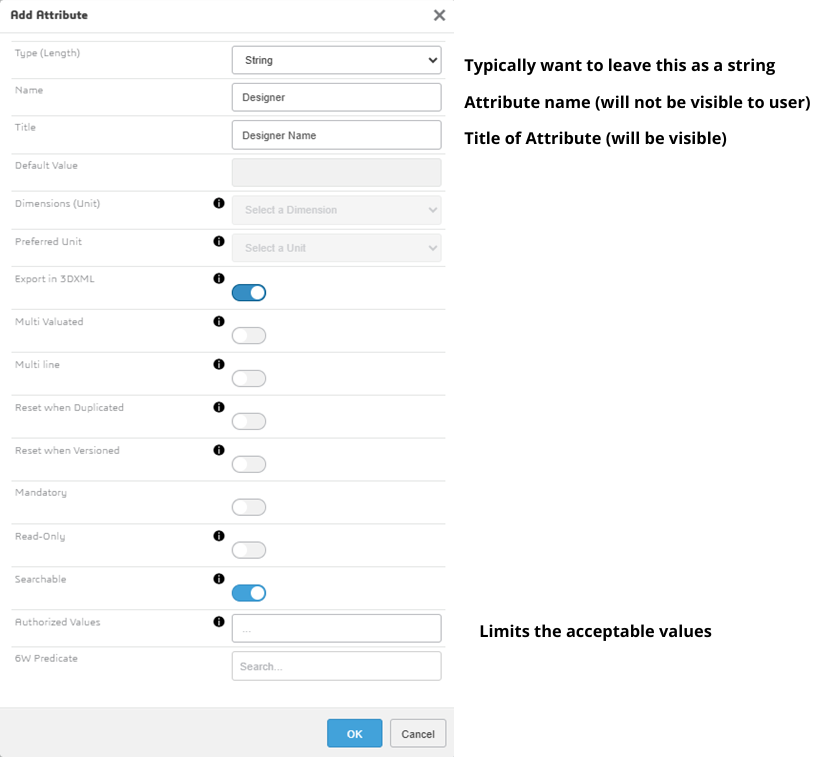
When creating the new attribute, be sure to choose a unique name that doesn’t duplicate any existing attributes on the platform. Additionally, avoid using special characters in the attribute name to ensure compatibility and prevent errors.
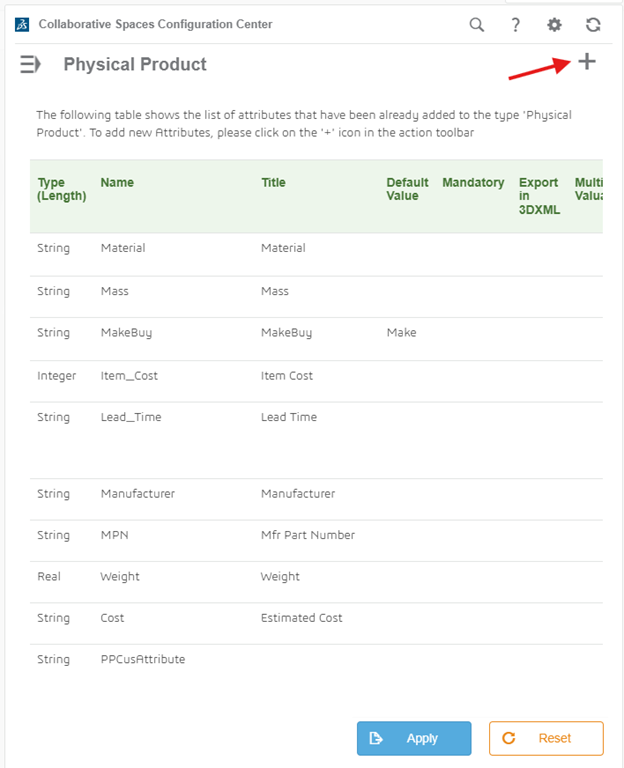
Clicking the plus in the top right corner will start a new attribute.
After clicking OK, your new attribute will appear at the bottom of the Physical Product page. If you scroll all the way to the right, you’ll notice that it does not have a green check mark next to it. This indicates the attribute has not yet been activated.
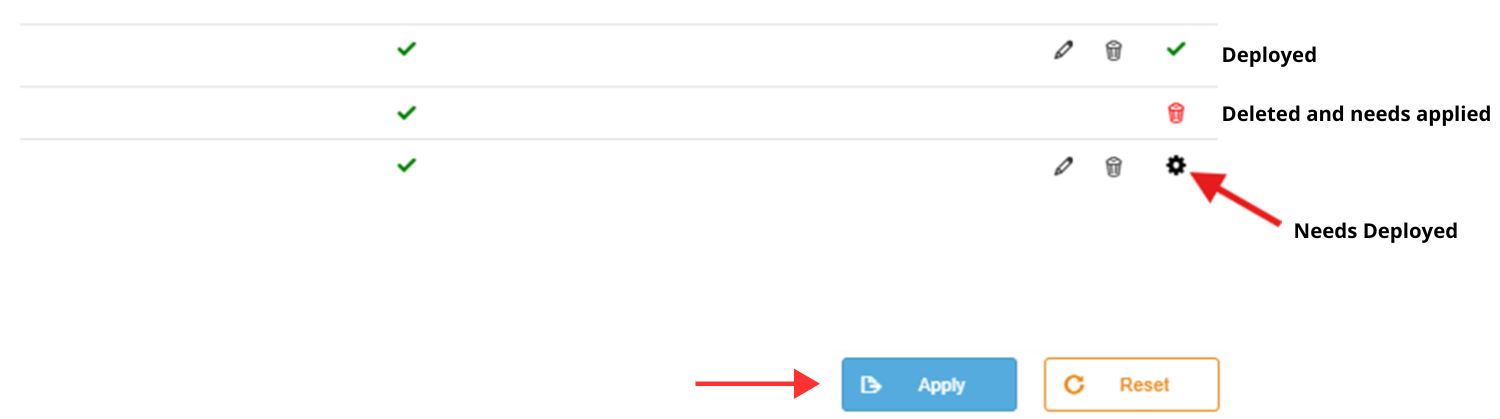
To deploy the attribute, click Apply.
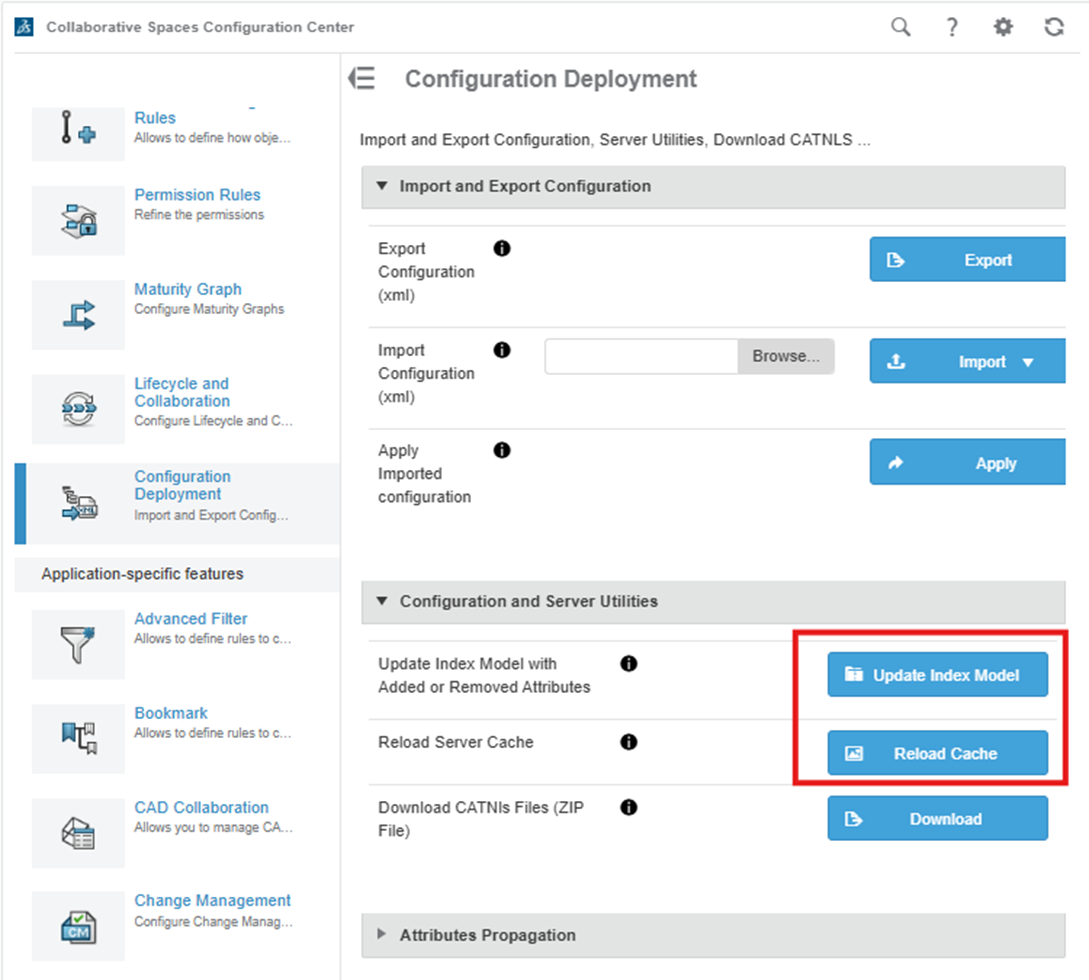
To make your custom attribute accessible to all users, navigate to the Collaborative Spaces Configuration Center and select Configuration Deployment.
Within this section, run both Update Index Model and Reload Cache. This process ensures that your custom attribute is properly deployed and available for use on a part.
Note: These actions may take some time to complete, so be patient as the system updates.
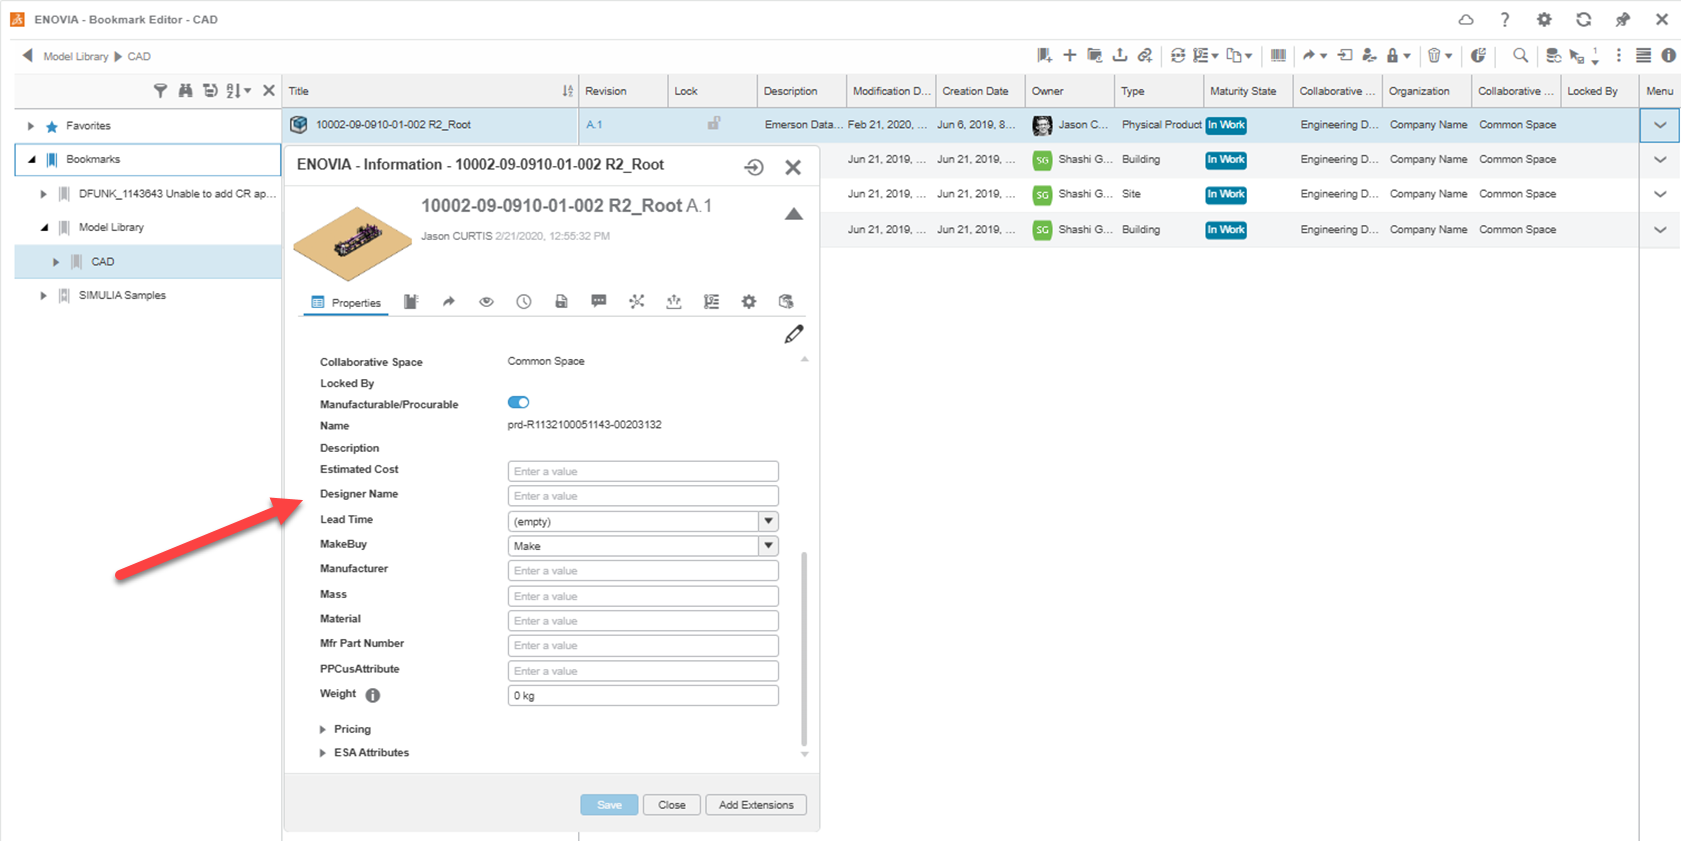
Open a saved 3D part. On the right side of the screen, click the down arrow, then select Information. Scroll down to locate your newly added custom attribute. If it appears, you can now assign a value or name to it.
With the ability to add custom attributes to the 3DEXPERIENCE platform, you can tailor the metadata for your products to allow for better, more effective searching and categorizing of your data.
Want to learn more? Check out more tips and tutorials listed below or on our 3DEXPERIENCE YouTube Channel.
Additionally, join the GoEngineer Community to participate in conversations, create forum posts, and answer questions from other 3DEXPERIENCE platform users.
Related Articles
Getting Started with 3DEXPERIENCE CST Connector
3D Sculptor: Create Your Own SubD Primitive in xShape
3DEXPERIENCE Index Mode vs Database Mode
Understanding Collaborative Spaces in 3DEXPERIENCE
![]()
About Dylan Funk
Dylan Funk is a Technical Support Engineer at GoEngineer.
Get our wide array of technical resources delivered right to your inbox.
Unsubscribe at any time.