How to Create Text Around a Circle in SOLIDWORKS
Have you ever wanted to create text around a circle (for example, a clock face or a rotary knob dial), but are unsure how to do it? This SOLIDWORKS tutorial walks through creating the text, which can be reused on other parts by simply copying it.
Creating Text Around a Circle
First, open a sketch with a circle or create a new sketch with the desired radius or diameter.
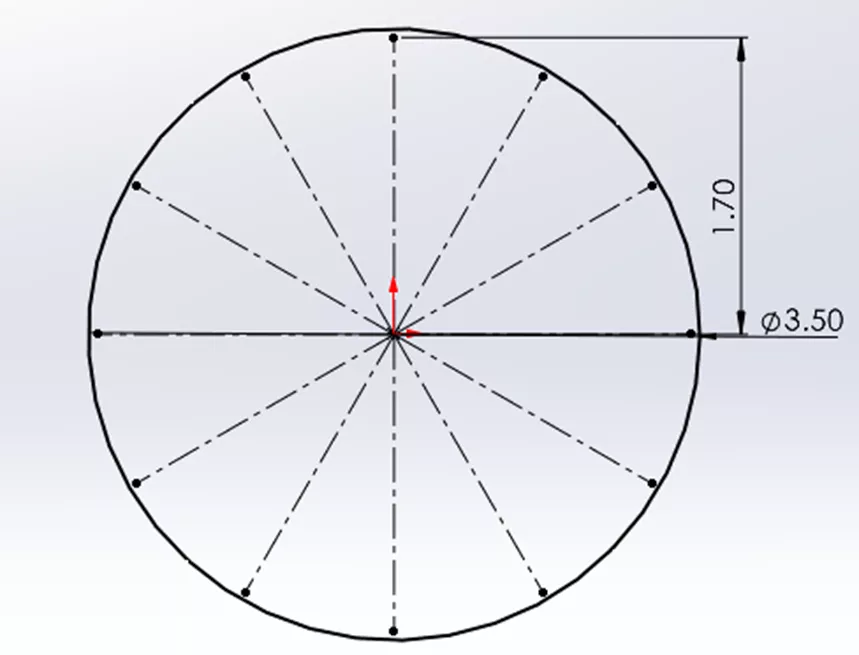
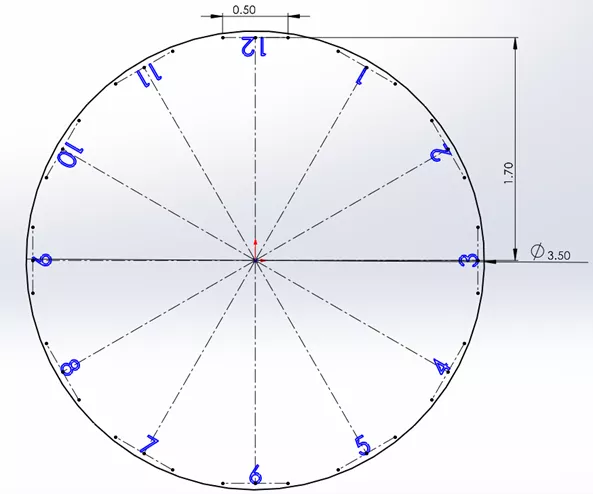
Once the circle has been generated, add Construction Geometry for the number of values. (In this example, I will choose 12.)
I recommend creating a vertical construction line first and then circular patterning this item to streamline the creation. Below is a screenshot after the construction lines have been added.
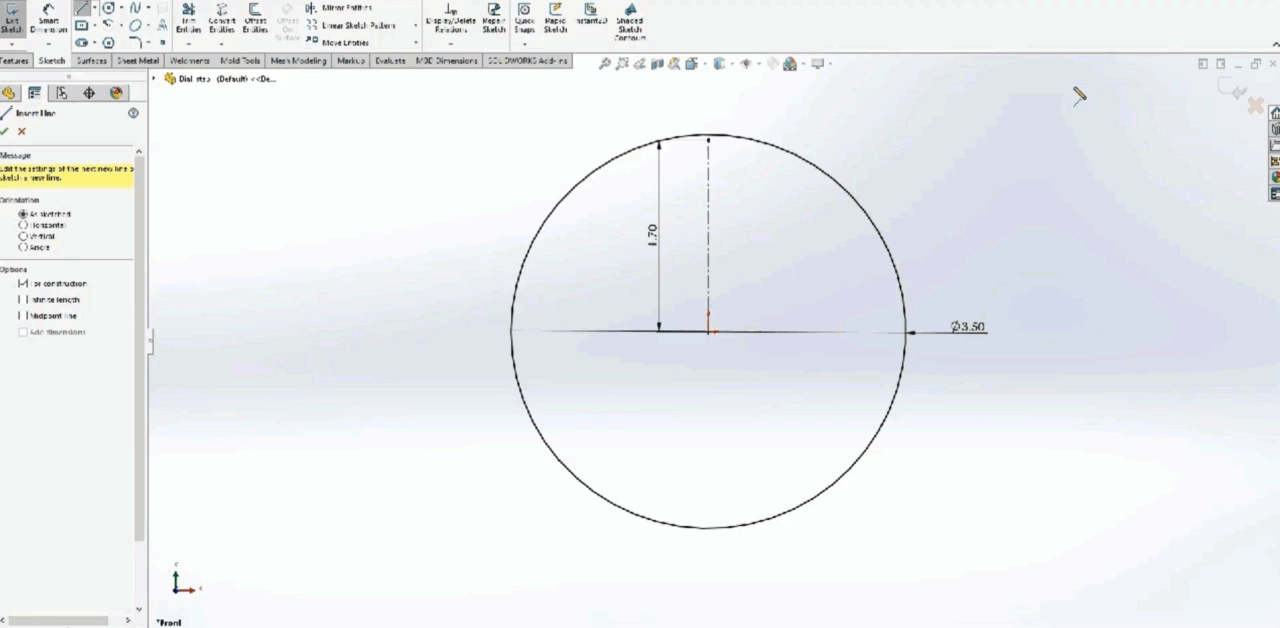
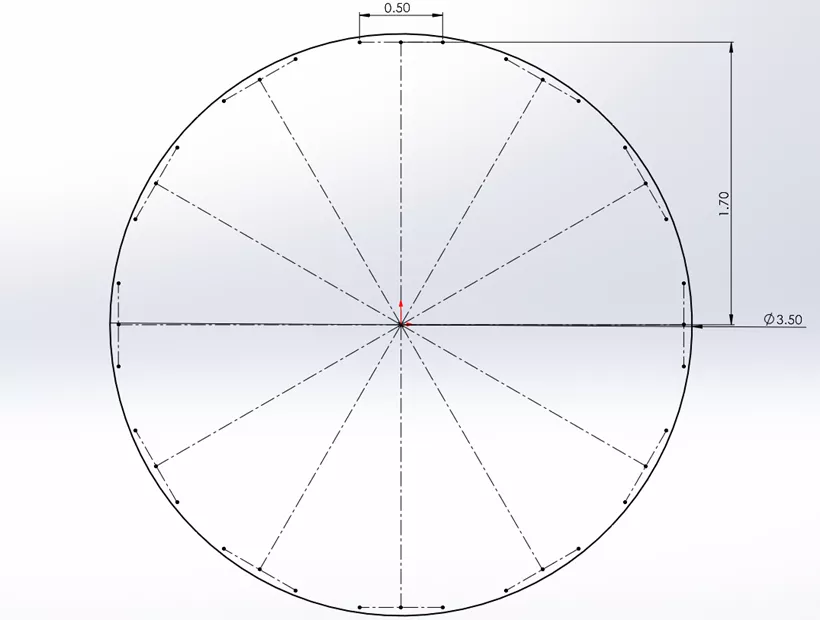
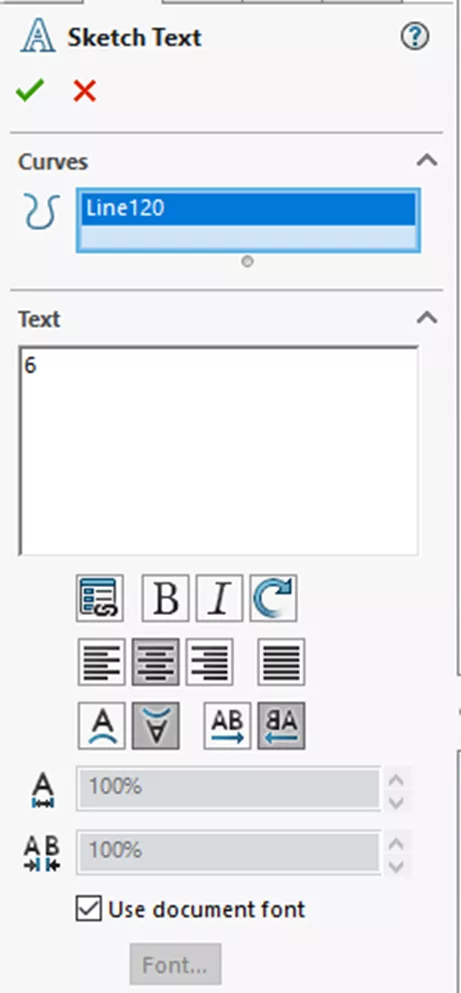
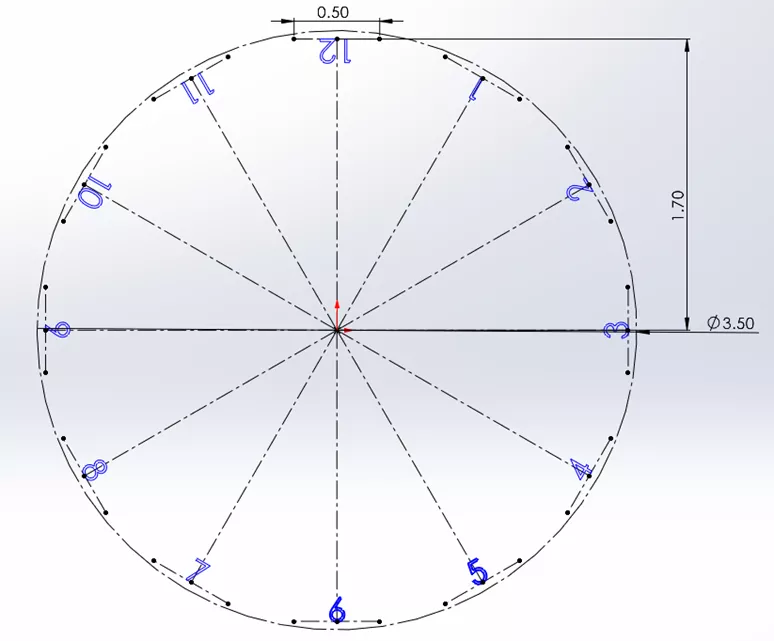
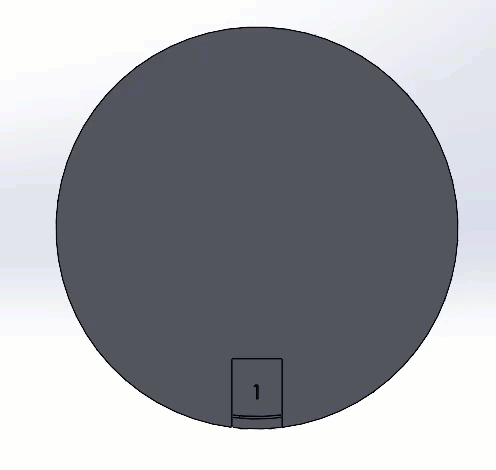
Once the lines denoting the positions have been created, add the Construction Geometry for the sketch text. Again, start at the vertical/12 o’clock position and then use the circular pattern tool to speed up the process.
After creating the sketch lines, create the Sketch Text that will go on each line. Below are the recommended settings.
Unfortunately, there is no quick way to create multiple numbers, as the circular pattern would display the same value in each spot, so each one must be numbered individually.
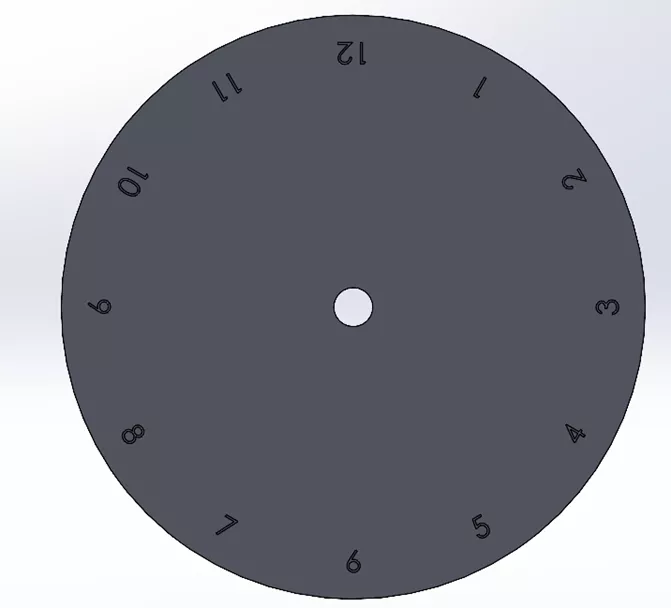
The next step to be able to cut this text into a cylinder is to set the outer circle to Construction Geometry. This way the sketch can be copied into other files and be scaled in size to fit different sized cylindrical faces.
Below is an image of the sketch cut onto a cylindrical face and the counter in action.
Things To Keep in Mind
When creating the values going around the circle, remember that patterning the Construction Geometry will save a bit of time for dimensioning and creating this geometry.
When scaling the sketch up for the larger diameter, use the Scale Sketch option inside of the sketch to scale it universally. Font size and style can be modified within the parts Document Properties, which helps avoid setting the font for each input.
I hope you found this article helpful. Check out more tips and tricks listed below. Additionally, join the GoEngineer Community to participate in the conversation, create forum posts, and answer questions from other SOLIDWORKS users.

SOLIDWORKS CAD Cheat Sheet
SHORTCUTS ⋅ MOUSE GESTURES ⋅ HOT KEYS
Our SOLIDWORKS CAD Cheat Sheet, featuring over 90 tips and tricks, will help speed up your process.
Want to take your SOLIDWORKS skills to the next level? Enroll in the official SOLIDWORKS Essentials training course. Both online and in-person classes are available.
More SOLIDWORKS Tutorials
4 SOLIDWORKS Part Modeling Tools That are Time-Savers
How to Create a Varied Sketch Pattern in SOLIDWORKS
How to Color Sketches in SOLIDWORKS
SOLIDWORKS Unabsorb Sketches Explained
Mirror 2D Sketches in SOLIDWORKS: Mirror Entities & Dynamic Mirror Entities
![]()
About Blaze Johnson
Blaze Johnson is a Sr. SOLIDWORKS Support Engineer at GoEngineer.
Get our wide array of technical resources delivered right to your inbox.
Unsubscribe at any time.