SOLIDWORKS Unabsorb Sketches Explained
Unabsorb Sketches is a handy SOLIDWORKS tool that can help ease the difficulty when adding sketches to a feature that has already been created. In this tutorial, learn how to use the Unabsorb Sketches tool to temporarily remove sketches from a feature to aid feature editing processes.
What is an Absorbed Sketch?
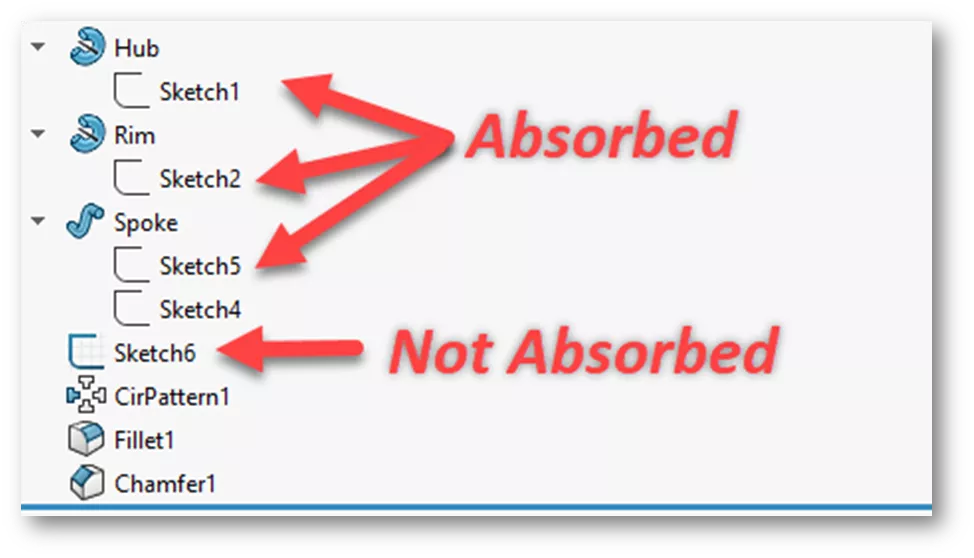
When a sketch is created in SOLIDWORKS, it appears in the FeatureManager Design Tree. However, when that sketch is used to create a feature, it gets absorbed under the feature in the tree. You must expand the feature to see the sketch. This is referred to as an absorbed sketch.
How to Unabsorb Sketches from a Feature
There are two ways to unabsorb sketches from features.
One way is to expand the feature, then use the Rollback Bar to drag up between the feature and its sketches. 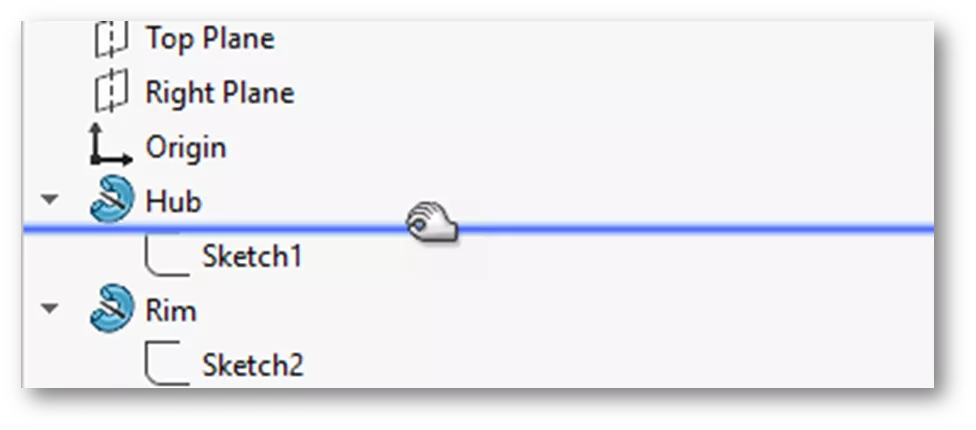
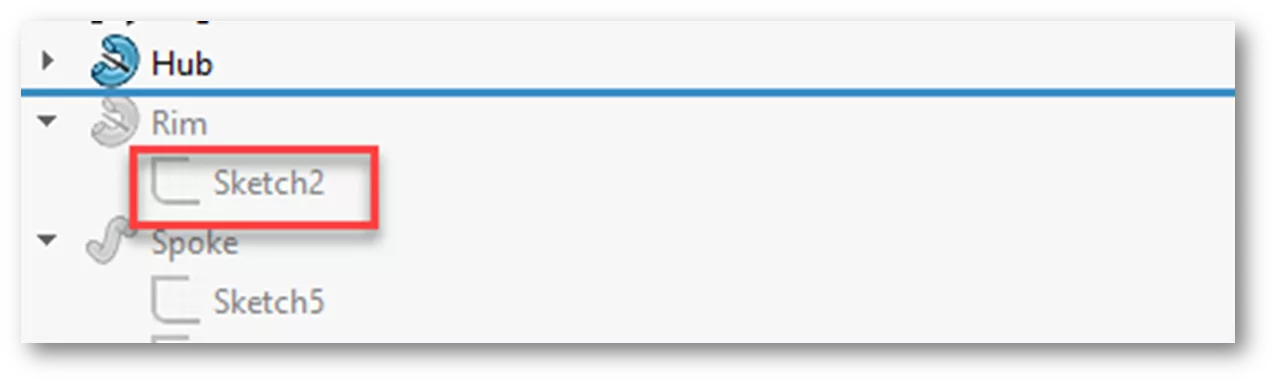
Another way is to right-click on the part name, go to Tree Display, then turn on Show Flat Tree View. This places the sketch above its corresponding feature.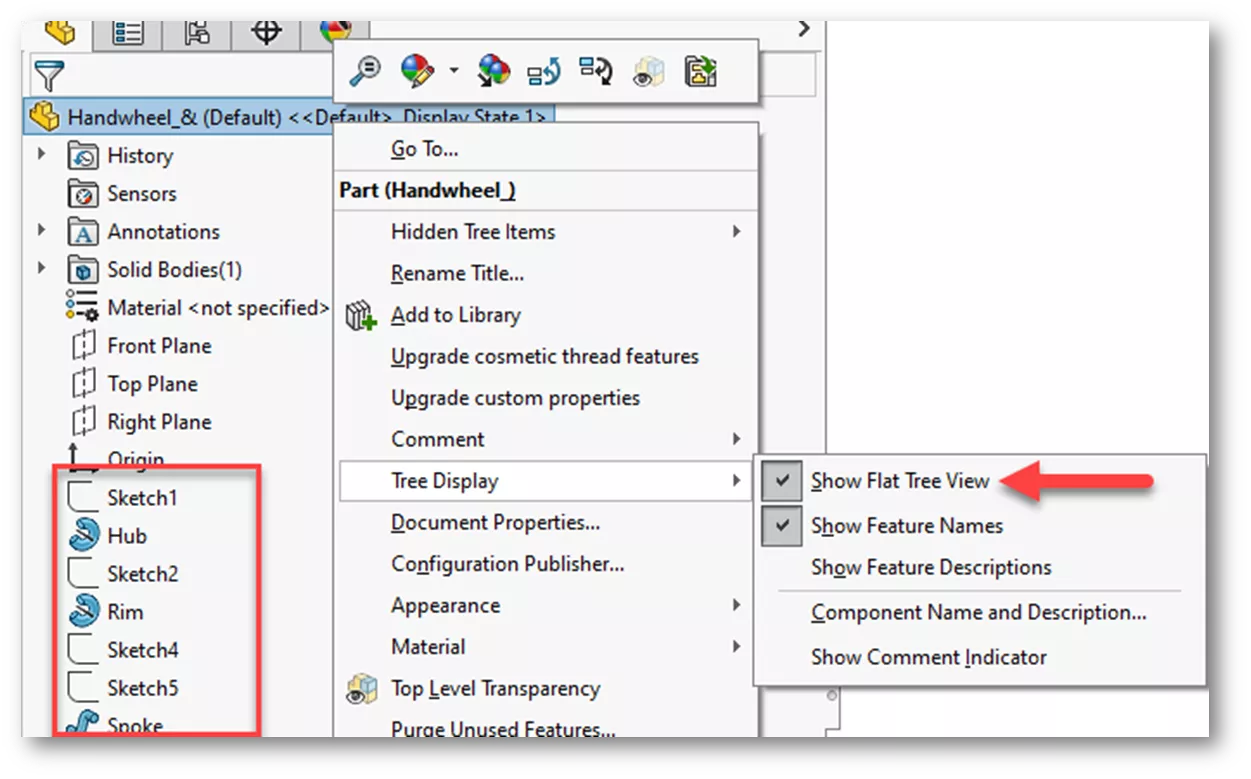
Why Unabsorb a Sketch from a Feature?
After creating a feature like a loft or a sweep, a user may need to add another profile or guide curve. One approach would be to use the Rollback Bar to roll above the feature, create a sketch, then rollback below the feature, edit it, and then add the sketch.
However, this approach is not helpful when you need relationships between the new sketch and the feature’s absorbed sketches. Rolling above the feature also suppresses the absorbed sketches.
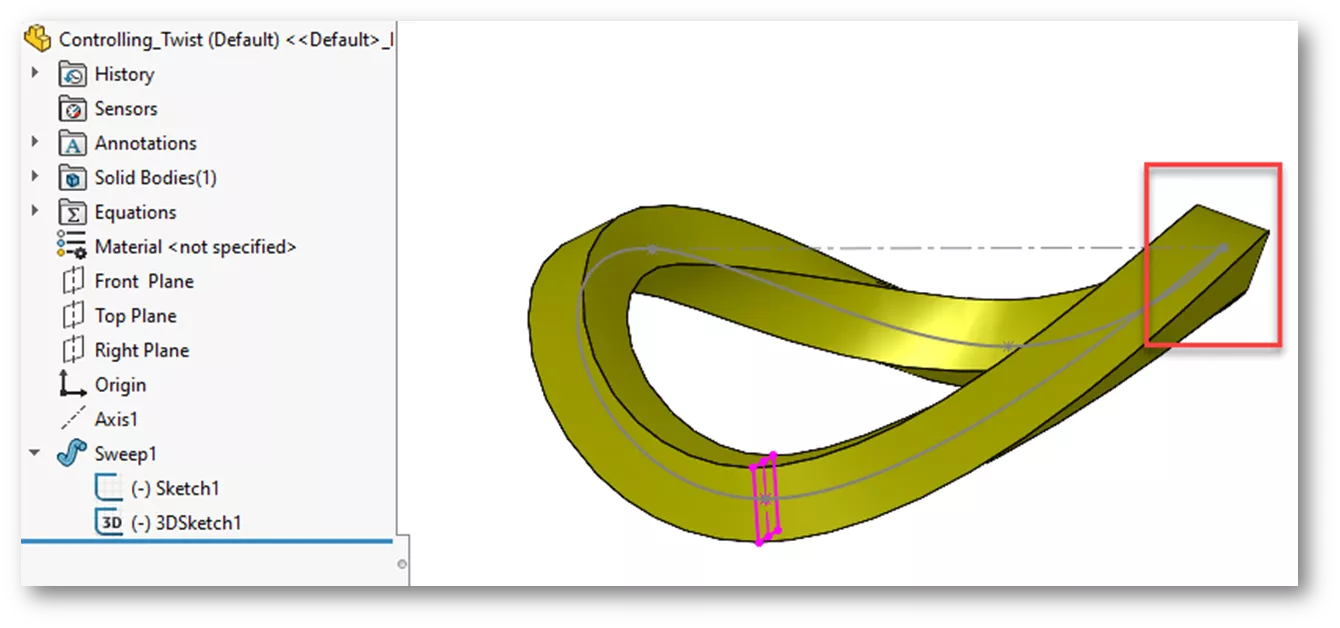
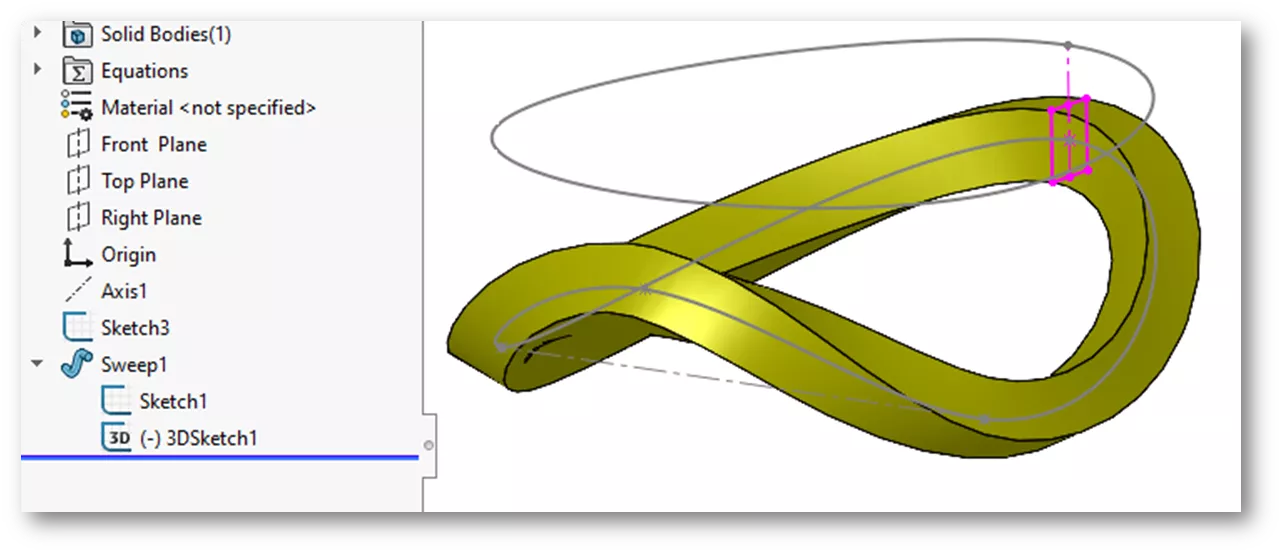
In the following example, we have a square profile swept along a 3D sketch path. There is a fair amount of twist happening. The design intent is for the profile to stay normal along the path with no twist.
To accomplish this, we need to create a new path and use the existing 3D sketch as a guide curve. We must also add a relationship between the profile sketch and the new path.
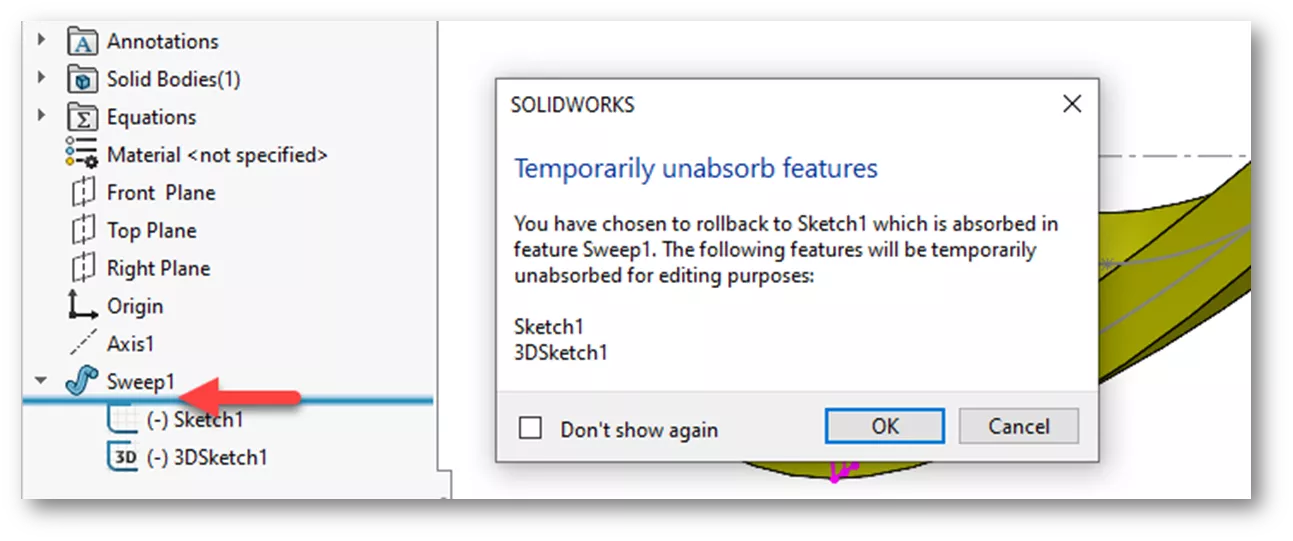
This is where Unabsorb Sketches comes in. We’ll use the Rollback Bar to roll between Sweep1 and its absorbed sketches. A dialog appears to confirm the sketches will be temporarily unabsorbed.
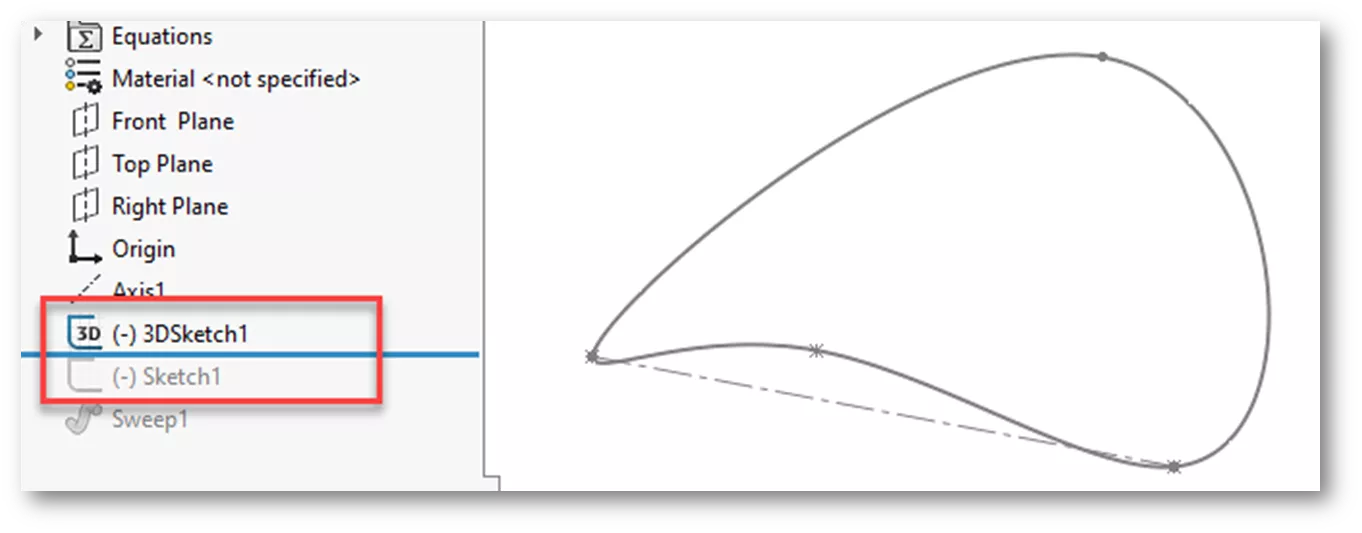
After clicking OK in the confirmation dialog, the Rollback Bar is placed between the profile and path sketches. This is great because we need to place a new path sketch above the profile sketch - so it's in the correct order.
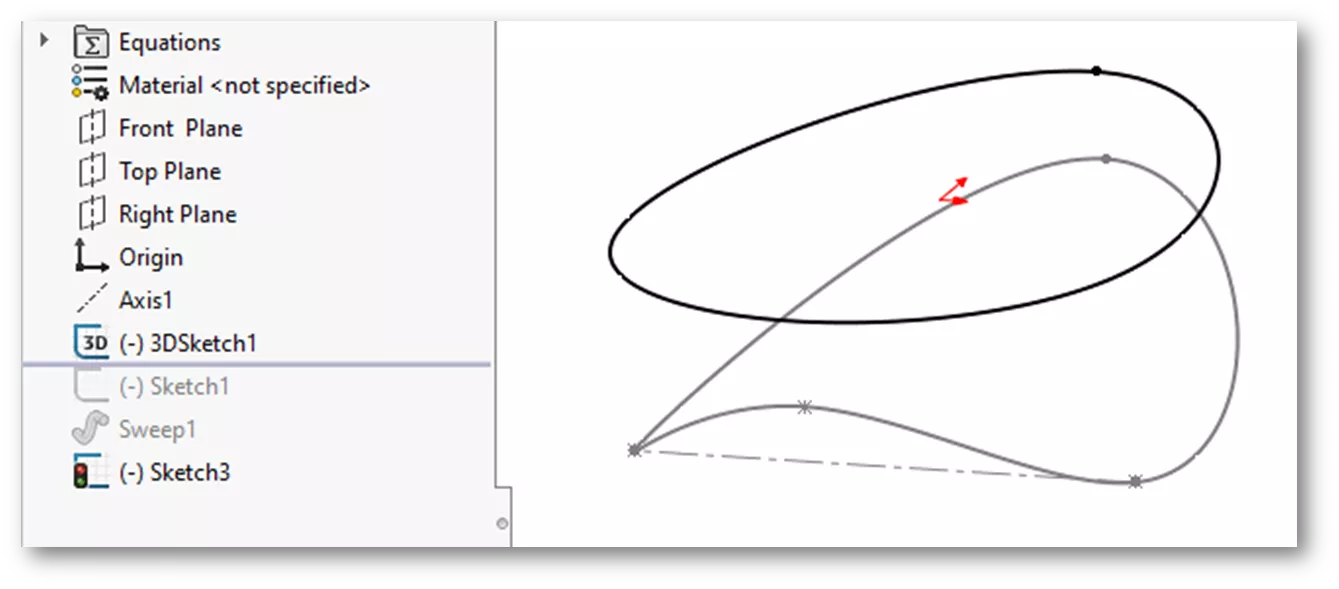
Here, we clicked on the Front plane and started a new sketch. We used the Convert Entities tool and selected the 3D path. This places a flat profile matching the 3D sketch profile on the Front plane. The sketch is placed below the sweep feature, but this will resolve itself once the sketch is closed.
- Suggested Article >> SOLIDWORKS Convert Entities Quick Tips
After closing the sketch, we’ll use the Rollback Bar to roll below the profile sketch. Then, we’ll edit the profile sketch and add a construction line from the profile to the new path sketch using a Pierce relation.
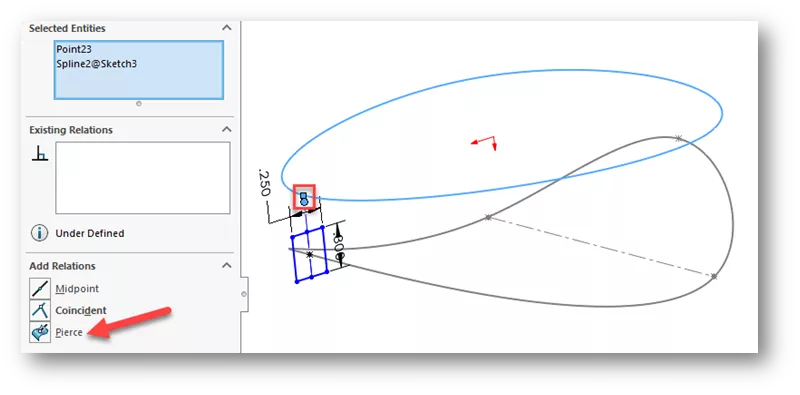
- Suggested Article >> SOLIDWORKS Pierce vs Coincident Relations & When to Use Each
After closing the profile sketch, the Rollback Bar is rolled to the end of the tree. Notice the new path sketch is above the sweep profile.
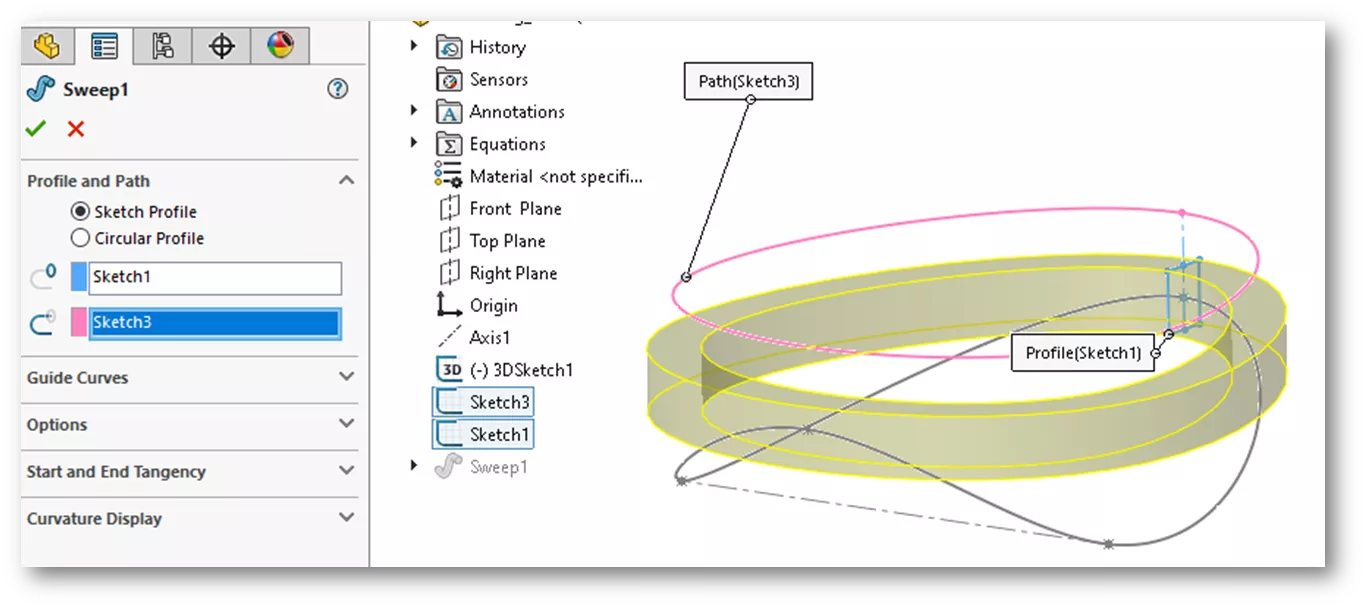
Now, we’ll edit the sweep feature, highlight the sketch path box, and then select the new sketch for the path. This sweeps the profile normal to the path.
To get the profile to move up and down, we’ll expand Guide Curves and choose the 3D sketch as a guide curve.
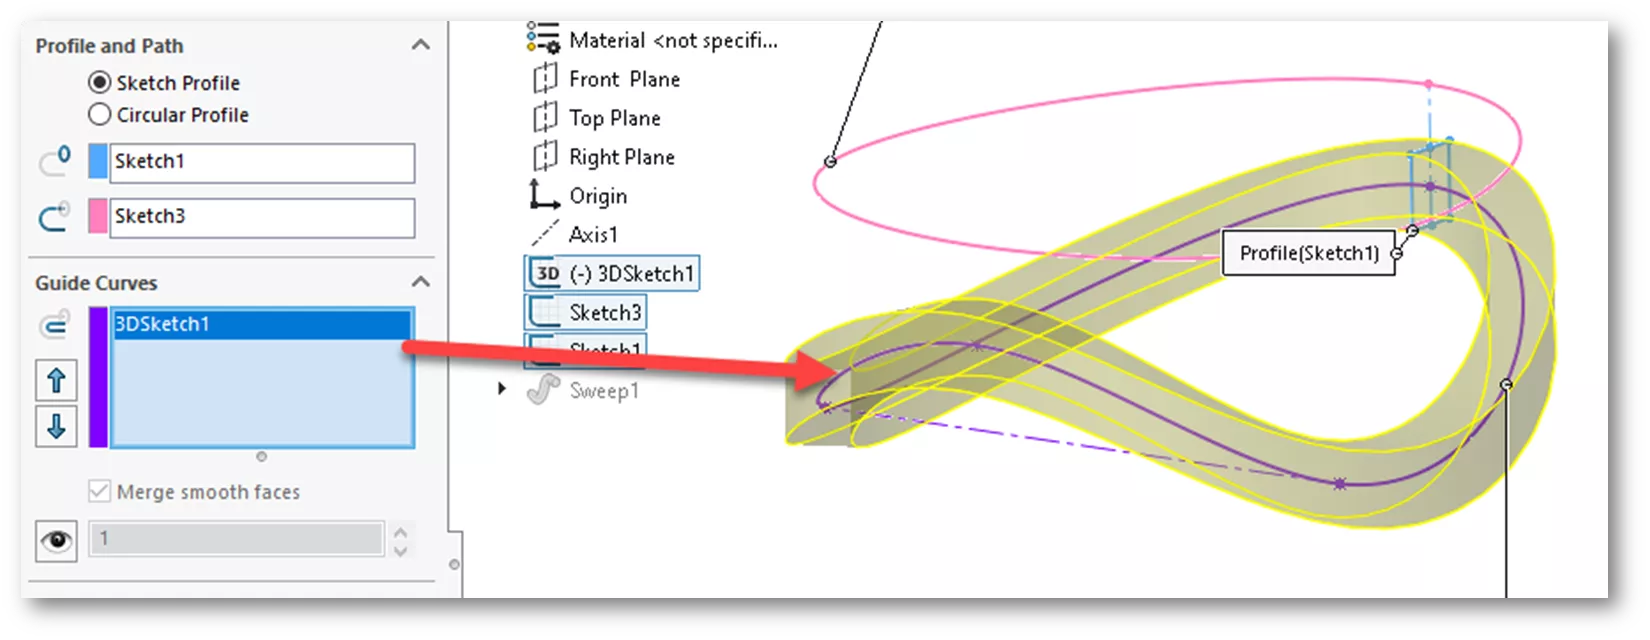
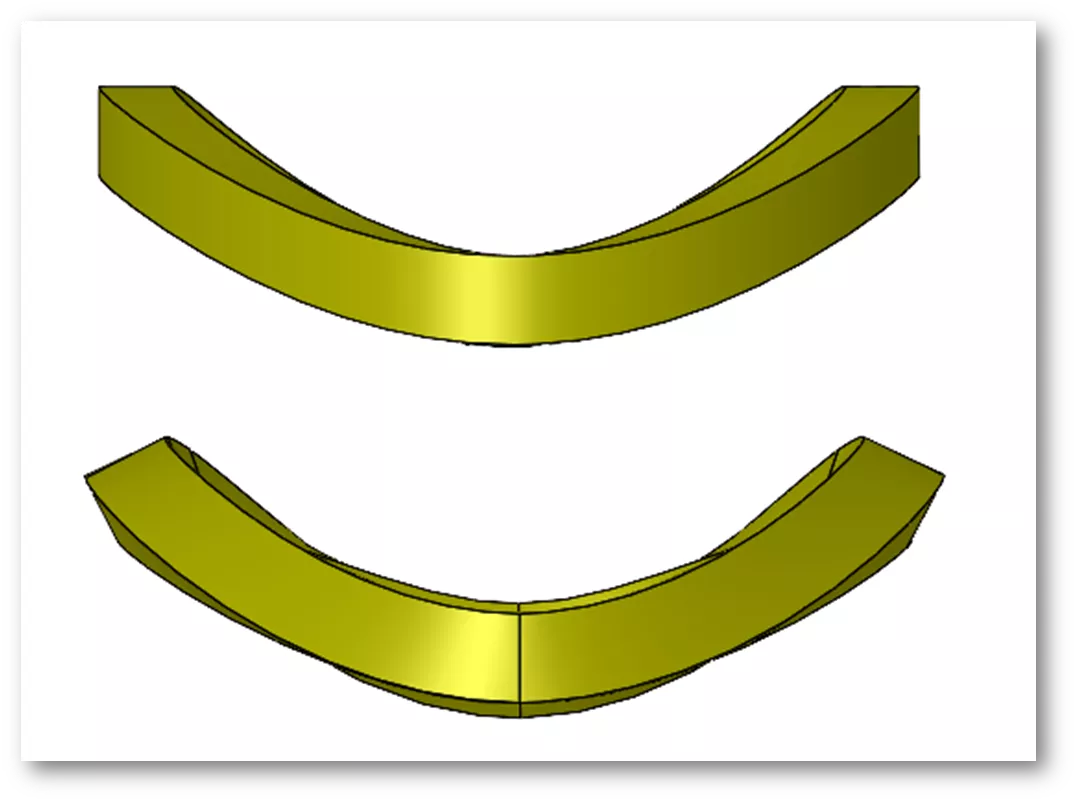
Compared to the original, the profile is more consistently normal to the path with far less twist.
As you can see, the SOLIDWORKS Unabsorb Sketches tool is great for editing features with multiple sketches. Check out more tips and tricks listed below. Additionally, join the GoEngineer Community to participate in the conversation, create forum posts, and answer questions from other SOLIDWORKS users.

SOLIDWORKS CAD Cheat Sheet
SHORTCUTS ⋅ MOUSE GESTURES ⋅ HOT KEYS
Our SOLIDWORKS CAD Cheat Sheet, featuring over 90 tips and tricks, will help speed up your process.
Want to take your SOLIDWORKS skills to the next level? Enroll in the official SOLIDWORKS Advanced training course. Both online and in-person classes are available.

More SOLIDWORKS Tutorials
SOLIDWORKS Tutorial: Master Modeling Techniques
Ultimate Guide to SOLIDWORKS Blocks: Toolbar Options, Block Creation, Walkthrough, and More
Use SOLIDWORKS Indent Feature in an Assembly
SOLIDWORKS Indent Cut vs Combine/Subtract

About Zach Brown
Zach Brown is a certified SOLIDWORKS Expert and a Technical Support Engineer. Prior to working at GoEngineer, he spent 15 years as a mechanical designer, CAD support tech, and instructor using SOLIDWORKS. His hobbies include playing guitar, riding motorcycles, and skiing.
Get our wide array of technical resources delivered right to your inbox.
Unsubscribe at any time.