How to Rotate and Customize a SOLIDWORKS Drawing View
There are several ways to customize your SOLIDWORKS drawing view. In this article, we'll show you three ways that are quick and easy:
- Rotate view
- Create a view
- Create a custom view
Rotate View
In the tool palette shown below, there is a Rotate View Tool highlighted in yellow.
This tool allows you to rotate all your views at once or to rotate a single view.
This method only allows you to rotate the view(s) on the plane which they are on but by any increment you wish.

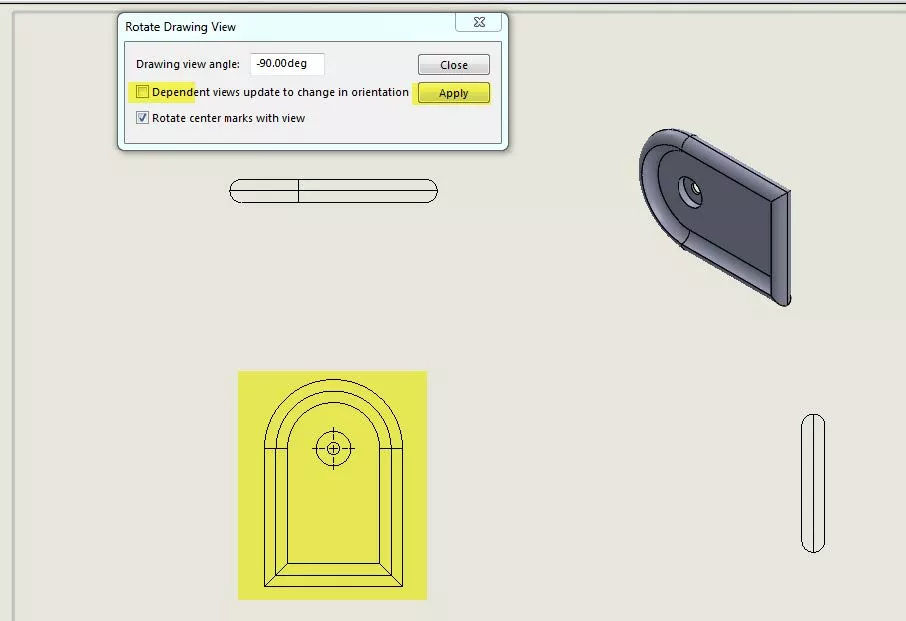
When the Rotate View Tool is selected, a popup dialog box appears:
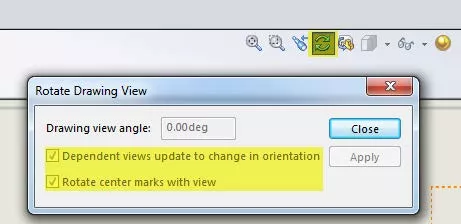
Since we have not selected any view, everything is greyed out.
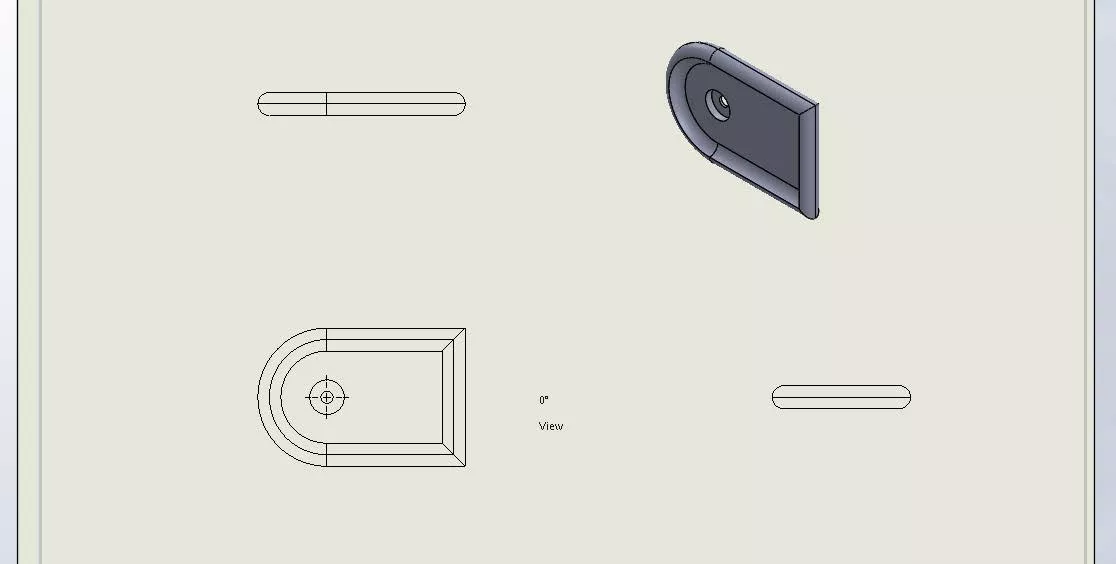
If you select the main view, it will rotate all the views together.
Before Rotate:
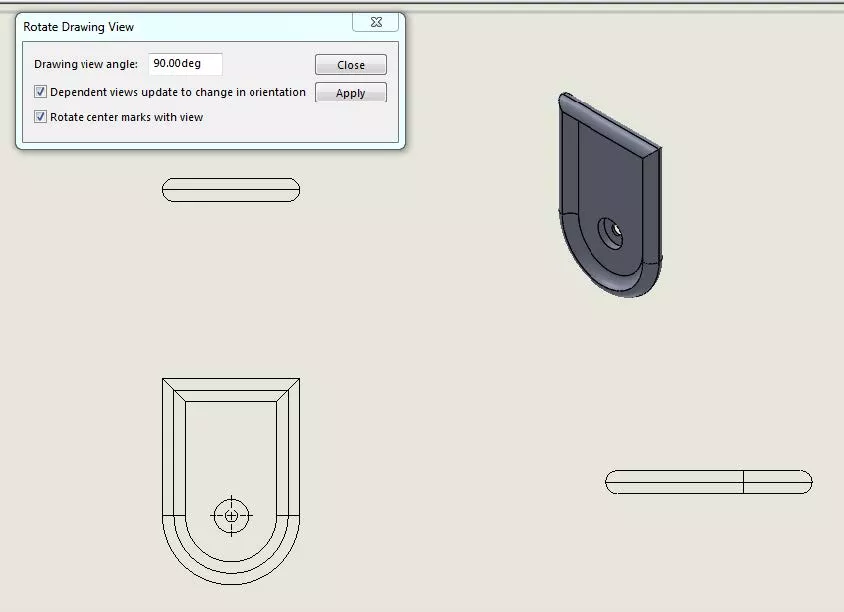
After Rotate:
If you want to rotate one View individually, uncheck the Dependent views update to change in orientation.
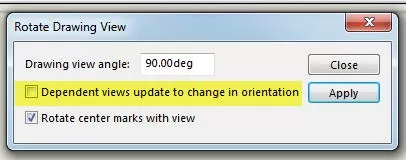
Make sure to click Apply to enable you to make the change.
Create a View
To create a view of the model as it currently shows in 3D space, you must do the following:
Orient your part or assembly the way you want it.
Go to the drawing.
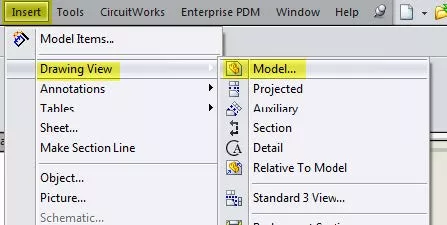
Go to Insert > Drawing View then Model and select.
The Model View Dialog Box will appear on the left.
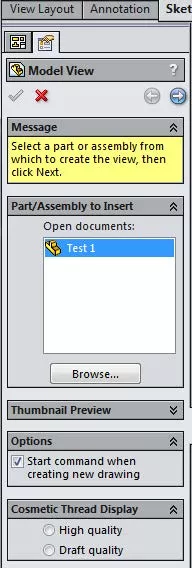
Double right-click on the Model (In my example, it is Test 1). A new Model View box will appear.
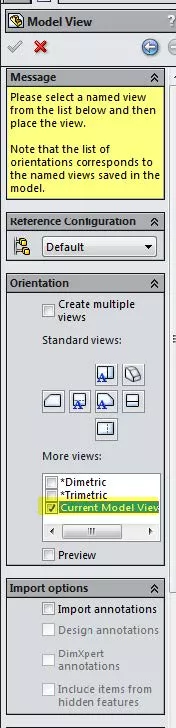
Make sure to check the box that says Current Model View under the Orientation area.
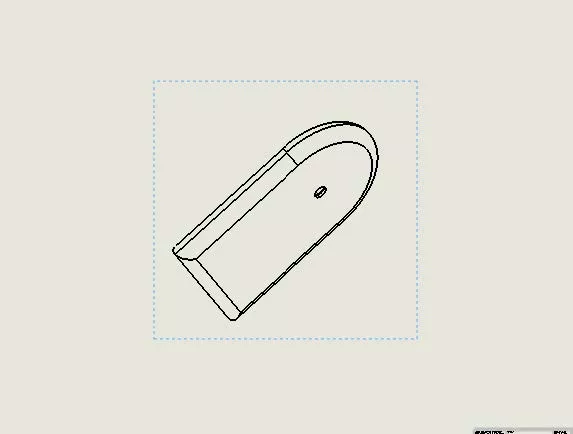
Drag your current view to the designated spot on your drawing.
Create a Custom View
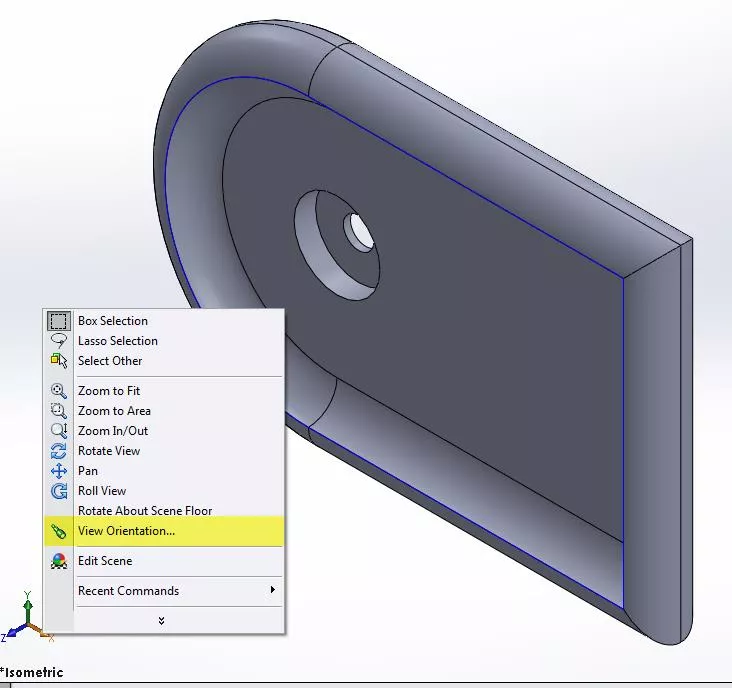
To create a Custom View go to the Part or Assembly.
Rotate your part to the way you wish it to be in the Custom View.
Go to the Red, Blue, and Green X,Y, Z Triad
Hover over one of the axes; it will turn gold.
Right-click and select View Orientation.
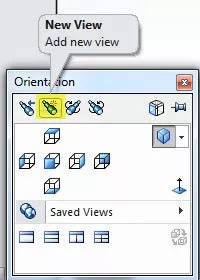
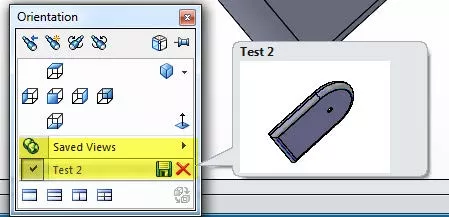
The Orientation box will appear. Select the new View Icon as shown below.
The Named View Box will appear. Type what you want the view name to be.
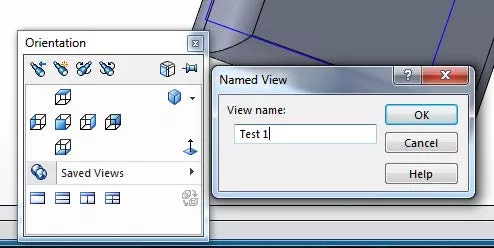
Click OK then in the Orientation box, you will see under Saved Views a new view, your Custom View.
Click the Save icon to the right as shown.
The dialog box will disappear.
Then follow steps in number 2 Create a View.
The only difference will be you will have another option to choose from in the Model View Dialog Box in the Drawing.
It will look like this:
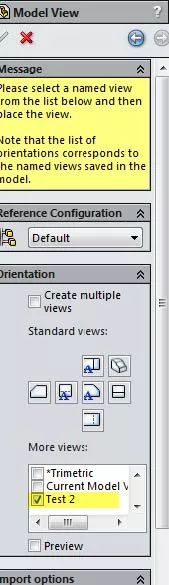
Make sure that your named Custom View is checked. Adjust the scale if necessary. then place the view.
More SOLIDWORKS Drawing Tutorials
Inserting Model Dimensions into a SOLIDWORKS Drawing
Easy Way to Link Properties to a SOLIDWORKS Drawing
Creating a Multi-sheet Drawing Template in SOLIDWORKS
Customizing Colors in SOLIDWORKS Drawings
![]()
About GoEngineer
GoEngineer delivers software, technology, and expertise that enable companies to unlock design innovation and deliver better products faster. With more than 40 years of experience and tens of thousands of customers in high tech, medical, machine design, energy and other industries, GoEngineer provides best-in-class design solutions from SOLIDWORKS CAD, Stratasys 3D printing, Creaform & Artec 3D scanning, CAMWorks, PLM, and more
Get our wide array of technical resources delivered right to your inbox.
Unsubscribe at any time.