Scanto3D Add-in Explained: Activation, Wizards, and Tutorial
Scanto3D, an add-in available in both SOLIDWORKS Professional and SOLIDWORKS Premium, is a great tool to use if you want to scan an existing part to obtain the mesh for better 3D model creation.
Used in a variety of industries such as consumer products, machine design, and medical design, Scanto3D is capable of creating organically shaped objects for reference and representation quickly and easily.
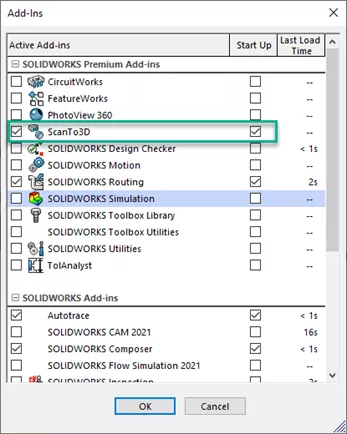
How to Activate Scanto3d
To activate Scanto3d, go to Tools > Add-ins or click the drop-down arrow next to the System Options gear.
Opening Scan Data
Opening Scan data is as simple as opening a regular file with SOLIDWORKS. Go to File > Open and ensure you have one of the below file types:
- Mesh Files (*.3ds; *.obj; *.stl; *.wrl; *.ply; *.ply2)
- PointCloud Files (*.xyz; *.txt; *.asc; *.vda; *.igs; *.ibl)
How to Use Scanto3D
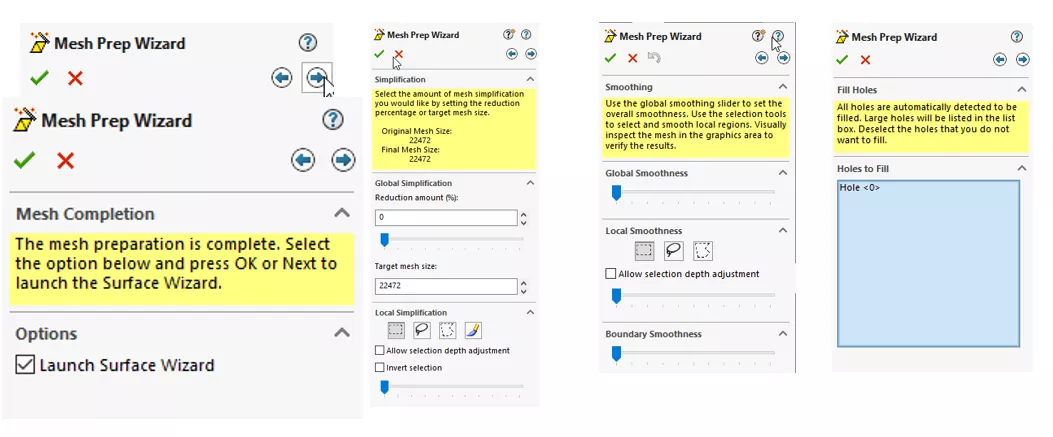
To use Scanto3D, open the file containing the scan body that you want to work on. Depending on the size of the body and how it was scanned, it may be helpful to isolate specific areas to focus on. To do this, select the portion of the body you want to work on and select the Mesh Prep Wizard.
Scanto3D Wizards
Mesh Prep Wizard
The Mesh Prep Wizard contains tools that allow you to manipulate the original mesh data; move it around, and remove unneeded data points. The mesh data can also be adjusted using global and local Simplification and Smoothness settings.
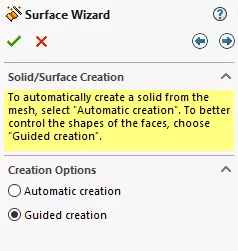
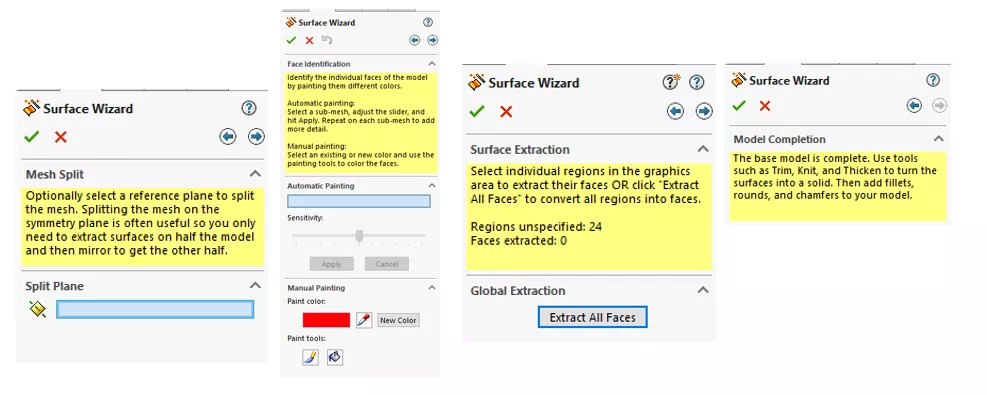
Surface Wizard
The Surface Wizard appears after you've completed the Mesh Prep Wizard. The Surface Wizard has two creation options: Automatic and Guided.
- Automatic creation uses a single-step process to automatically create a solid model from the mesh. This option is ideal for anatomical and organic shapes. The Automatic Surface Creation interface, shown below, allows you to define the overall surface detail, and adjust feature lines. You can delete existing feature lines, create new ones, and relax feature lines to smooth them out.
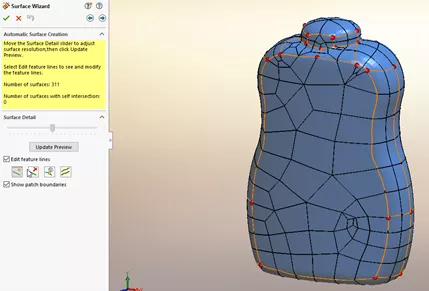
Once this is complete, you are given a confirmation dialogue box that the Surface Body has been created, and how many faces it has.
- Guided creation uses a multi-step process to create surfaces. This option is good for analytical surfaces or when you want to have more control over the surfaces. Guided creation offers a few more options than Automatic creation including the ability, if needed, to split the body for instances like molds. The Guided creation will also paint the surfaces, allowing for more detail in the finished model.
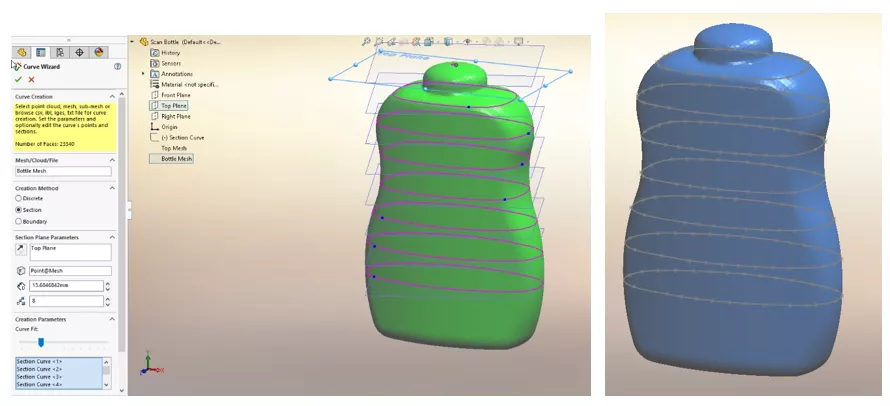
Curve Wizard
Another helpful option with Scanto3D is the Curve Wizard, which helps make profile curves for creating a Loft feature later. To manipulate where and how the curves are created, the Curve Wizard includes Section options, Section Plane parameters, and Creation Parameters.
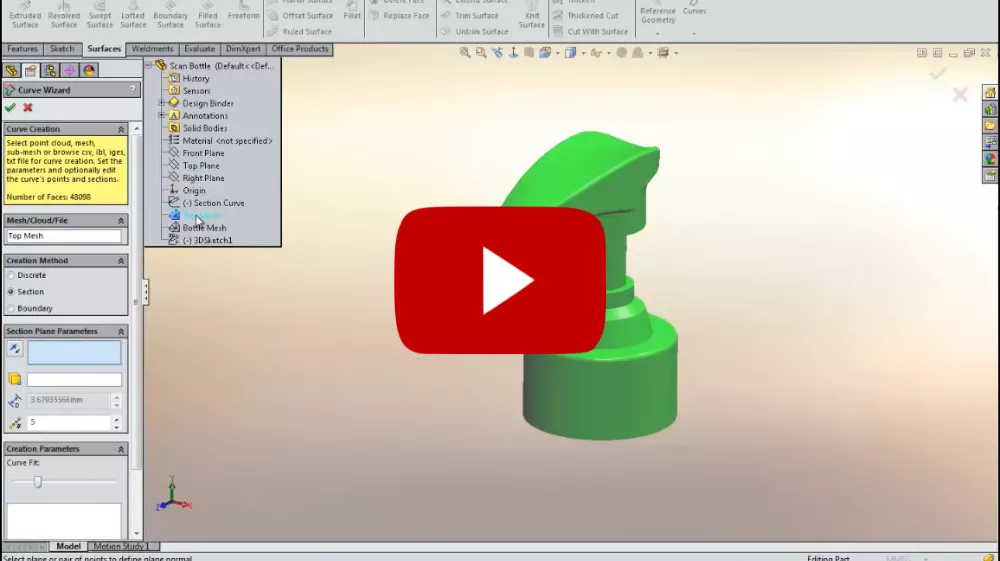
Scanto3D Tutorial
The video below is a step-by-step tutorial from our YouTube channel using Scanto3D and demonstrating different ways of working with scan data in SOLIDWORKS.
More SOLIDWORKS Tutorials
SOLIDWORKS Combine Feature Tutorial
Working with Exploded Views in SOLIDWORKS
Inserting Model Dimensions into a SOLIDWORKS Drawing
How to Scale a Part in SOLIDWORKS

About Krystal Petersen
Krystal Petersen is a SOLIDWORKS Technical Support Engineer based out of Auburn Hills, Michigan. Krystal studied Product Engineering at Oakland Community College and has earned her CSWA and CSWP Certifications. She joined the VAR channel in 2015 with DASI (now GoEngineer). Krystal is a huge fan of Star Wars and likes to spend her off time fishing and camping.
Get our wide array of technical resources delivered right to your inbox.
Unsubscribe at any time.