Show SOLIDWORKS Simulation Plots on Specific Components in an Assembly
When running a simulation study on an assembly in SOLIDWORKS Simulation, you may need to view the effects of your simulation on a specific part or parts for the simulation plot you are interested in. Some examples may be that parts of the assembly are covering the part that you wish to quickly analyze, or you may want to specifically show what happens to a specific part in a simulation report you are generating for a presentation. This article discusses two approaches to isolate and show the simulation results for a single part.
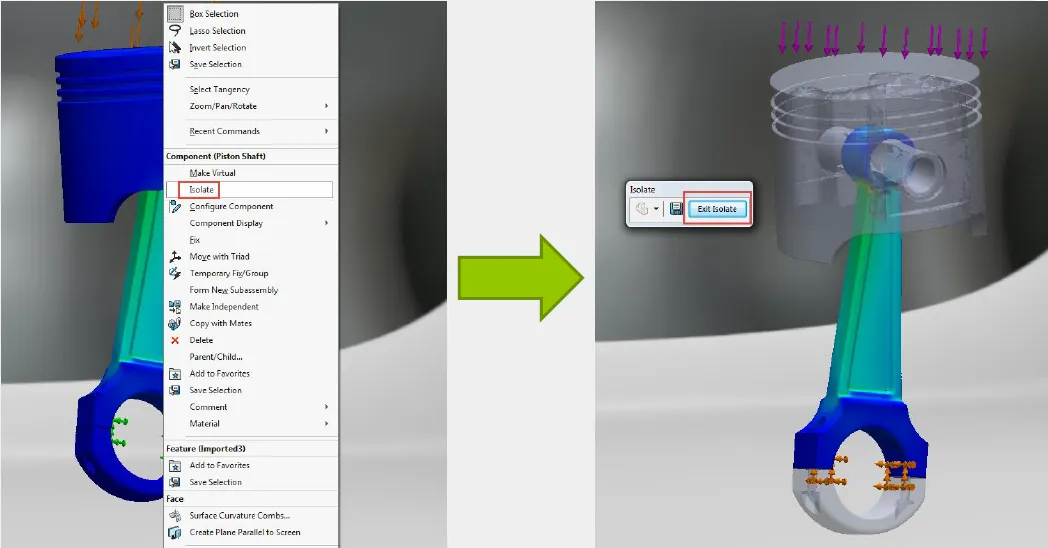
Right-click part and click Isolate To exit Isolate mode click Exit Isolate
Approach #1: Use the isolate command to view simulation results on a specific part or parts in an assembly
Select a single part, or many parts in the simulated assembly, right-click in the graphics area, and choose the Isolate command. This will temporarily show the part or parts that you have selected, and hide all of the others. When using this method you will have to update your simulation plots to view the isolated part or parts. To learn about how to update your simulation results please see our article 3 Ways to Refresh SOLIDWORKS Simulation Plots.
The benefit of this approach is that you can quickly and easily review what is happening to a specific part or parts for any of your plots in your results folder. While in Isolation mode you may probe the specific part or make a section, or Iso clipping of the part as well. This will give you a detailed overview of the parts in the assembly that you are most interested in. Once you wish to return to the whole assembly simulation plot simply click the Exit Isolate button and update your simulation results again.
Right-click part and click Isolate. To exit Isolate mode click Exit Isolate
Approach #2: Create a New Simulation Plot which only shows the specific part that you specify
By right-clicking on the Results folder in your Simulation feature tree you are given options to manually create several different types of plots in addition to the ones that were automatically generated after you ran a study.
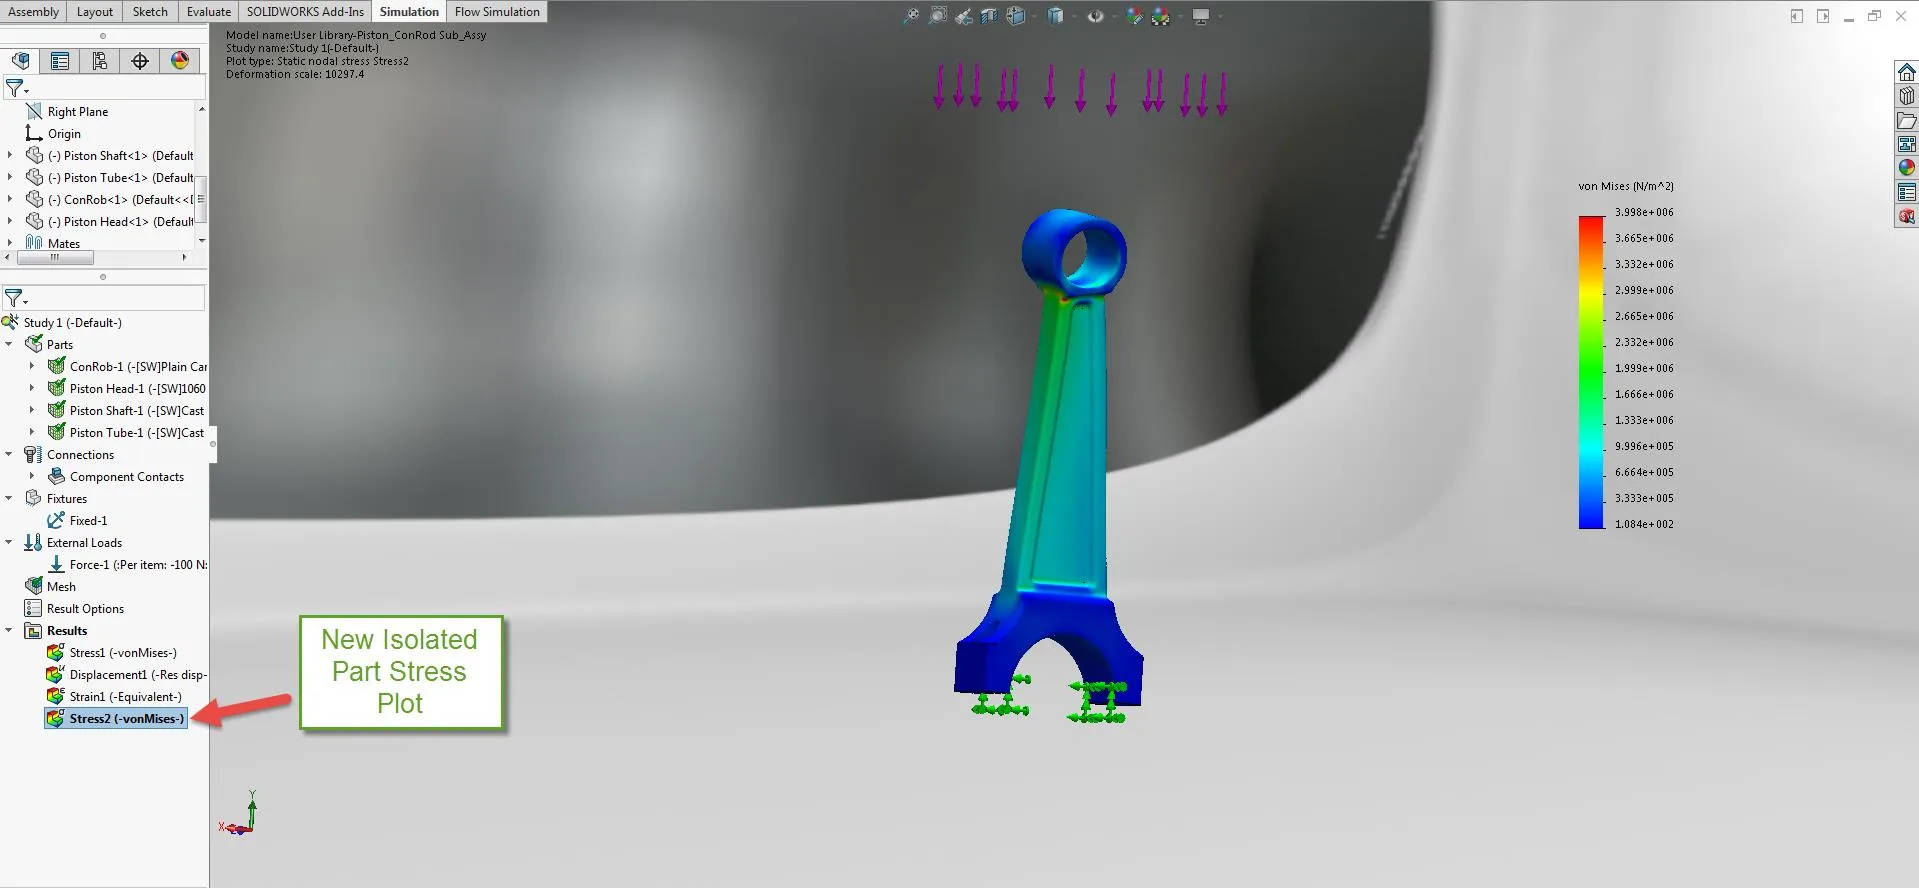
To make a simulation plot of a specific part or parts in the assembly first click Advanced Options > Show plot only on selected entities > Select bodies for the plot. Now click on the part or parts that you wish to include in this plot. Once you have a list of everything you wish to include in this plot click the green checkmark and the new plot will be created.
Now that you have created a new isolated plot you can hide or show the new isolated plot as necessary. Another benefit of this approach is that this new isolated plot will automatically be generated in a simulation report the next time that one is published.
Right-click the Results folder and then choose any of the listed simulation plots to create manually.
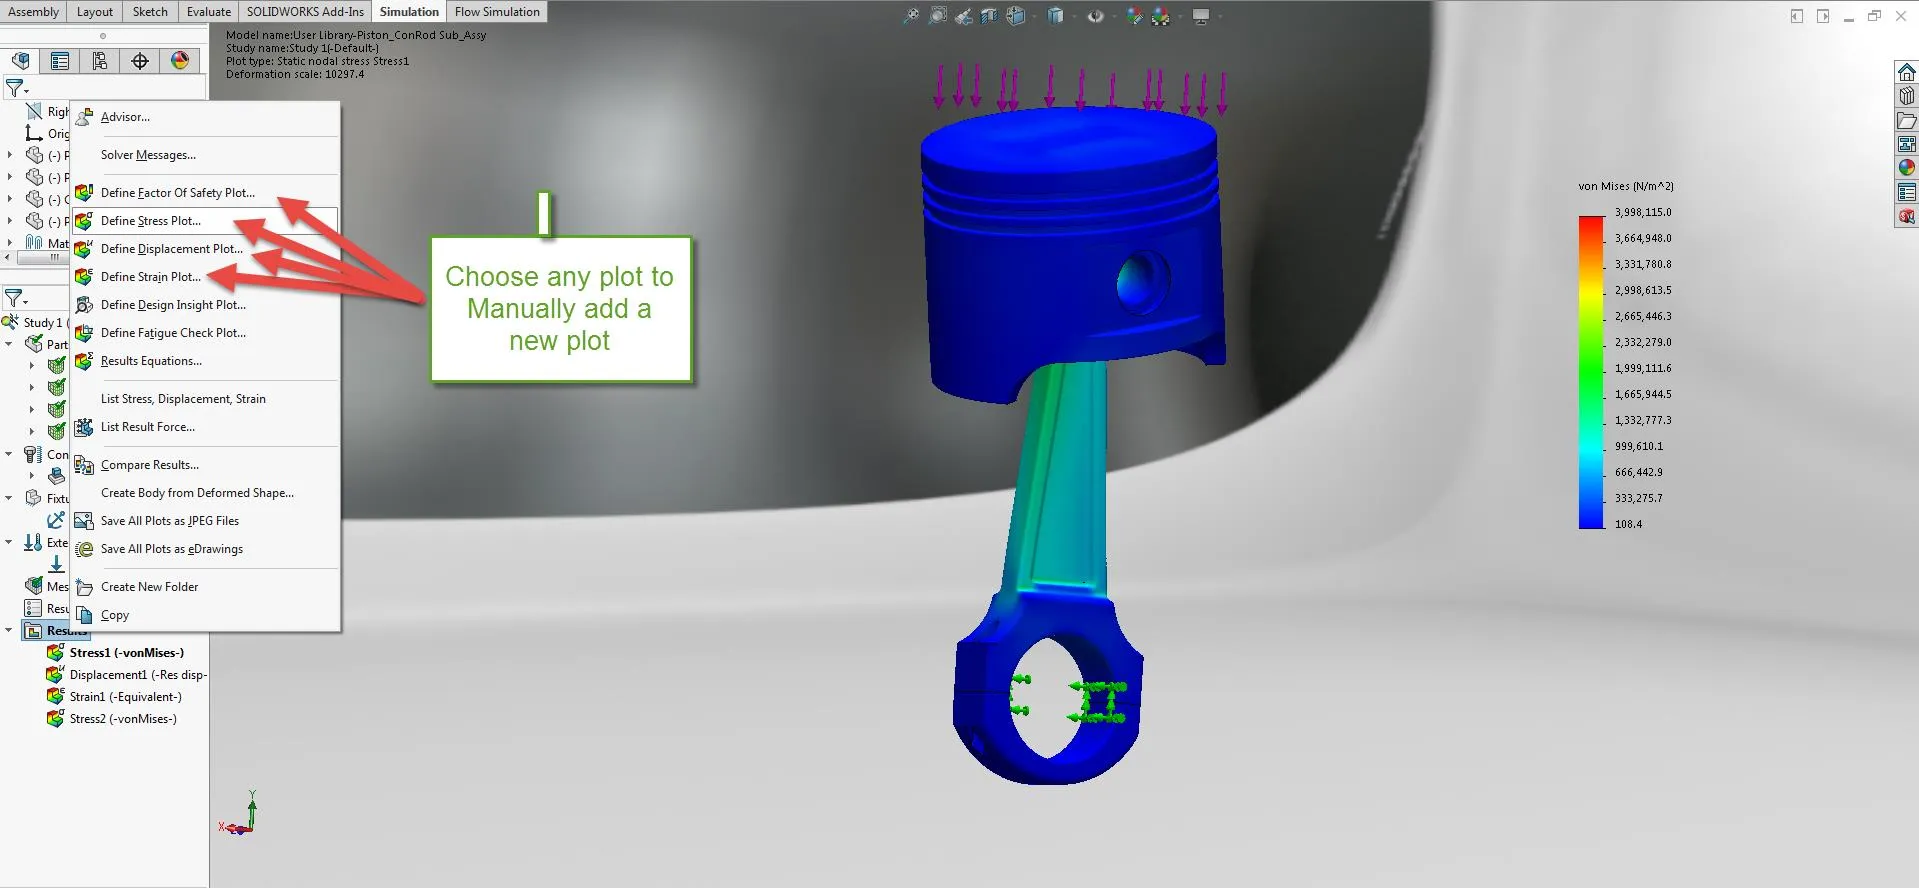
Click Advanced Options > Show plot only on selected entities > Select bodies for the plot.

A New Plot that specifically shows the chosen isolated Part or parts has now been created in the results folder.
Related SOLIDWORKS Simulation Articles
SOLIDWORKS Simulation Elements: Solid vs. Beam Results
Time Based Thermal Stress in SOLIDWORKS Simulation
Exporting a Deformed Body in SOLIDWORKS Simulation
Naval Shock Analysis (DDAM) Using SOLIDWORKS Simulation

About Taran Packer
Taran is a SOLIDWORKS Simulation Technical Support Specialist at GoEngineer. He has a Bachelor’s degree in Biomedical Engineering from the University of Utah. Taran enjoys learning about different tools in SOLIDWORKS Simulation, Flow Simulation, and Plastics.
Get our wide array of technical resources delivered right to your inbox.
Unsubscribe at any time.