SOLIDWORKS Configuration Publisher: Create Configuration Tables
In this tutorial, we show how to create and modify a configuration table in SOLIDWORKS. We'll then use Configuration Publisher to select specific configurations to update in assemblies from a dropdown list.
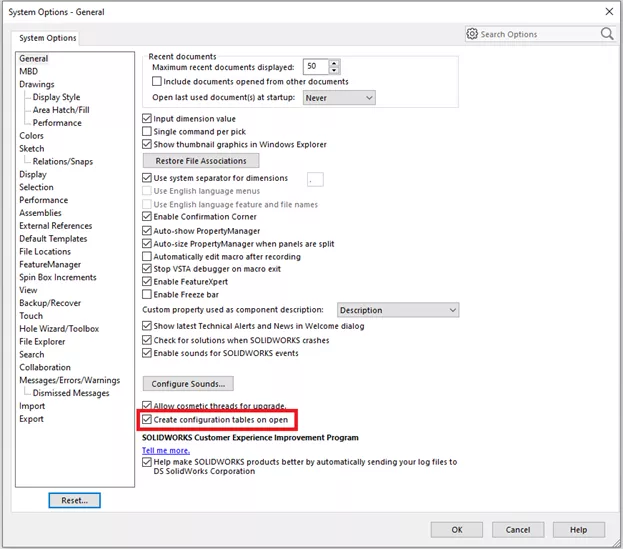
First, make sure that Configuration Tables are set to be created on open.
To do this, navigate to Tools > Options > General options and select Create configuration tables on open.
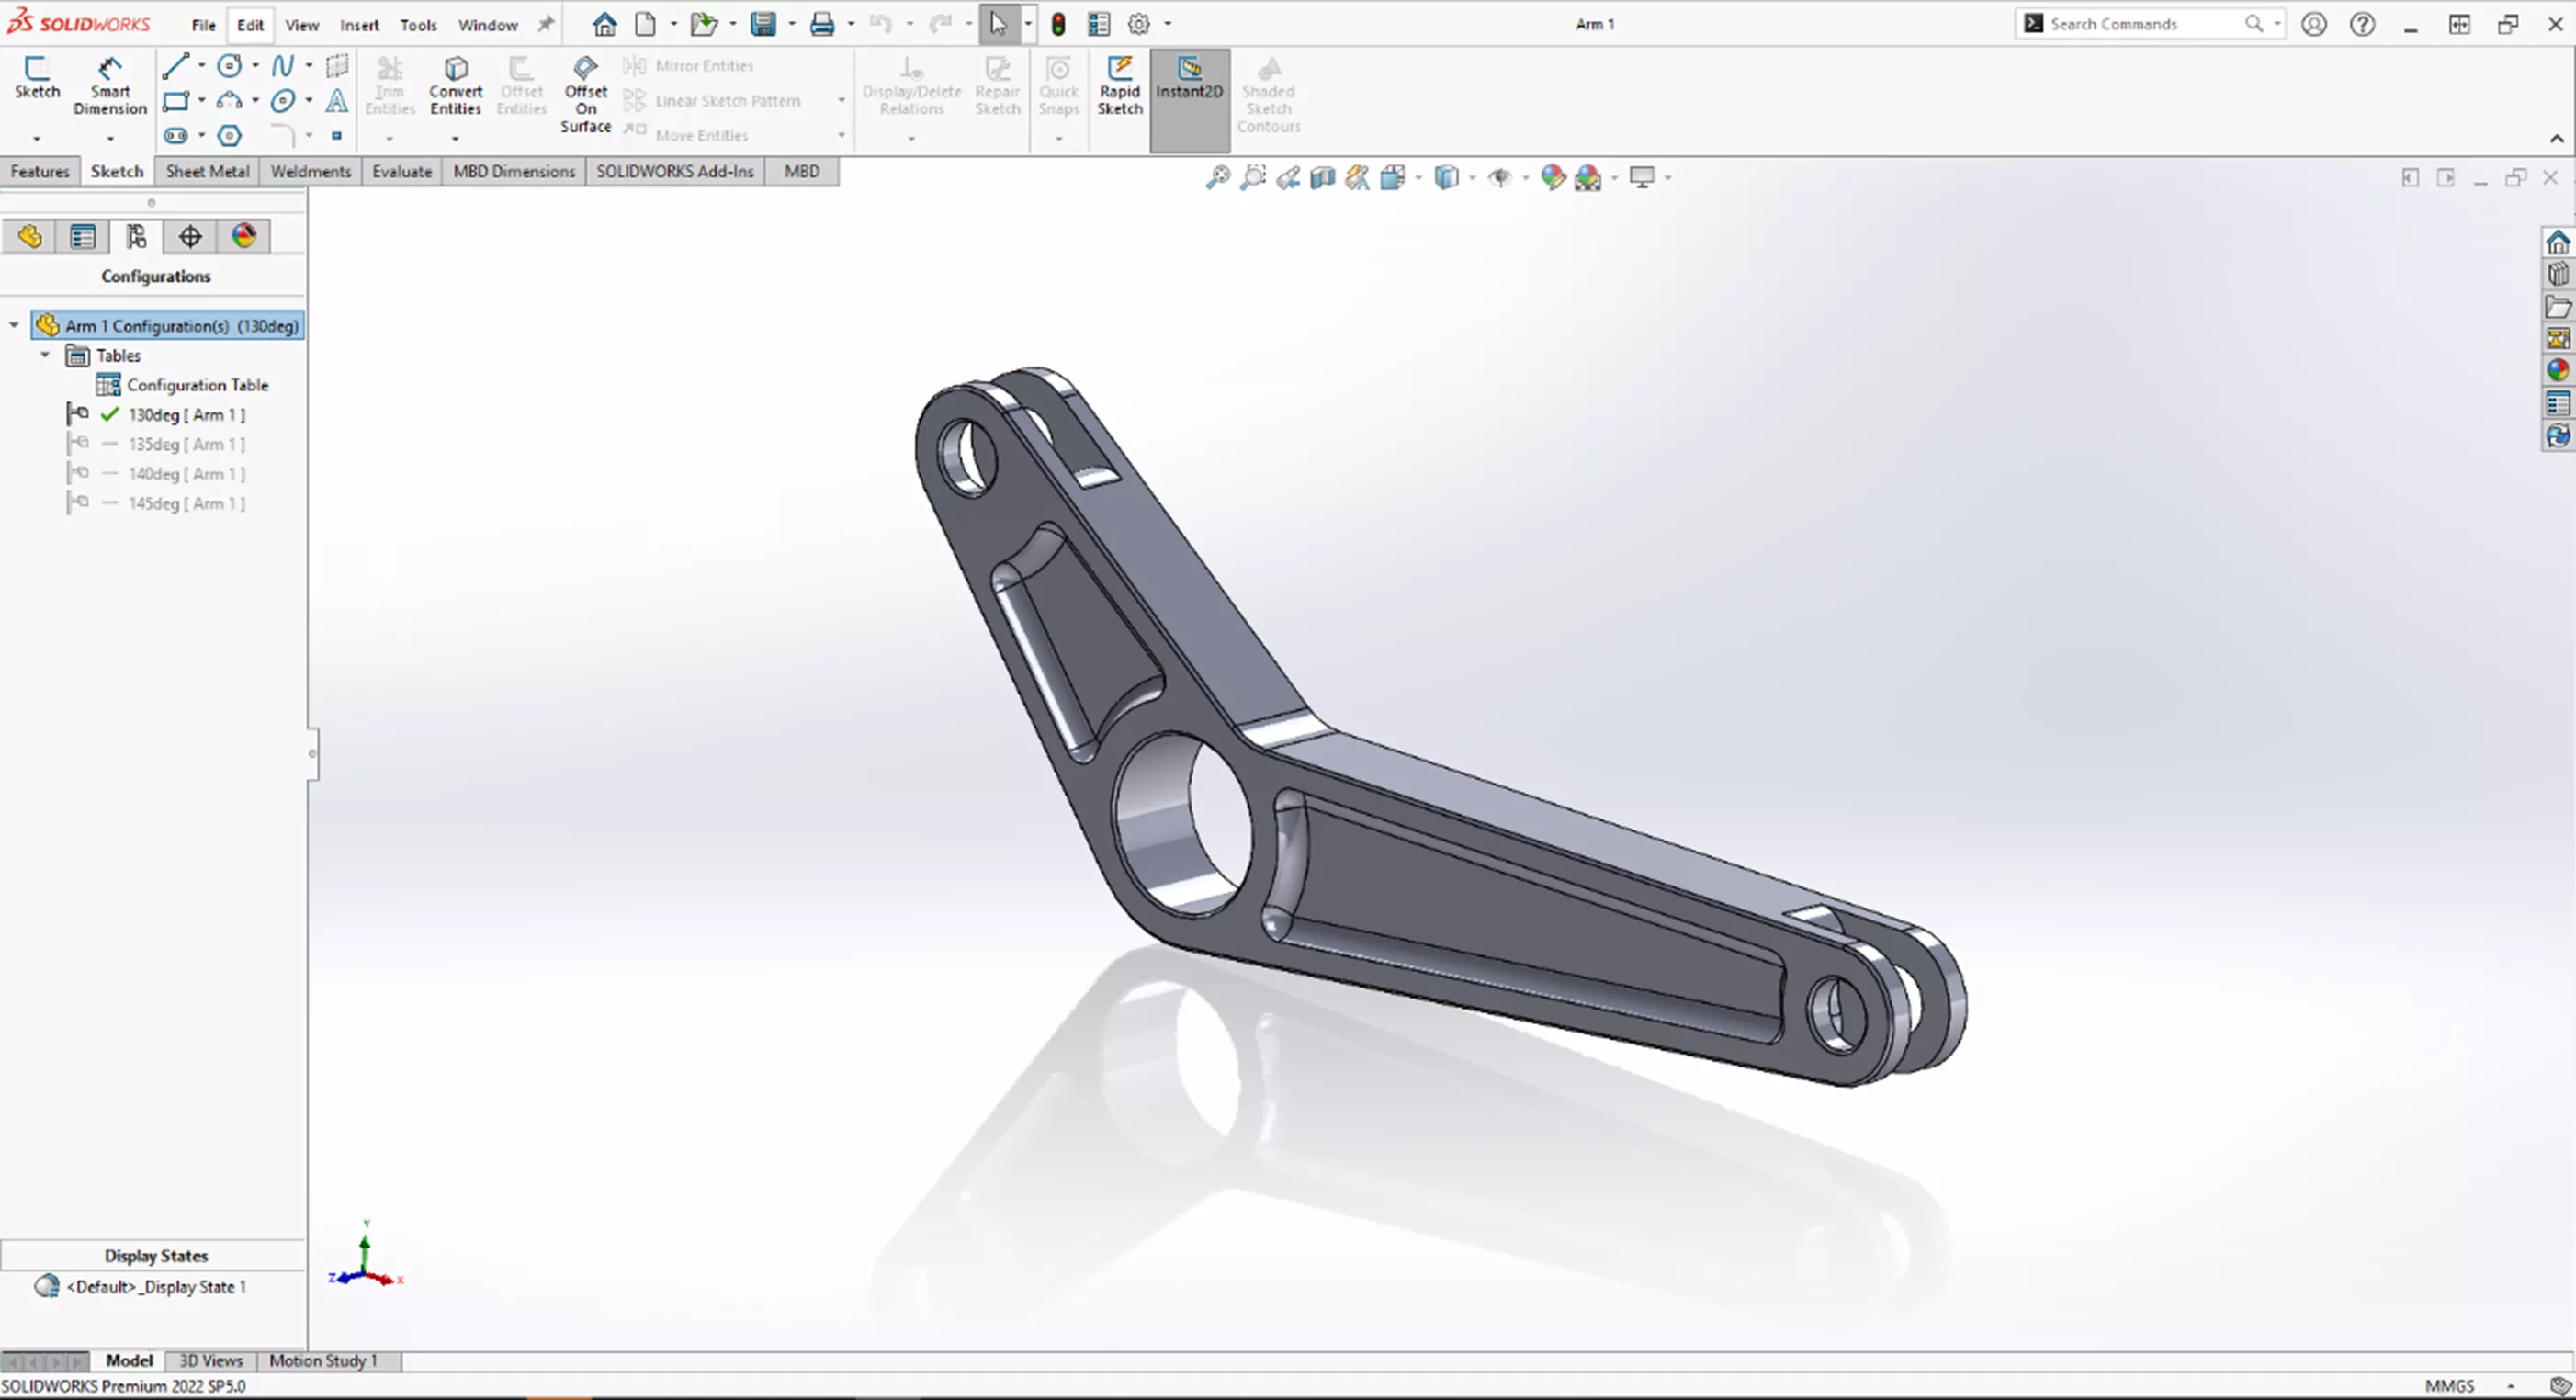
Once selected, when creating configurations, it will automatically create a configuration table to more easily suppress or control features for the given configurations. In this example, we have a model with four (4) configurations for demonstration.
Now let's make some changes to each configuration.
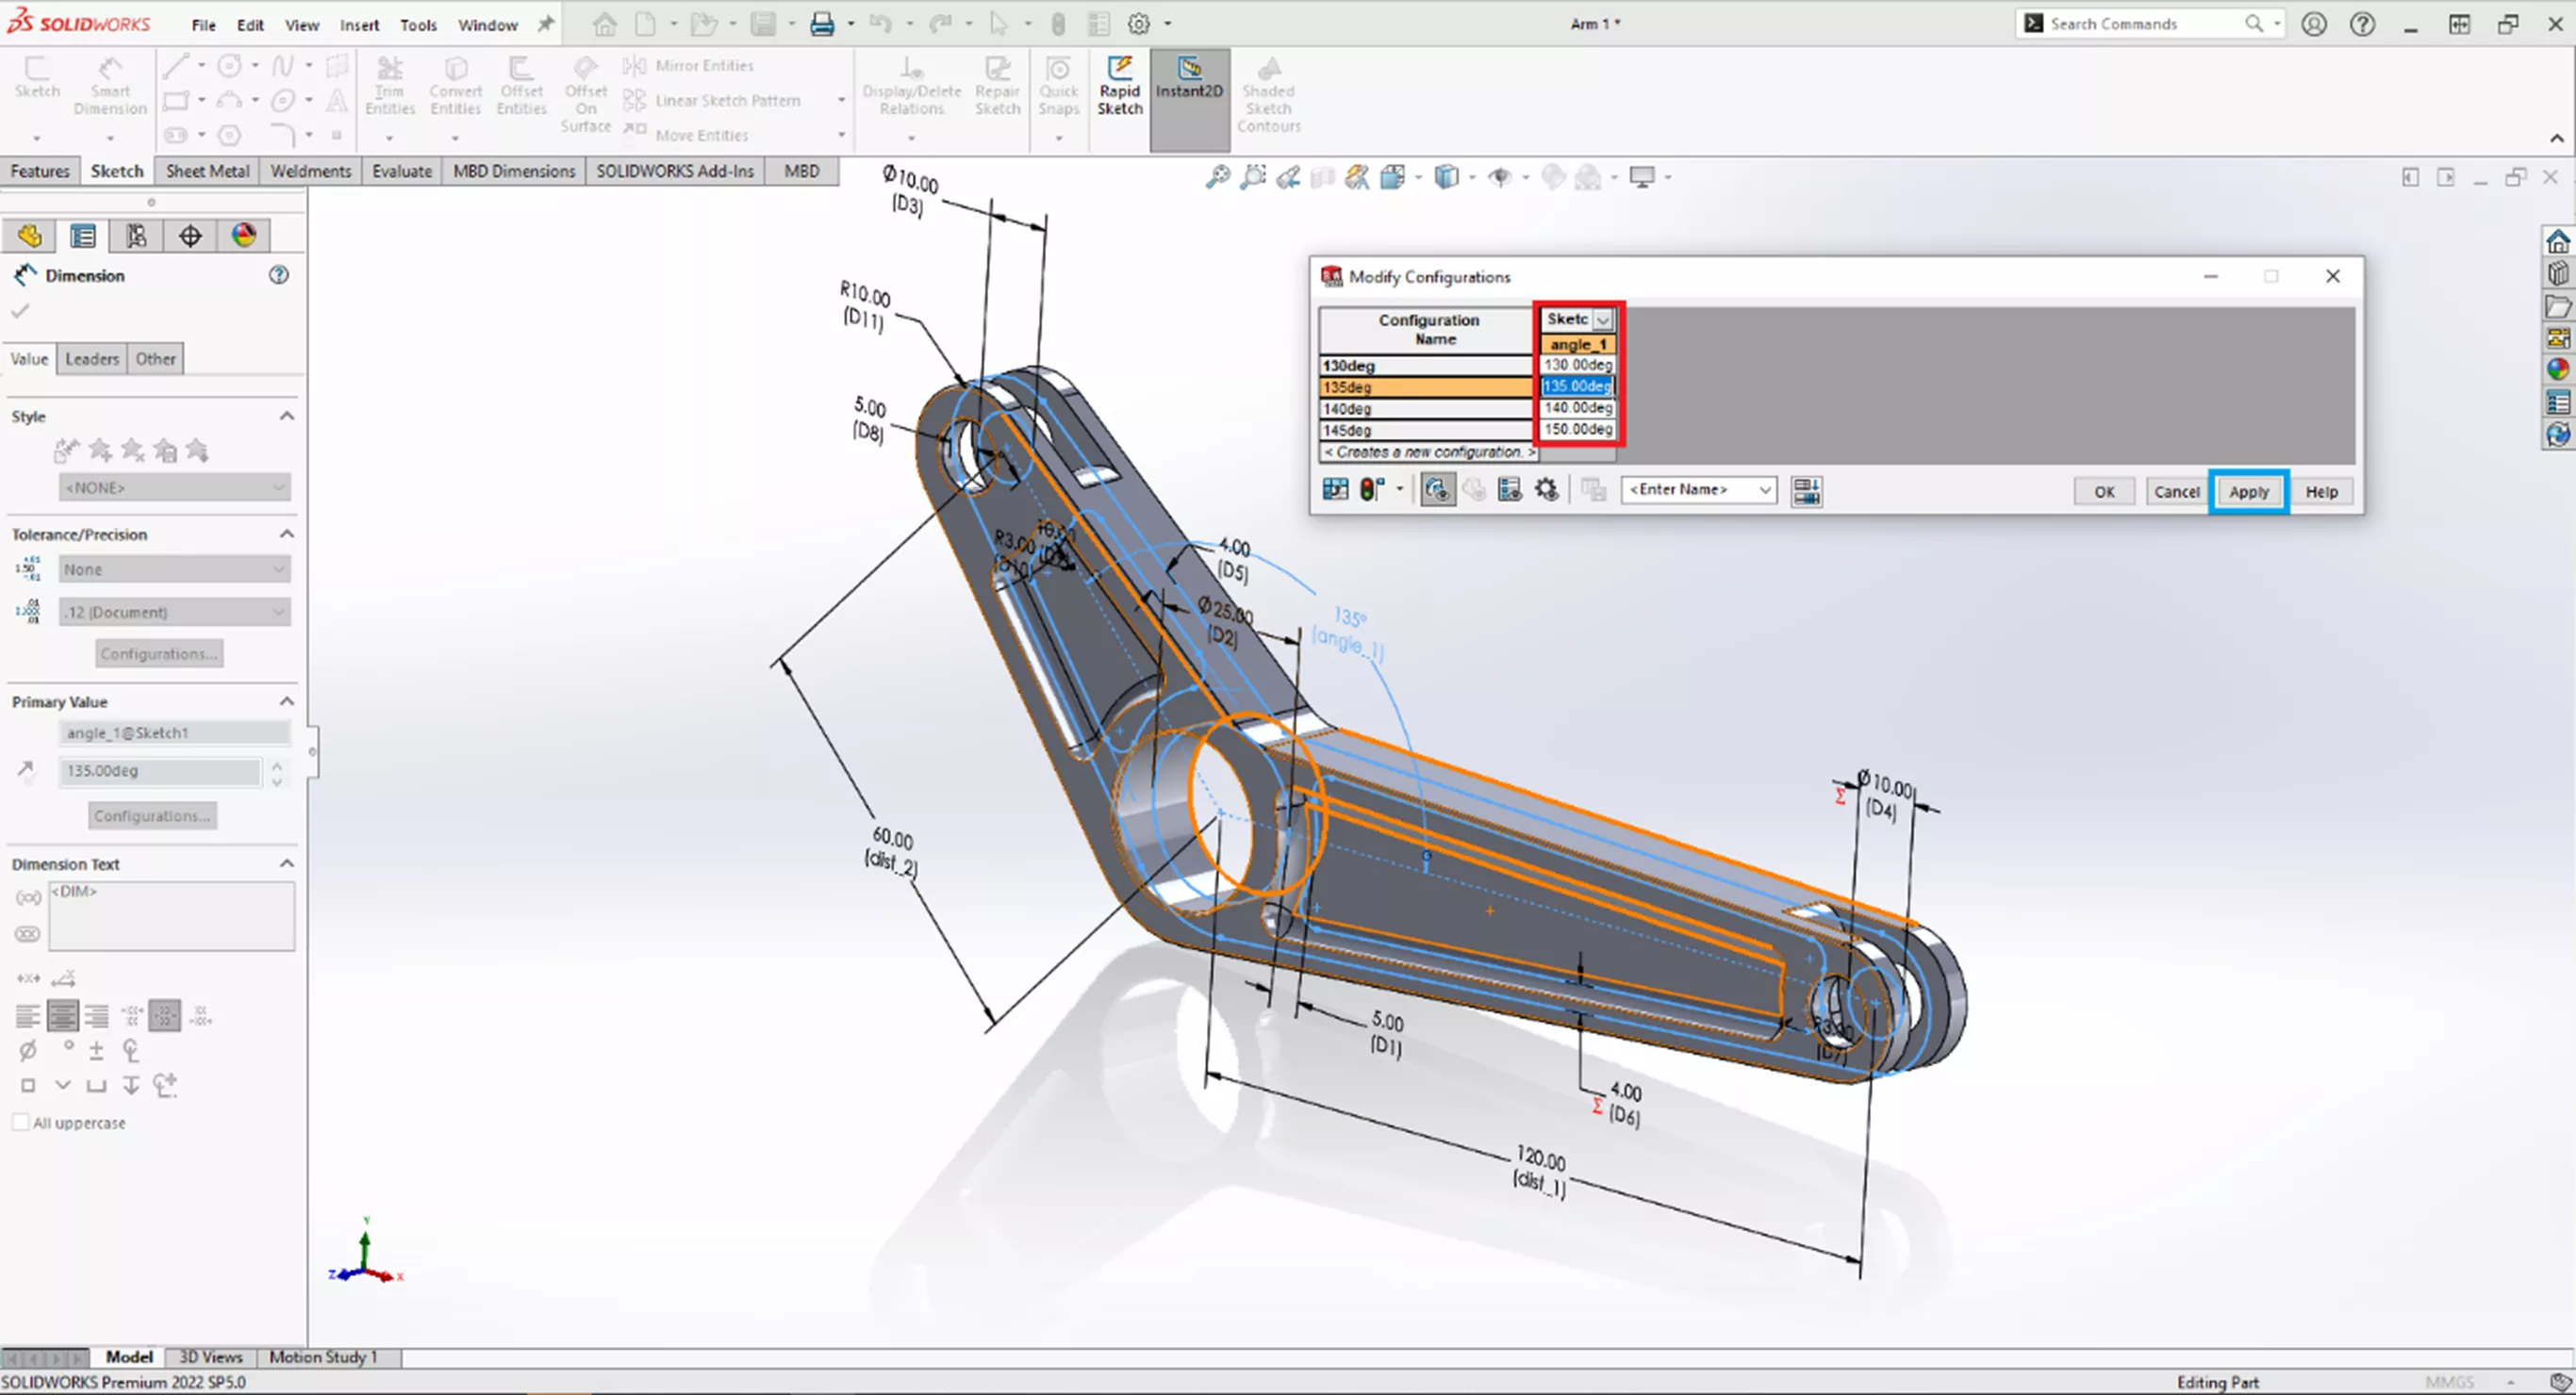
Double-click on the sketch under Boss-Extrude1 in the FeatureManager design tree to show the dimensions placed in this sketch. Right-click on the angle dimension and select Configure Dimension.
This will open a window where we can modify this dimension for each configuration. Once we have configured this dimension, click Apply and then close the window.
With our dimension configured, we can now see that as each configuration is selected, the angle matches the configurations.
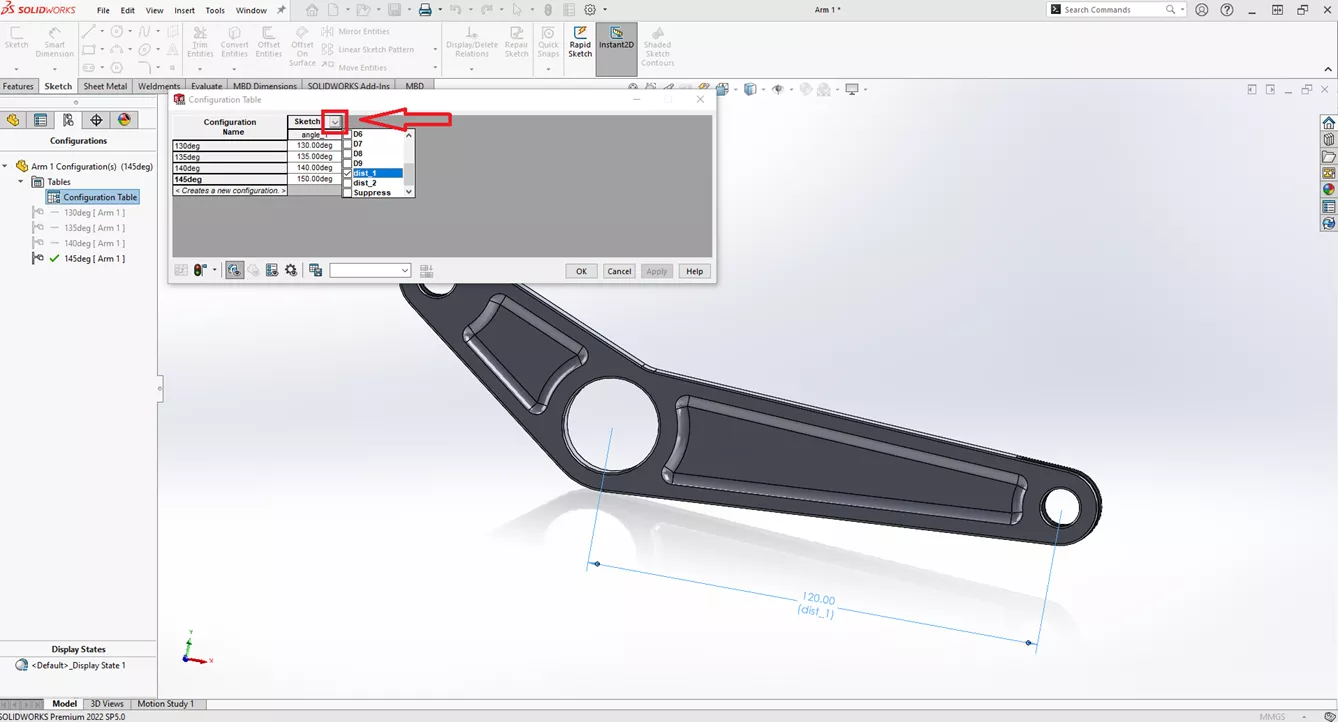
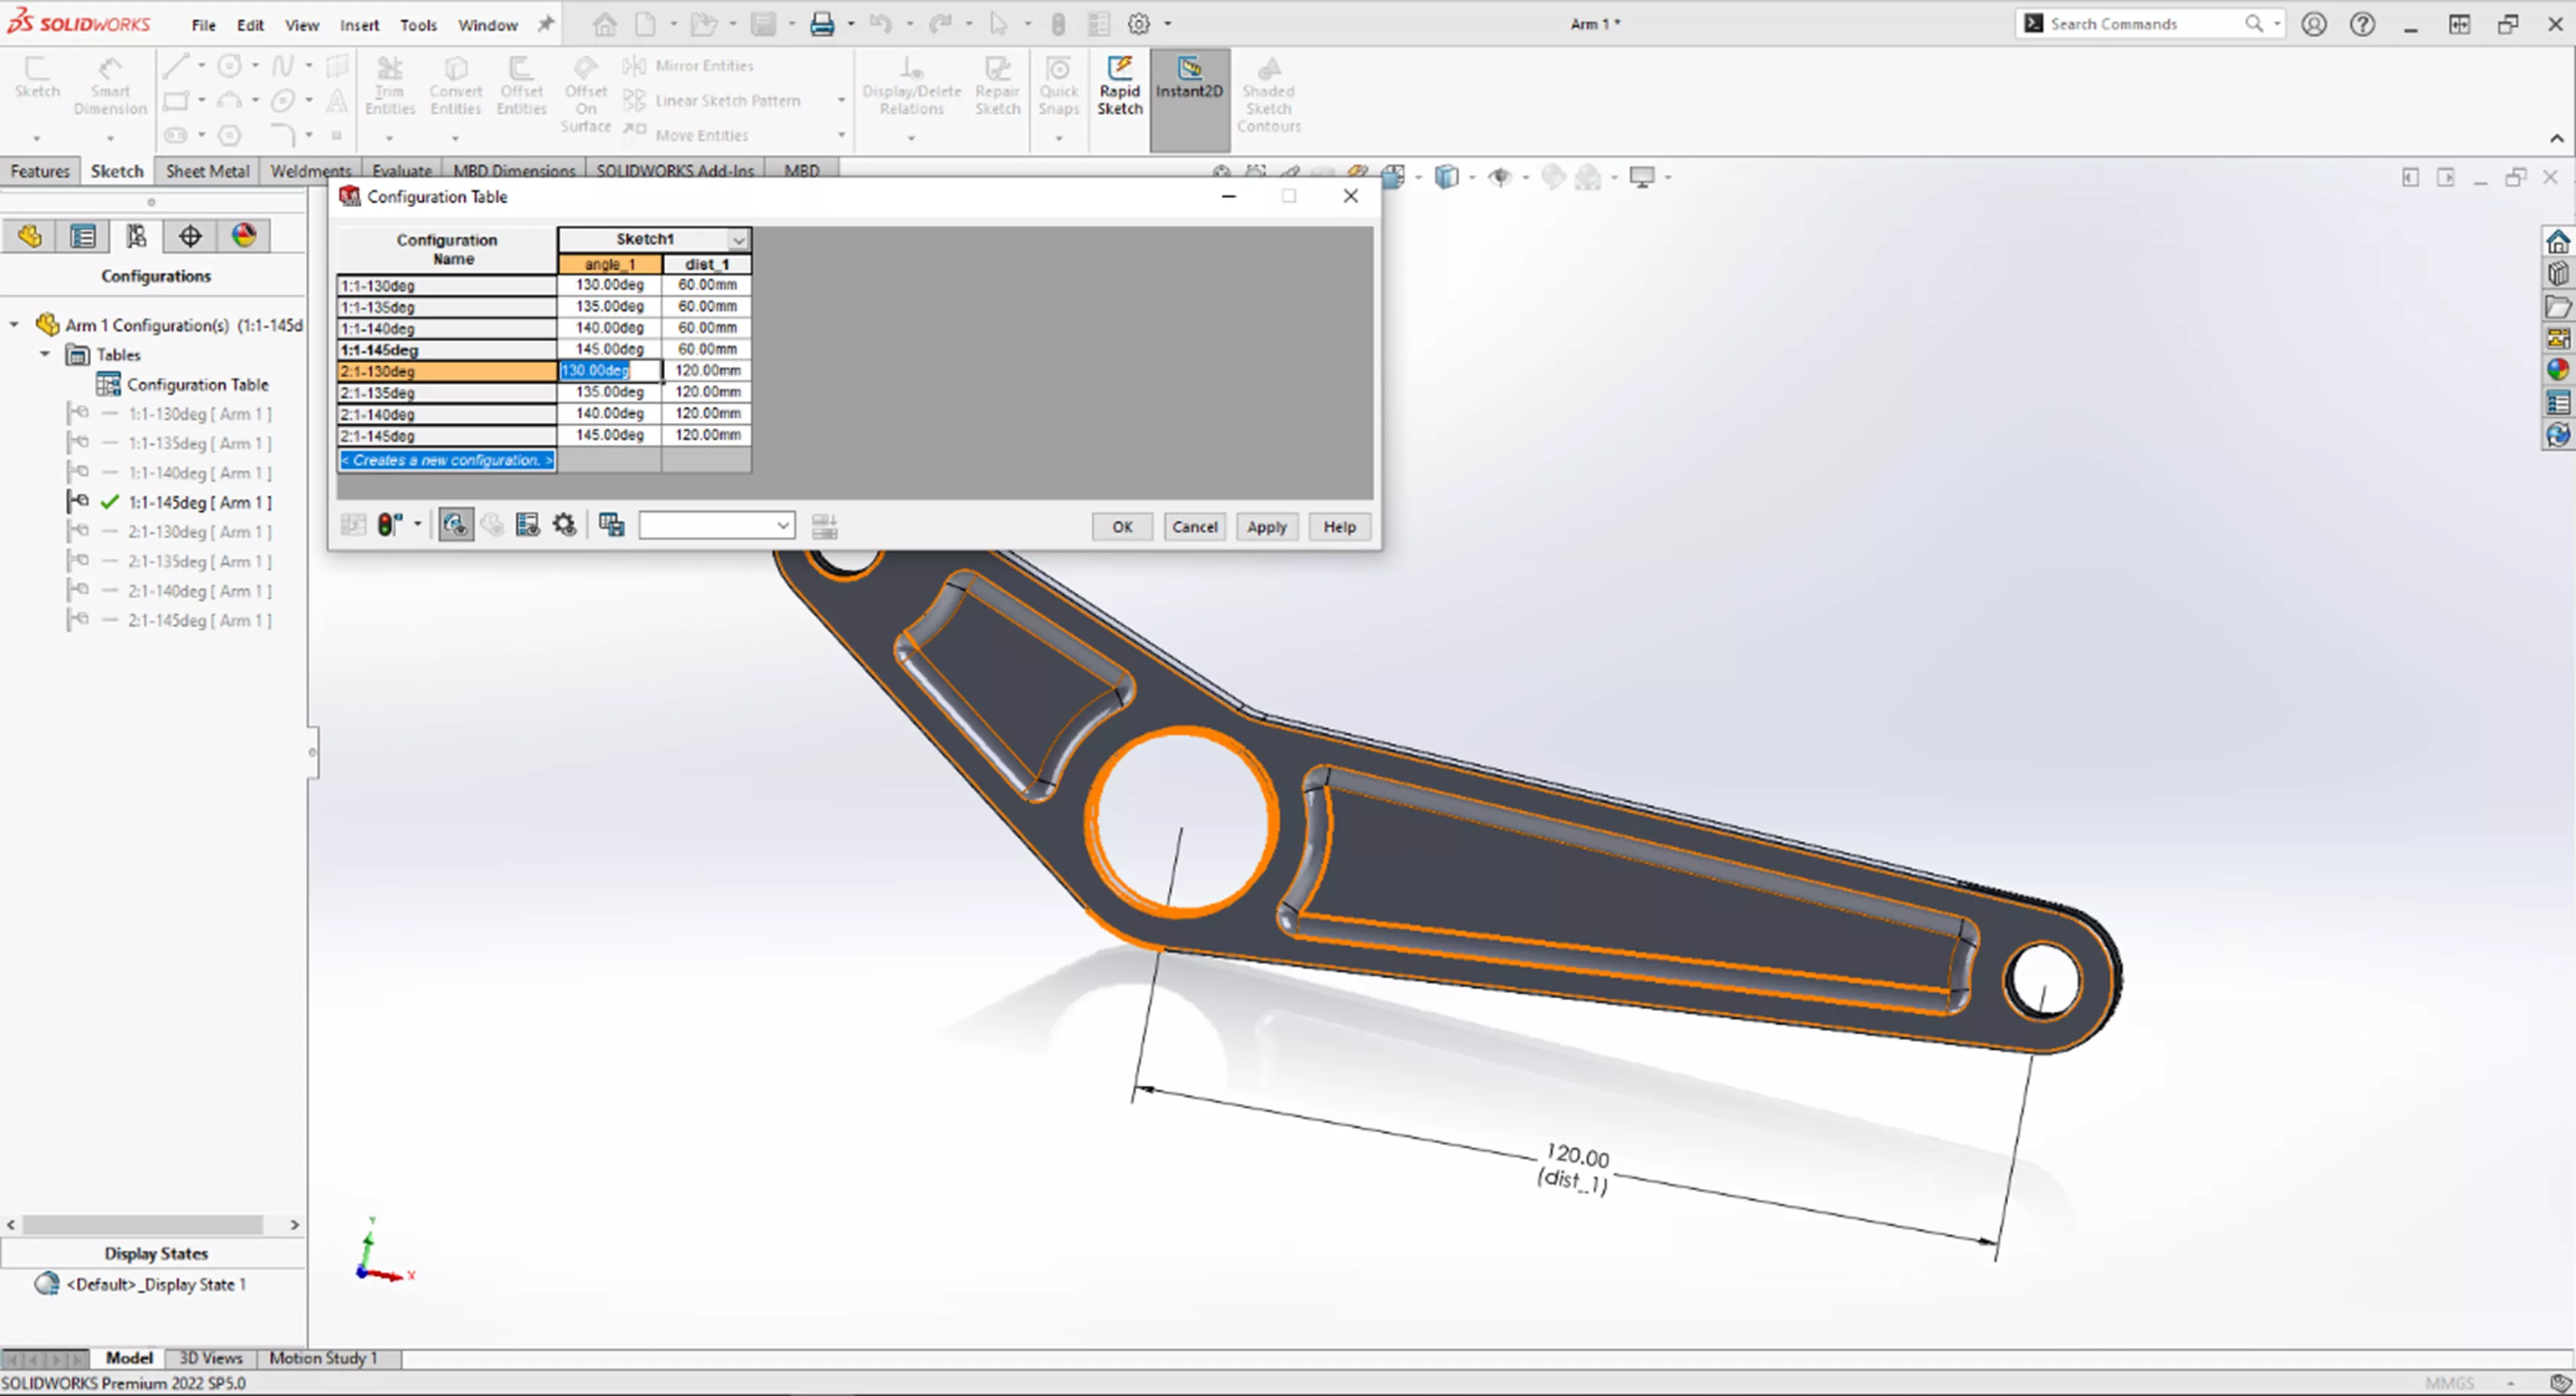
Right-clicking on the configuration table and selecting show table will open the configuration table where we can add configurations, features, sketch dimensions, etc., to quickly create and modify configurations.
To create more configurations, select the dropdown arrow next to the angle_1 column in the configuration table and select dist_1. This will allow us to control both the angle and the lever arm ratio.
Here we'll rename the configurations to specify both the angle and the ratio, then add four (4) more configurations for a 2:1 ratio and the same angles. This will give us eight (8) configurations in total linked to the configuration table.
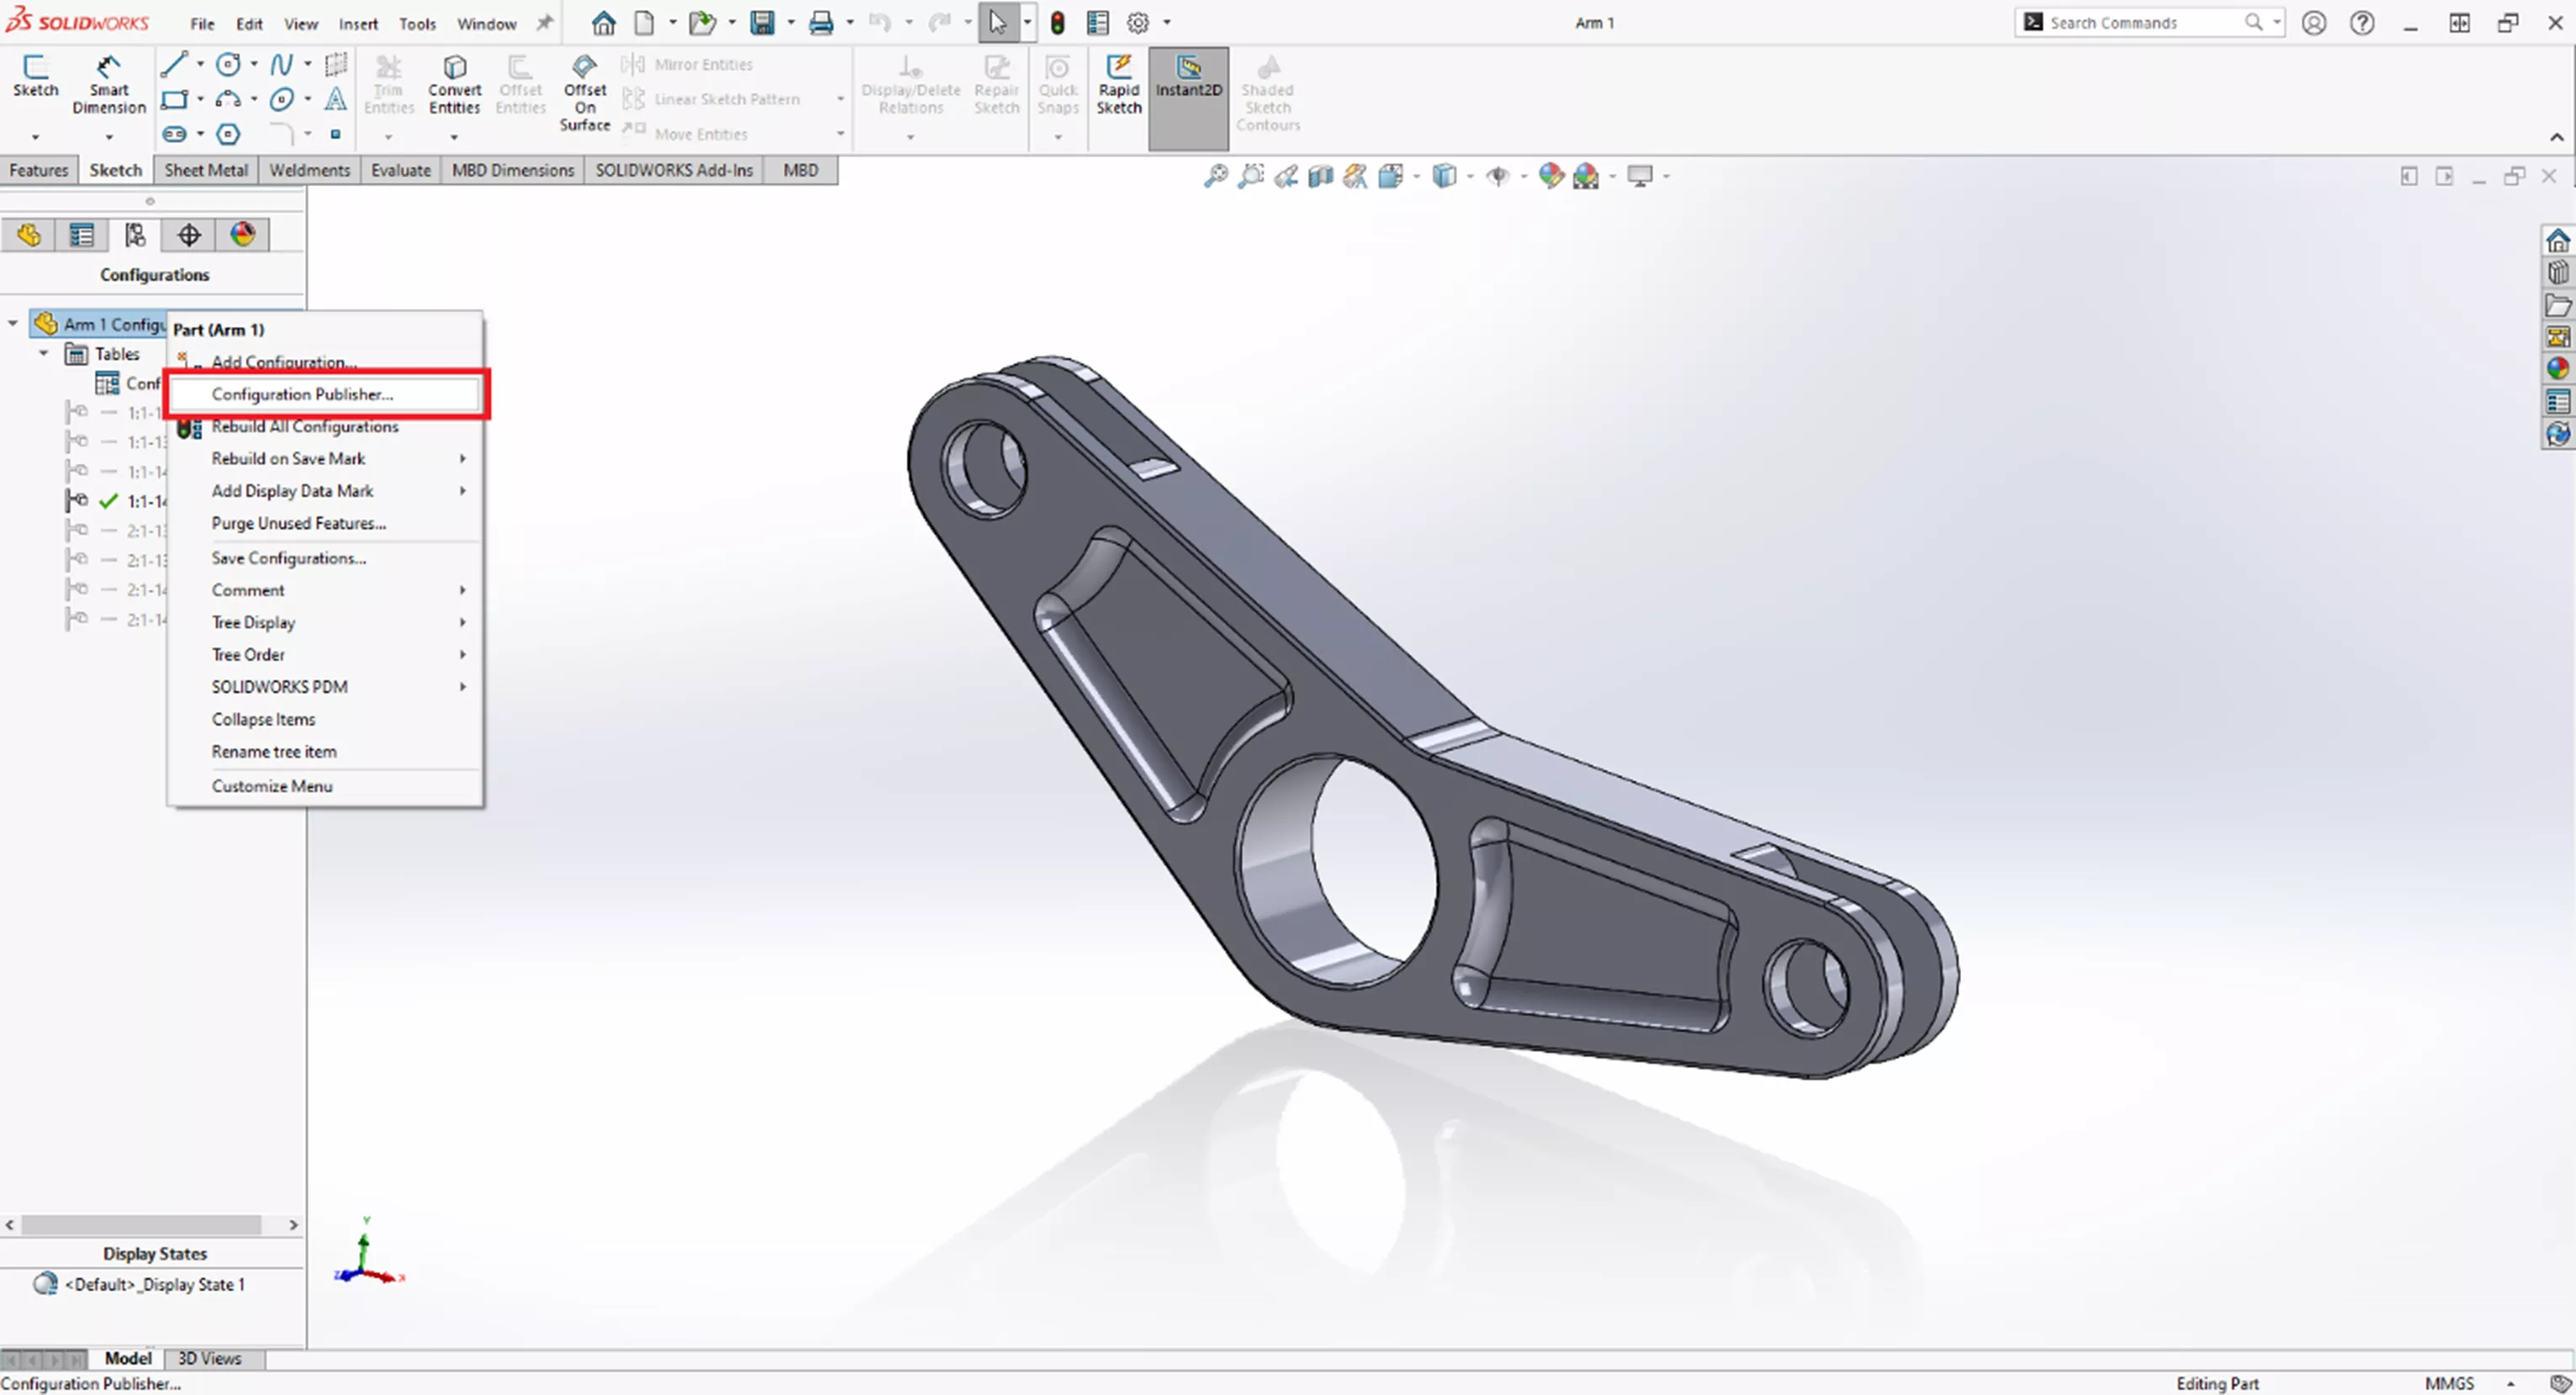
With the configuration table created, it is time to use the Configuration Publisher to allow even more options when inserting this part into an assembly. Right-click on the component at the top of the ConfigurationManager and select Configuration Publisher.
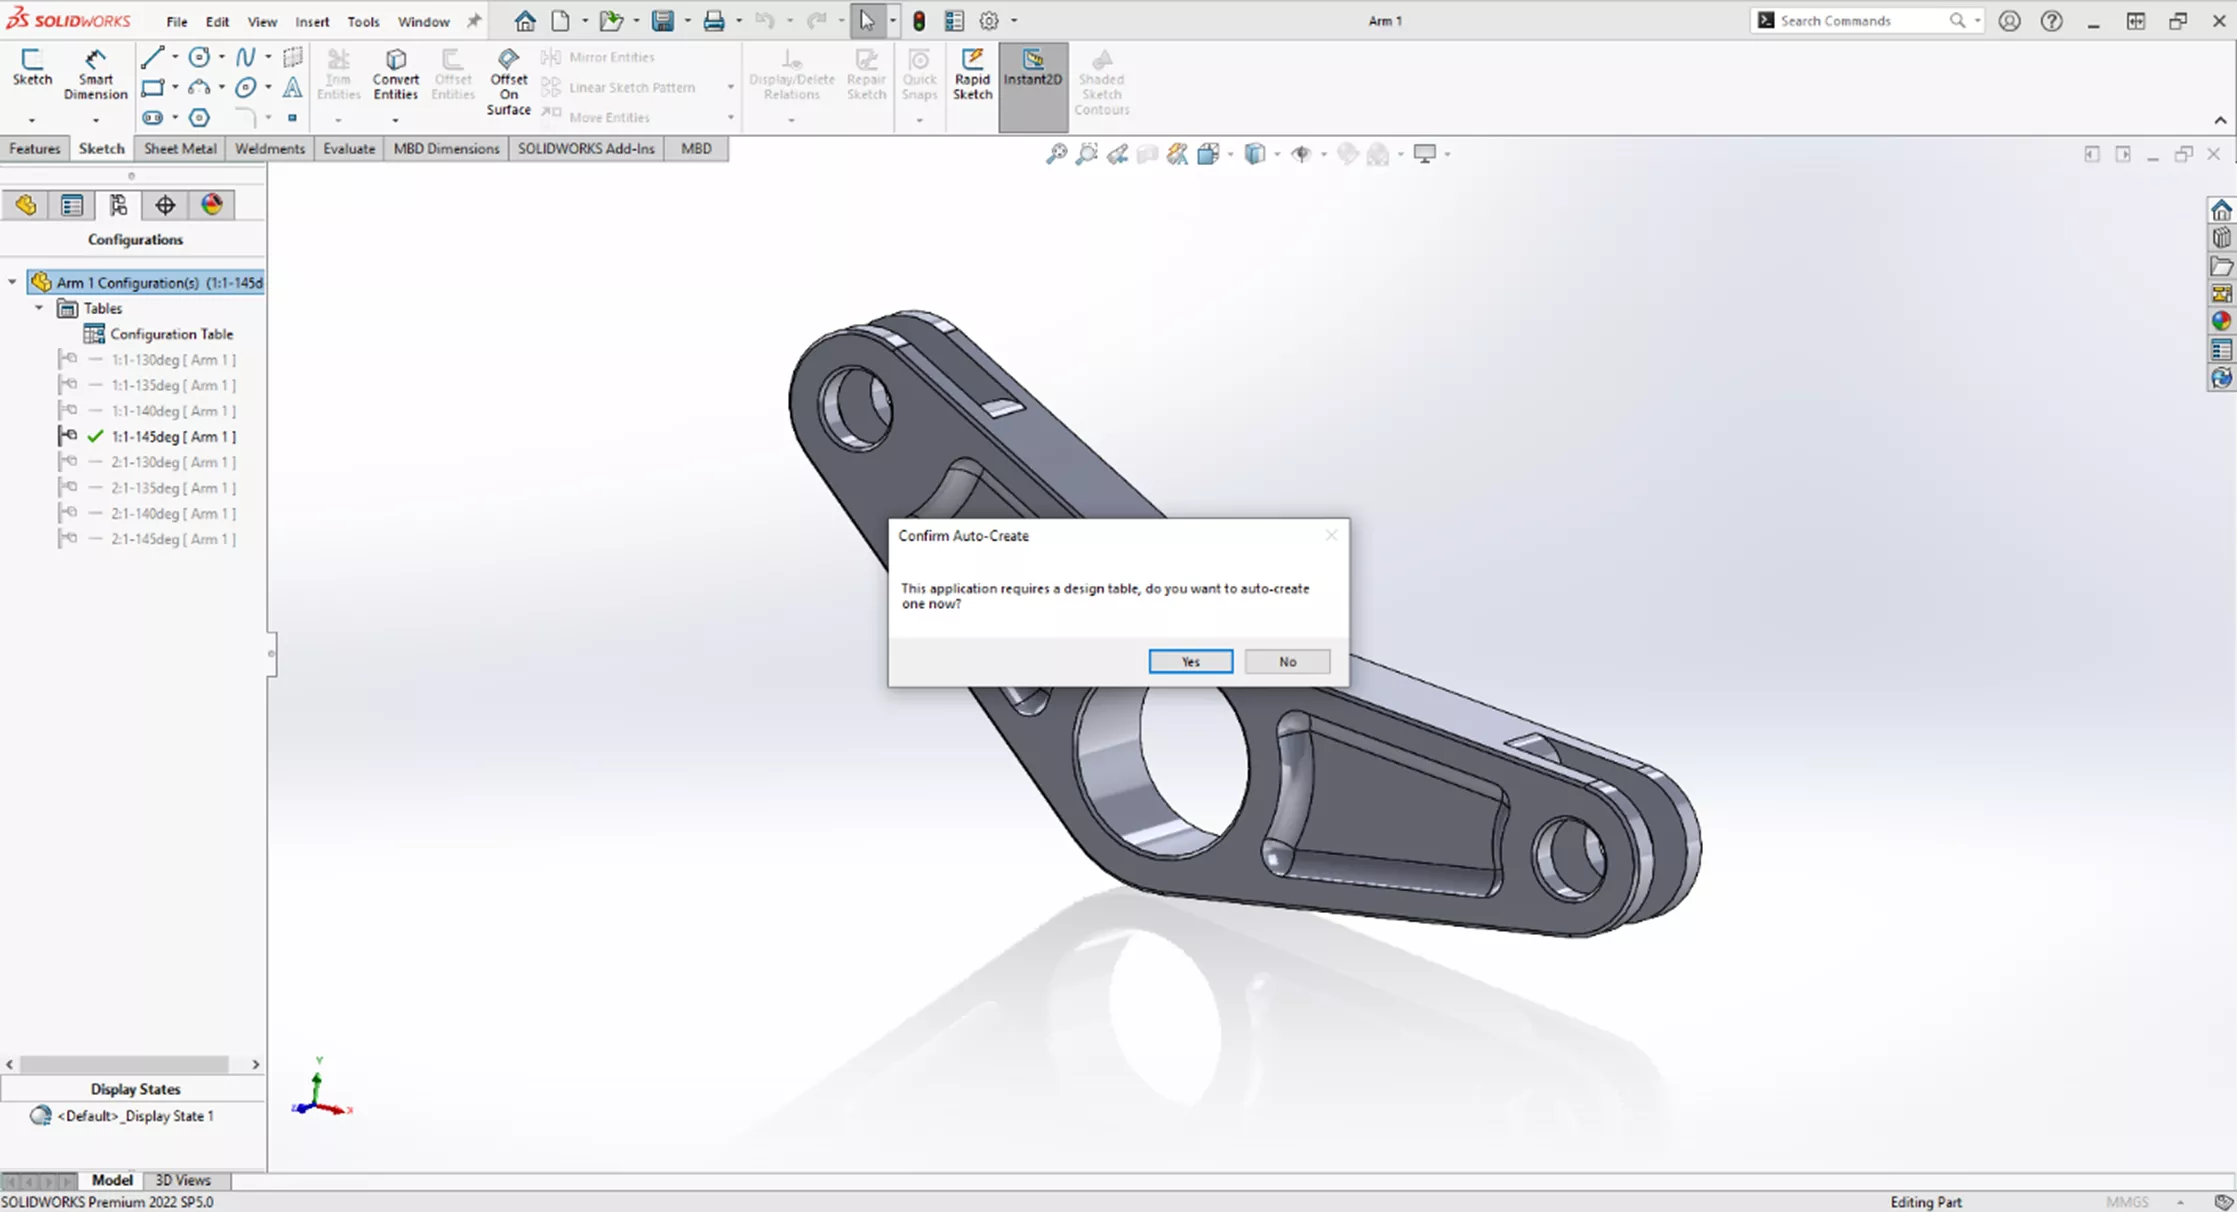
When we publish our configurations, it will prompt us to create a design table. In order for Configuration Publisher to work, it must have a design table. For this example, I will leave the default suggested settings for the design table and let it automatically populate.
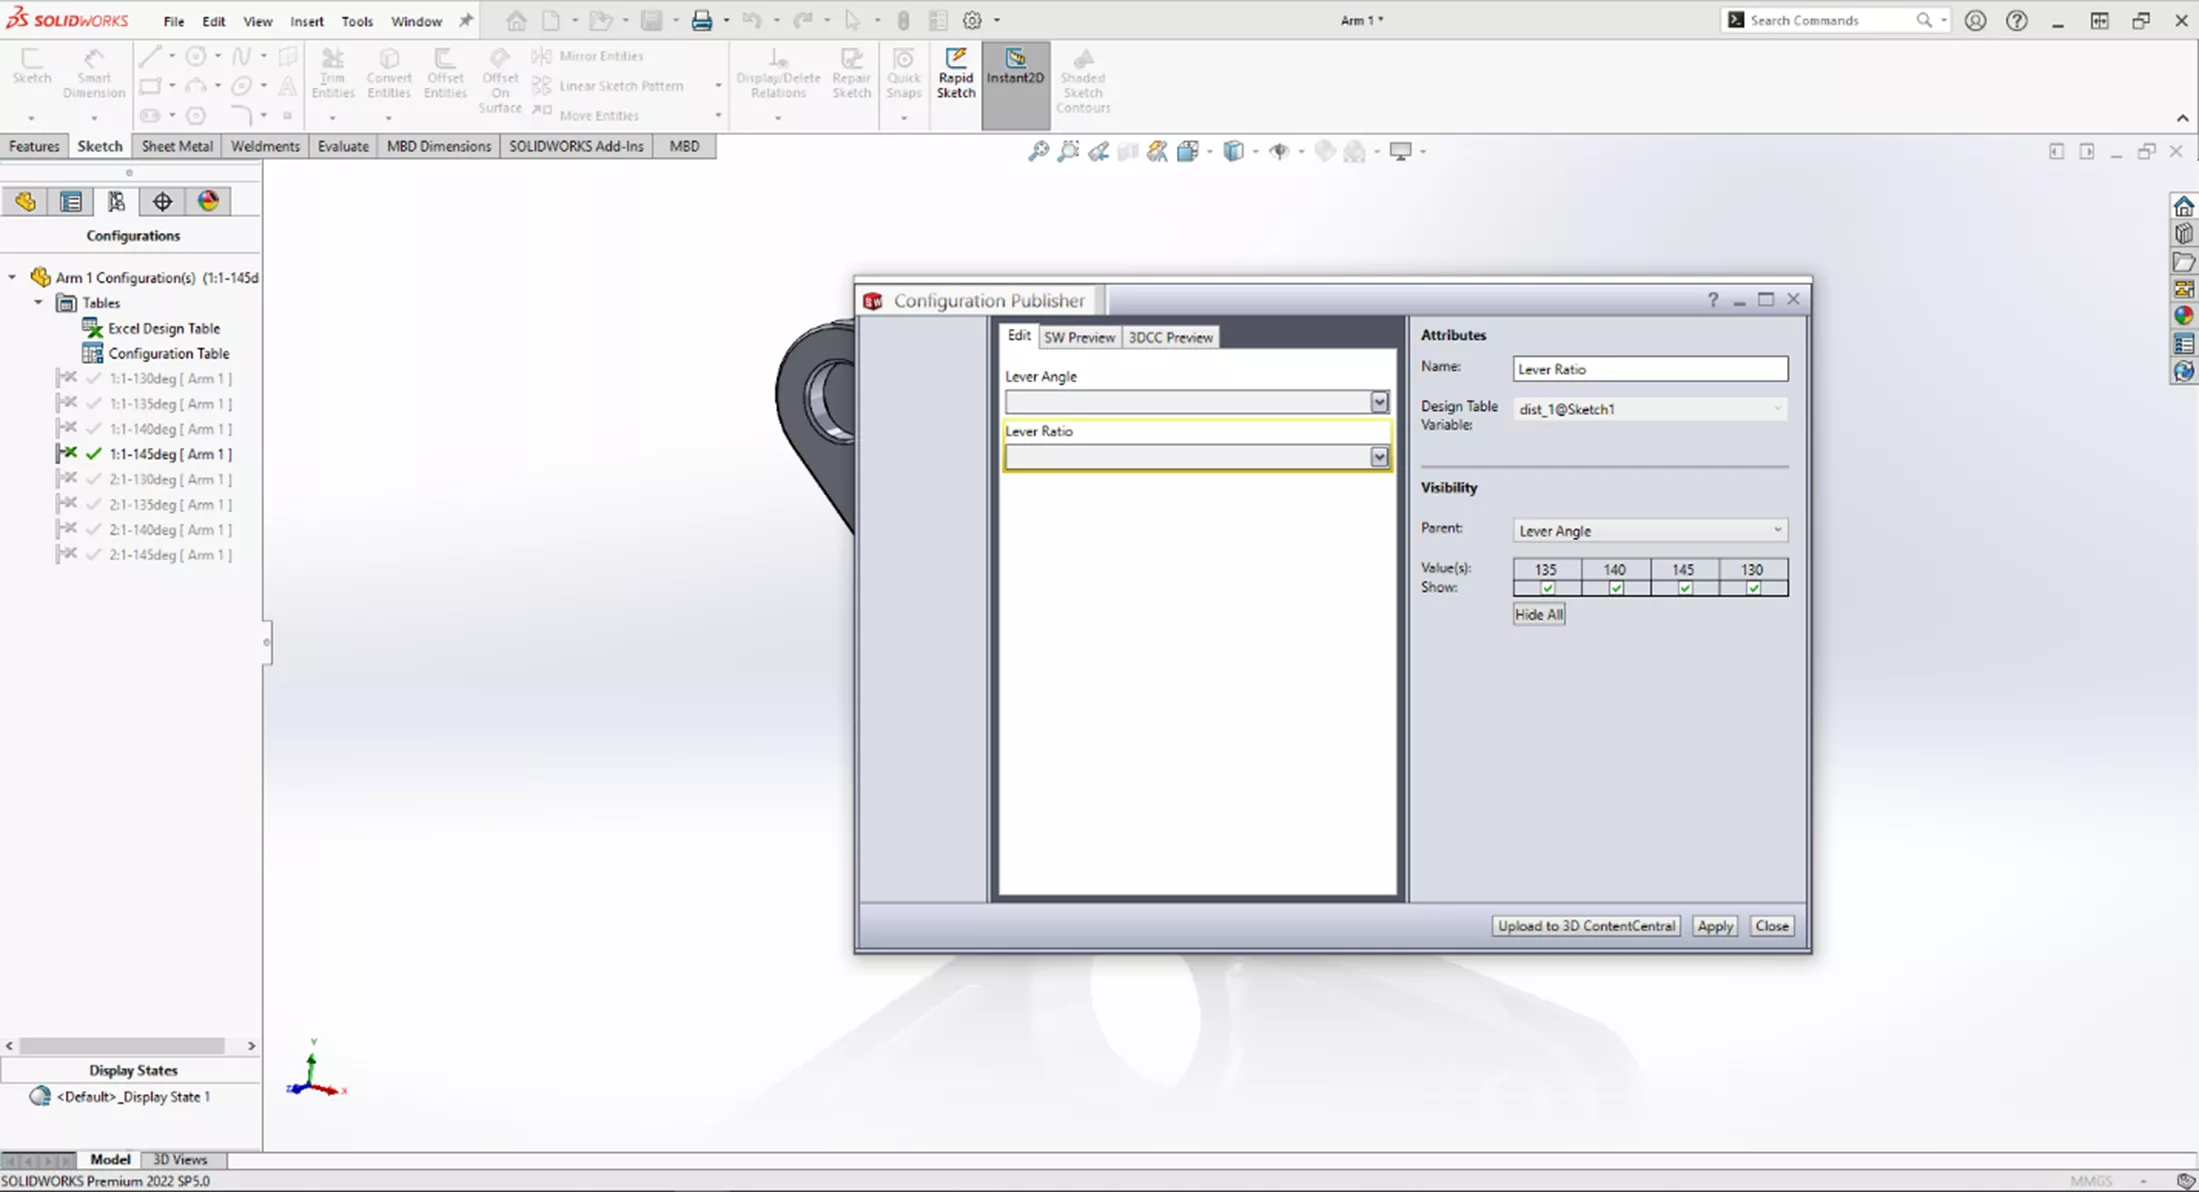
With the design table created, and the Configuration Publisher window open, we now have all the properties we created in our configuration table. Drag these from the left column into the white box in the center. From here, we will create our attributes in the right column.
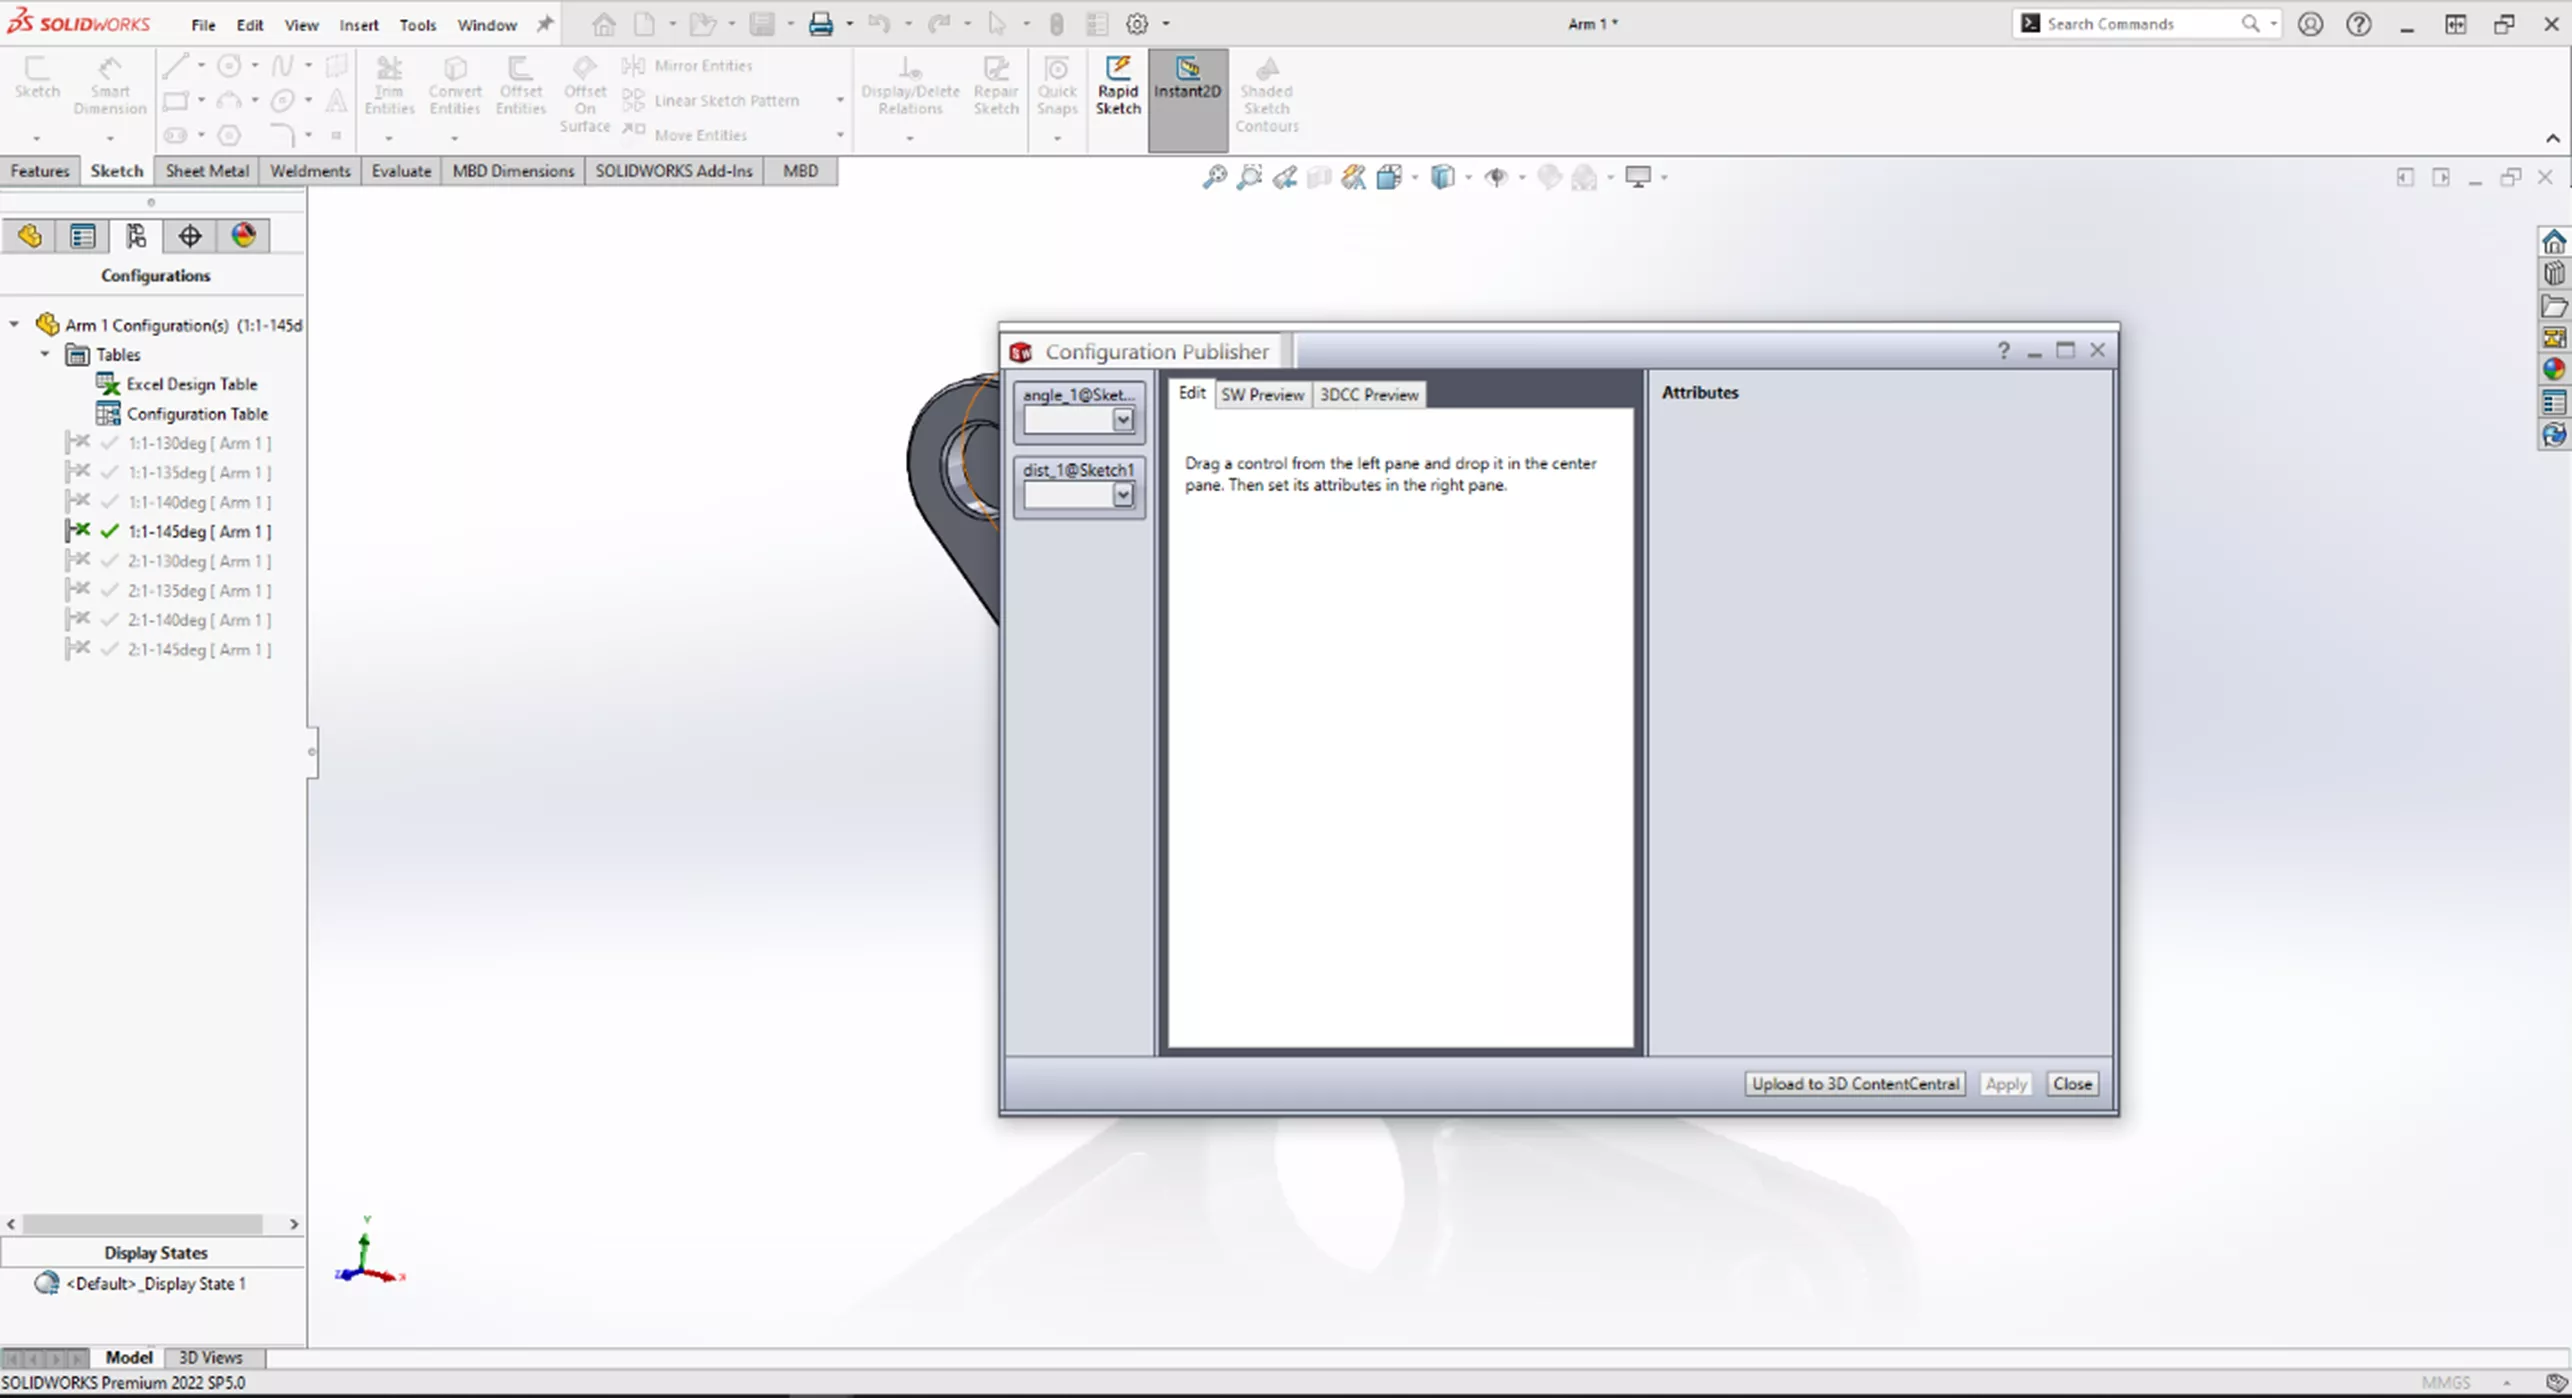
With the properties placed in the center box, each list item has been selected and renamed accordingly - one for Lever Angle and the other for Lever Ratio.
We can also see here that we can set the visibility. This is used when there are features that are suppressed. We can set the visibility of these features when only the parent feature is checked.
We will explore this option more in part 2 of this guide. For now, we will select Apply and then close the Configuration Publisher.
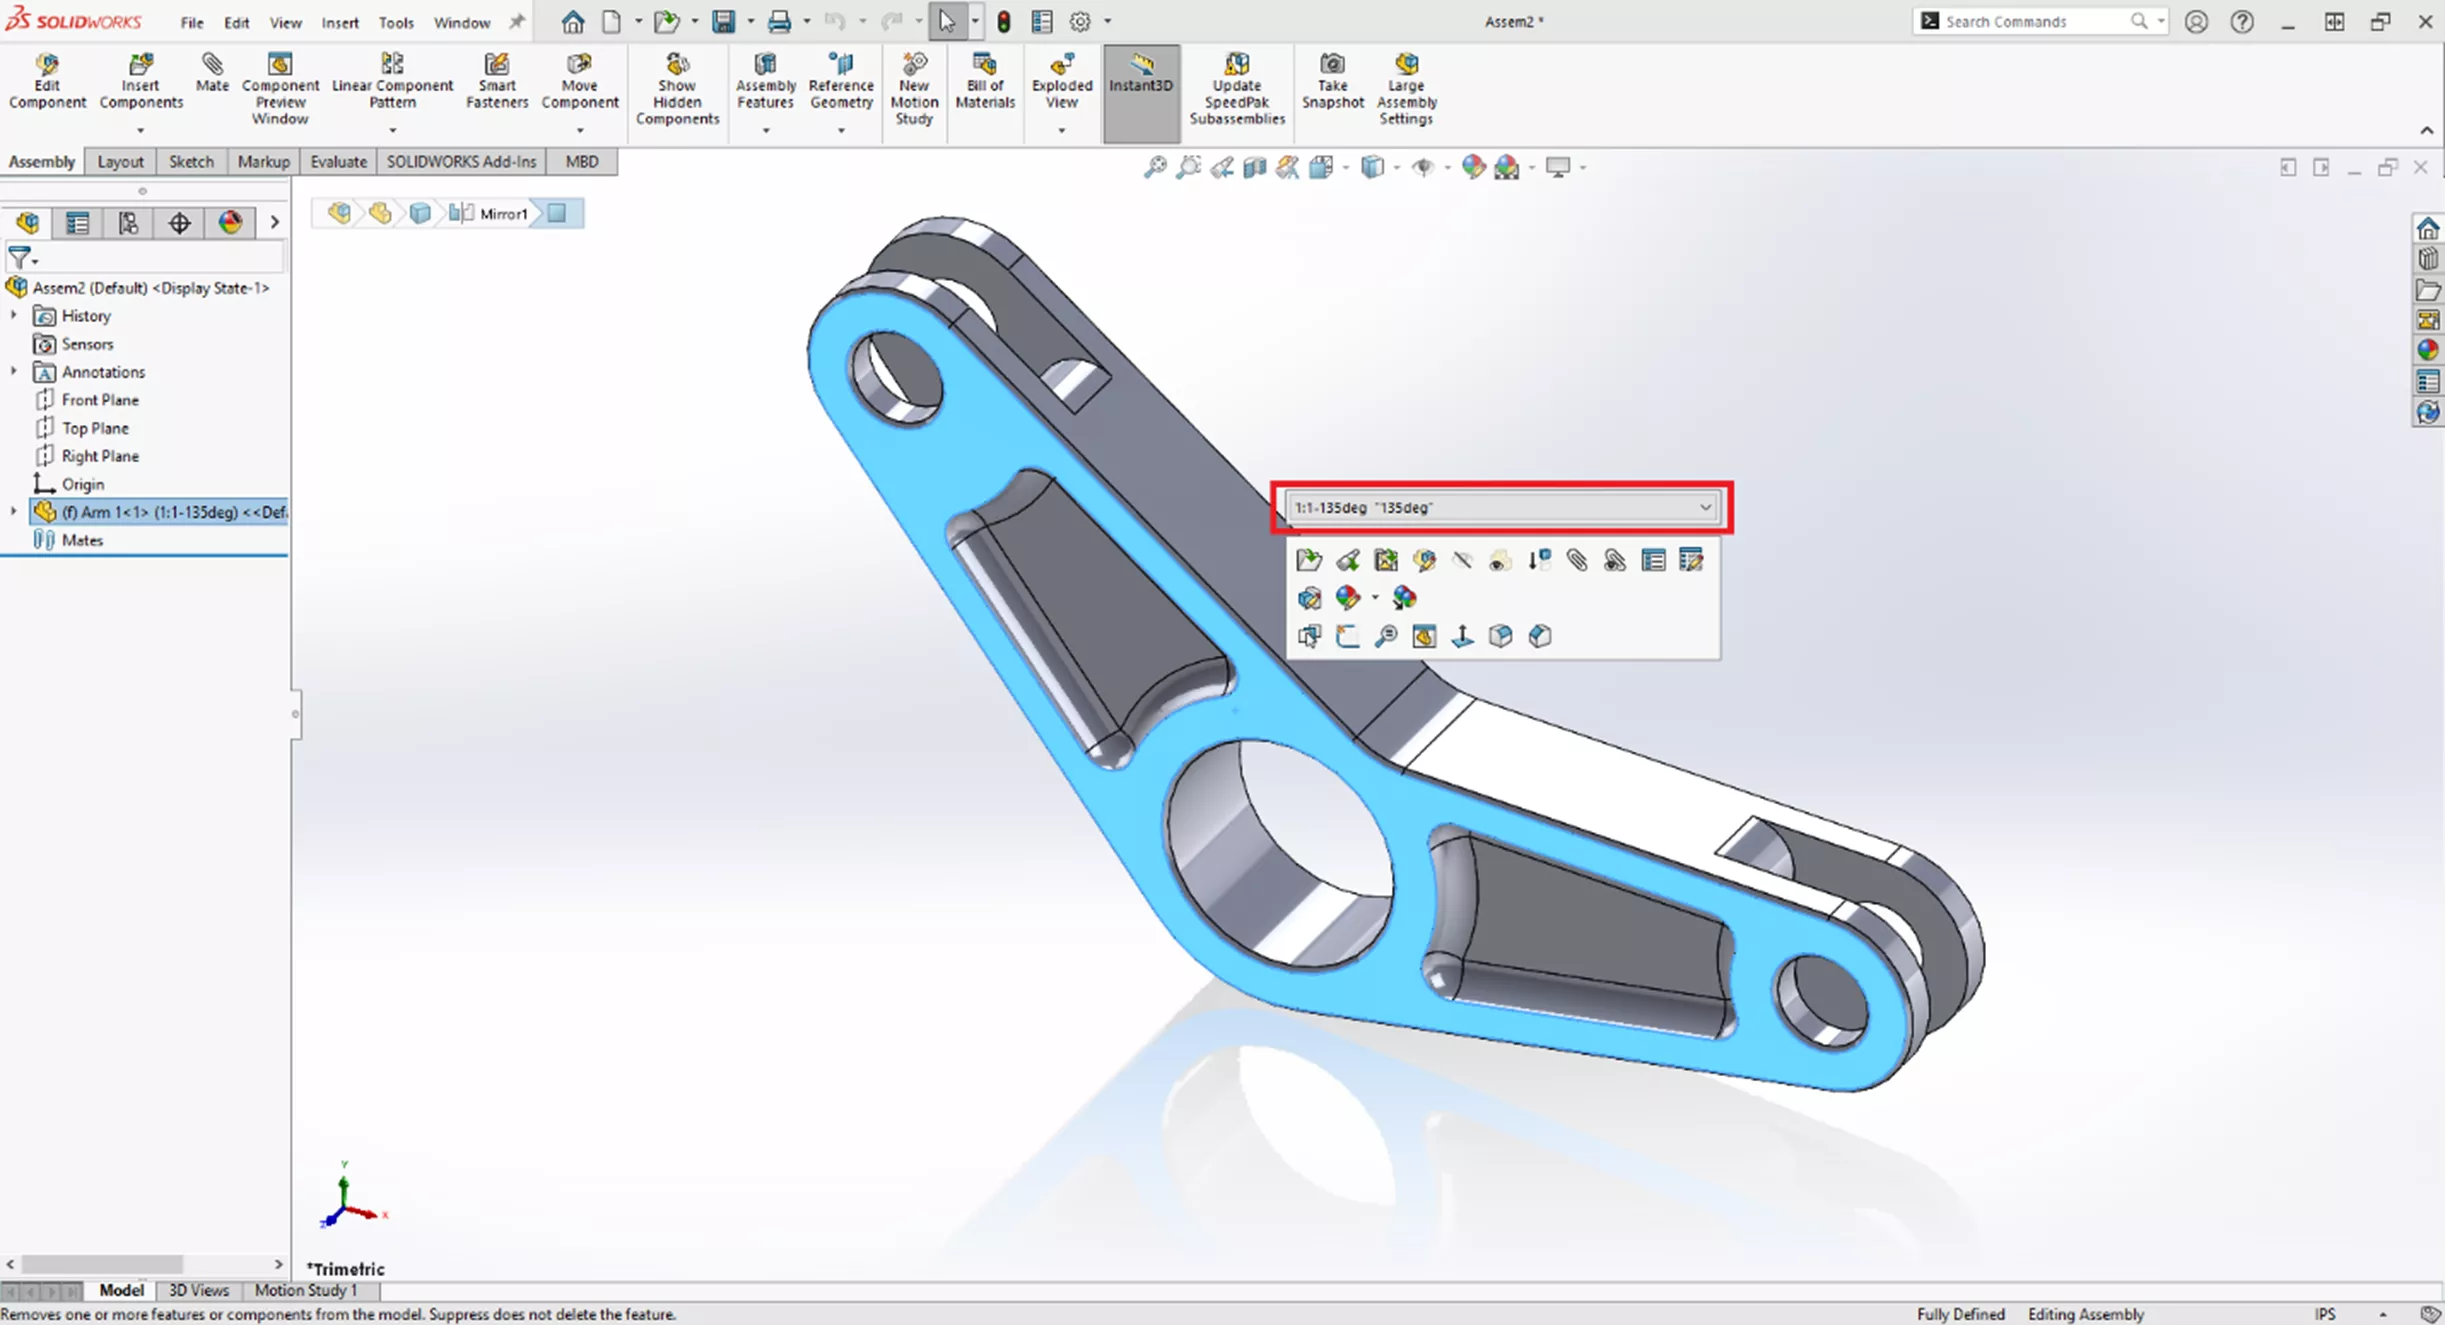
With the Configuration Publisher created, we can place this part into an assembly. Once we have placed the component, we now have a dropdown box any time we click on the component in the graphics window where we can quickly specify the desired configuration.
Conclusion
This concludes part 1 of our guide on using Configuration Publisher in SOLIDWORKS. In part 2, we explore creating custom dropdown menus for when we place components into an assembly.
Want to Become an Expert?
Enroll in the official SOLIDWORKS Assembly Modeling training course online or in-person.

Check out more SOLIDWORKS tutorials below.
More SOLIDWORKS Tutorials
SOLIDWORKS Configuration Publisher: Custom Dropdown Menus
SOLIDWORKS Tutorial: Edit, Create, & Convert Style Splines
How to Open Large Assemblies in SOLIDWORKS
Breadcrumbs in SOLIDWORKS Explained
![]()
About Kenny Bacon
Kenny Bacon is a SOLIDWORKS Technical Support Engineer at GoEngineer.
Get our wide array of technical resources delivered right to your inbox.
Unsubscribe at any time.