SOLIDWORKS: Detecting & Resolving Interferences
SOLIDWORKS assemblies let you detect interferences between parts so you can clearance them. It shows you where the interference is so you can edit the part within the context of the assembly to ensure a proper fit. You can even use the interfering parts to create perfect cavities that fit the offending parts like puzzle pieces.
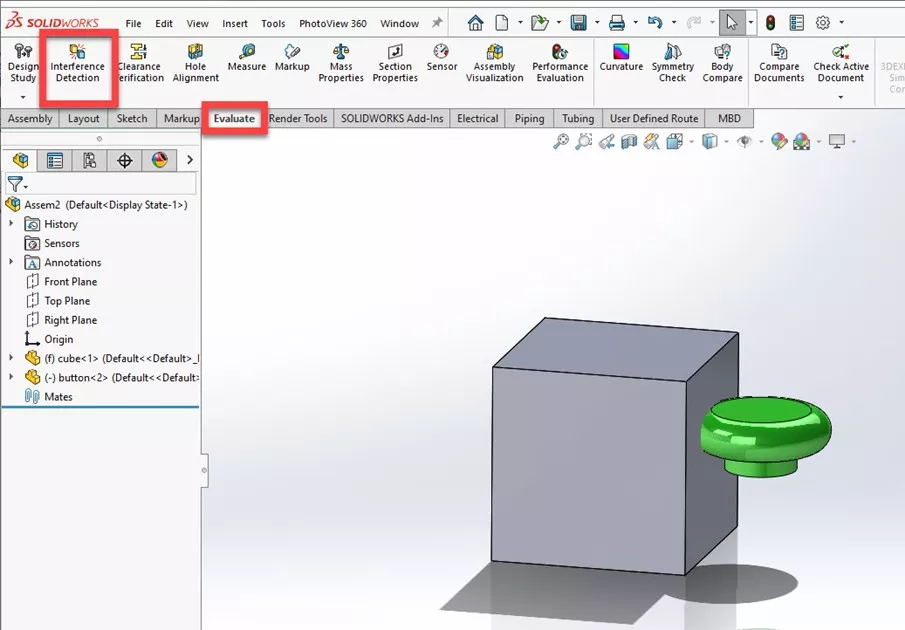
Detecting Interference in SOLIDWORKS
Sometimes interference is easy to detect, and sometimes it isn’t. To run an official check, select the Interference Detection within the Evaluate tab of the assembly.
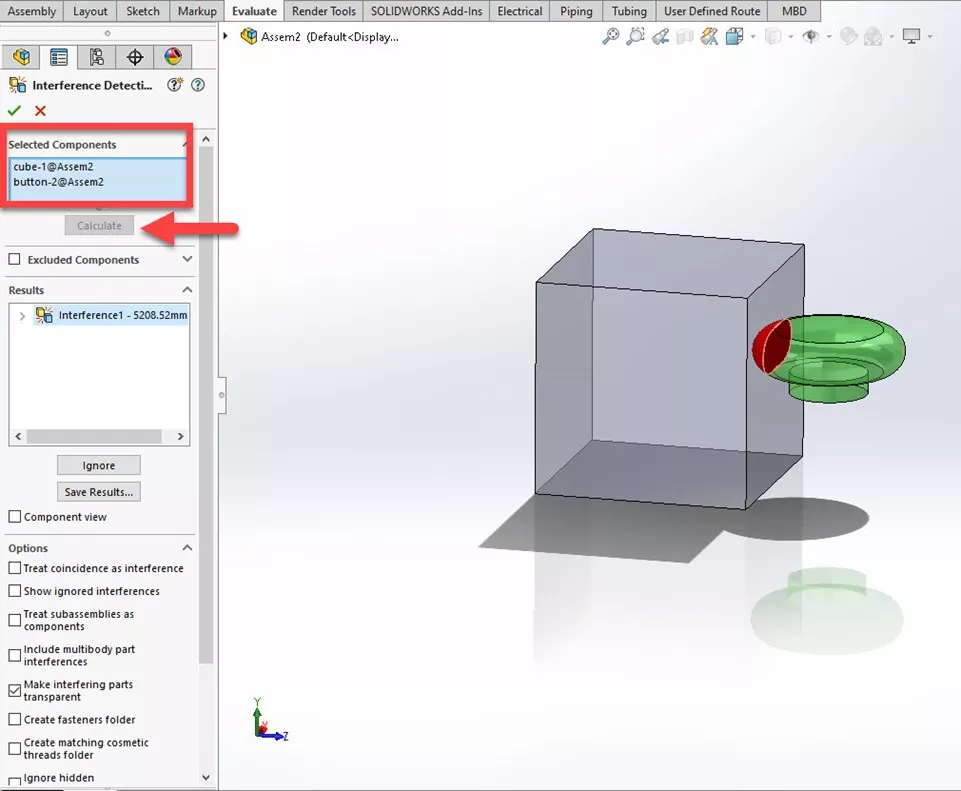
Select the parts to check in the graphics area (or leave the whole assembly selected) and click Calculate.
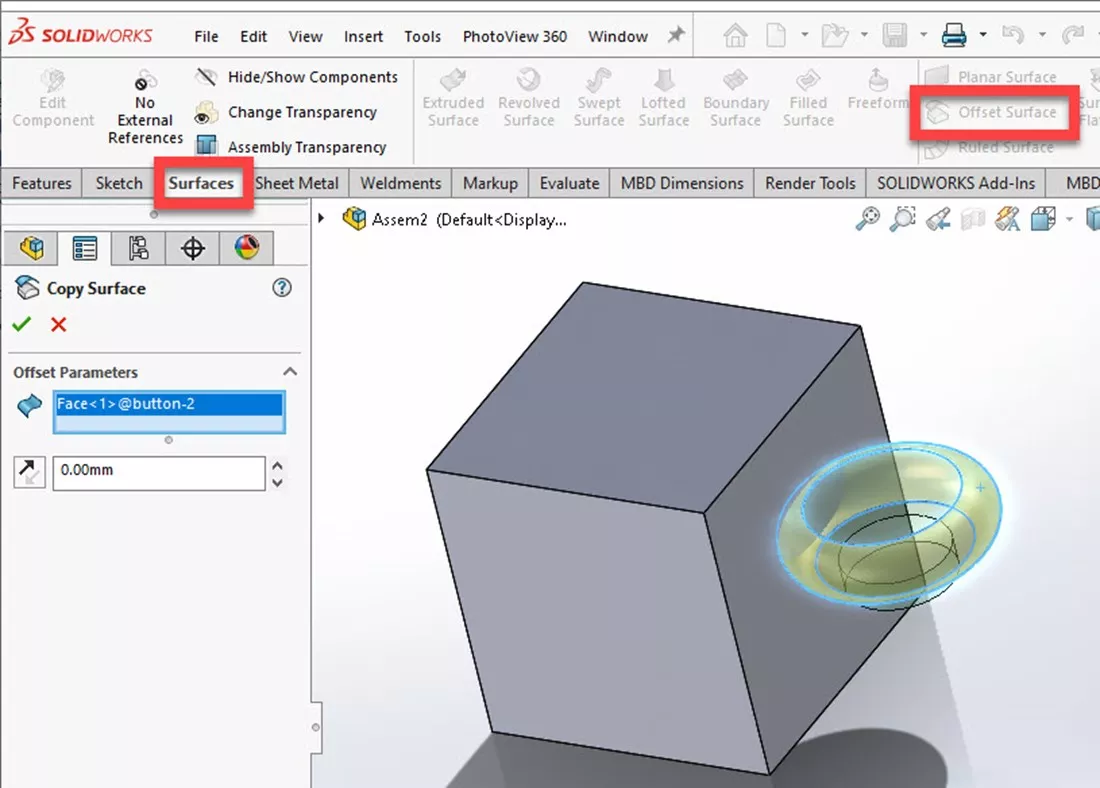
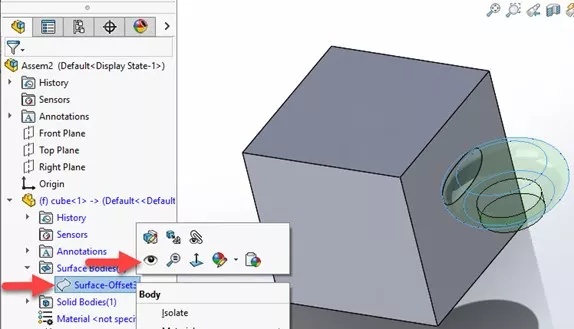
Create an Offset Surface
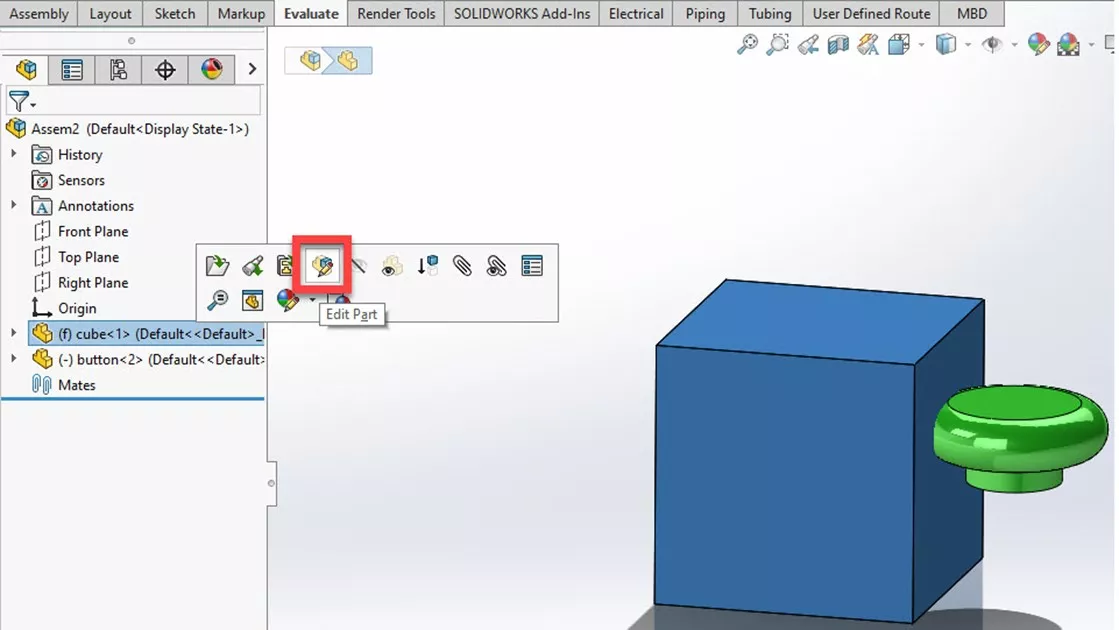
To edit the part in context, right-click on its name in the FeatureManager Design Tree and select Edit Part. This allows you edit the part while still viewing the assembly. This way, you can use the offending part to create the desired geometry.
Next, select Offset Surface from the Surfaces tab. You can then select the part that you want to use to create the surface and specify the offset (in this example, I chose zero offset for a perfect fit).
Cut the Part
Using the offset surface, you can then cut a cavity into the part. Select Cut With Surface under the Surfaces tab and select the created surface. You can also specify the direction of the cut.
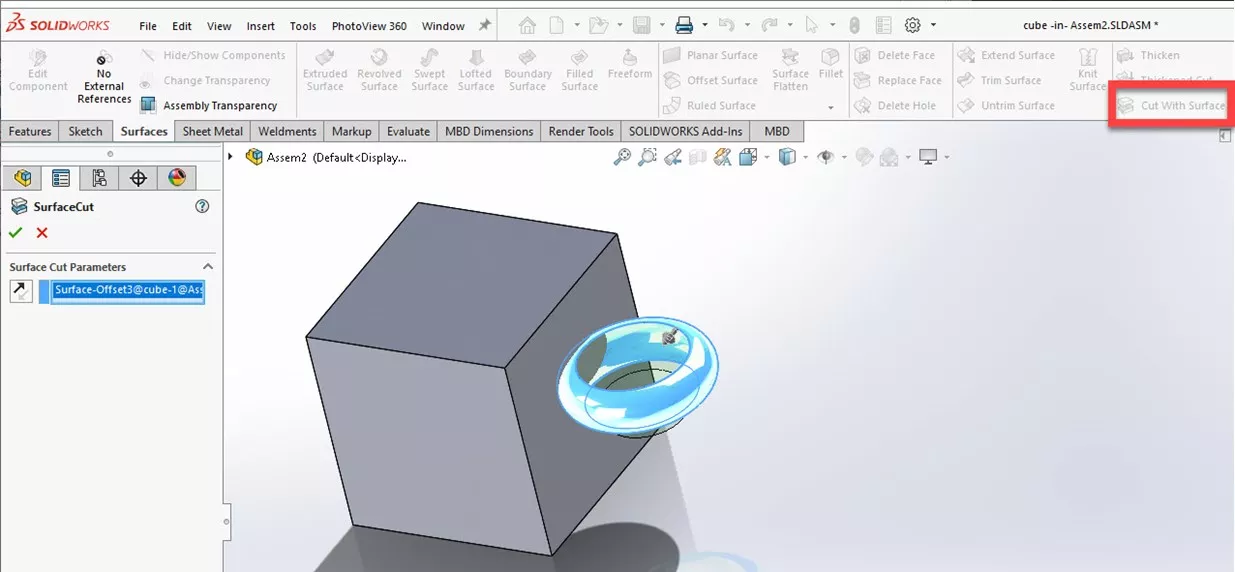
Hide the surface by right-clicking on it in the FeatureManager Design Tree. Because the surface is just a surface body and not a solid body, it won’t affect the geometry of the part. Notice that there is now a cavity where the offending part sticks into the block.
To verify that it worked, you can run another interference detection.
This time it passed!
![]() Get the most out of your SOLIDWORKS. Check out more tutorials below or on our YouTube channel. We have an extensive library of videos, from tips and tricks to what’s new videos, in-depth webinars, and much, much more!
Get the most out of your SOLIDWORKS. Check out more tutorials below or on our YouTube channel. We have an extensive library of videos, from tips and tricks to what’s new videos, in-depth webinars, and much, much more!
More SOLIDWORKS Tutorials
How to Save a SOLIDWORKS Assembly as an STL File
4 SOLIDWORKS Part Modeling Tools that are Time Savers
Save SOLIDWORKS Assembly as Part Preserve Geometry References
Understanding Hierarchy of SOLIDWORKS Appearances

About Gary Ballentine
Gary Ballentine is a Mechanical Engineer based out of our Headquarters in Salt Lake City, Utah. He earned a Bachelor’s degree from the University of California, Davis, a certification in Technical Writing from San Francisco State University, and a Bachelor’s degree in Mechanical Engineering from the University of Utah. Gary has been part of the GoEngineer family since April 2019 as a Support Engineer and Certified SOLIDWORKS Instructor.
Get our wide array of technical resources delivered right to your inbox.
Unsubscribe at any time.